Getting Started with Spacemail
This guide is for users setting up their Spacemail mailbox for the first time. It covers the essential steps to get started and shows you how to configure features. By the end, you’ll have your Spacemail mailbox ready to send and receive emails securely.
DNS records setup
Before you start using Spacemail, make sure your DNS settings are properly configured, as they directly affect whether your emails can be sent and delivered successfully.
If your domain is pointed to Spaceship nameservers, all necessary DNS records for Spacemail are added automatically, and no further action is needed. If you’ve recently switched nameservers, please allow 48–72 hours for propagation to complete.
If you’re using a third-party domain or custom nameservers, you’ll need to add the required DNS records manually on your provider’s side. Refer to our guide for the full list of DNS records: Which DNS records are needed for a third-party domain
Once the records are added, please allow 48–72 hours for propagation before your Spacemail account is fully ready to send and receive emails.
You can also check our guides for specific providers to make the setup easier:
When DNS configuration and propagation are complete, you can log in to Spacemail webmail and start sending and receiving emails.
Exploring the Spacemail Webmail Interface
.01k9ewqkszm5q3wdprdkgnsfya.png)
Compose – create a new email.
Inbox options – right-click on Inbox (or other folders) to create subfolders, mark all as read/unread, or delete all messages.
Spacemail updates – view the latest feature releases and announcements.
Storage indicator – shows how much mailbox space you’ve used.
Refresh – check for new incoming emails manually (mailbox also refreshes automatically on email/event arrival or every 5 mins of inactivity).
Appearance switch – toggle between light and dark mode.
View switch – move between Webmail and Calendar.
Help Center – if you need help, you can contact support and check the FAQ.
Settings – manage webmail preferences, security options, filters, forwarding, signatures, spam management, and more.
Profile menu – view your display name and email address, copy your mailbox name, set a display picture, and log out.
Below is an overview of key settings available in Spacemail, grouped into functional categories.
Personalize your mailbox
Profile
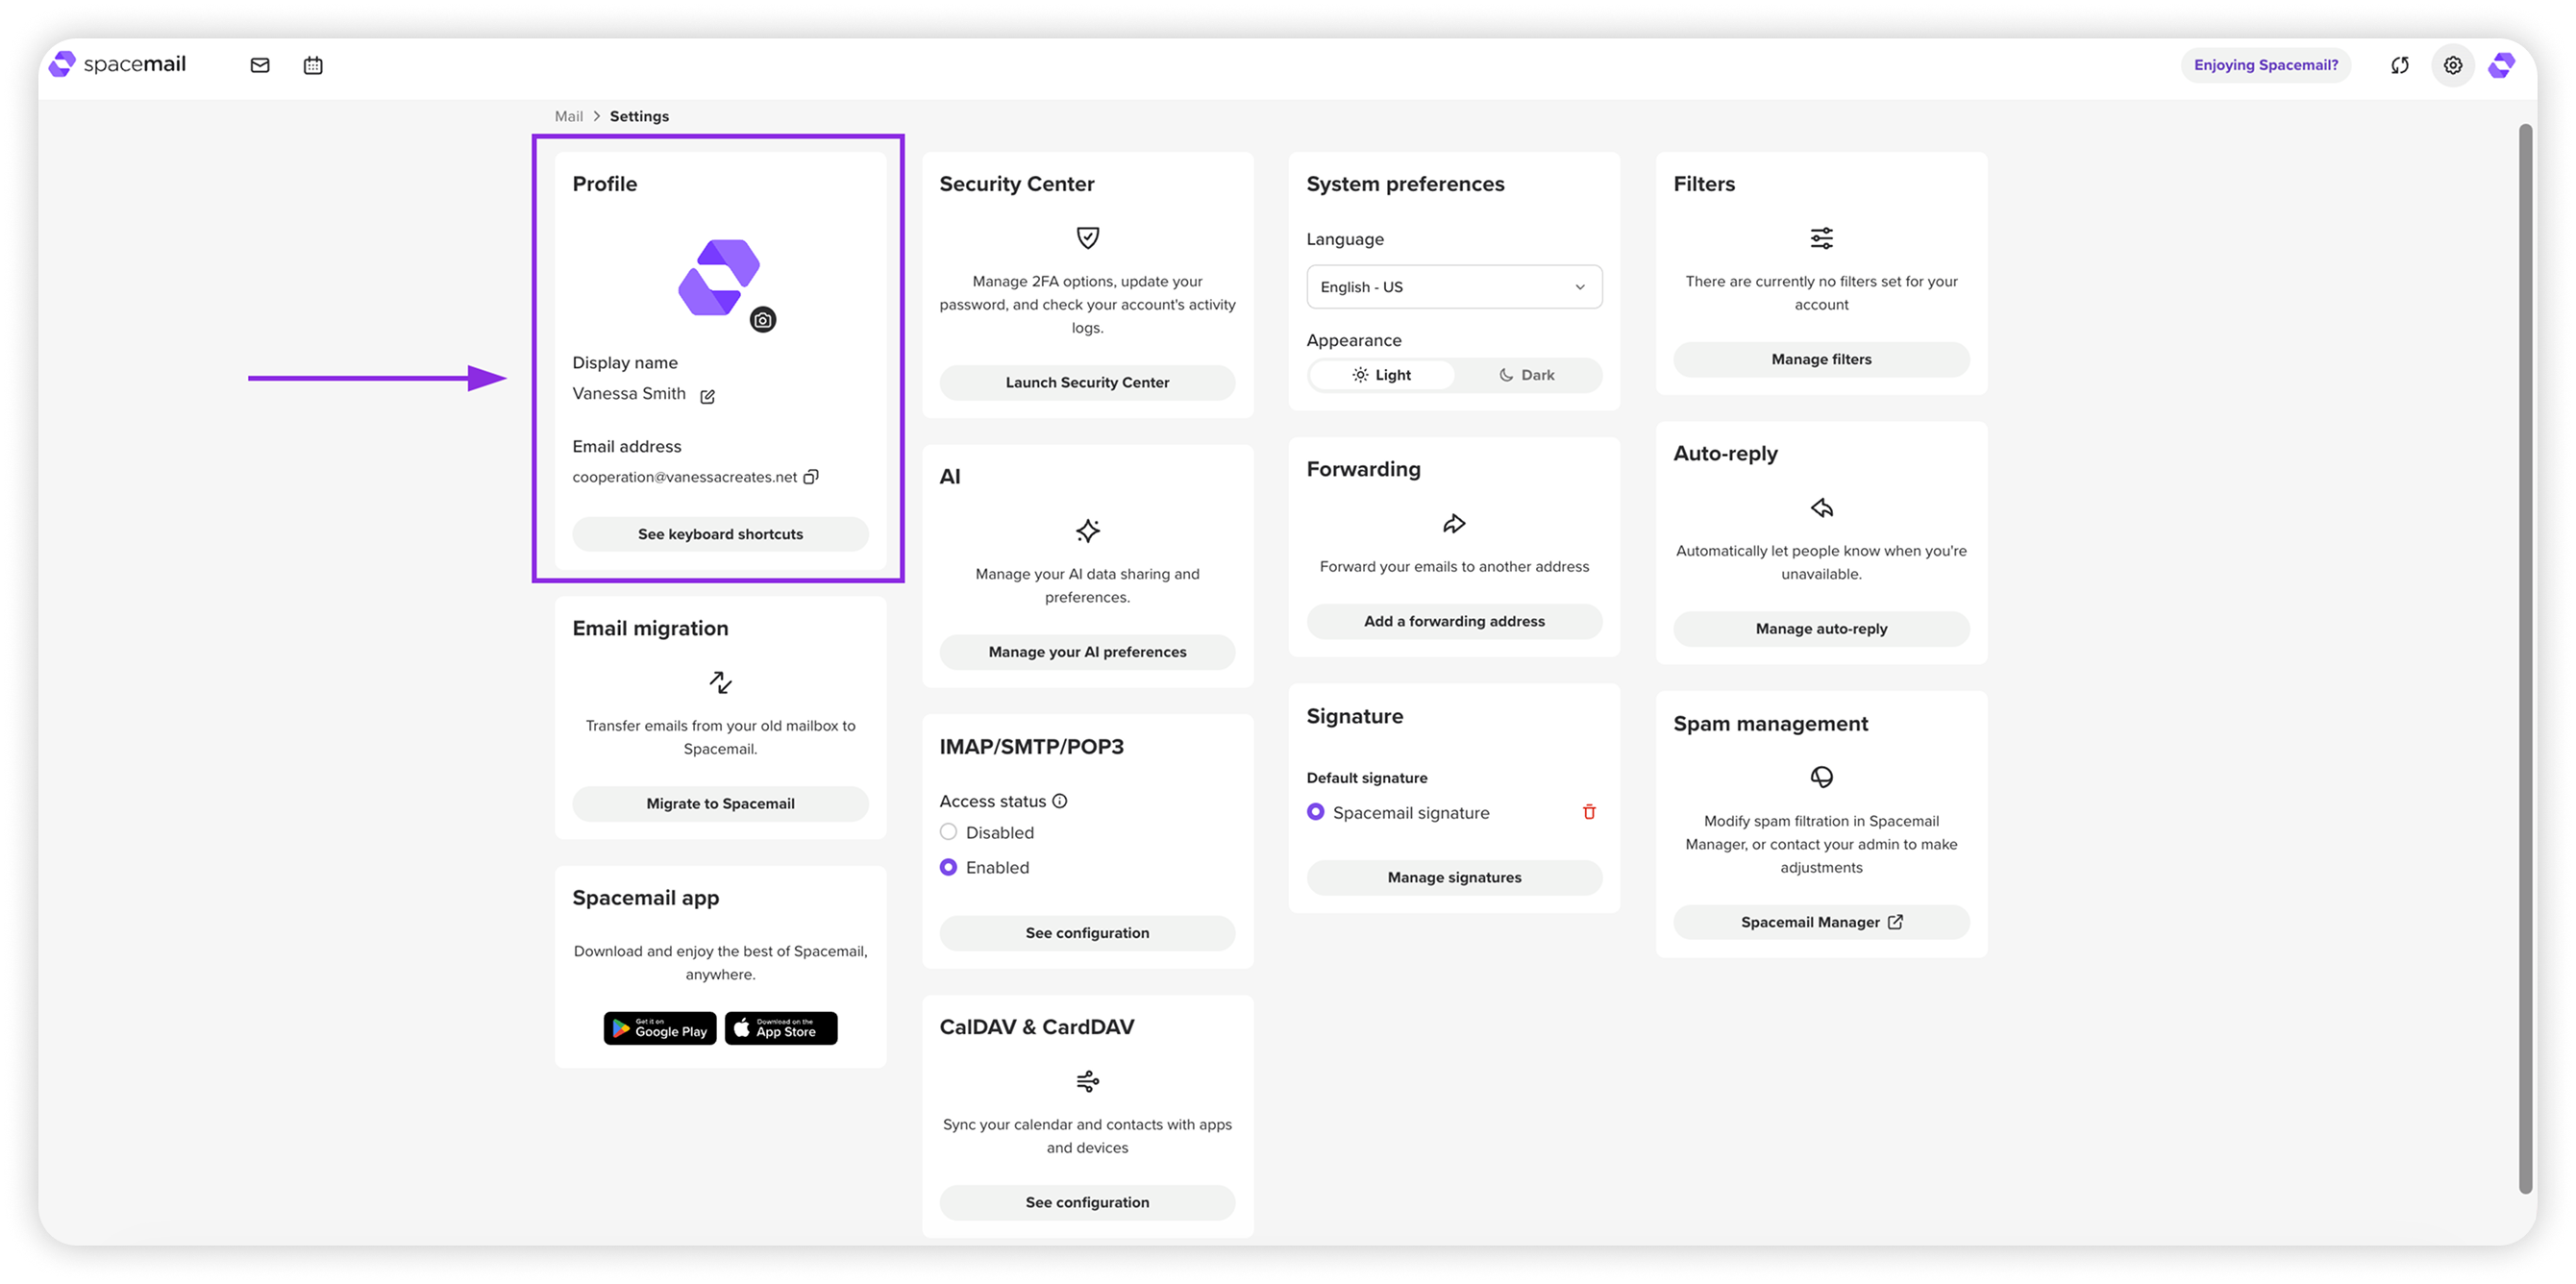
In the Profile section, you can personalize how your mailbox looks and how your recipients see you:
Display name – edit the name that appears when you send emails.
Profile picture – upload or change your avatar.
NOTE: It will be visible only to other Spacemail users.
Email address – view and copy your mailbox address.
Keyboard shortcuts – click to see all available shortcuts for faster navigation and actions in webmail (e.g., Ctrl + Enter to send, Ctrl + S to save draft).
System preferences
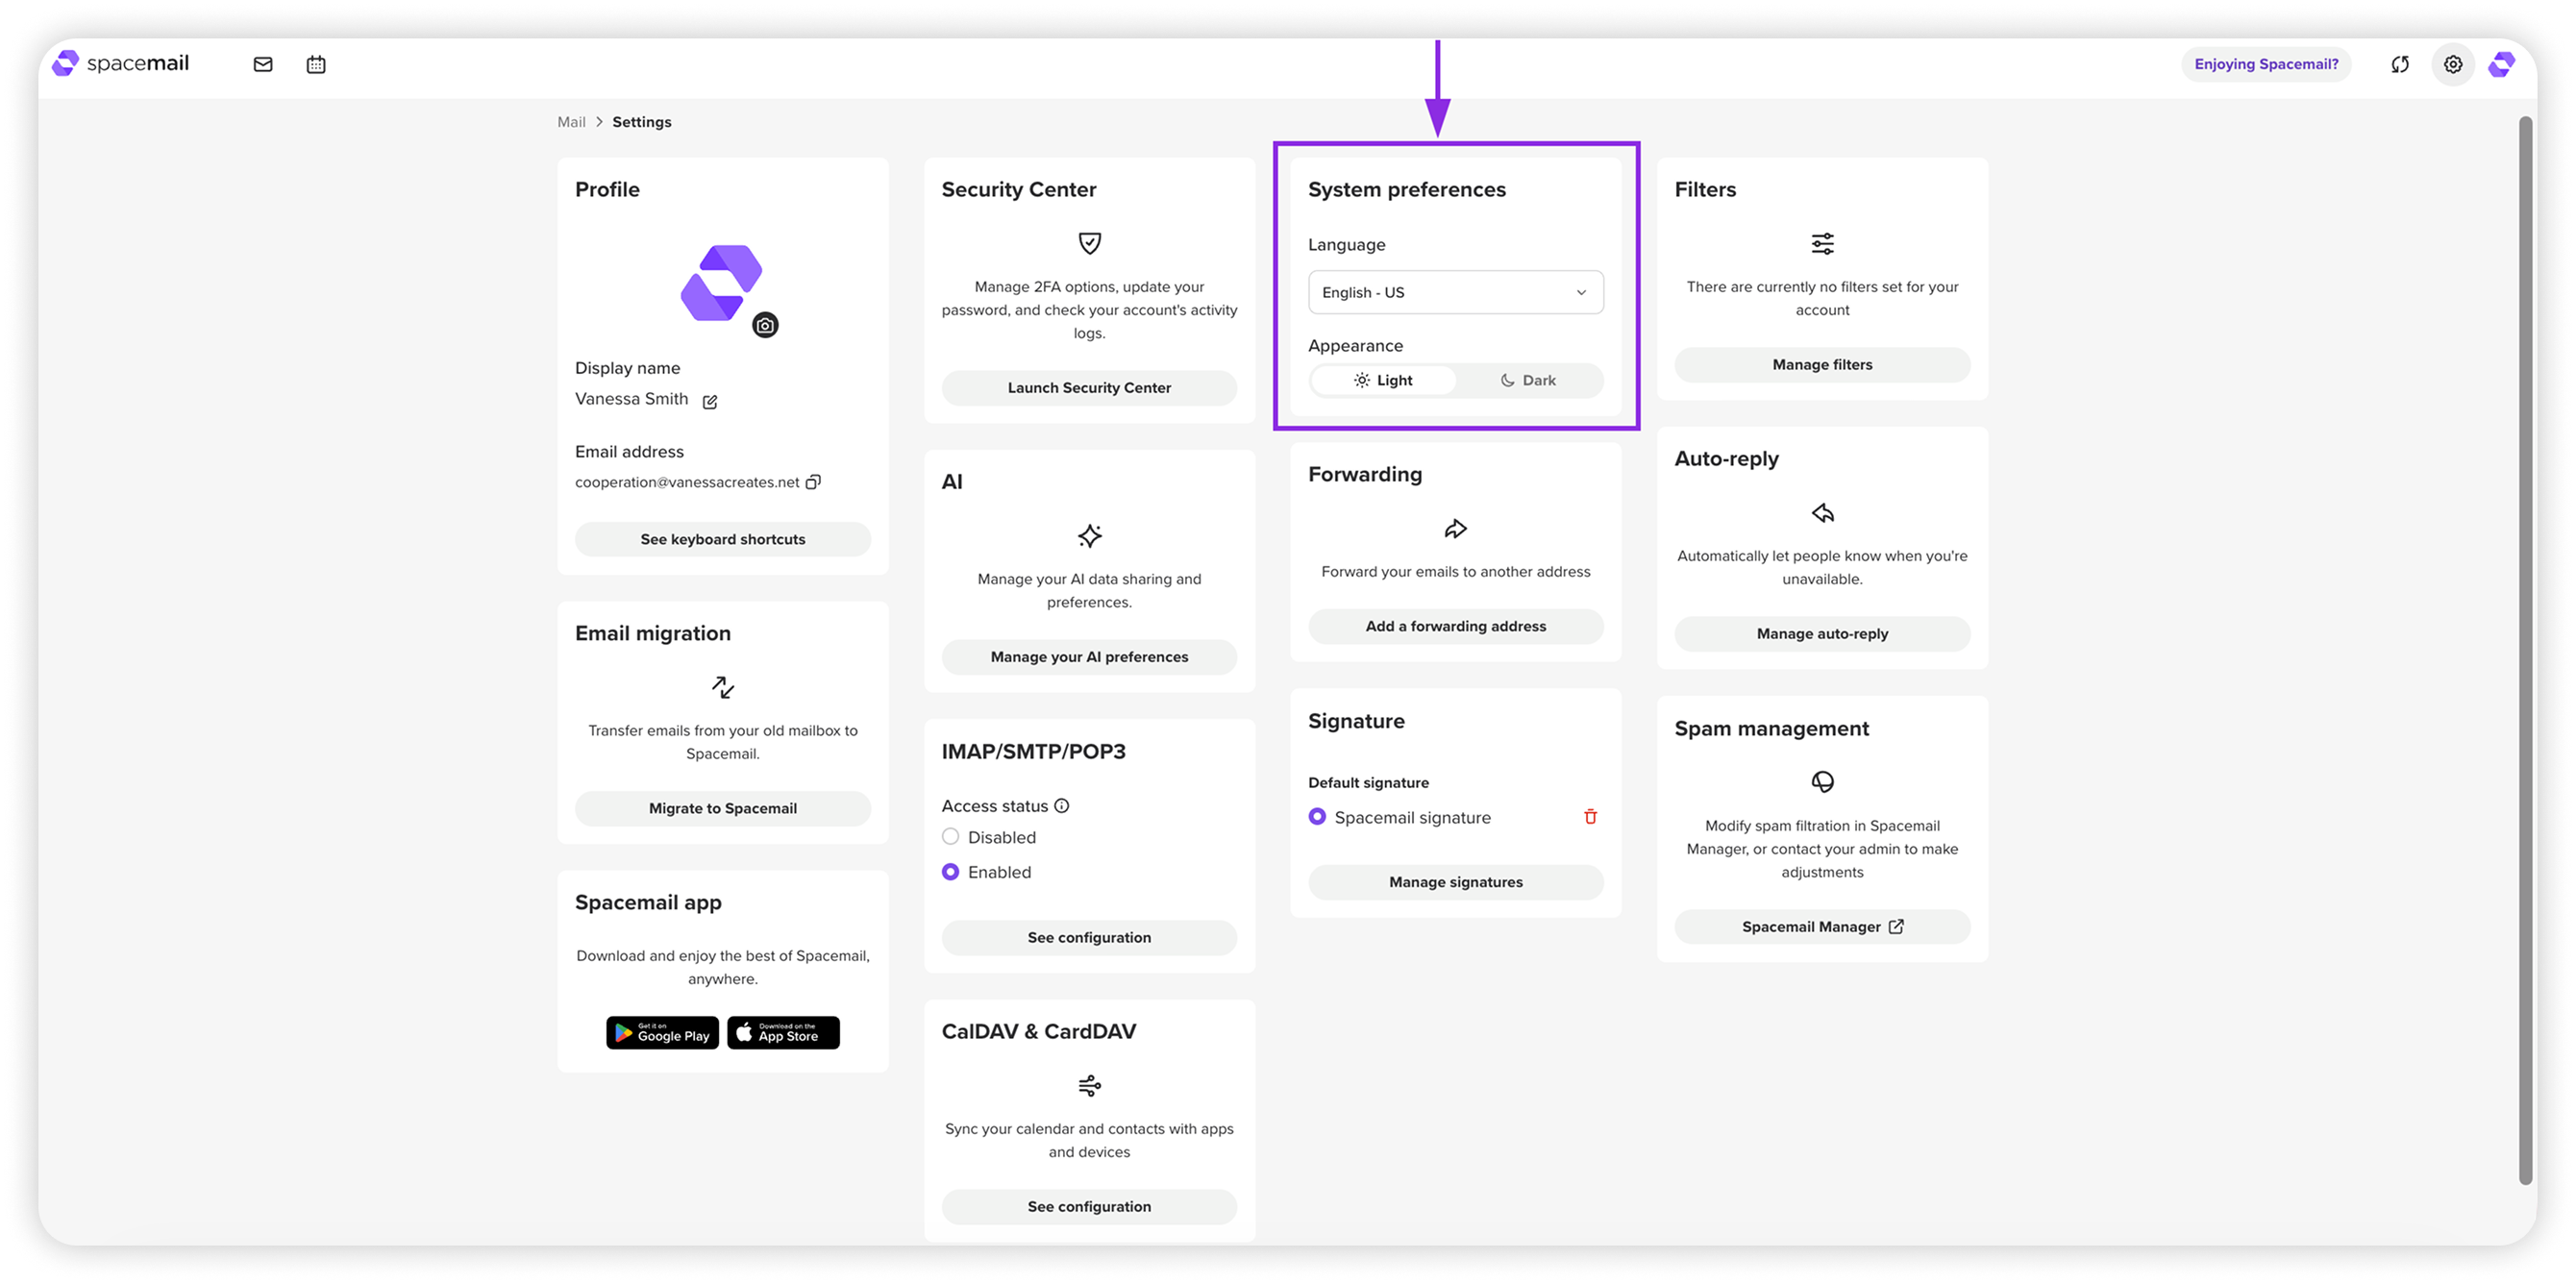
In System preferences, you can adjust the general appearance and language of your webmail:
Language – choose the interface language for Spacemail.
Appearance – switch between light and dark mode.
NOTE: These settings affect only your personal view and do not change how emails appear to recipients.
Signature
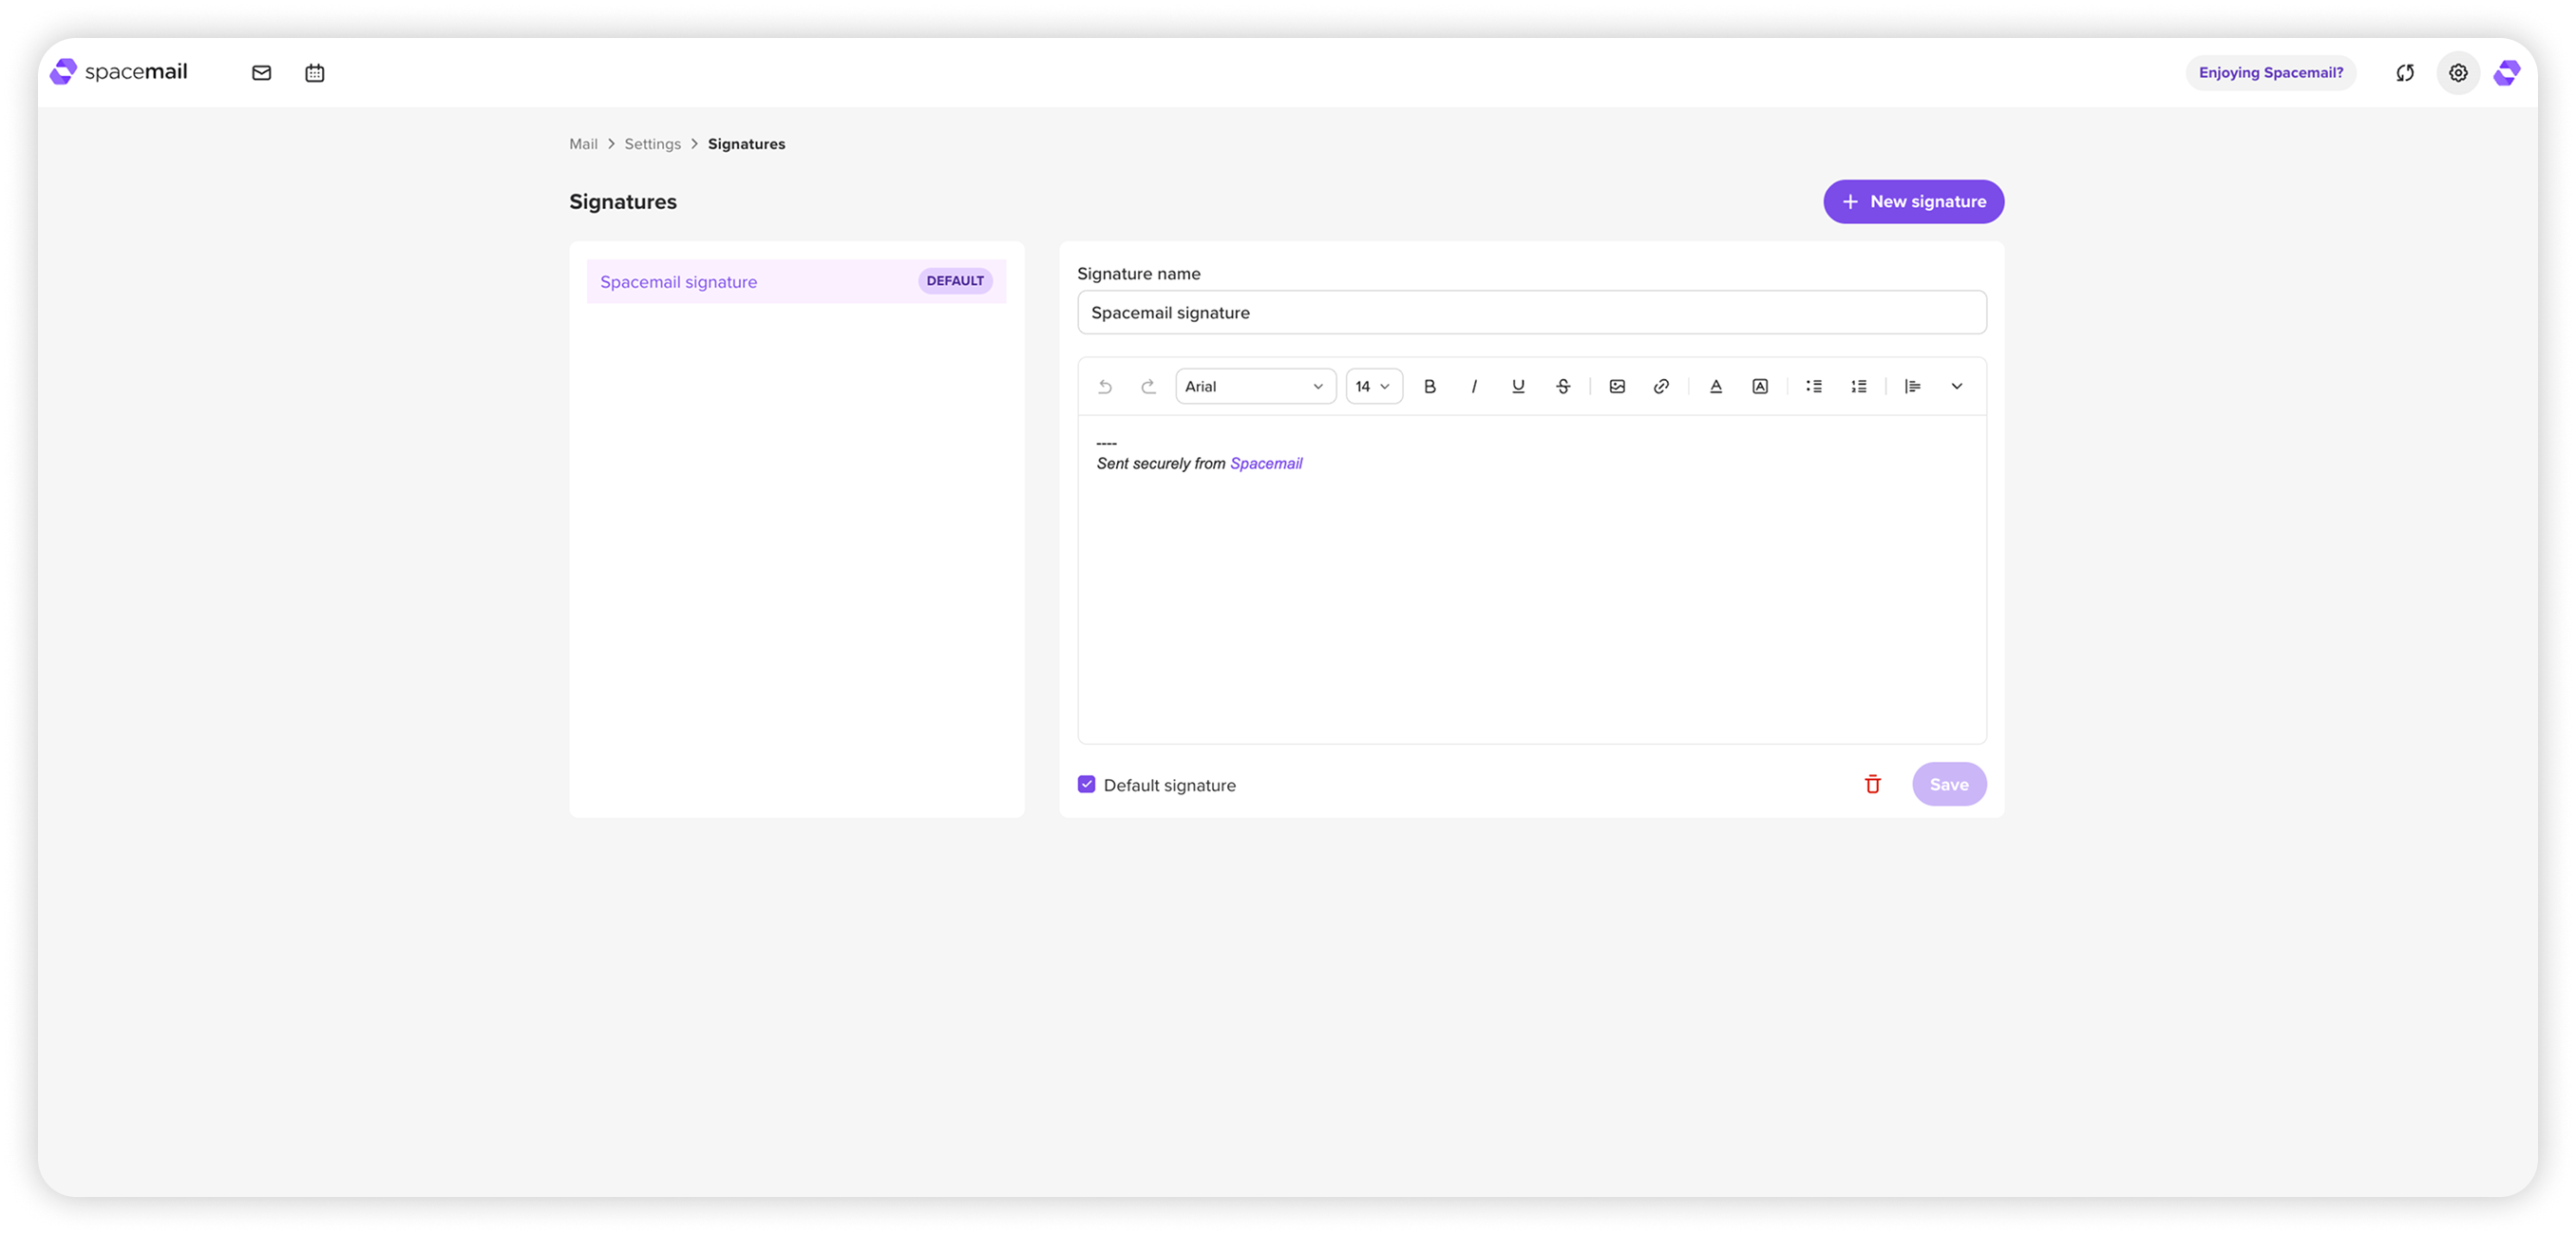
The Signature section allows you to create and manage email signatures.
You can:
Add one or multiple signatures
Set a default signature for all outgoing emails
Edit or delete existing signatures
Feel free to use this guide for detailed instructions on setting a signature for your mailbox: How to Create an Email Signature in Spacemail
Filters
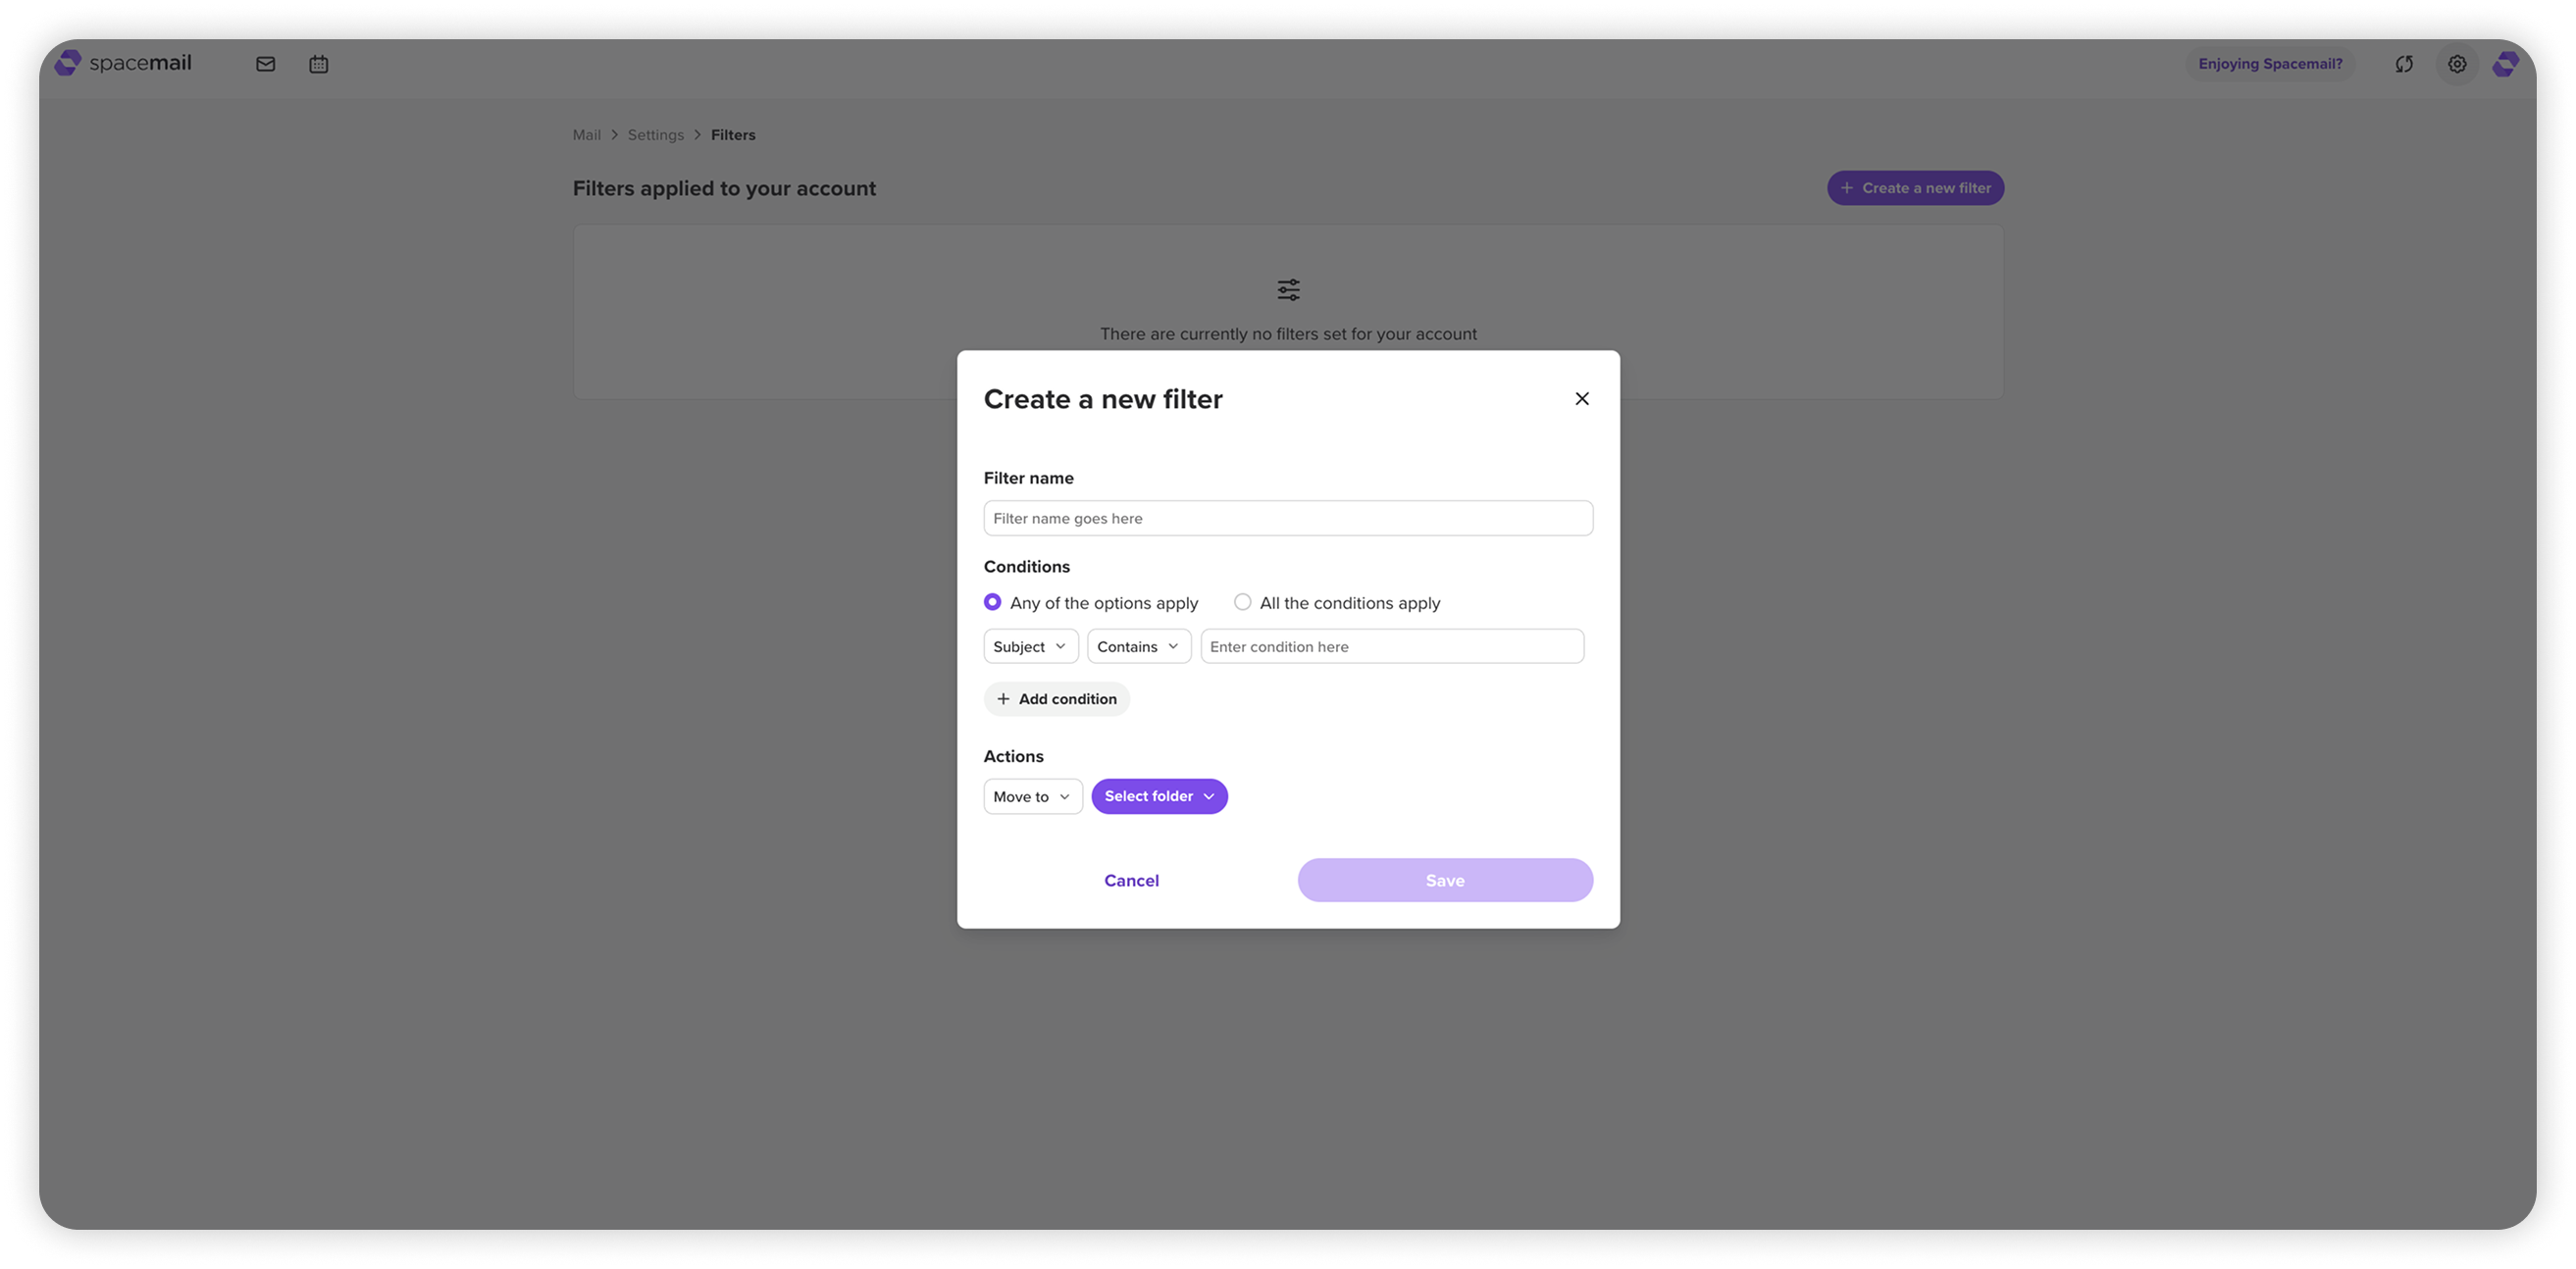
The Filters section lets you automatically sort incoming emails based on your own rules.
You can:
Filter emails by subject, sender, recipient, or message body.
Set conditions like Contains, Does not contain, Is exactly, Is not exactly, Starts with, Does not start with, Ends with, Does not end with.
Choose whether all conditions must match or just one.
Move matching emails to a specific folder — Inbox, Spam, Trash, Sent, or Drafts.
For a step-by-step guide on creating filters, check this article: How to create filter rules
Security & Access
Security Center
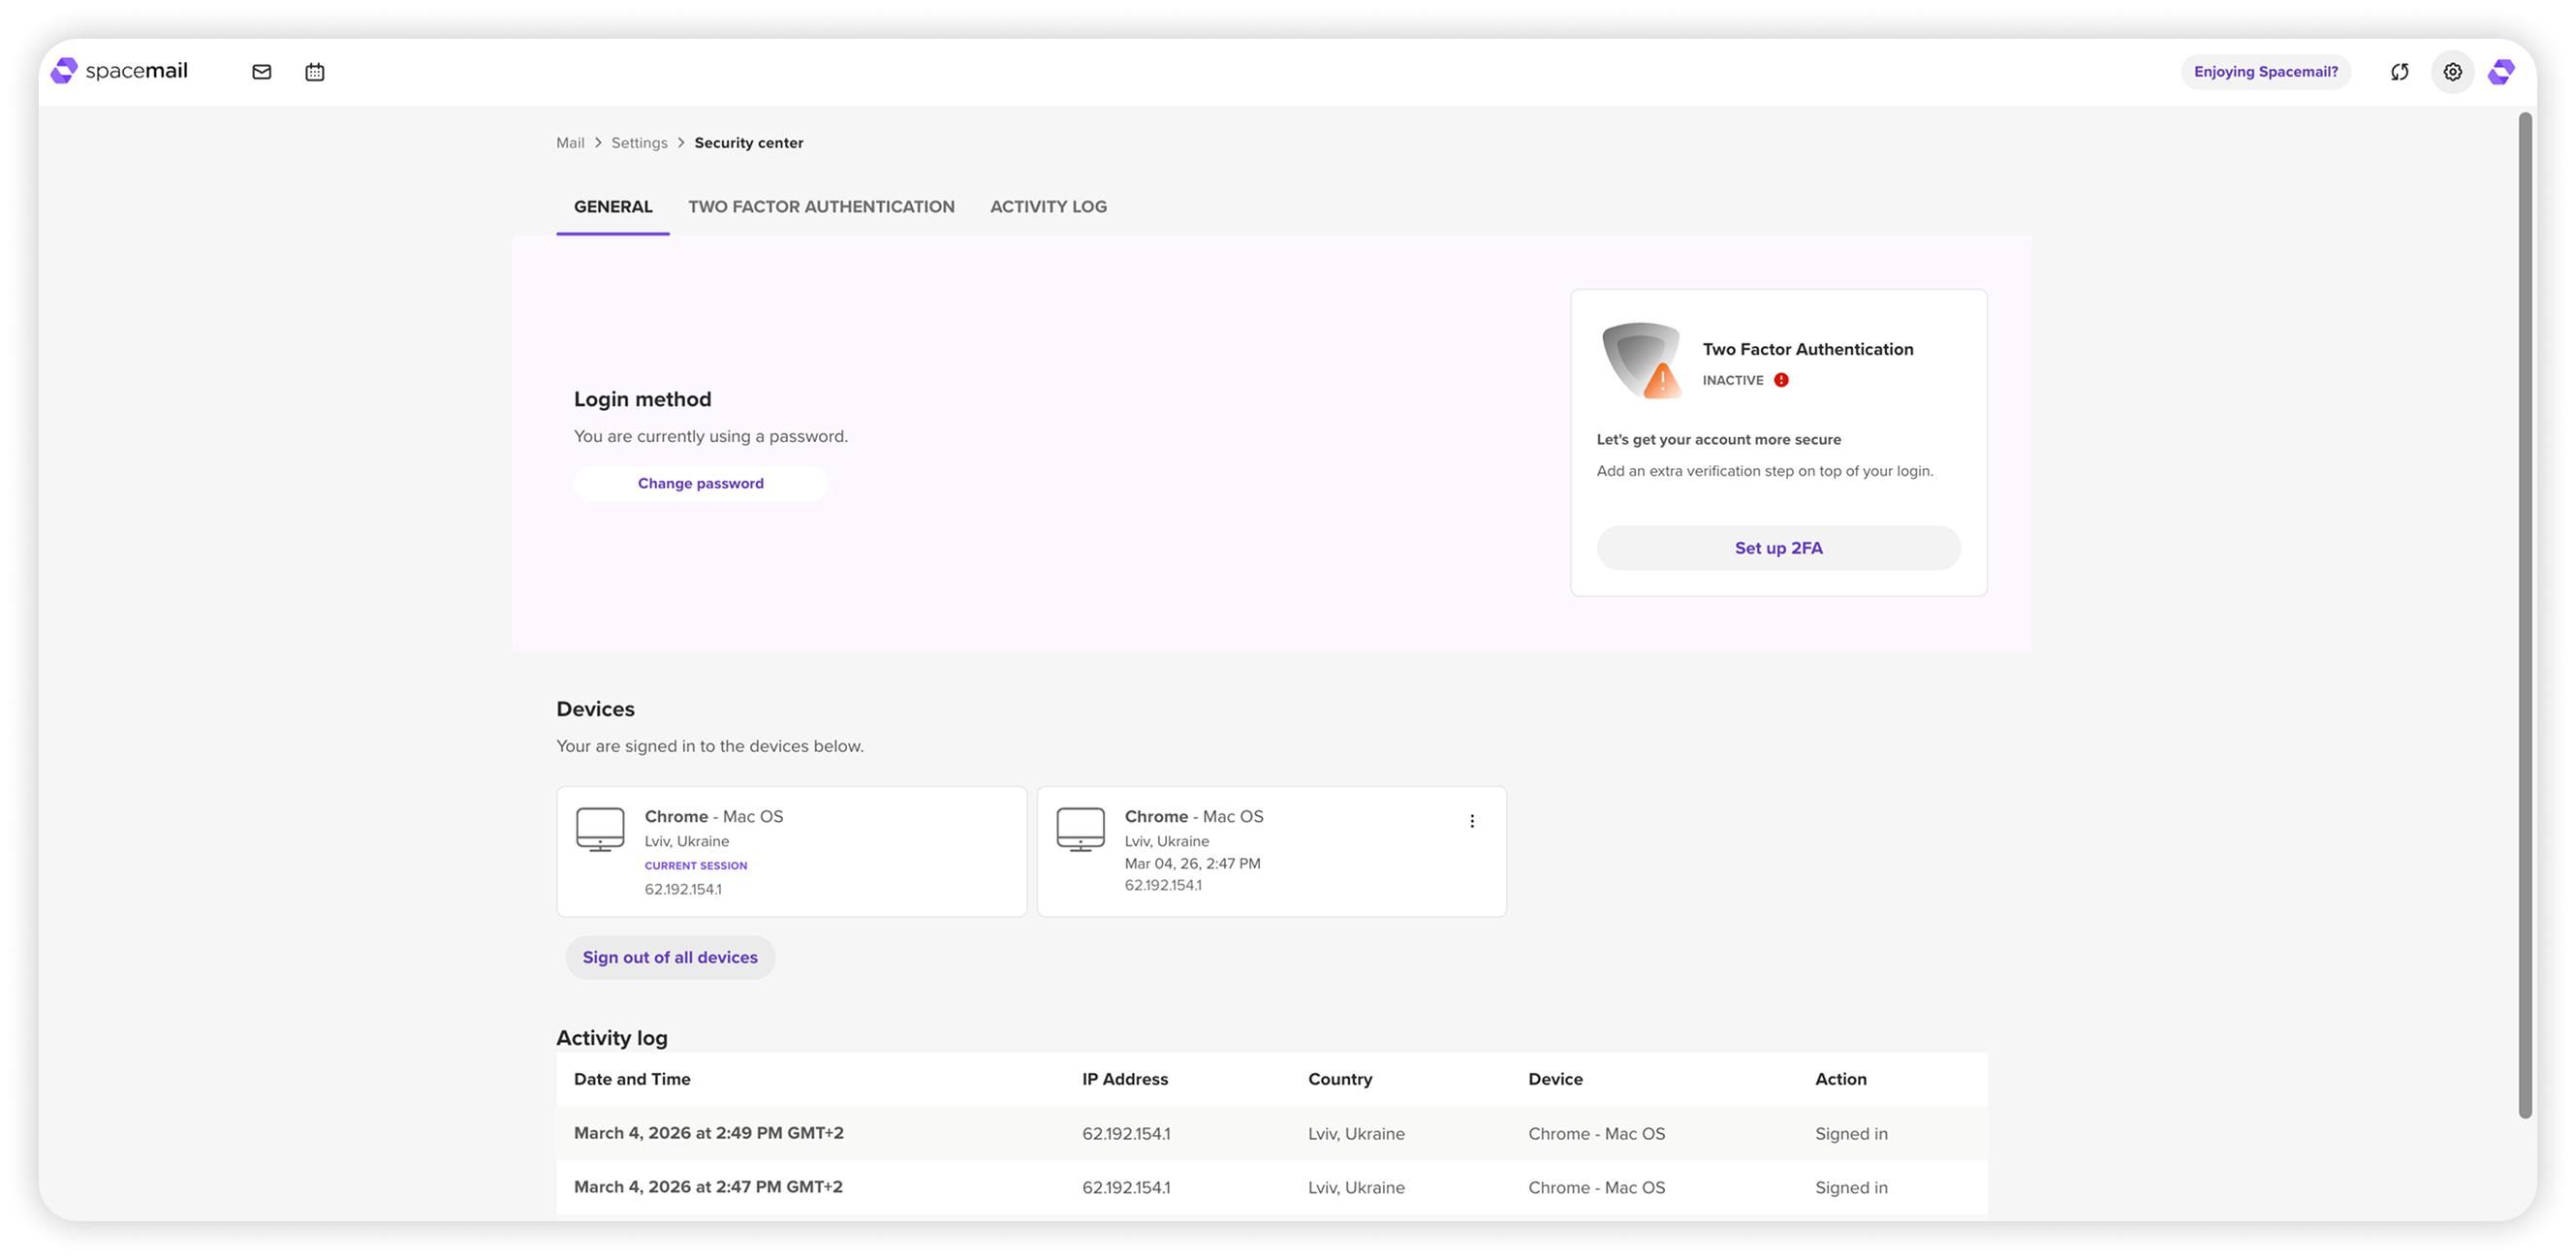
The Security Center lets you manage your login methods, add extra protection, and track account activity to help keep your mailbox secure. The main options include:
Login method – change your password at any time to keep your account secure.
Two-Factor Authentication (2FA) – add an extra layer of protection with a code from your mobile device. Once enabled, you’ll be asked for both your password and the code when logging in. You can also remove 2FA, manage backup codes, and devices in the Security Center. Step-by-step instructions for enabling 2FA are available here: How to set up Two-Factor Authentication (2FA) in Spacemail
Devices – see all devices currently signed in to your account. If needed, you can remotely sign out of all sessions.
Activity log – review recent login attempts and account activity to spot anything unusual.
Email migration
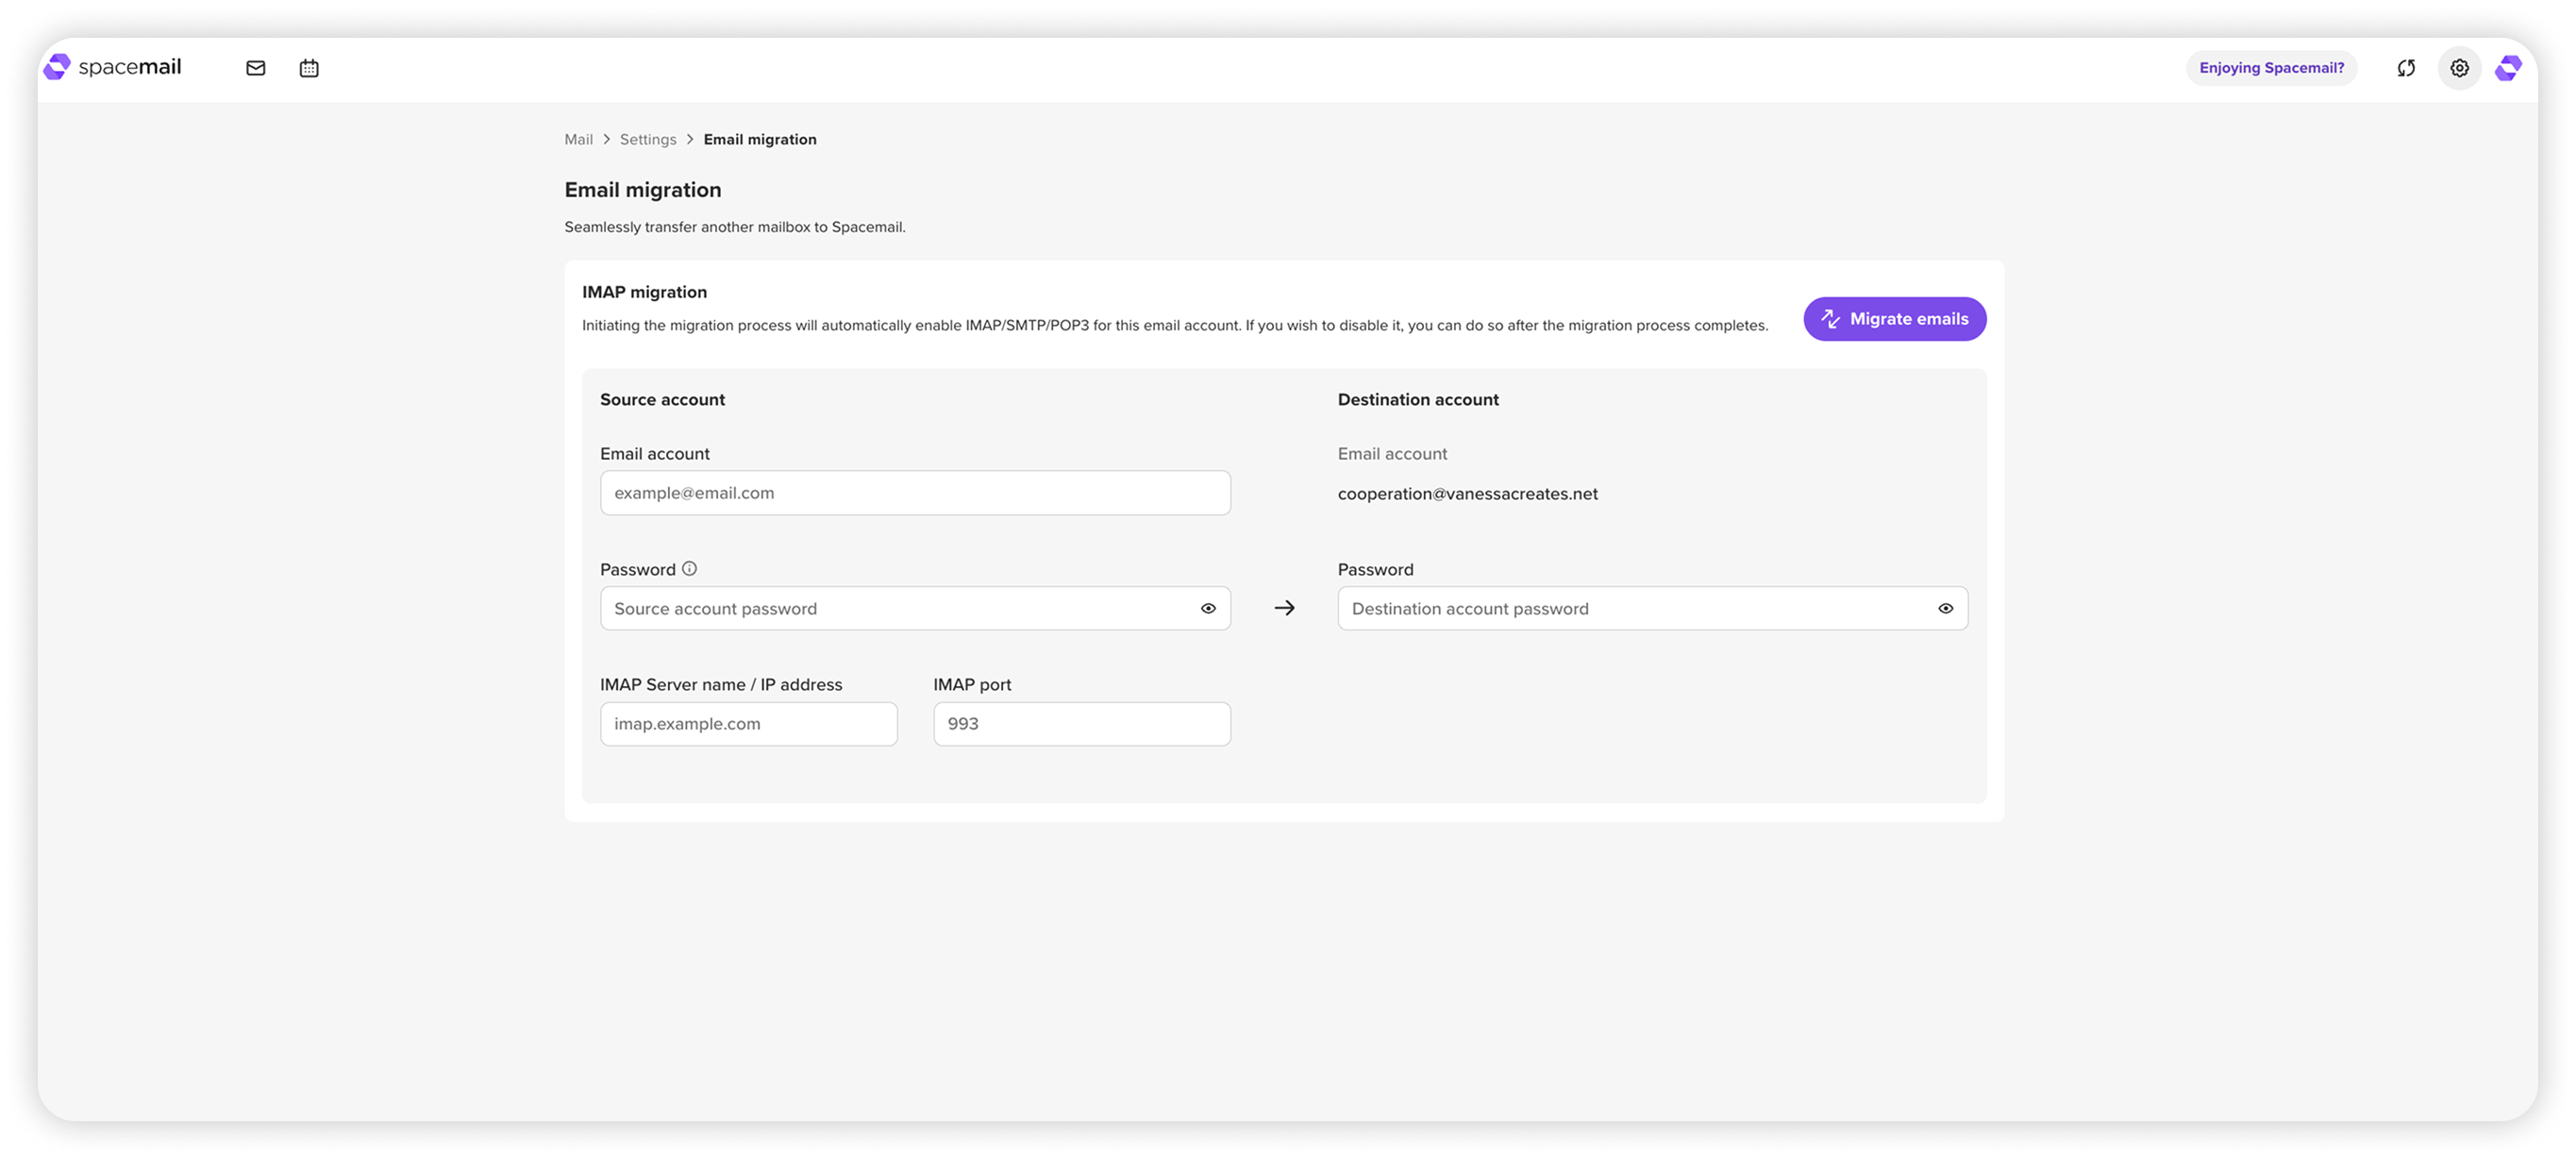
The Email migration tool helps you transfer emails from another email provider (such as Gmail, Outlook, etc.) directly into your Spacemail account. You only need to provide the source account details (email, password, IMAP server, port) and your Spacemail password — then click “Migrate emails” to start the transfer.
It is possible to find detailed instructions here: How to Migrate Your Emails to Spacemail
AI
Spacemail AI Assistant, available in your Compose window, provides the option to generate professional email drafts from just a few short words.

In the Settings > AI section, it is possible to:
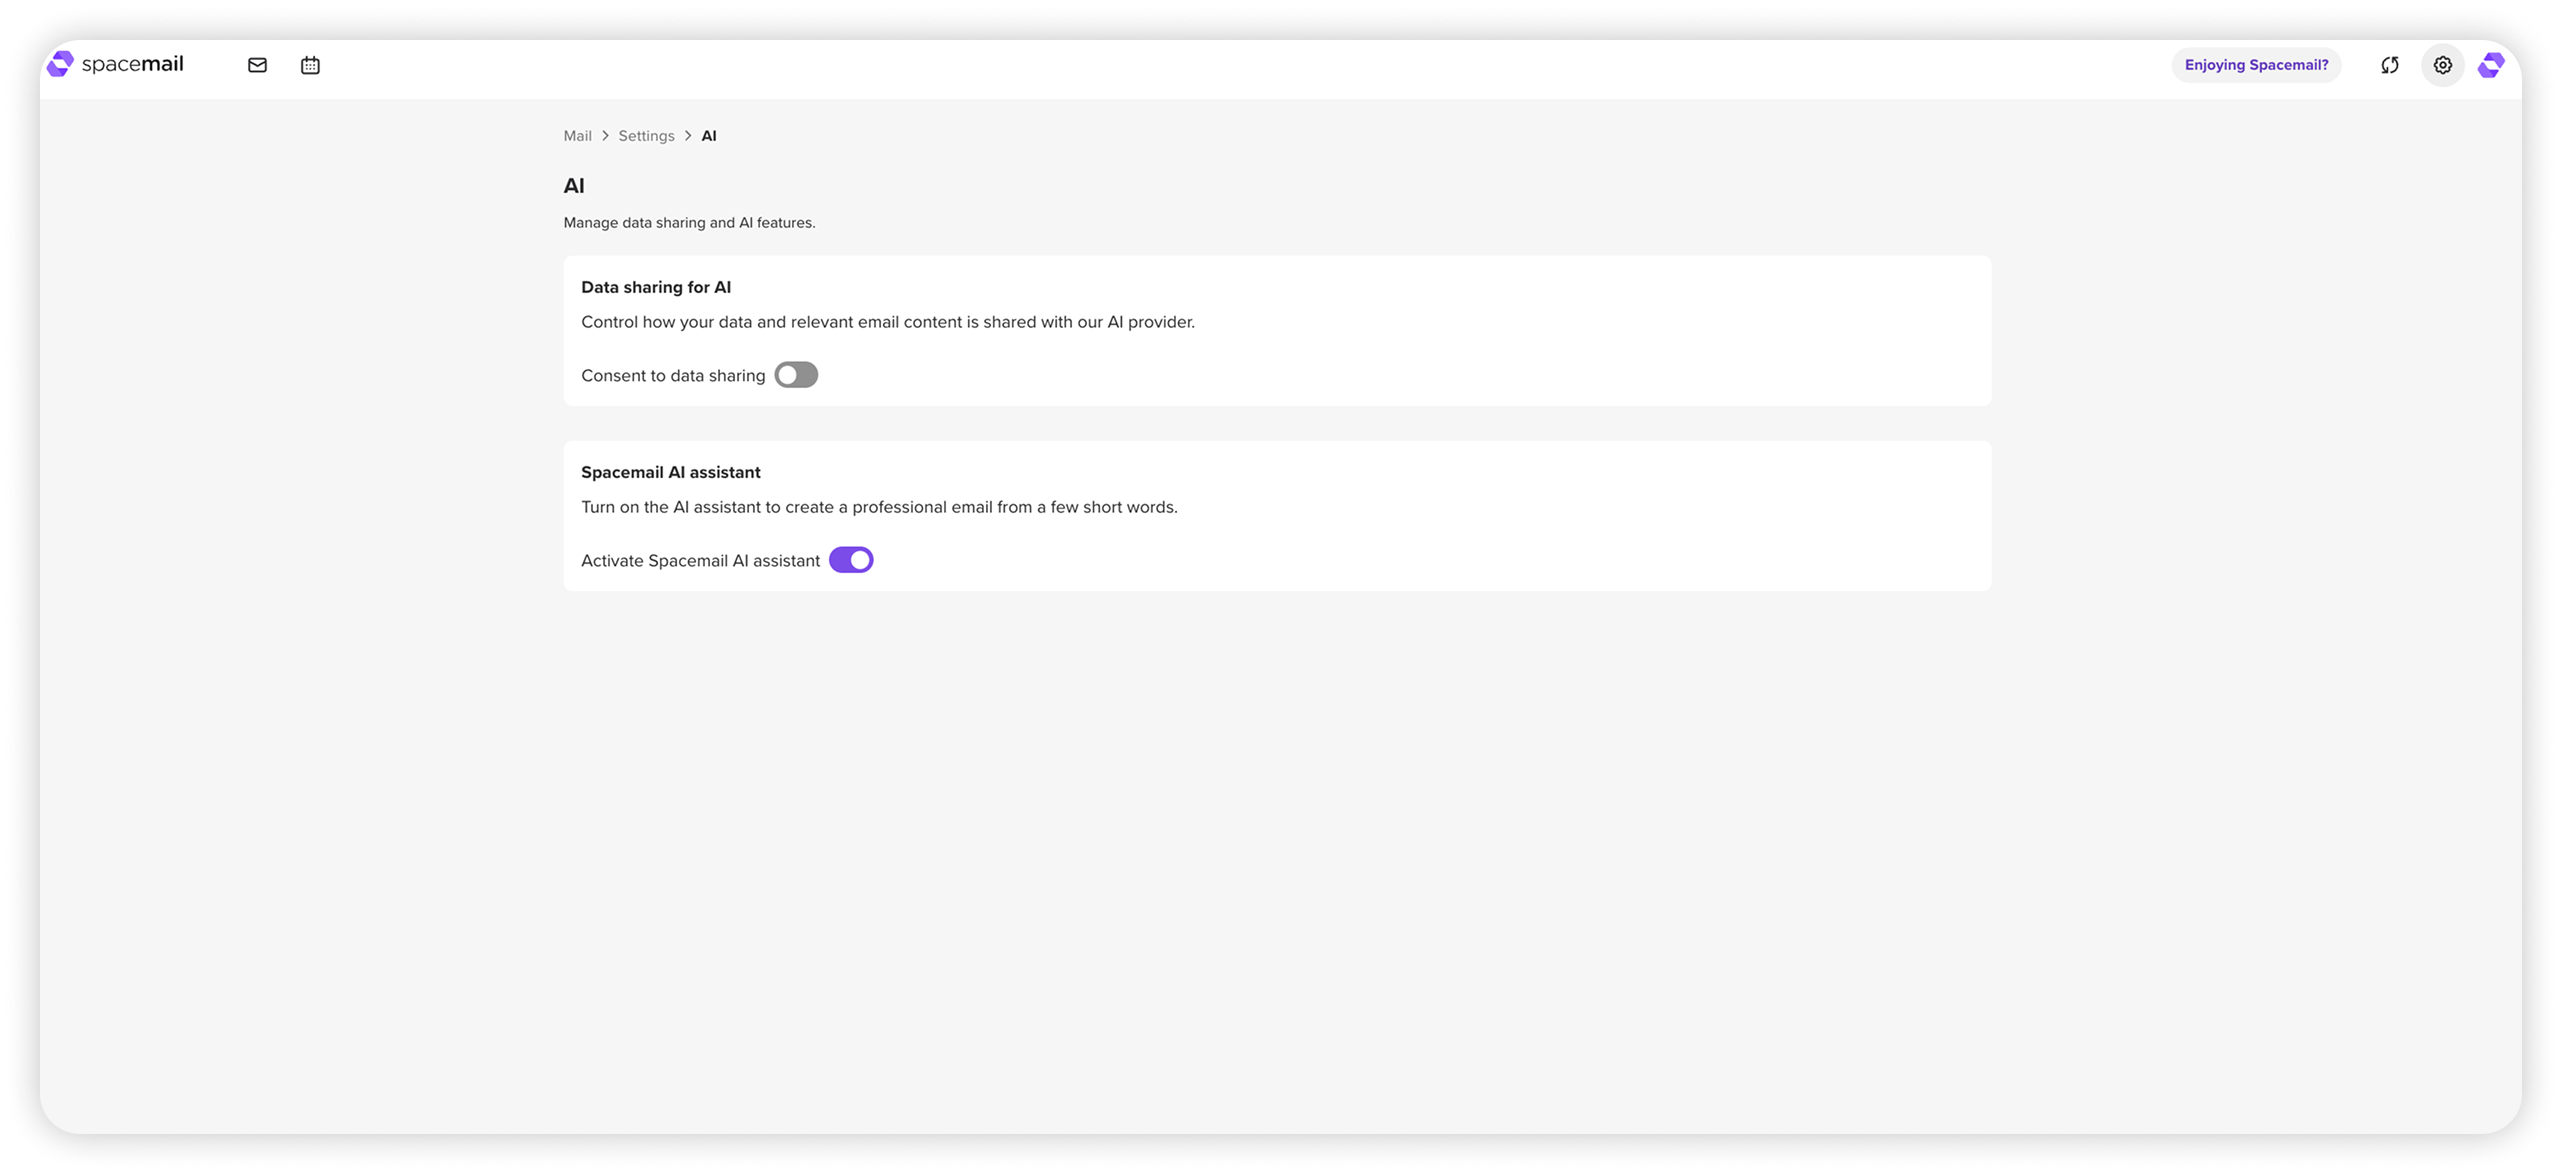
• Enable or disable data sharing with the AI provider
NOTE: When data sharing is enabled for the first time, or re-enabled after being turned off, a consent prompt will appear asking whether data can be shared with the AI provider.This preference can be updated at any time in Settings > AI.
• Always hide or show the AI assistant prompt in the Compose or Reply window using the Activate Spacemail AI Assistant toggle
IMAP/SMTP/POP3
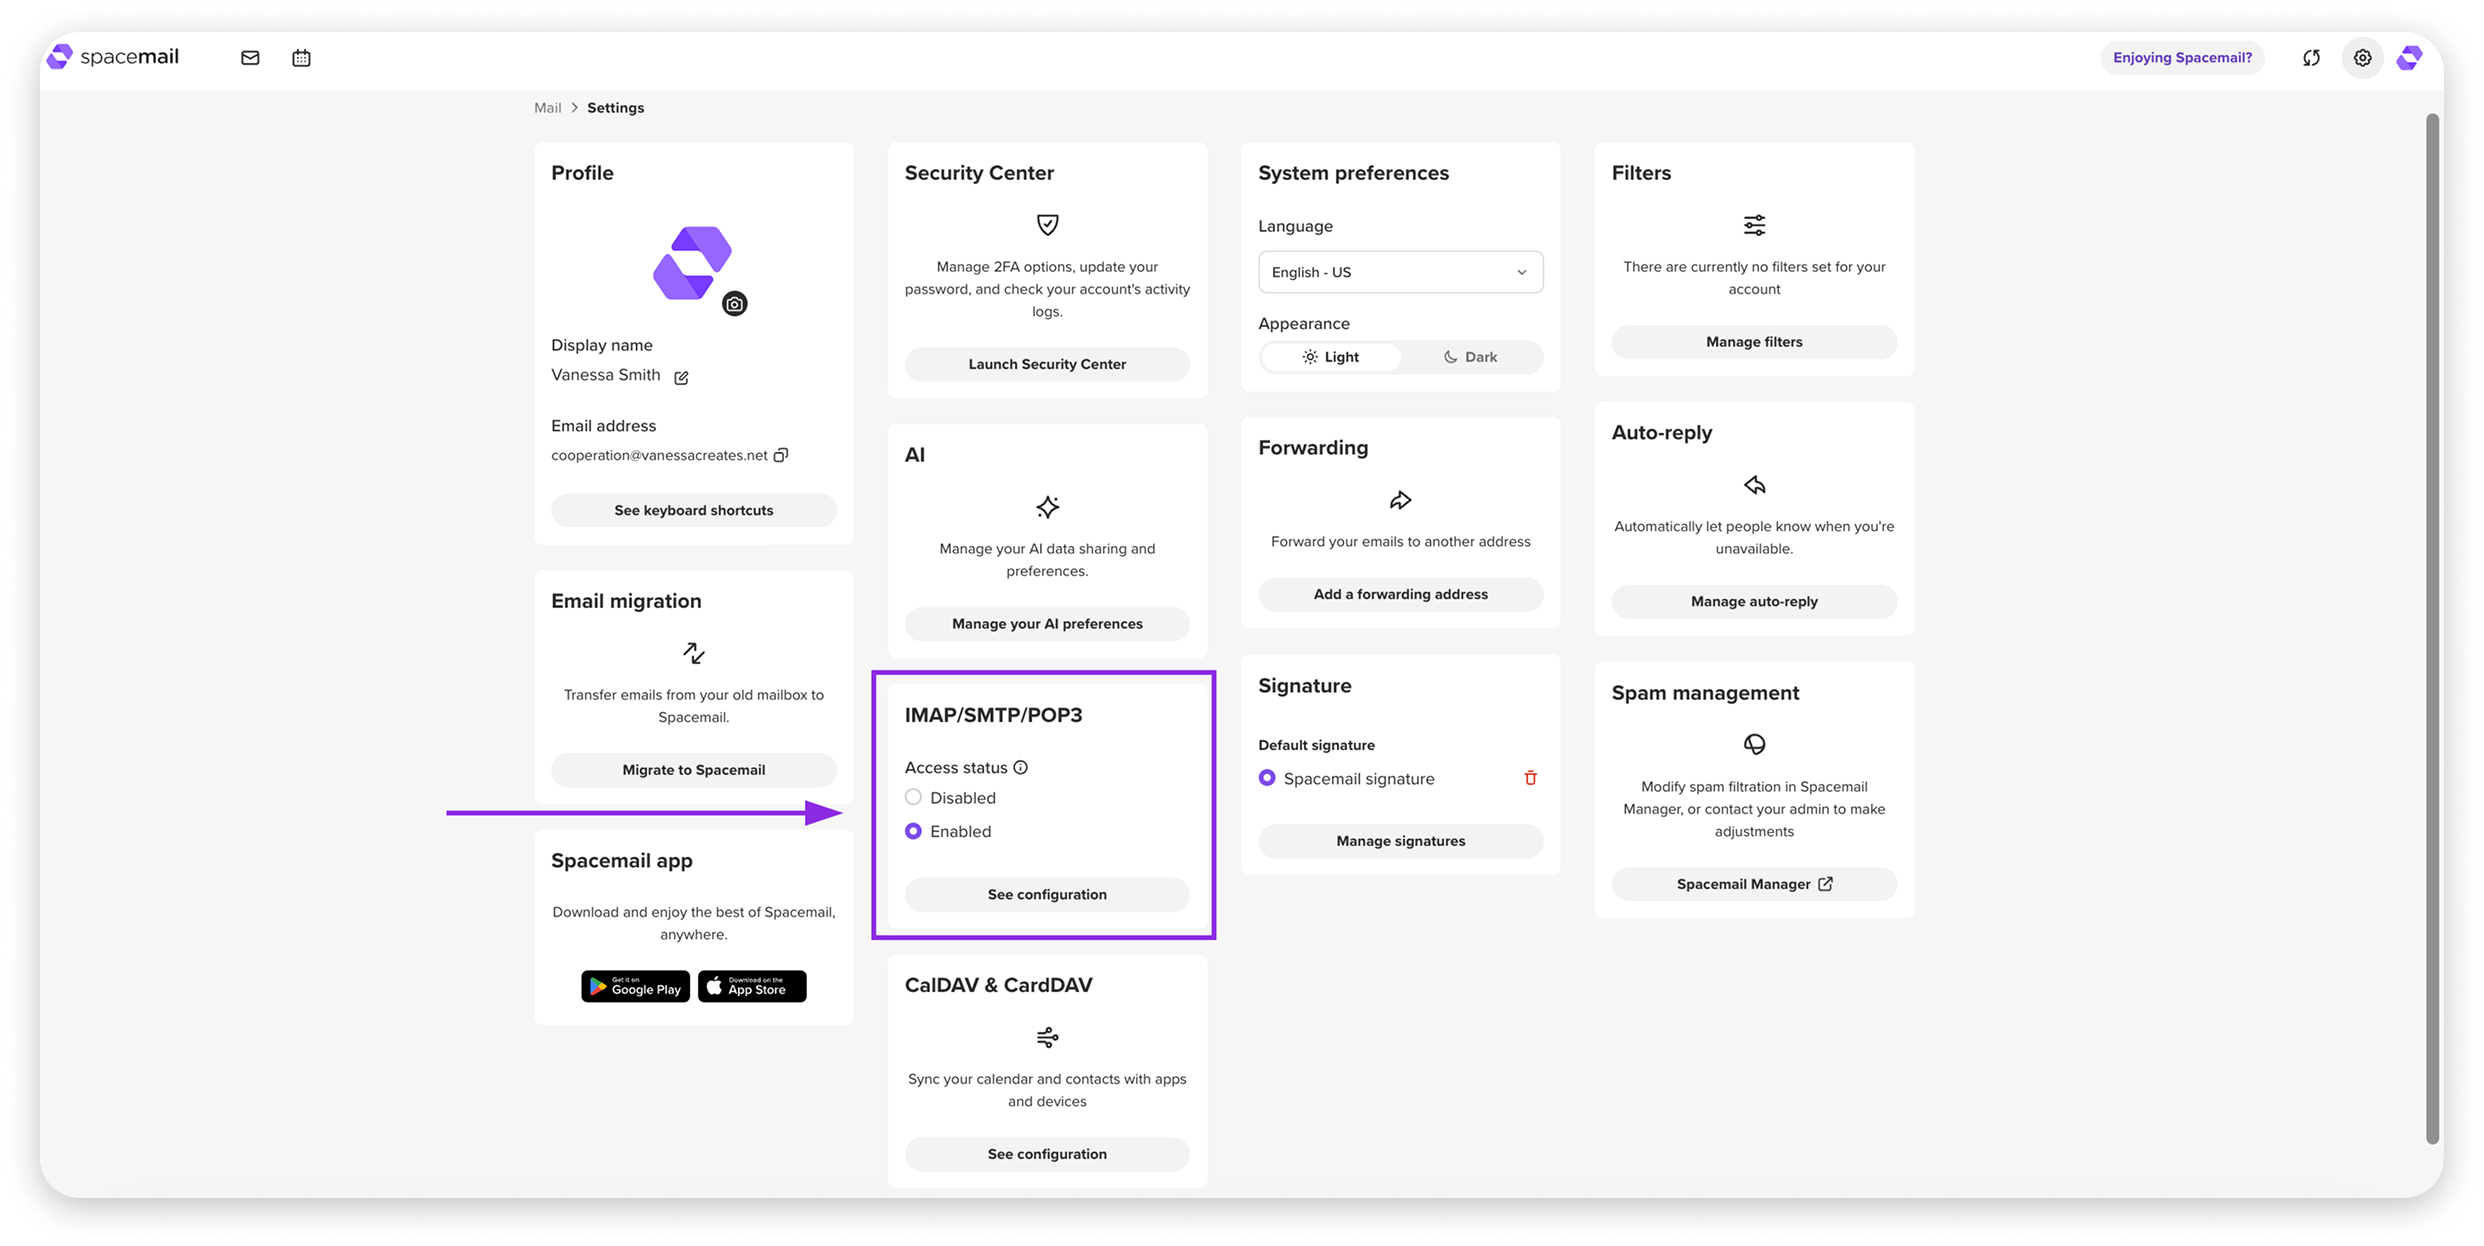
In this section, you can enable or disable IMAP/SMTP/POP3 access for your Spacemail account. This setting is enabled by default for all mailboxes. You can also view the connection details by clicking "See configuration".
These details are required to add your Spacemail address to a device or any third-party email client.
Guides you may find helpful:
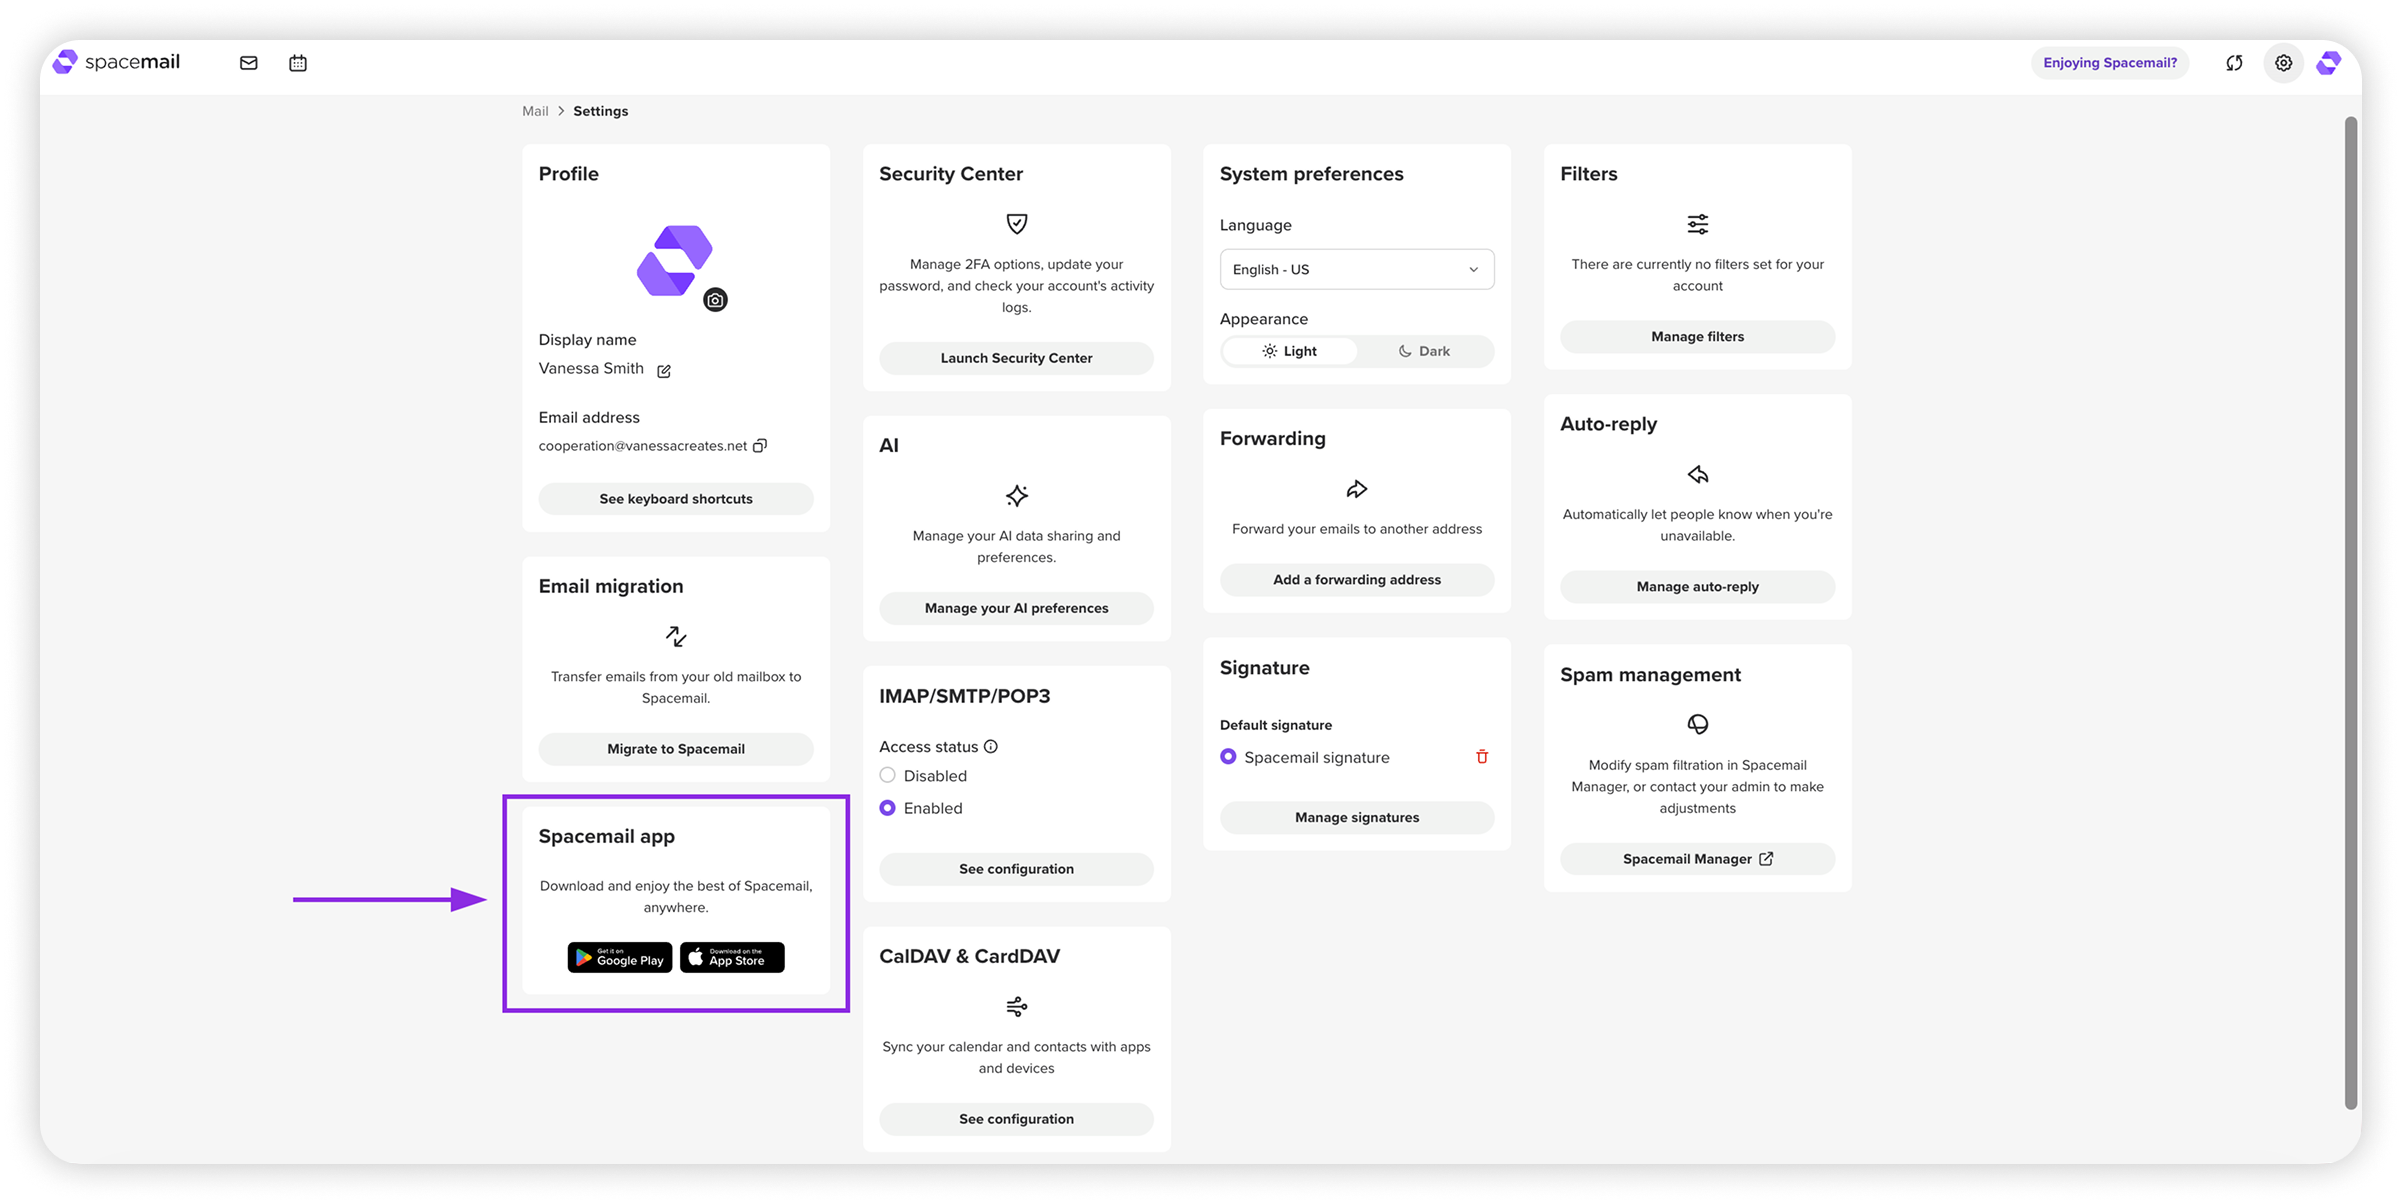
Alternatively, you can use the Spacemail mobile app, available for Android and iOS.
Forwarding
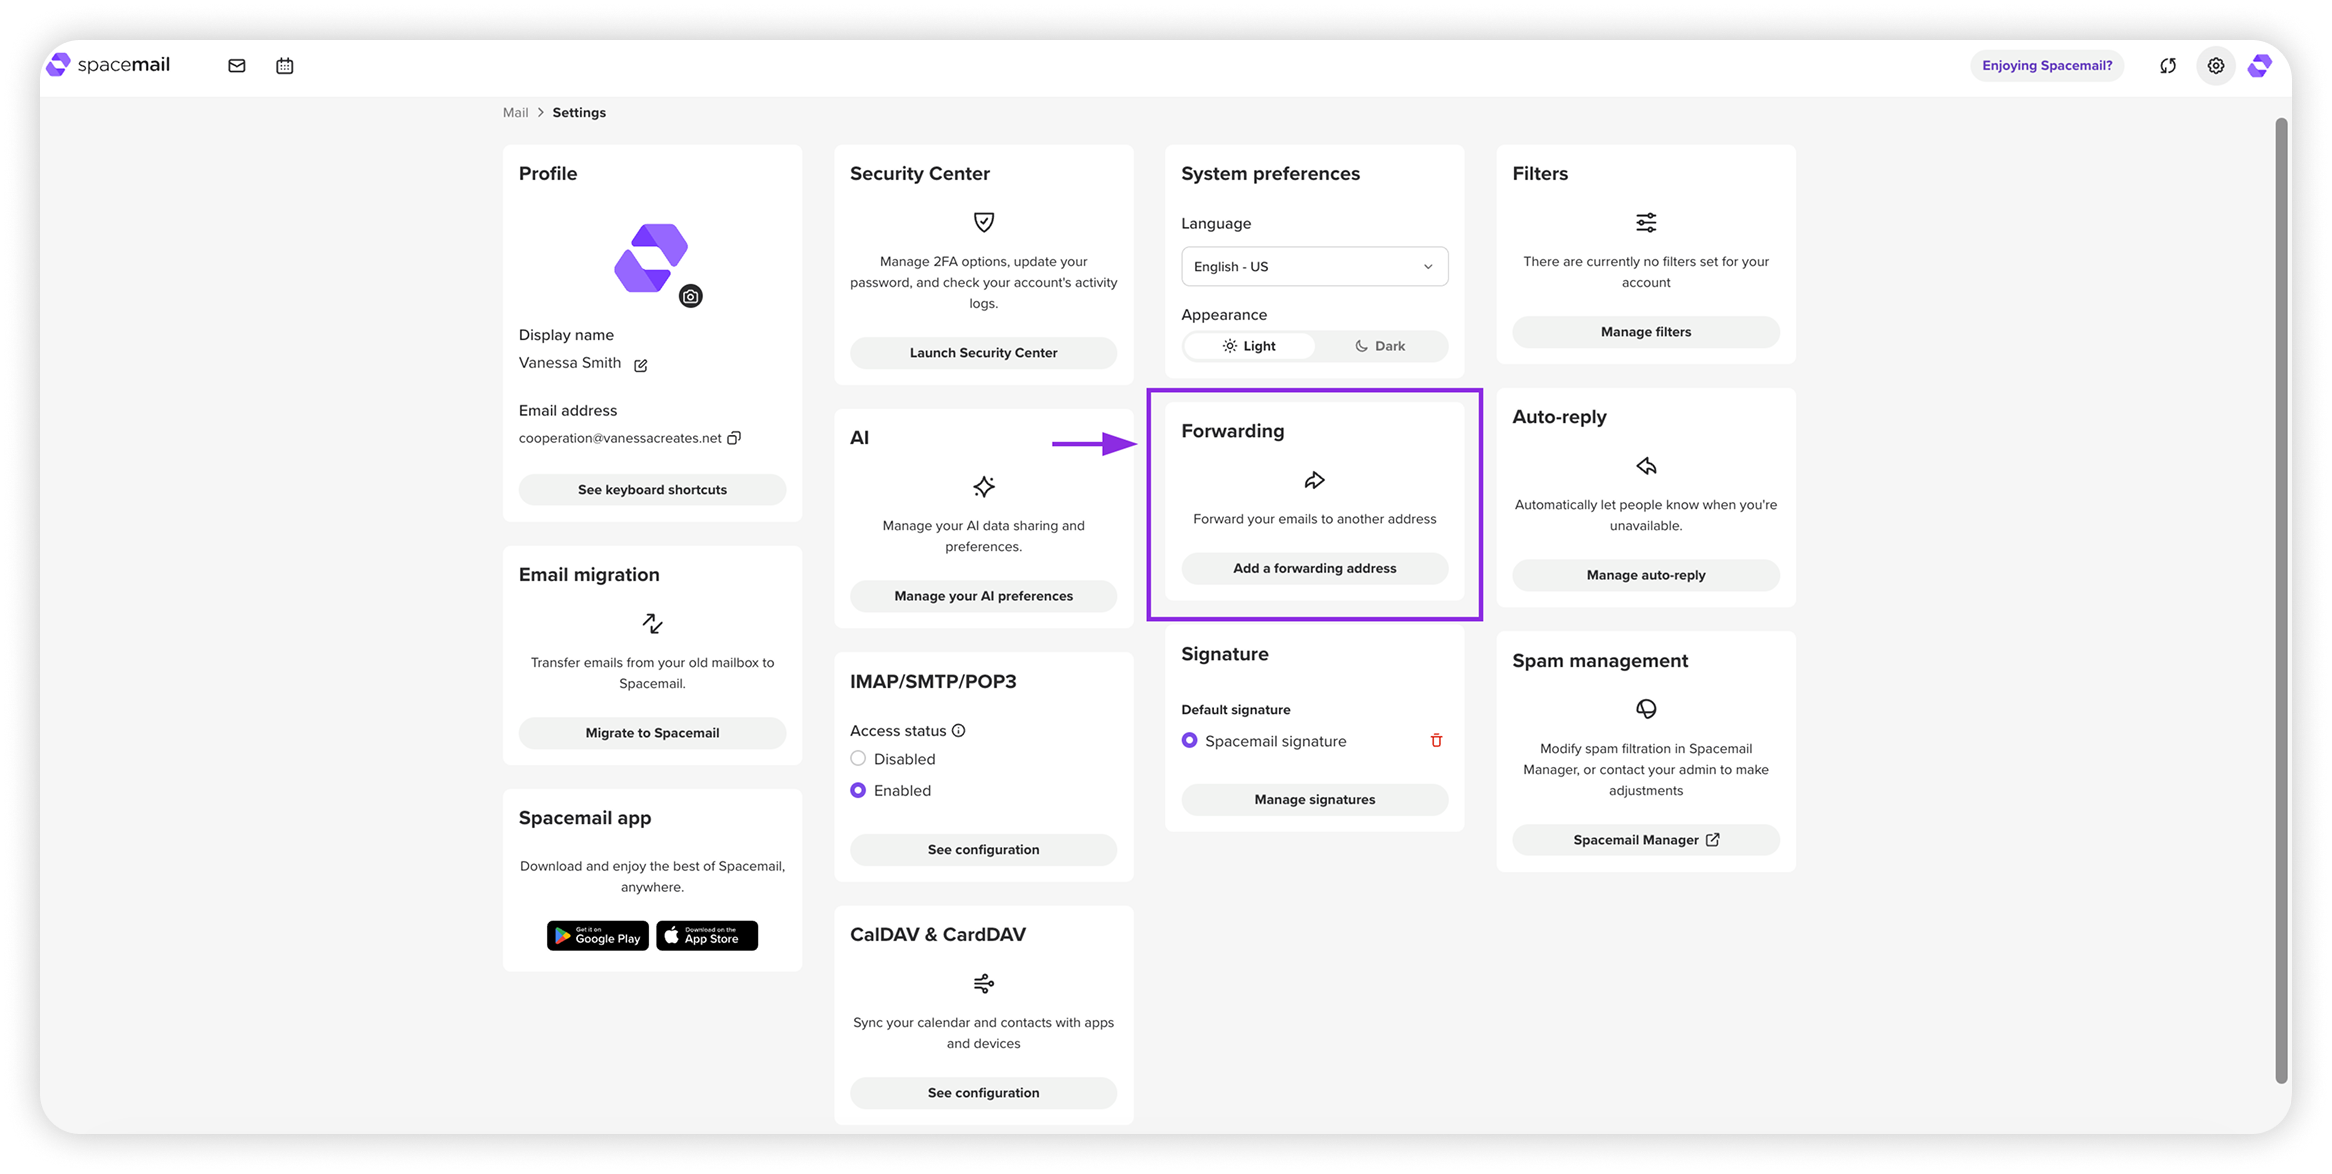
In the Forwarding section, you can set up an additional email address to which all incoming messages will be automatically redirected. You can also choose to keep a copy of forwarded emails in your Spacemail inbox.
You can refer to this guide if you wish to set up forwarding in your Spacemail account: How to Set Up Email Forwarding in Spacemail
Auto-reply
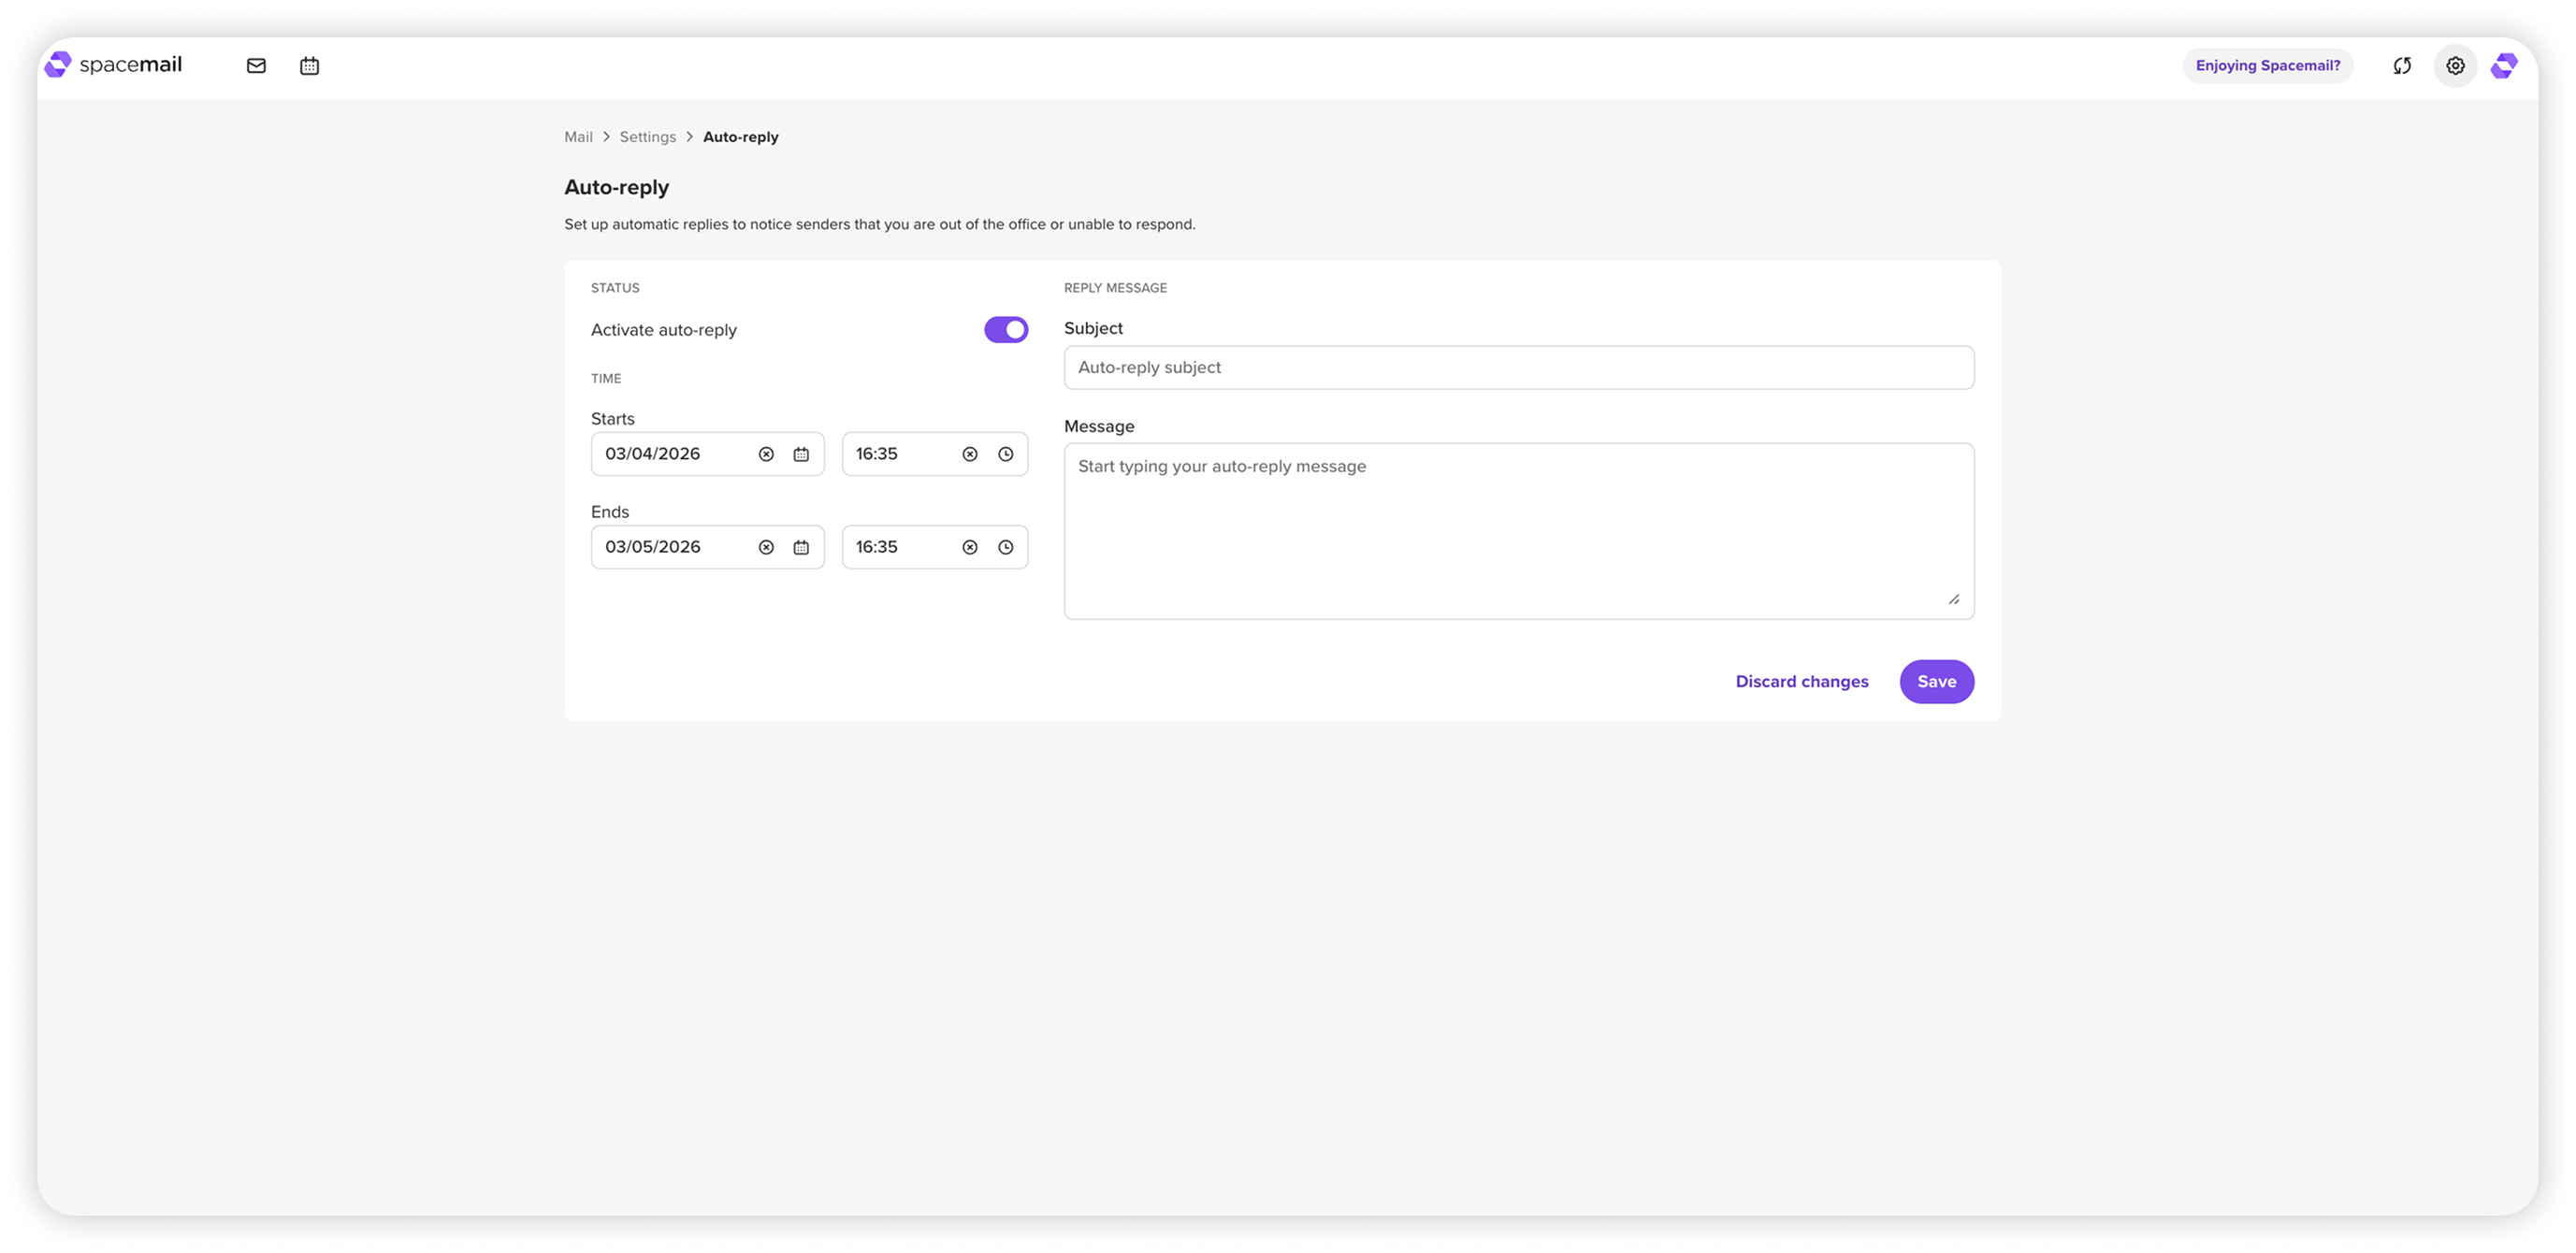
The auto-reply feature allows you to automatically respond to incoming emails when you're unavailable. It's helpful for letting senders know you're out of the office, on vacation, or can't reply right away.
You can set up: the auto-reply subject, the message that will be sent automatically, and the start and end times for the auto-reply.
It is possible enable or disable this feature using the Activate auto-reply toggle. When turned on, the system will automatically send your reply to incoming messages during the specified time period.
Spam management (Jellyfish)
Spacemail includes Jellyfish, a built-in machine-learning spam filtering and management tool. Jellyfish protects your mailbox from spam, phishing, spoofing, viruses, and malware, ensuring that unwanted or dangerous emails don’t reach your inbox. In addition to built-in spam filtering, Jellyfish also provides an admin panel to manage your email flow.
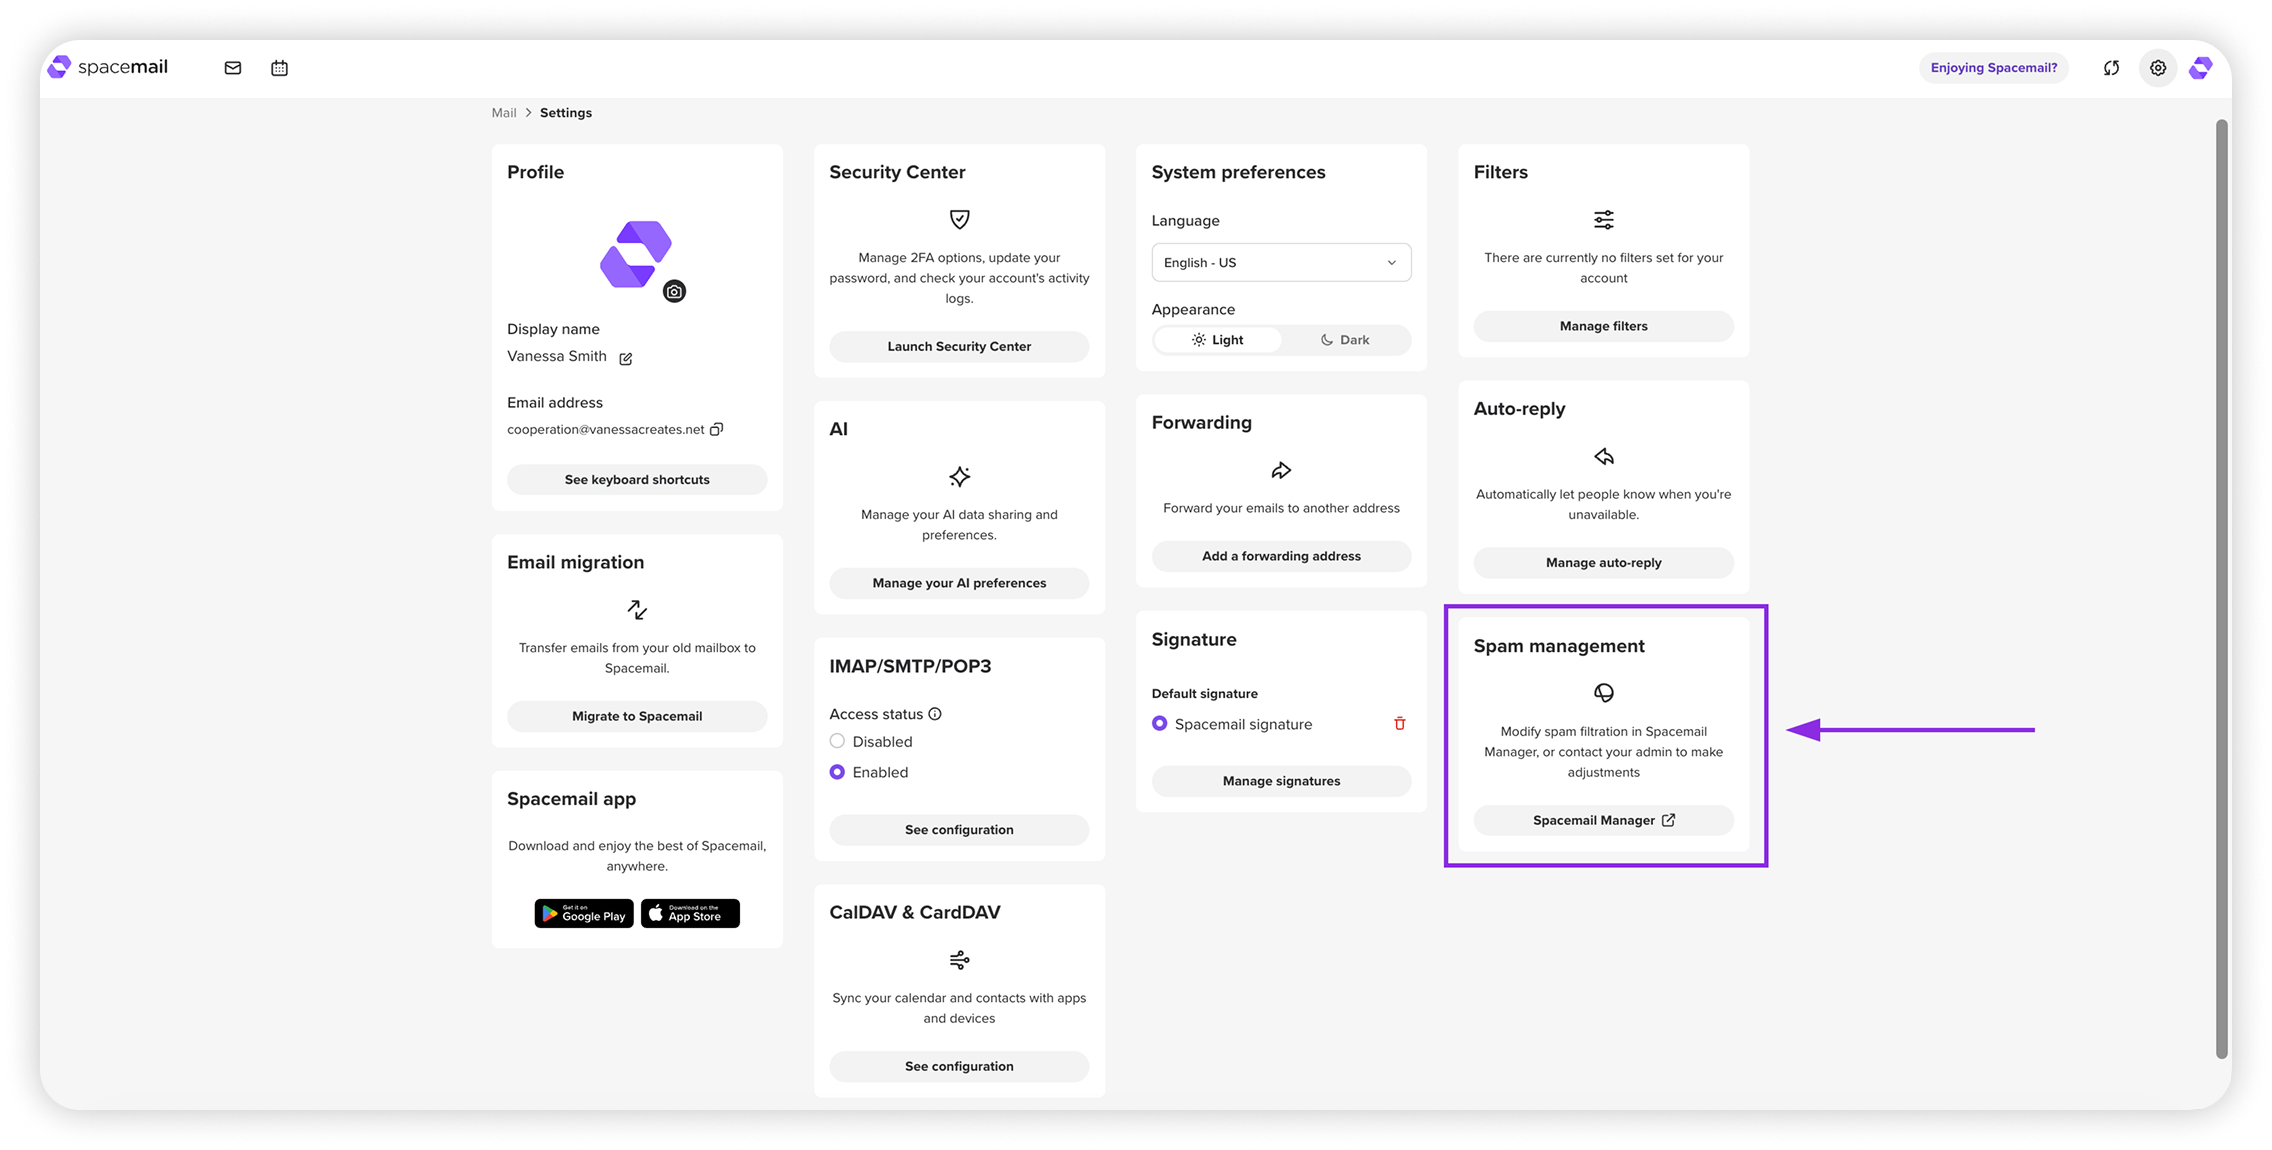
In Spacemail Settings, the Spam management option works as a shortcut.
Clicking it will redirect you to Spacemail Manager, where you can open the Jellyfish dashboard.
This means you can access Jellyfish either from Settings (via this shortcut) or directly in Spacemail Manager — whichever is more convenient.
.01kjypd6c7znbjjraw88qqh0s0.png)
Inside the dashboard, you can configure how incoming mail is filtered and controlled. The main options include:
Blocklist and Acceptlist – block unwanted senders/domains or mark trusted ones as always allowed.
Advanced rules – create custom filtering rules to adjust how your email is handled.
Logs – view detailed logs of how Jellyfish has processed your incoming emails.
Jellyfish-related articles:
Spacemail Manager
Catch-all
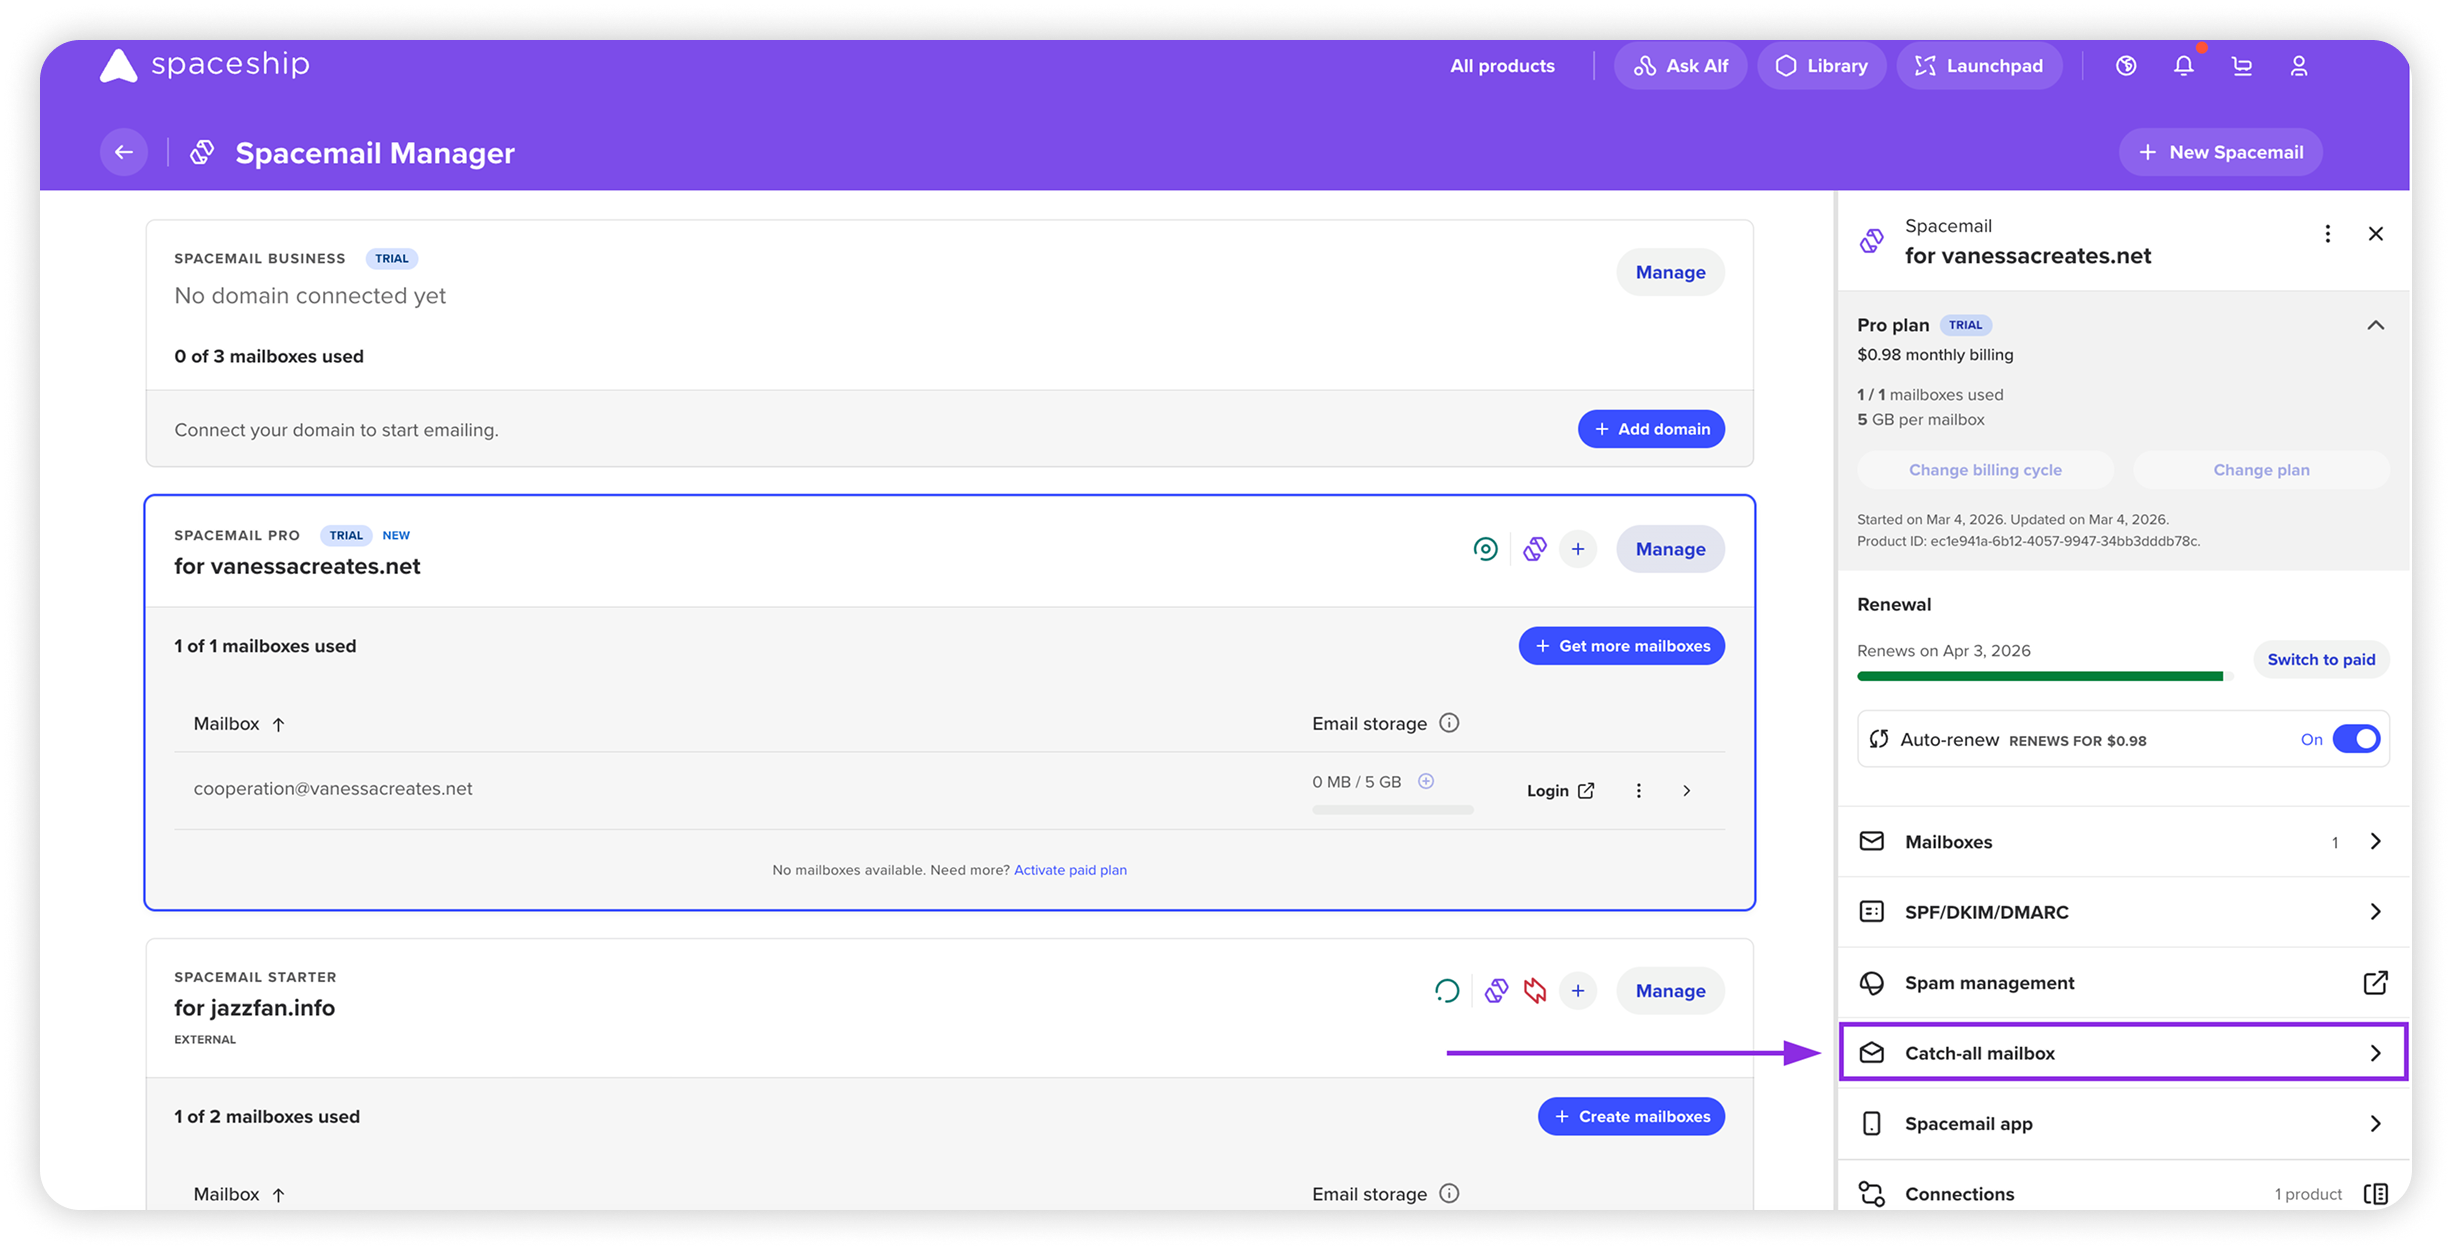
Catch-all allows you to choose one of your existing mailboxes to receive all messages sent to non-existent addresses under your domain.
You can check how to set it up in this guide: How to set up a catch-all?
Alias

An alias is an additional email address that helps protect your primary mailbox and keep your communication organized. You can send and receive emails using your alias in Spacemail, but you can’t use it to log in to your account.
It is possible to find detailed instructions on how to set it up: How to set up Spacemail aliases?
And that’s it!