How to set up Spacemail DNS records on Cloudflare (step-by-step guide)
If your domain is pointed to Cloudflare nameservers, follow these steps to configure Spacemaill DNS records:
Step 1. Log in to your Cloudflare account at https://dash.cloudflare.com/login
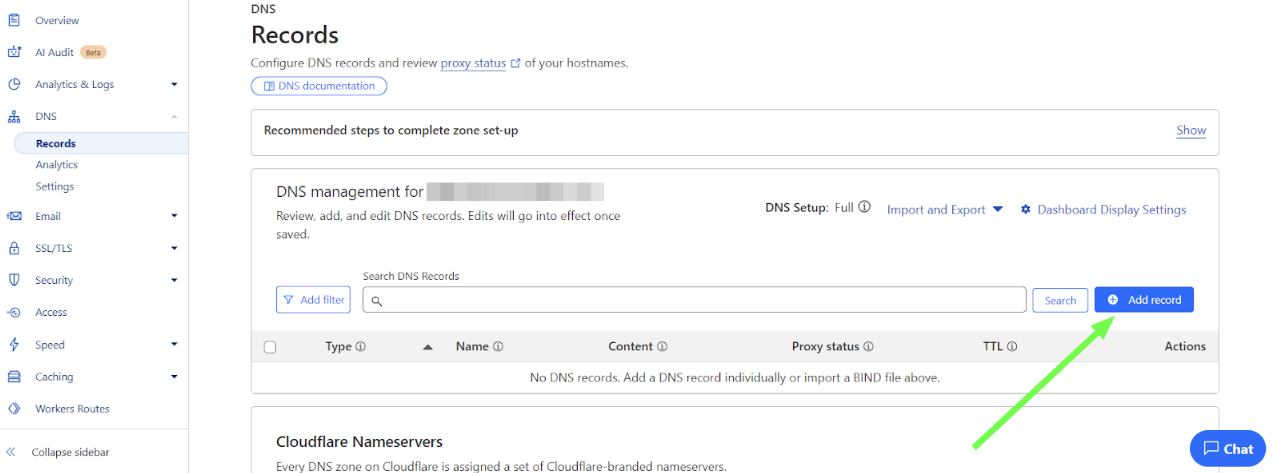
Step 2. Navigate to the DNS menu:

Note: In the screenshots, the domain name has been blurred for privacy. Wherever you see a blurred section, that’s where your own domain name will appear.
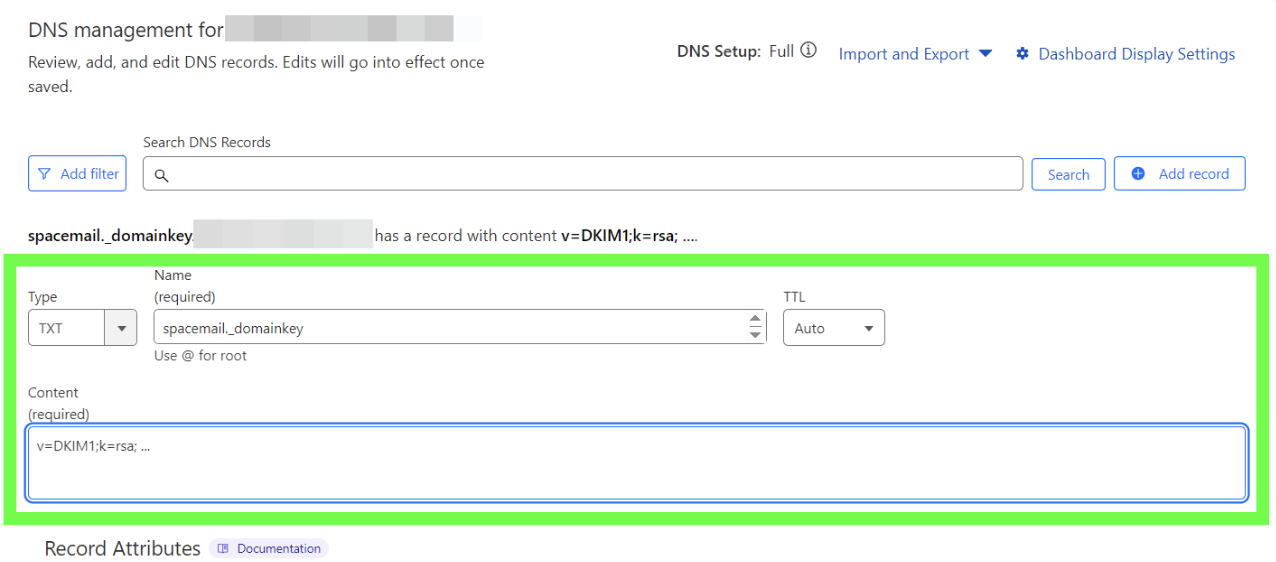
Step 3. Press the Add record button to add the DNS records:
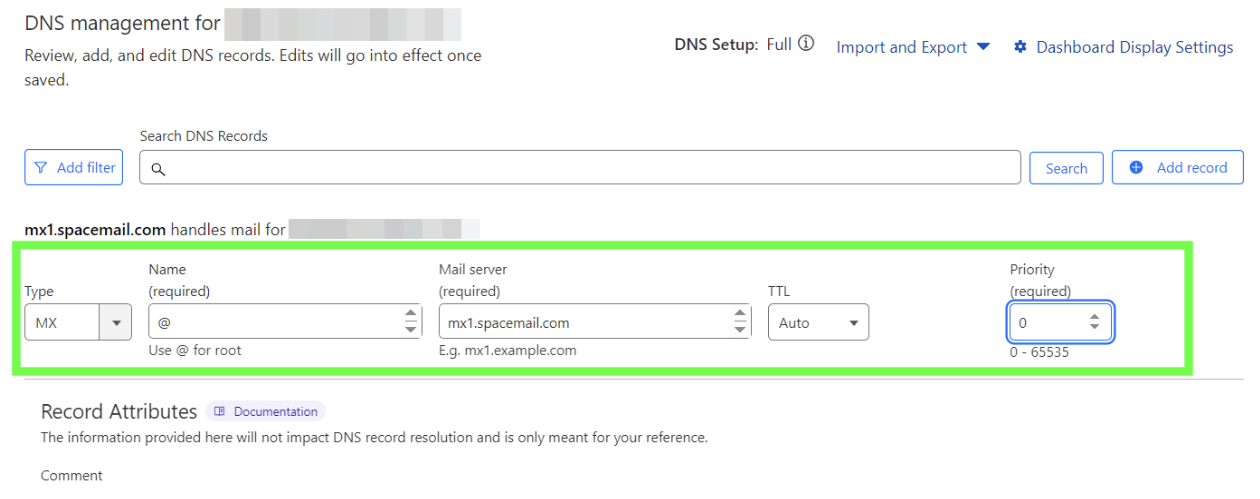
The following DNS records should be added for the domain name (@ stands for yourdomain.com):
Type: MX | Name: @ | Content: mx1.spacemail.com | Priority: 0 | TTL: Auto
Type: MX | Name: @ | Content: mx2.spacemail.com | Priority: 0 | TTL: Auto
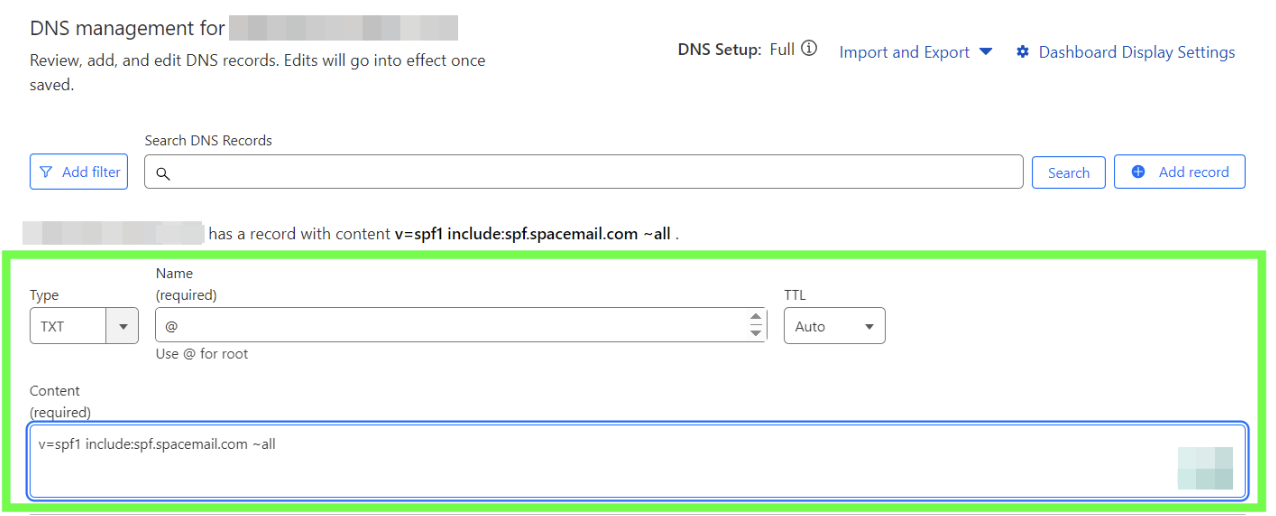
Type: TXT | Name: @ | Content: v=spf1 include:spf.spacemail.com ~all | TTL: Auto
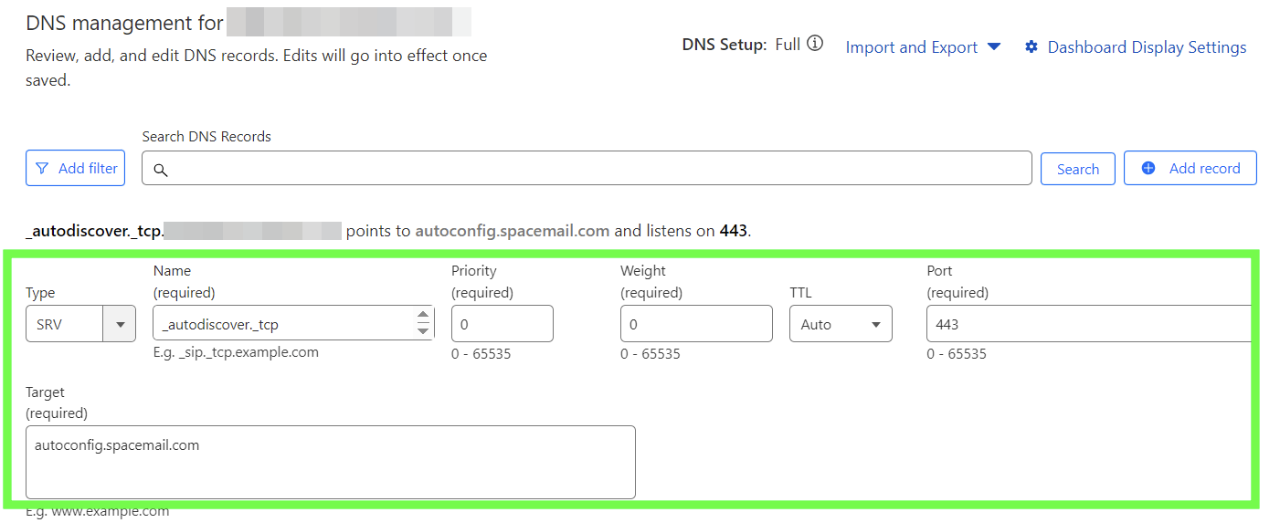
Type: SRV | Name: _autodiscover._tcp | Priority: 0 | Weight: 0 | Port: 443 | Target: autoconfig.spacemail.com | TTL: Auto
Type: TXT | Name: spacemail._domainkey | Content: the unique value should be copied from your Spaceship account.
To find it in your Spaceship account and set it up, please follow these steps:
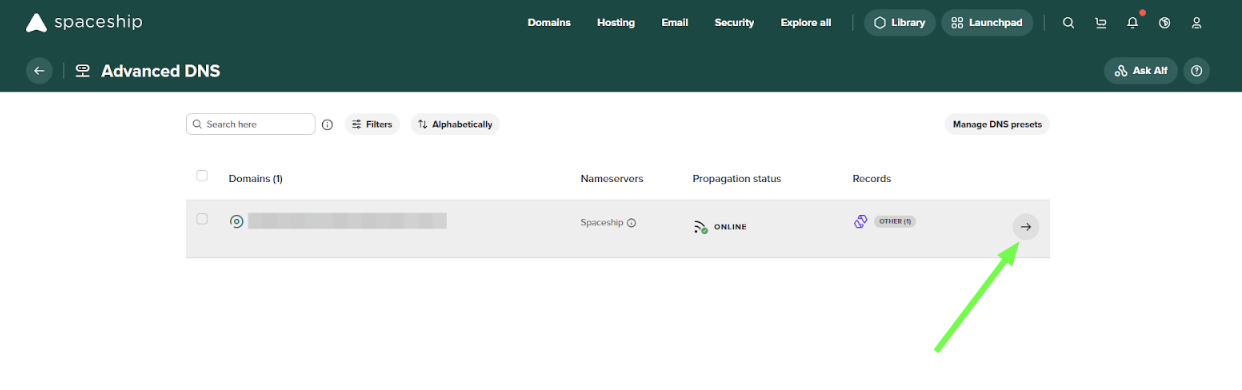
1. Go to the Advanced DNS application.
2. Find your domain name associated with Spacemail and click on the arrow next to it:
3. Scroll down to the ‘Inactive records’ section, click on the arrow to expand, and find ‘Spacemail DNS records’:
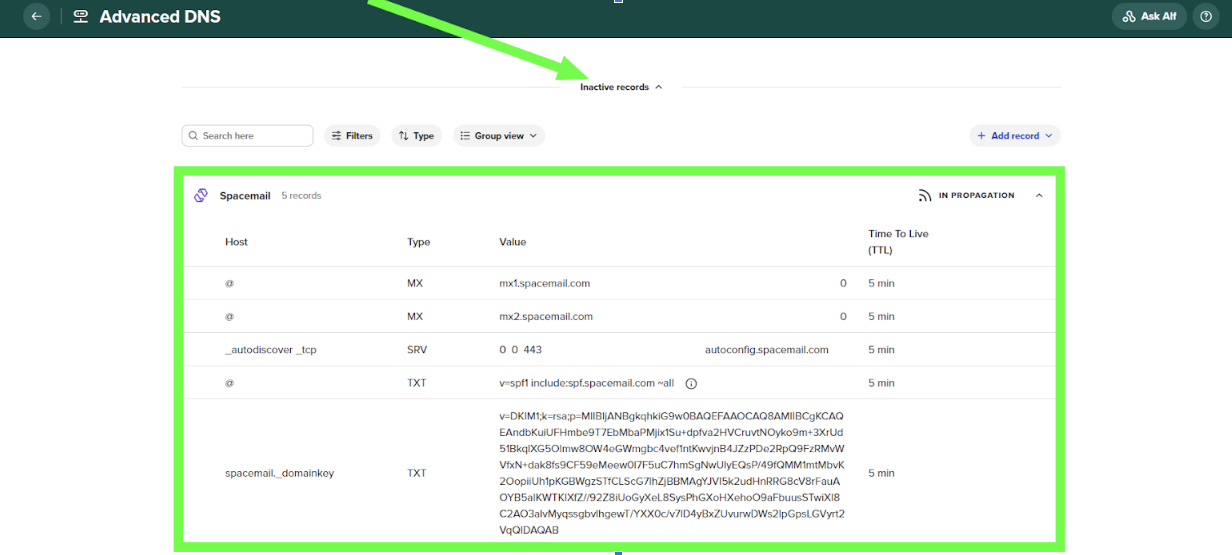
4. Locate a TXT record that starts with ‘v=DKIM1; k=rsa; …’ and add this record to the DNS zone of your domain with the hostname ‘spacemail._domainkey’:
Type: TXT Record | Name: _dmarc | Content: v=DMARC1; p=none; rua=mailto@yourdomain.com (or the one generated using an online DMARC generator tool)
DMARC helps protect your domain from email spoofing and phishing by defining how unauthorized emails should be handled. To configure DMARC, you will first need to generate a DMARC record using an online DMARC generator tool (for example, MXToolbox DMARC Record Generator) and then add it as a TXT record to your domain’s DNS zone.
NOTE: The DMARC policy can later be adjusted to quarantine or reject depending on your email setup and monitoring preferences.
Please keep in mind, if your domain is registered with a third-party registrar, it’s also required to add the verification TXT record. The verification TXT record can be located in the Advanced DNS application . Once there, click on the Manage button, locate the “Configure your DNS settings for products to work correctly” field, and click on “View guides”. Then, scroll down and select "Verifying domain ownership".
Step 4. Check that all the records are added and wait 30-40 minutes for the records to propagate. You can use any online checkers to check if the propagation is over. Feel free to check it here.
Note: When you enter the value for a TXT record in Cloudflare (e.g., value), Cloudflare will automatically enclose it in double quotation marks, like "value". This is completely normal and required by DNS standards. The quotation marks are not part of the value you need to copy or enter - they just indicate that it's a string of text, which is how TXT records are stored and displayed in DNS systems.
That's it! If you have any questions or need some help, please contact us.