How to set up Spacemail in macOS Mail using IMAP & SMTP
This tutorial will show you how to set up a Spacemail account in the Mail application on macOS using IMAP for incoming and SMTP for outgoing mail.
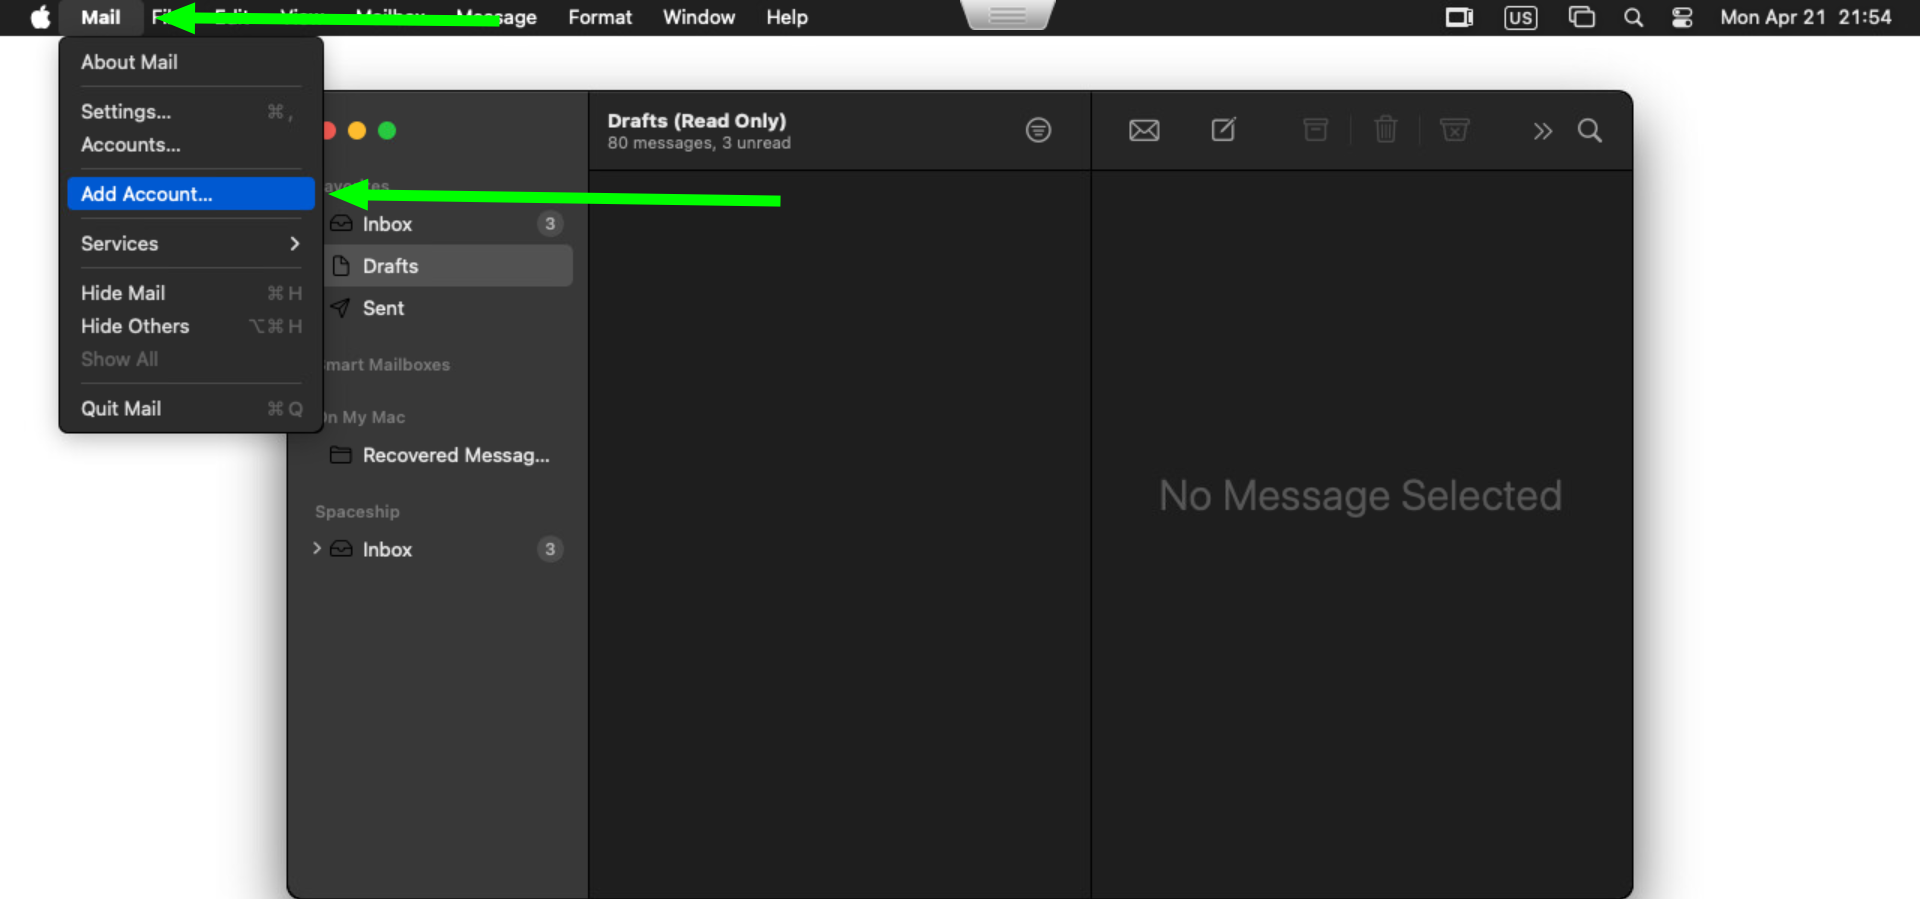
In case you already have some account set up in your application, click on Mail and select the Add Account option while Mail is open on the screen
If it is the first time you use Mail, you will see a pop-up where you can add the email account. Select the Other Mail Account option and hit the Continue button: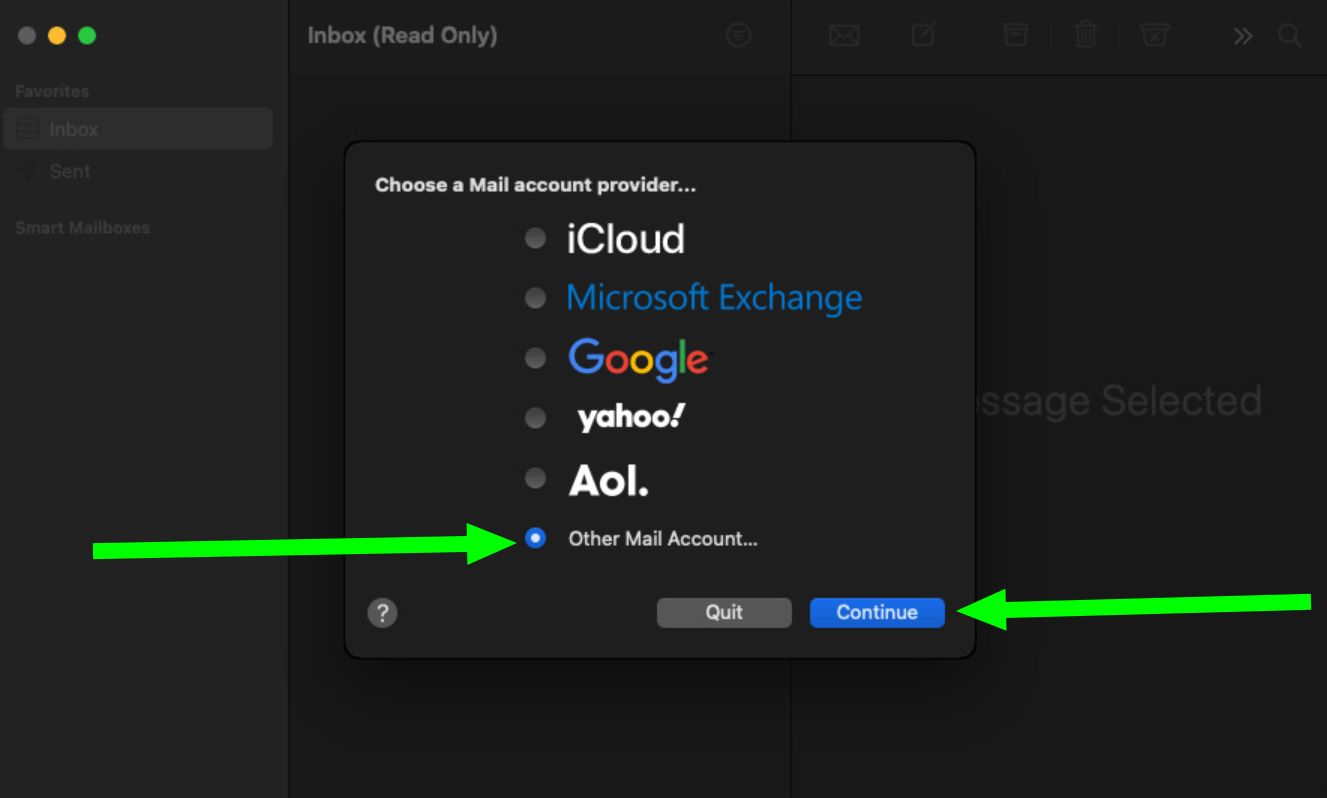
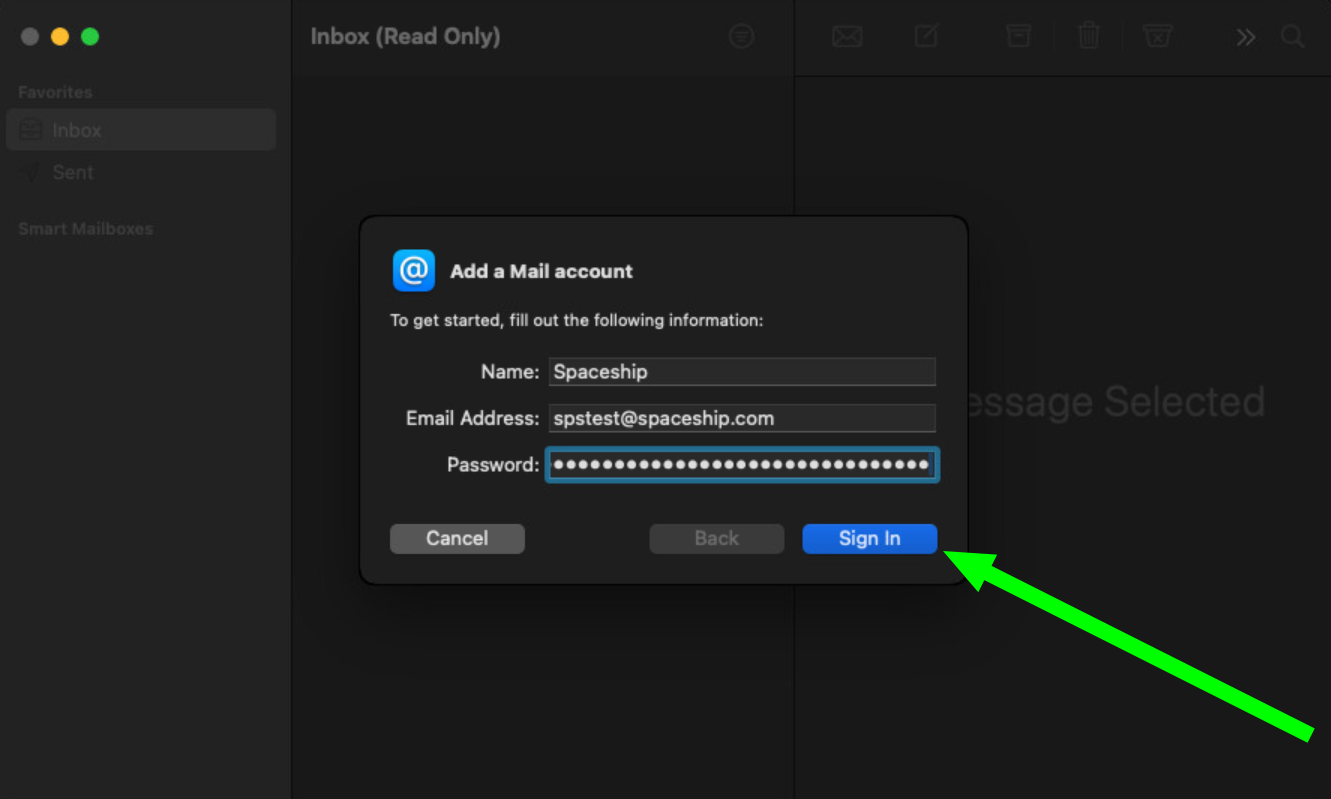
In the Add a Mail Account window, enter your full name, email address, and email account password, then click Sign In:
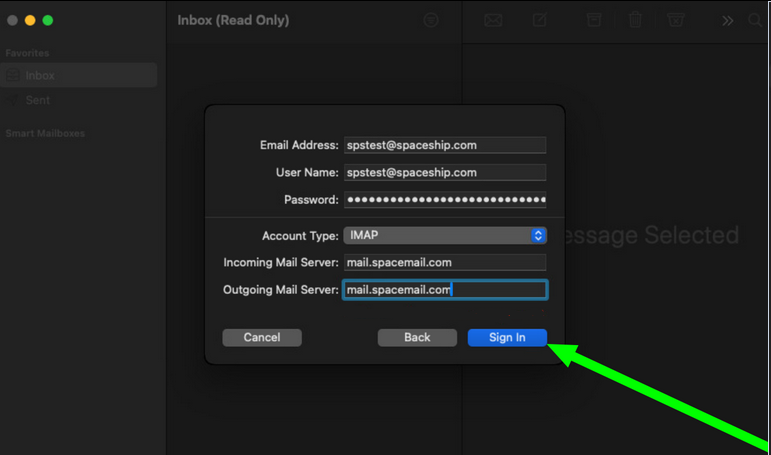
The application will try to detect settings automatically. Disregard the result and fill in these boxes manually. Enter your account details:
Email address: full email addressUsername: full email address
Password: password for your Spacemail mailbox
Account type: IMAP
Incoming Mail Server: mail.spacemail.com
Outgoing Mail Server: mail.spacemail.com
Click on Sign In once the details are filled:
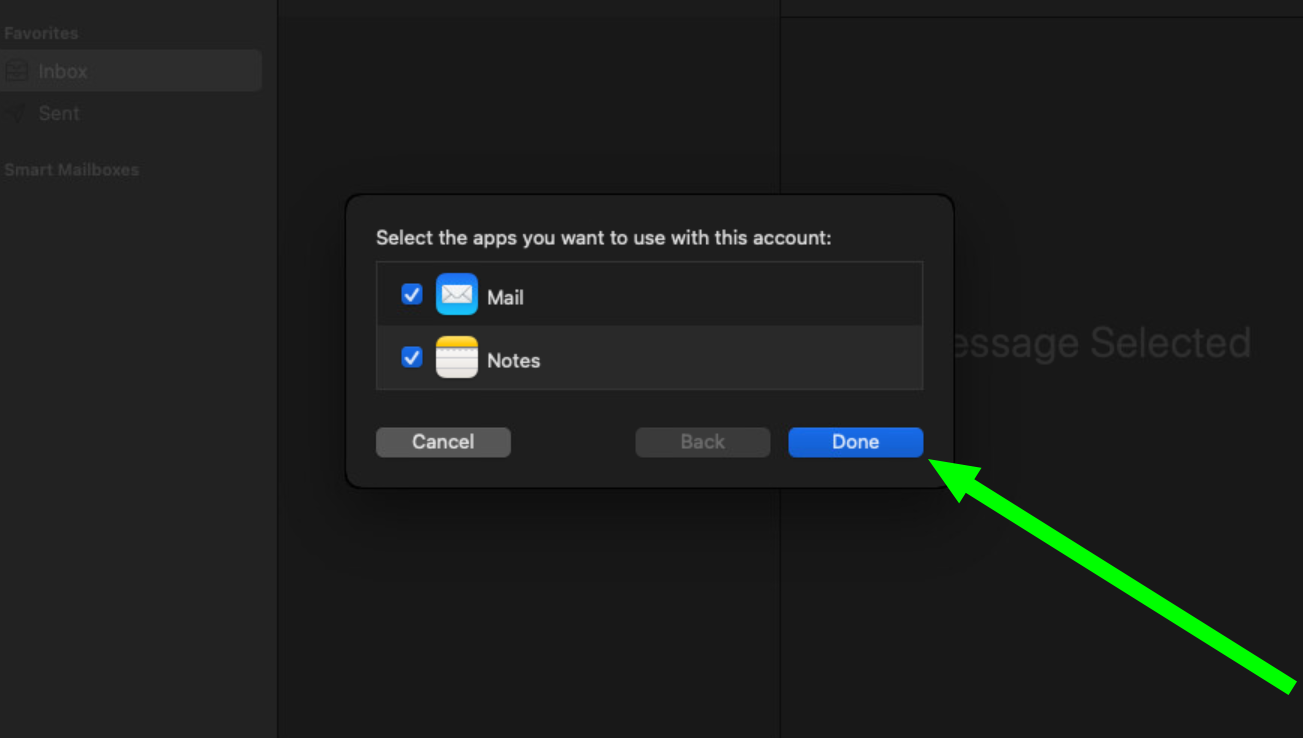
You may use both Mail and Notes here. Click the Done button to finish adding the mailbox to the Mail app:
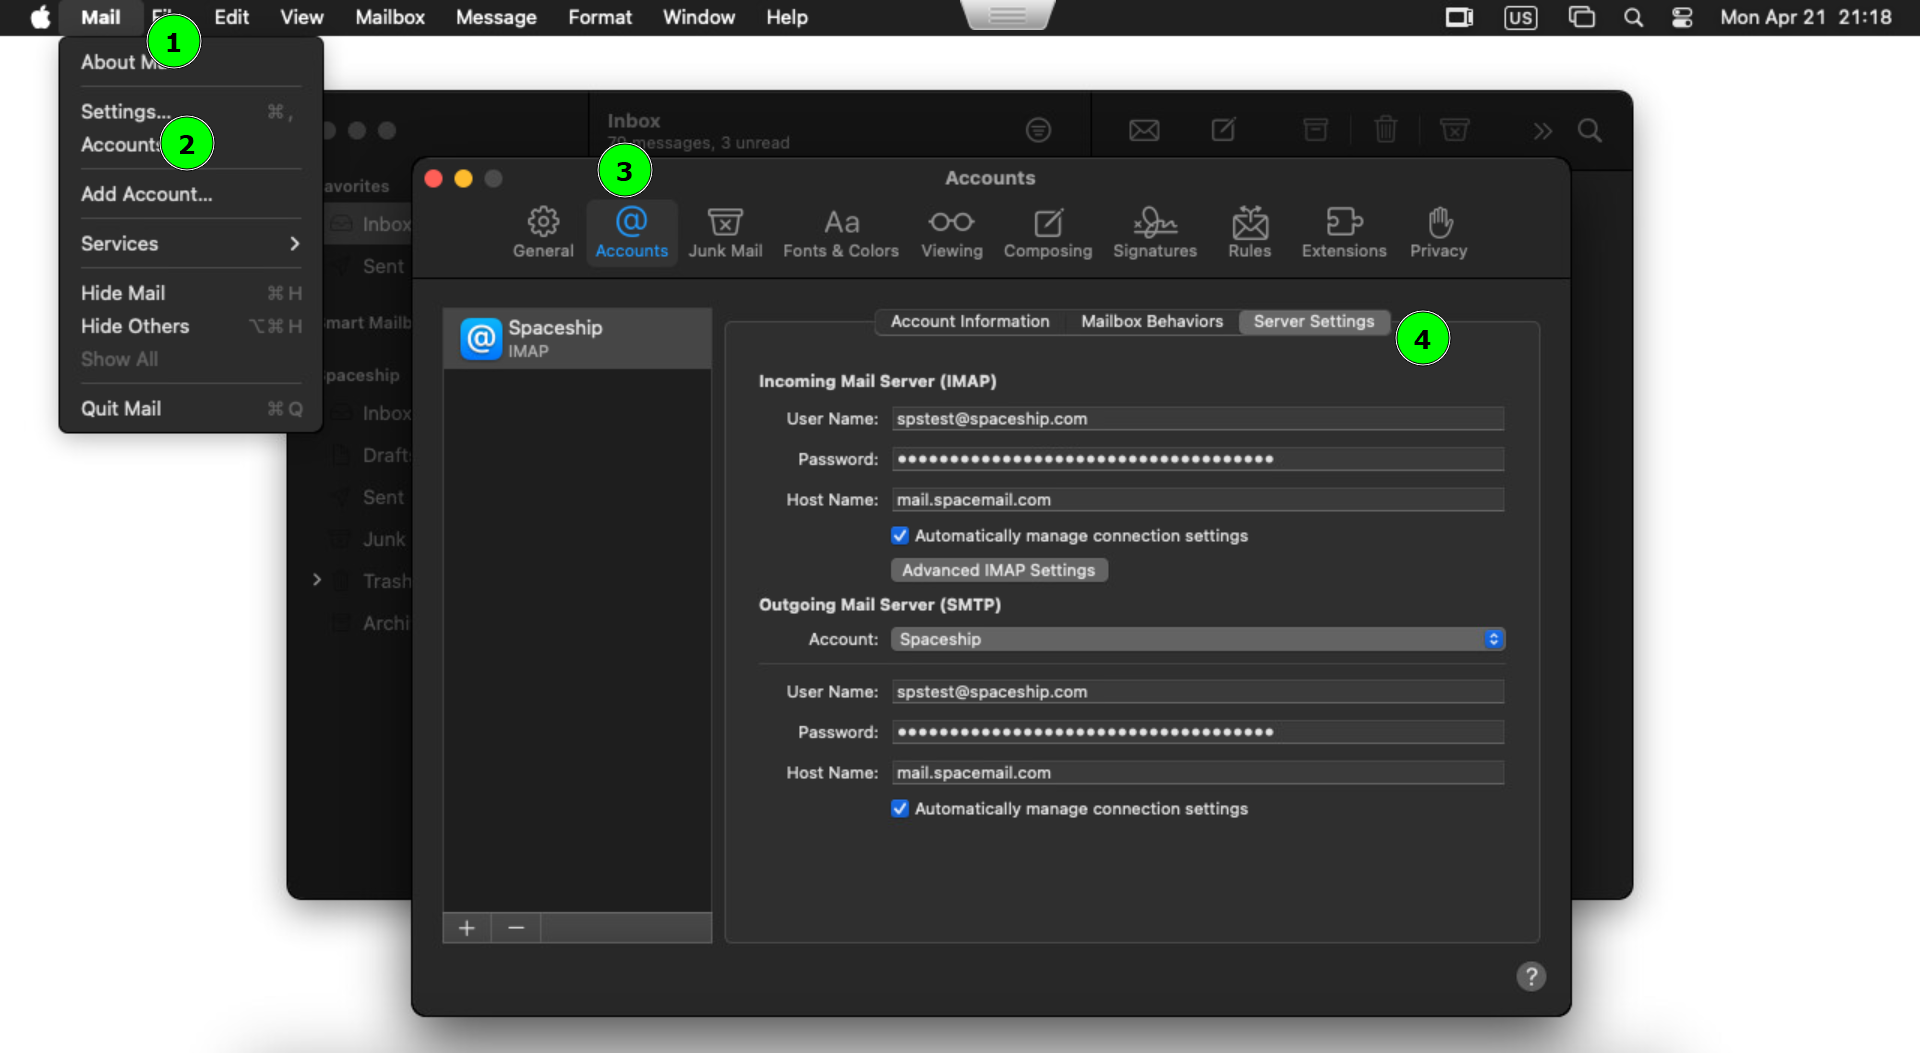
The next step is to verify that the Incoming and Outgoing Mail Server settings are correct. Please click on Mail and go to Settings. Once there, select Accounts and go to Server Settings:
Click on the Advanced IMAP Settings and fill in the following details:
IMAP Path Prefix: 993
TLS Certificate: none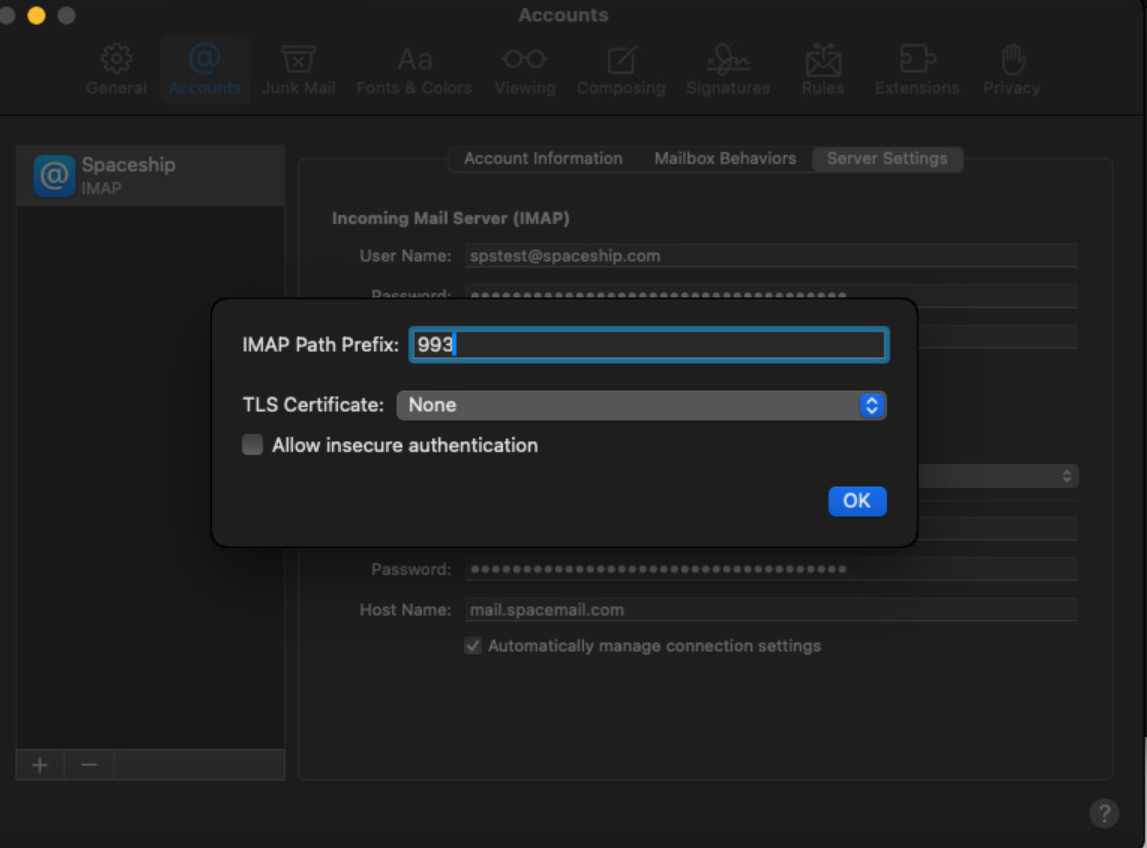
Once done, click on the OK button and save the changes.
If you have any questions, please don't hesitate to reach out to our Support Team for further assistance.
That’s it!