How to set up Spacemail in Outlook for iOS using IMAP & SMTP
In this article, we’ll cover how to set up your Spacemail mailbox using the IMAP/SMTP protocol in the Outlook application for iOS.
IMPORTANT: Outlook for iOS doesn't support POP3 accounts..
Open the Outlook app on your device.
Select Add Account to add one of your existing Microsoft email accounts, or Create New Account if you want to create a new account.
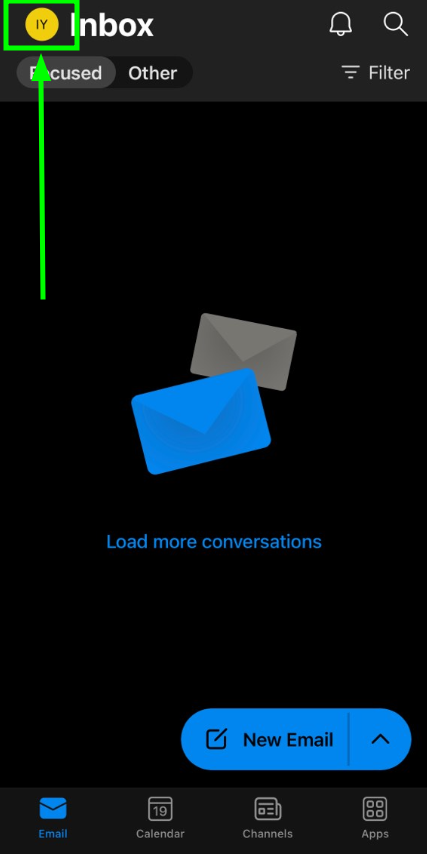
At the top of the app, tap the Outlook button next to Inbox, and then select Settings:
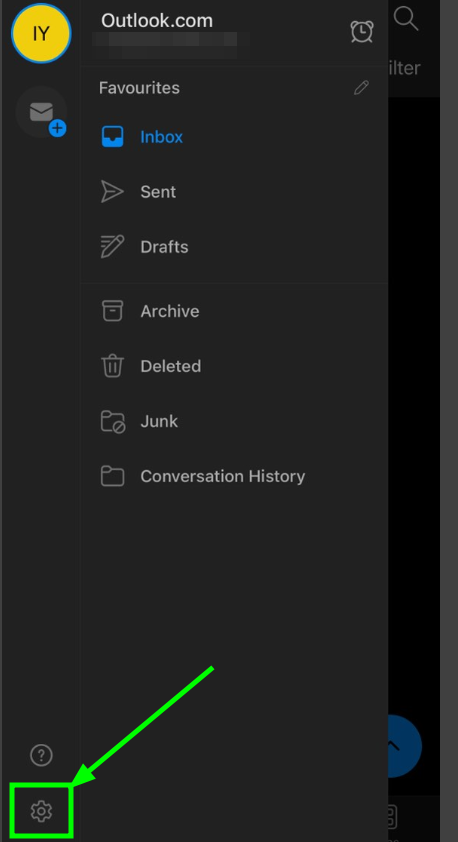
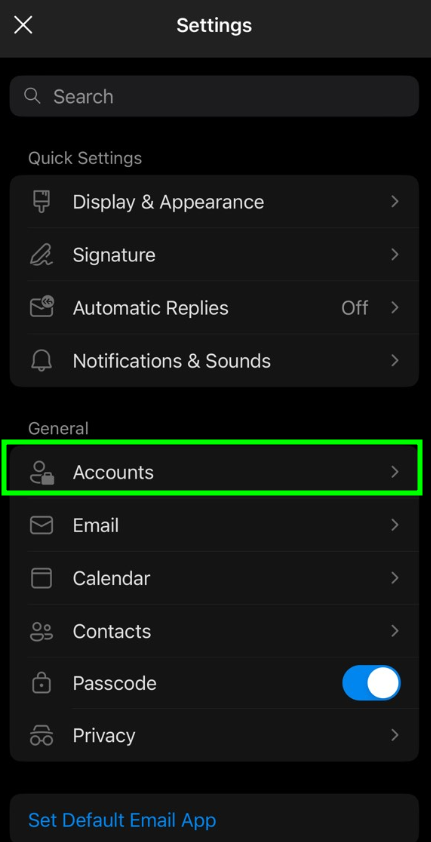
Select Accounts, then Add Account to add one of your existing Spacemail mailboxes:
In the new menu, select Email account and enter your Spacemail email address, and click on Add account:
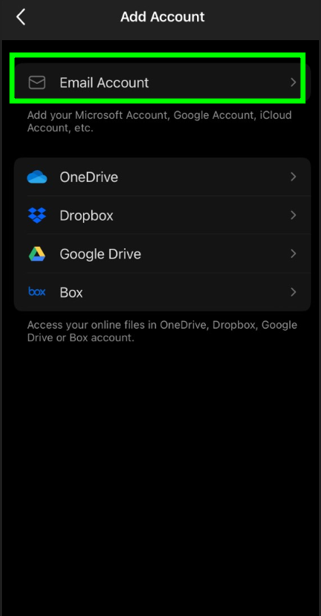
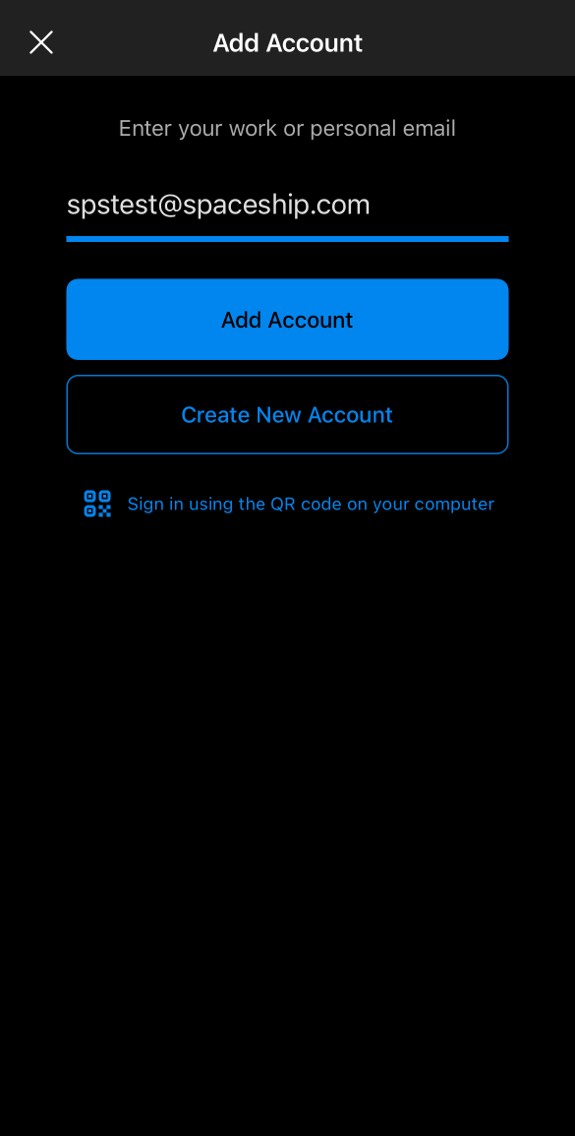
Note: In this article, we use spstest@spaceship.com as the example address.
Note 1: Spacemail service supports an autoconfig feature for Outlook Mobile and Thunderbird, which allows setting up an email account automatically. You'll simply need to provide your name and passwords — Outlook will handle the rest.
This way, the main configuration details will be automatically filled in. However, you’ll still need to enter the following manually:
Display Name: This is the name that recipients will see as the sender.
Description: A label for your email account (only visible to you).
IMAP Password: the password for the Spacemail mailbox.
SMTP Password: The password for your Spacemail mailbox.
If you, by any chance, do not remember your password, you can easily reset it using the following tutorial.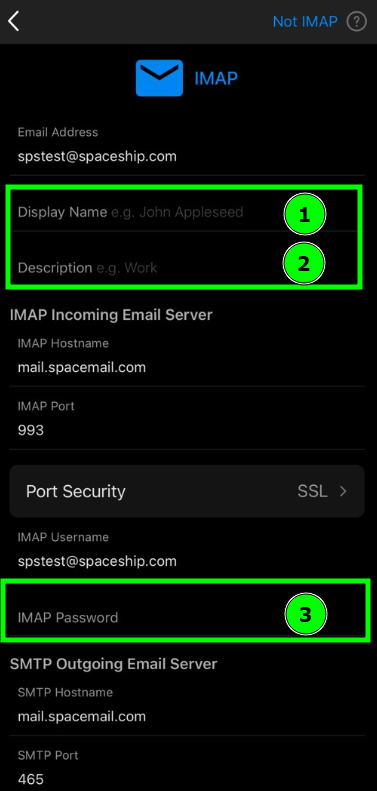
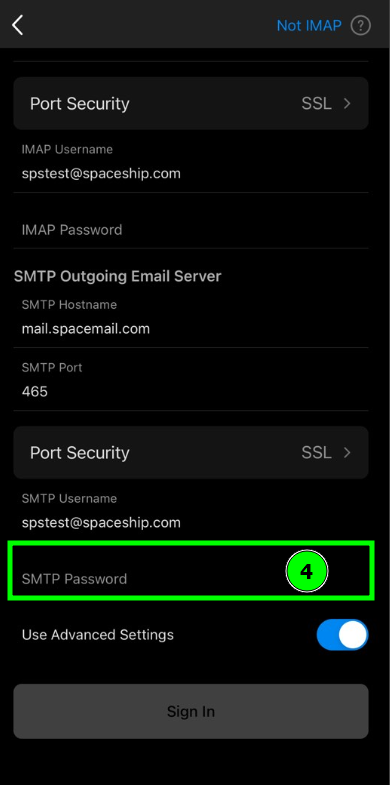
Once all the fields are filled in, tap the Sign In button.
Congrats, the setup is finished! You can now start managing your Spacemail account in Outlook
If you have any questions, please don't hesitate to reach out to our Support Team for further assistance.
That's it!