How to work with the WordPress Migration Tool
The WordPress Migration tool is a new option that allows you to move your WordPress website to our Spaceship EasyWP hosting. It’s designed as a simple, self-service option that doesn't require advanced technical skills. You can also migrate large websites or those with complex configurations, without the limitations of manual transfers or third-party plugins.
To begin the migration process:
1. Ensure you have a new (not Unboxed) EasyWP subscription. Start the Unboxing process. Go to your Launchpad > EasyWP Manager:
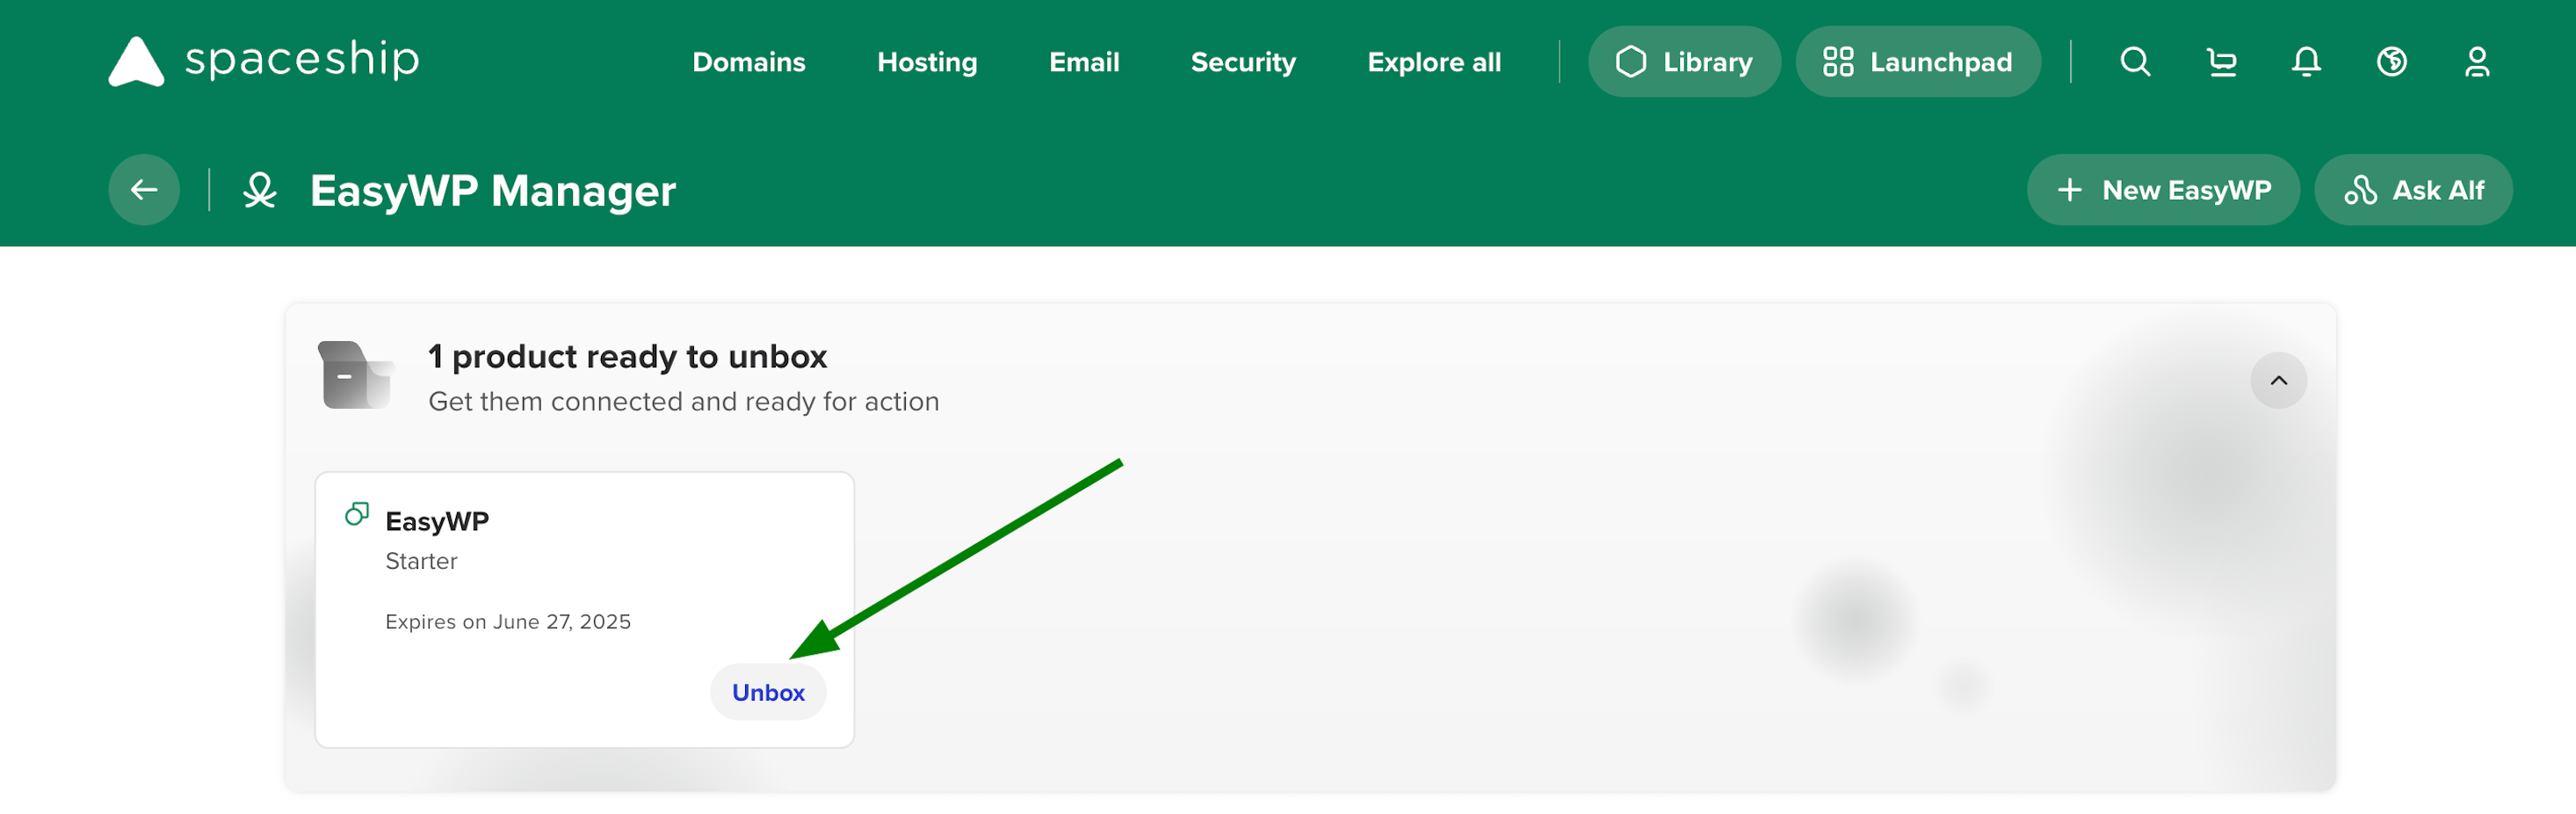
Note: If you want to migrate the site to the already unboxed EasyWP subscription, you need to remove all the connections, delete the current website first, and start unboxing again.
During the first step, you will have two options:
Start a new EasyWP account - start a new WordPress website from scratch.
Migrate your WordPress website - launch the EasyWP WordPress Migration tool to move your site in simple steps.
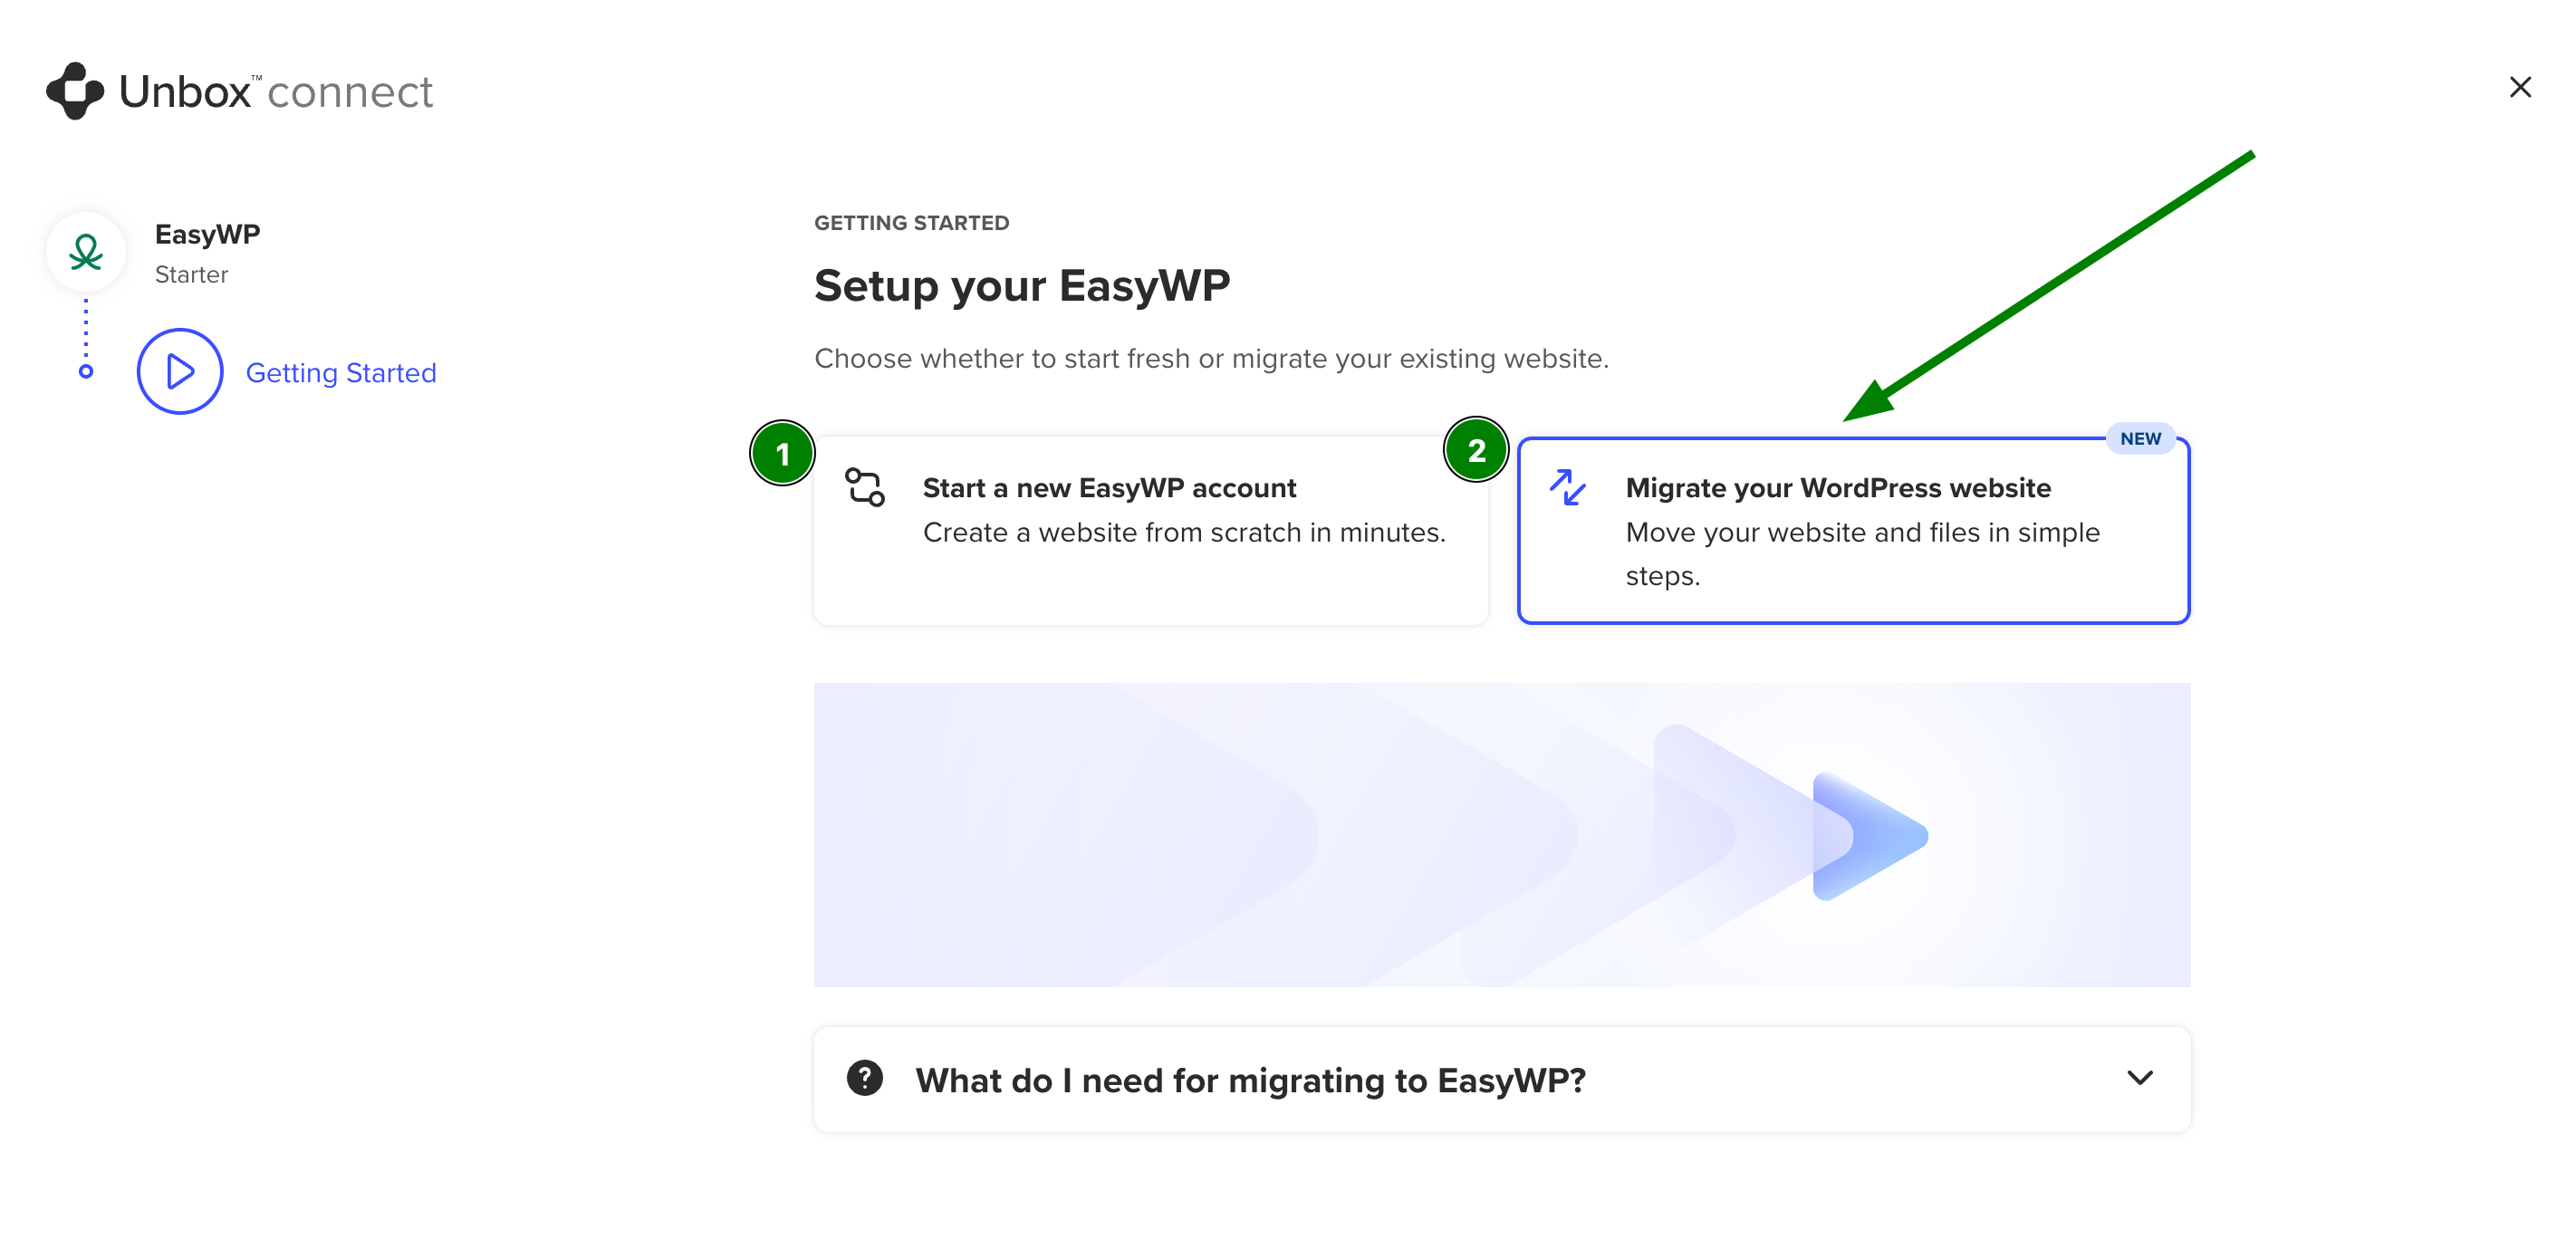
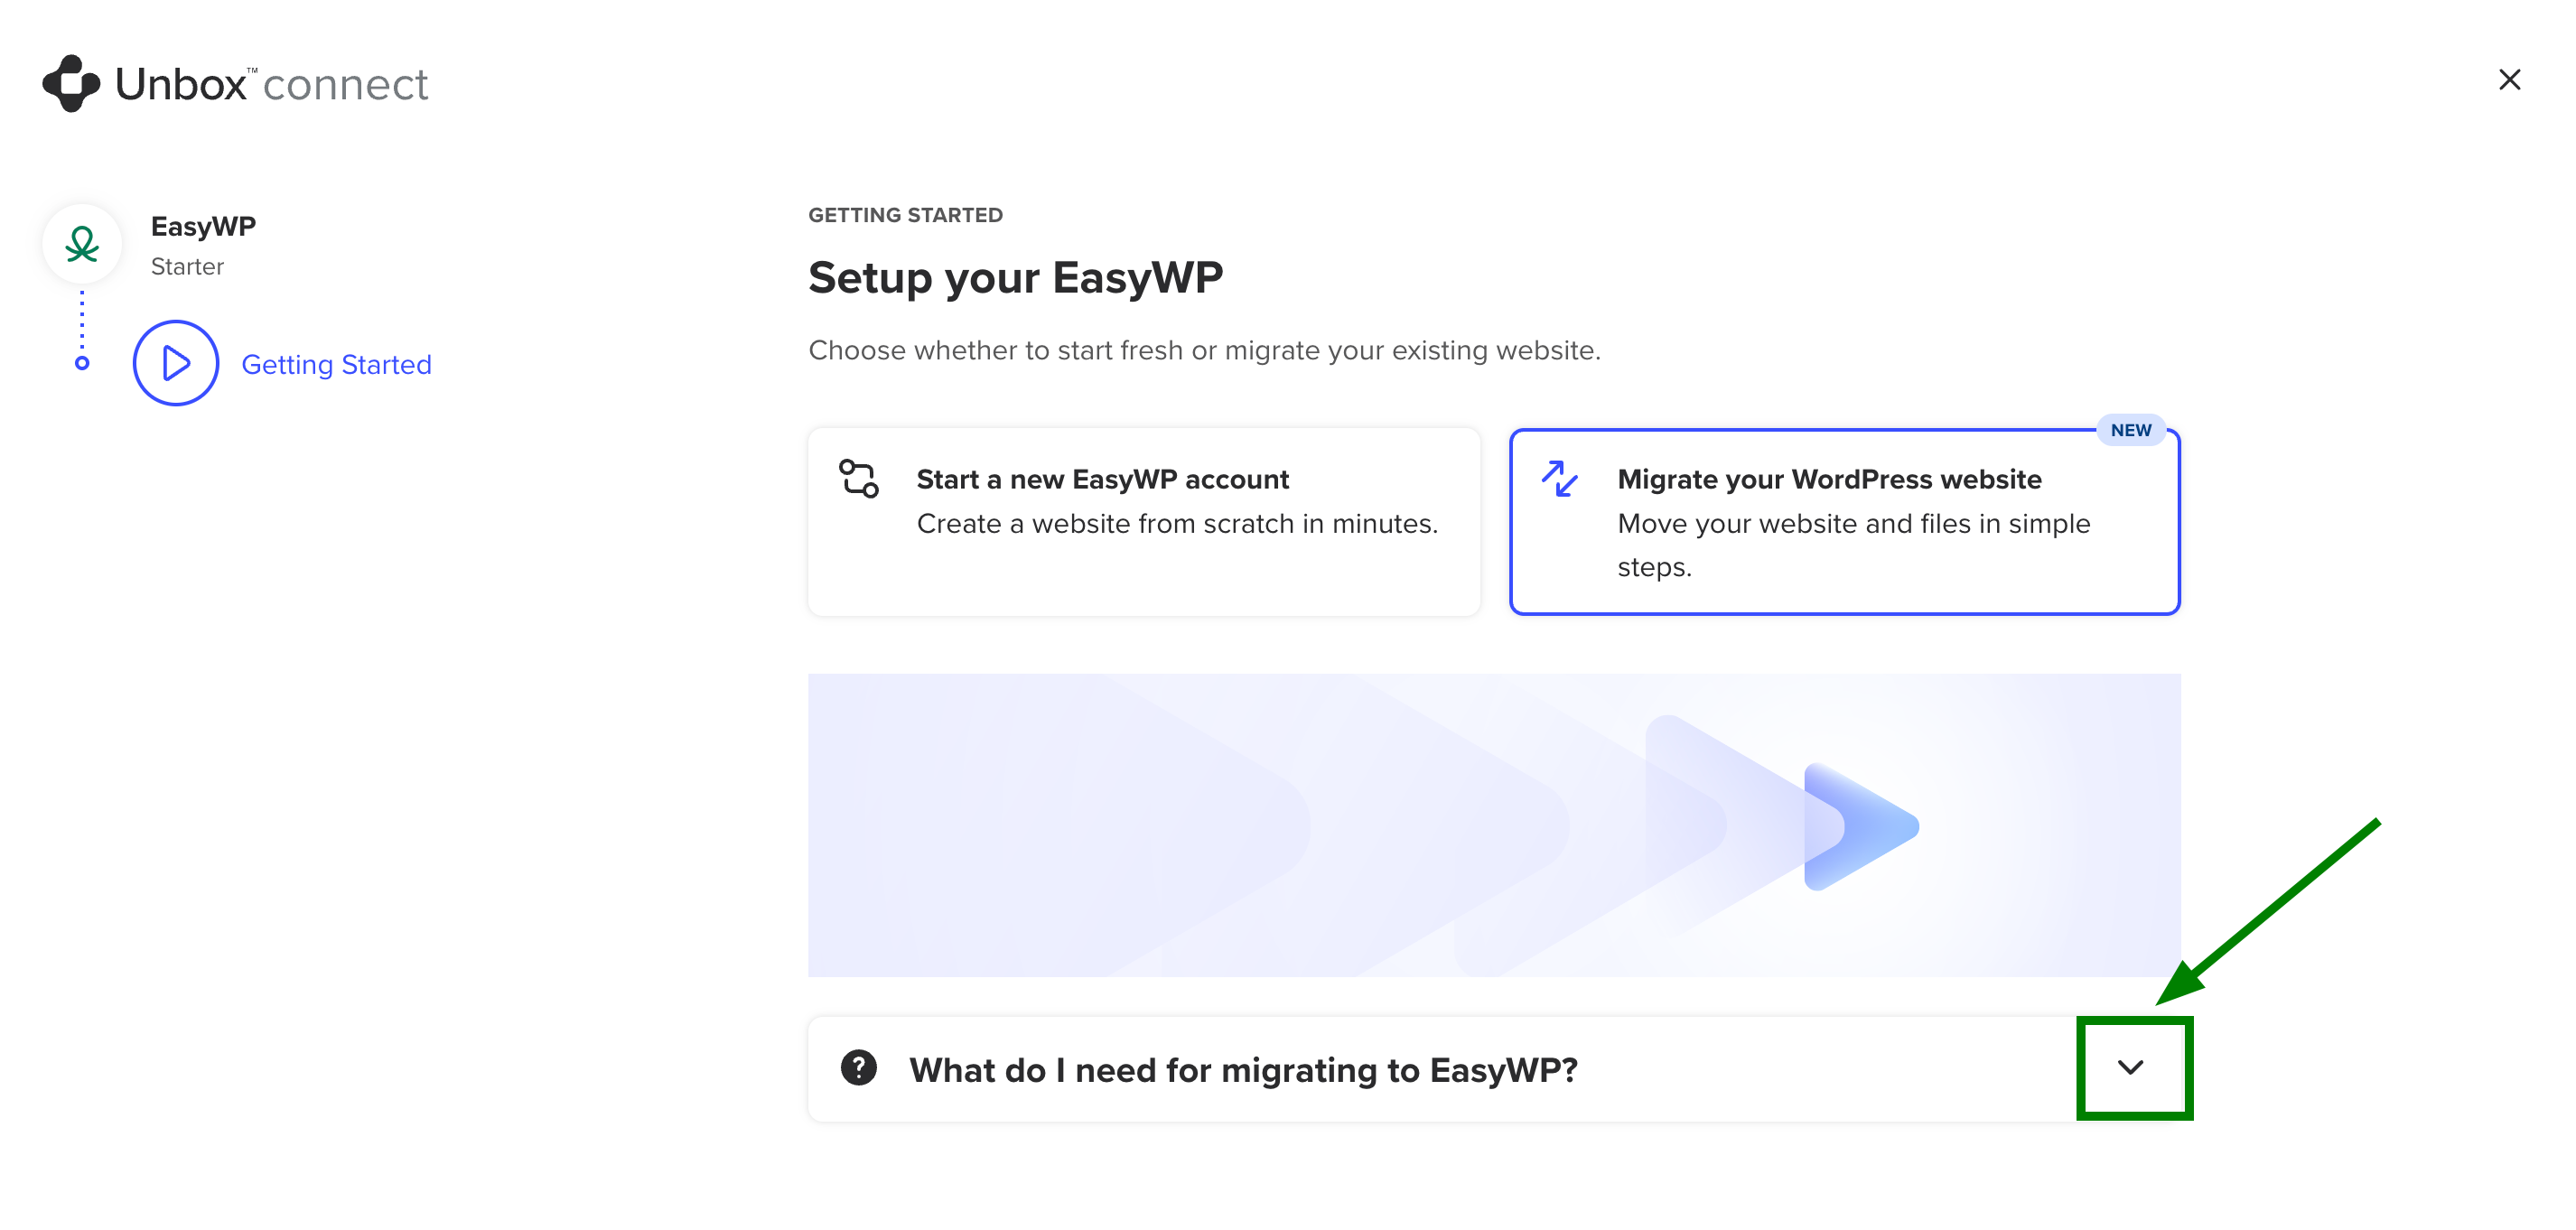
Open the drop-down box to check what you need to migrate to EasyWP:
To proceed with the migration, you will be provided with the existing migration requirements and restrictions that need to be checked, as displayed below:
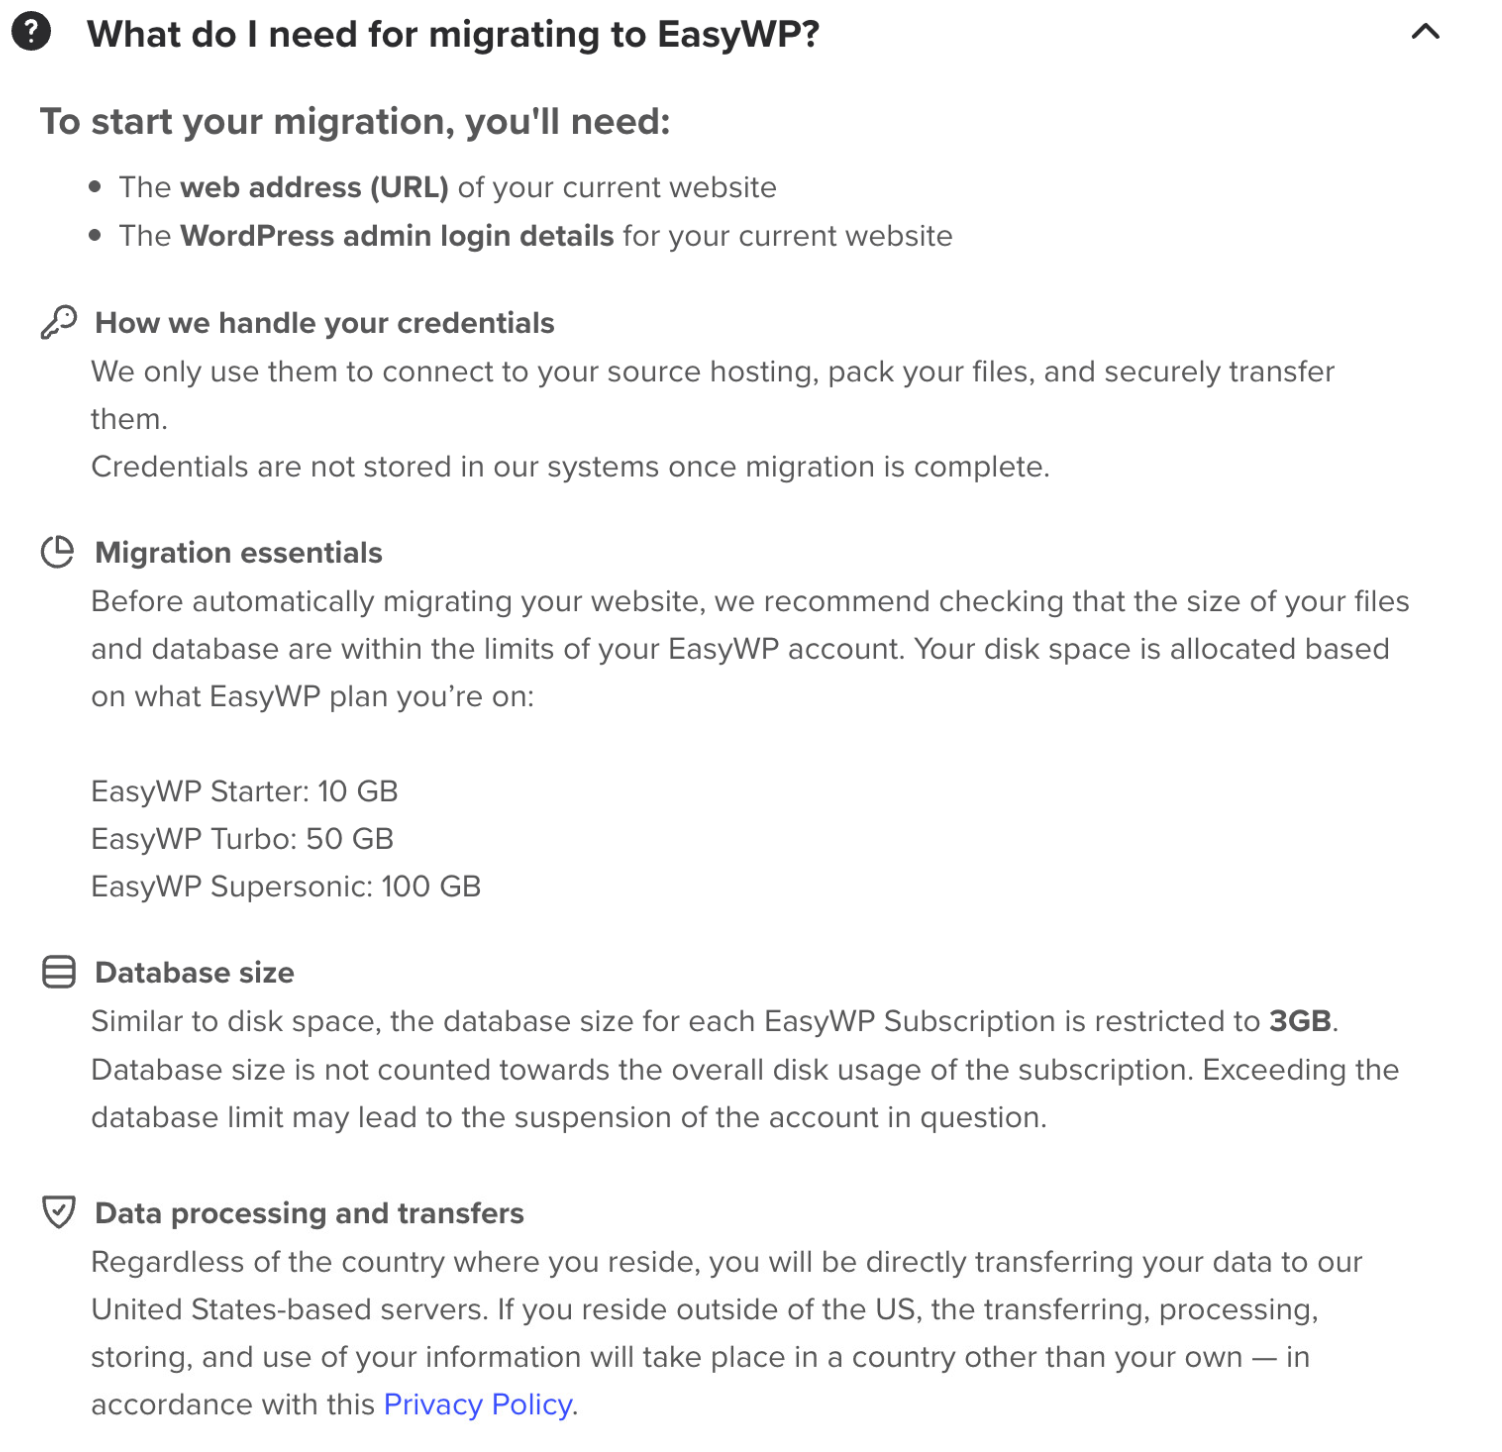
Note: Do not change your domain’s nameservers during the migration. The domain must remain pointed to your current (origin) hosting for the migration to succeed.
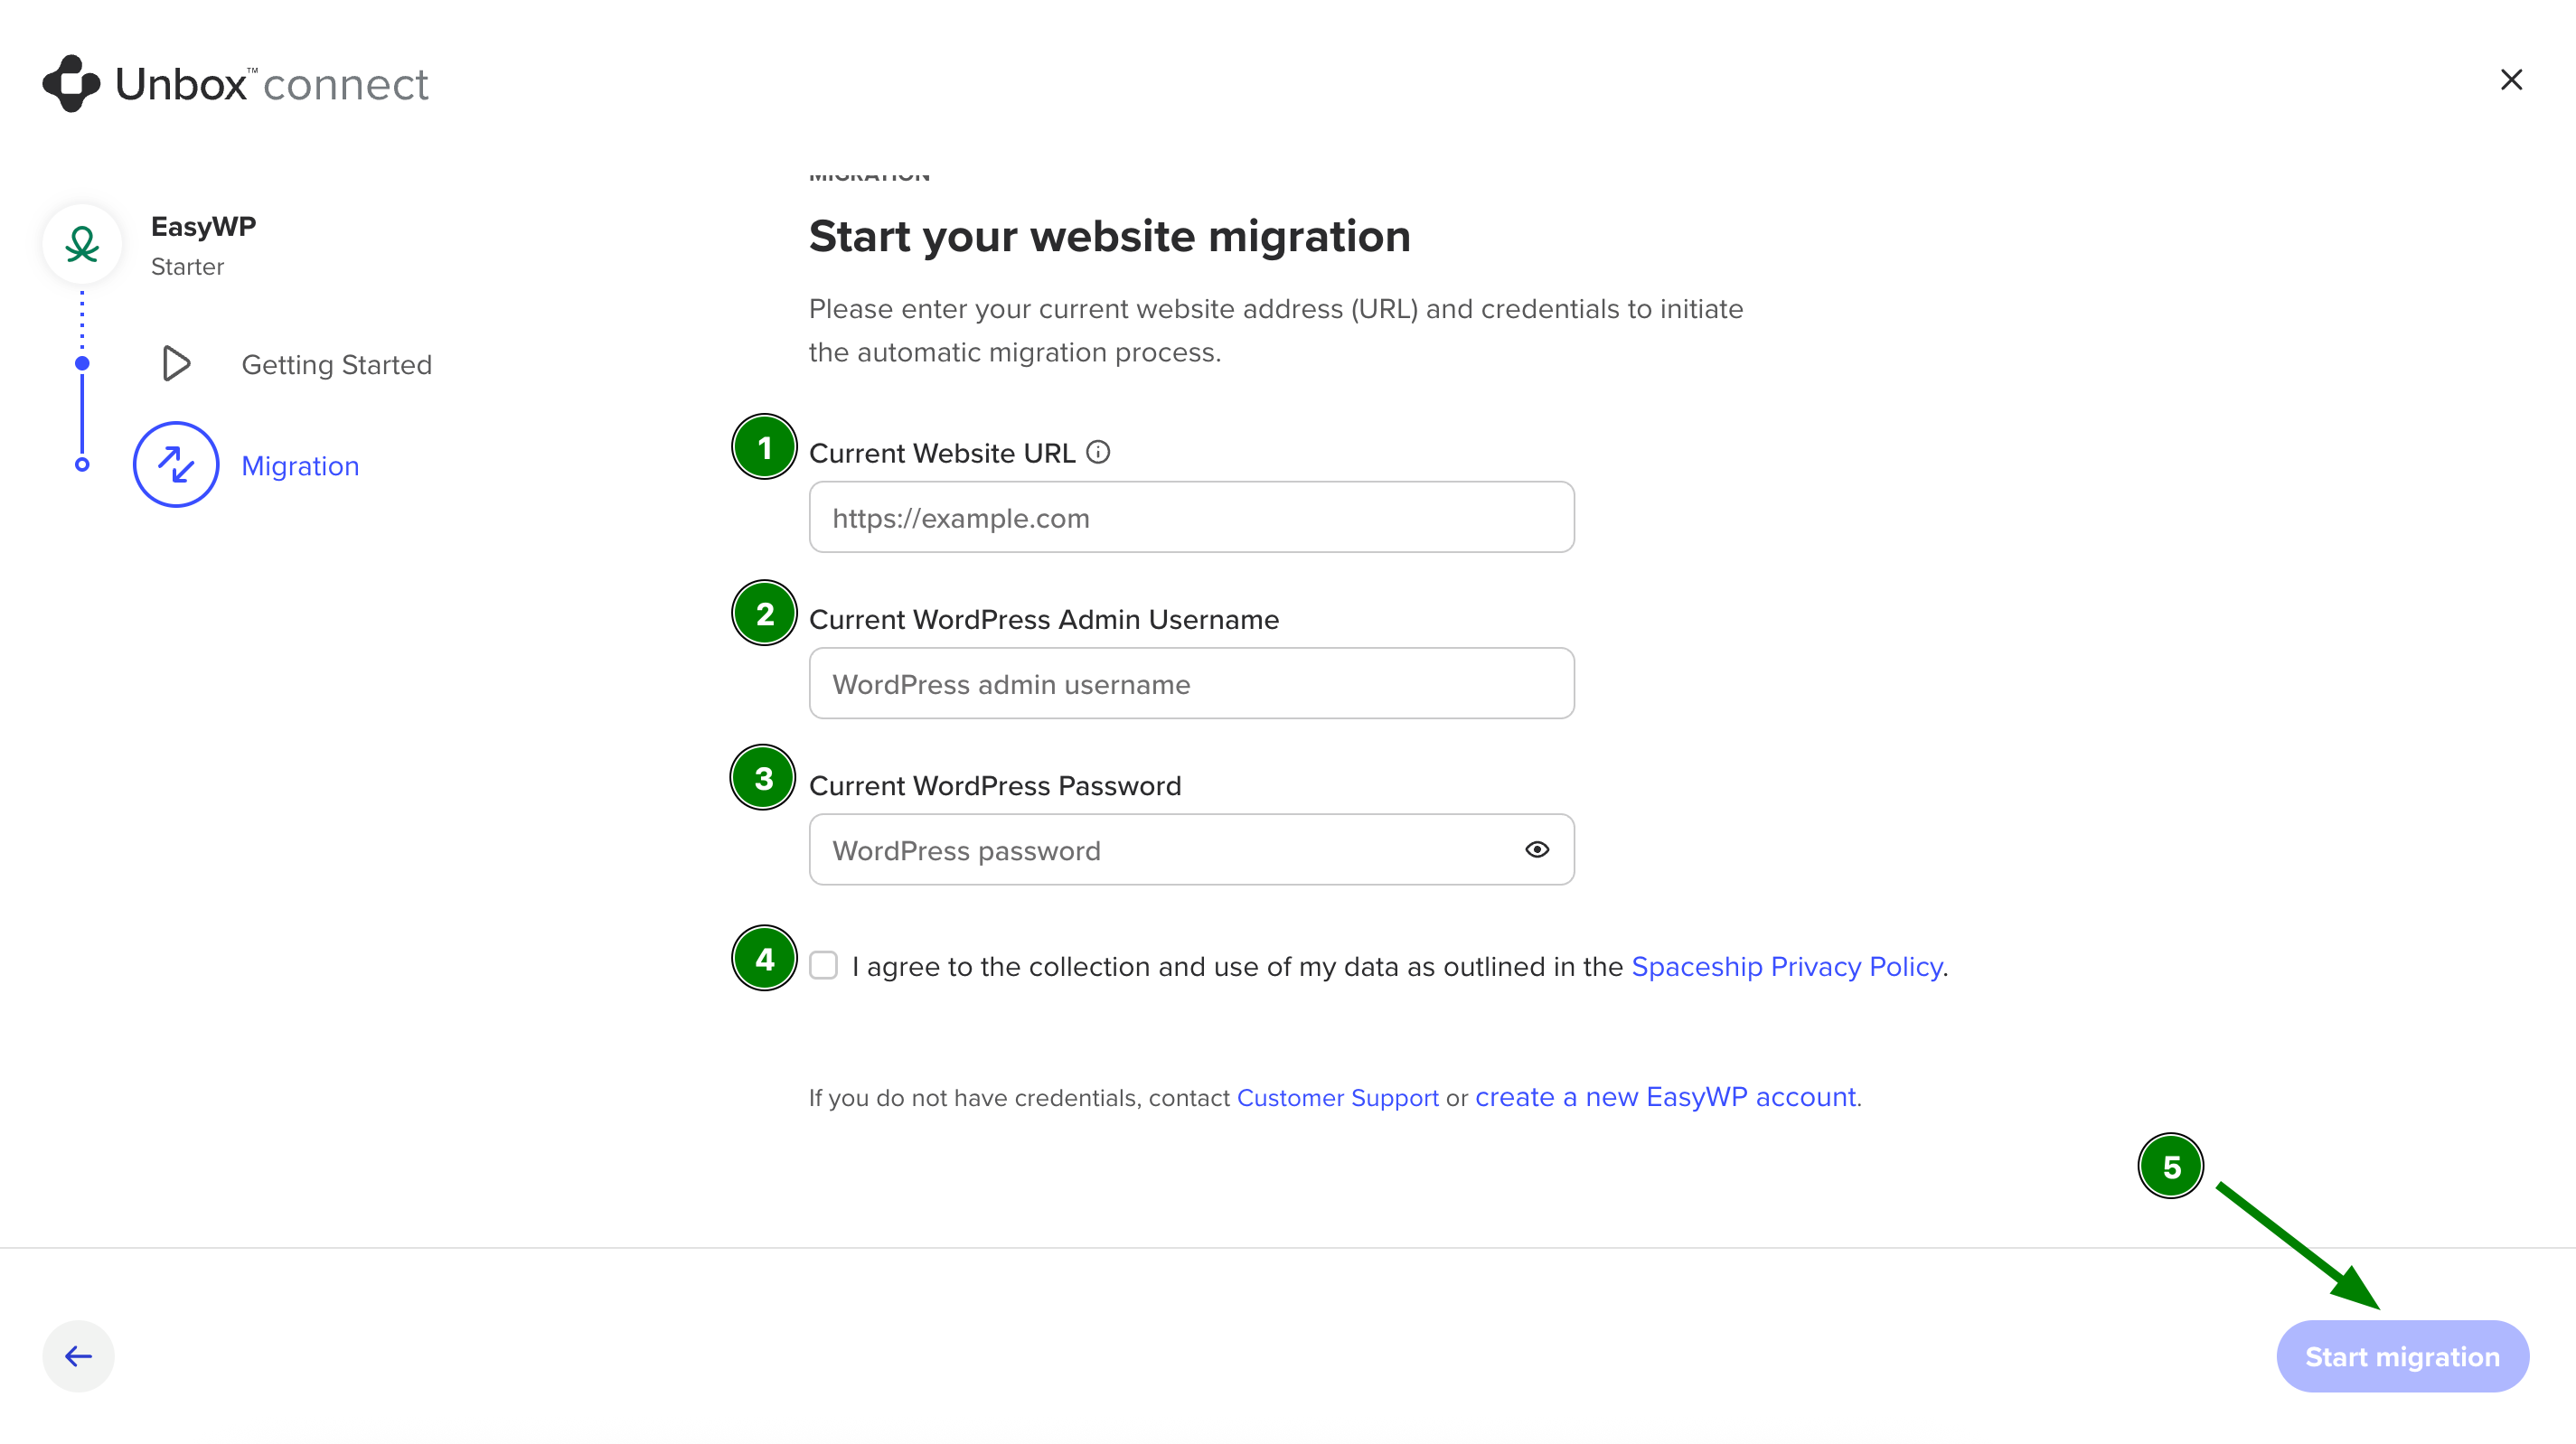
2. To initiate the automatic migration process, fill in the fields with the current website address URL, the current WordPress admin username, and the current WordPress password. Also, you should checkmark the agreement to collect and use the client's data as outlined in the Spaceship Privacy Policy:
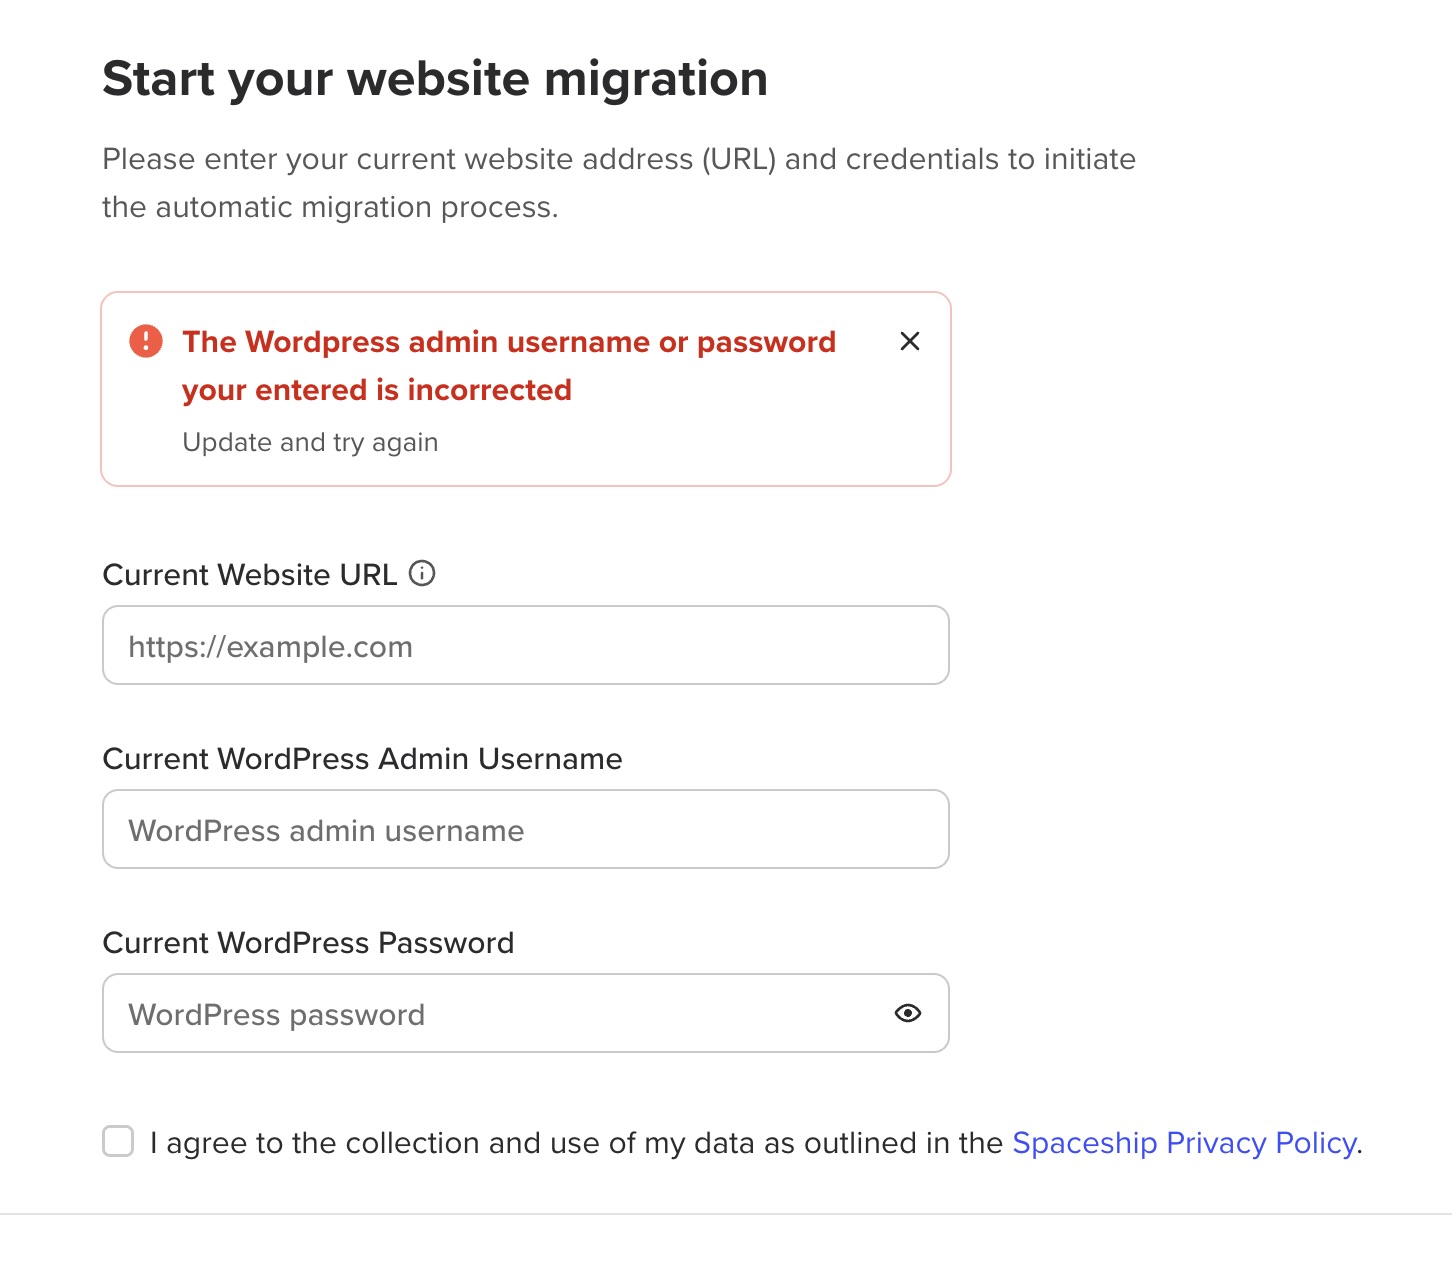
Note: If you enter invalid website credentials, you will receive the following error:
3. Once you click on the Start migration button, the migration process will take place:
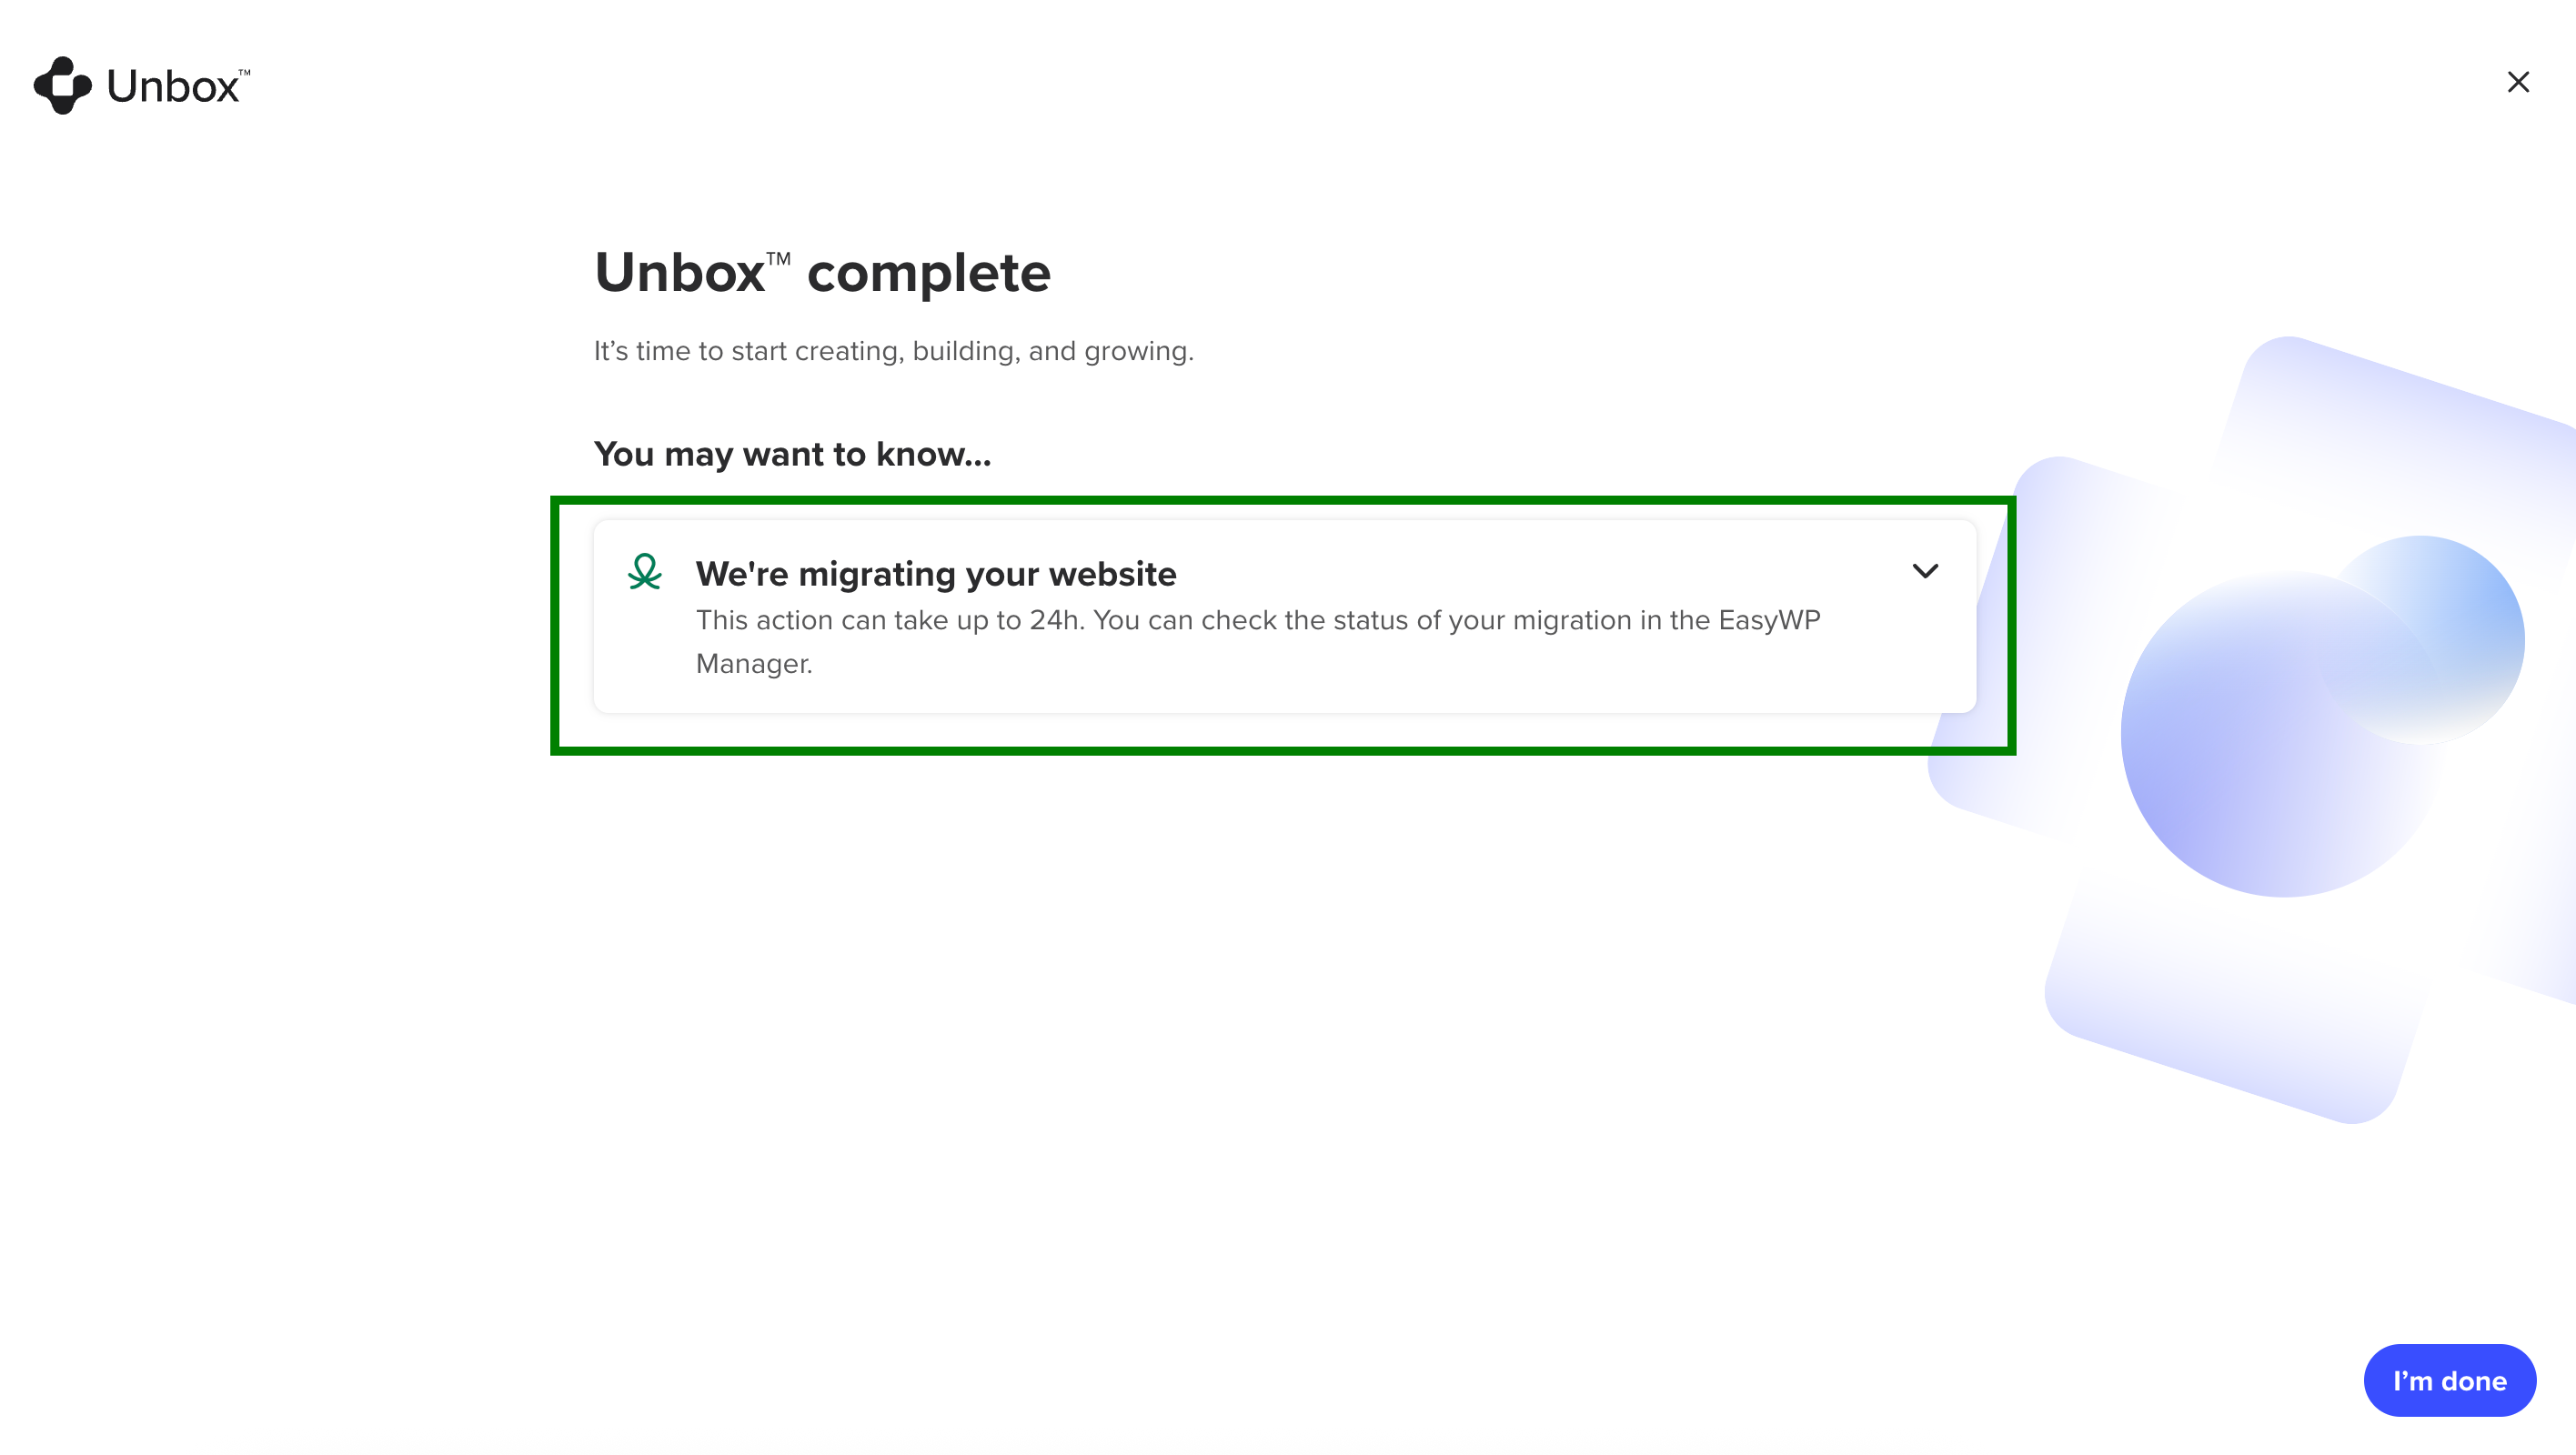
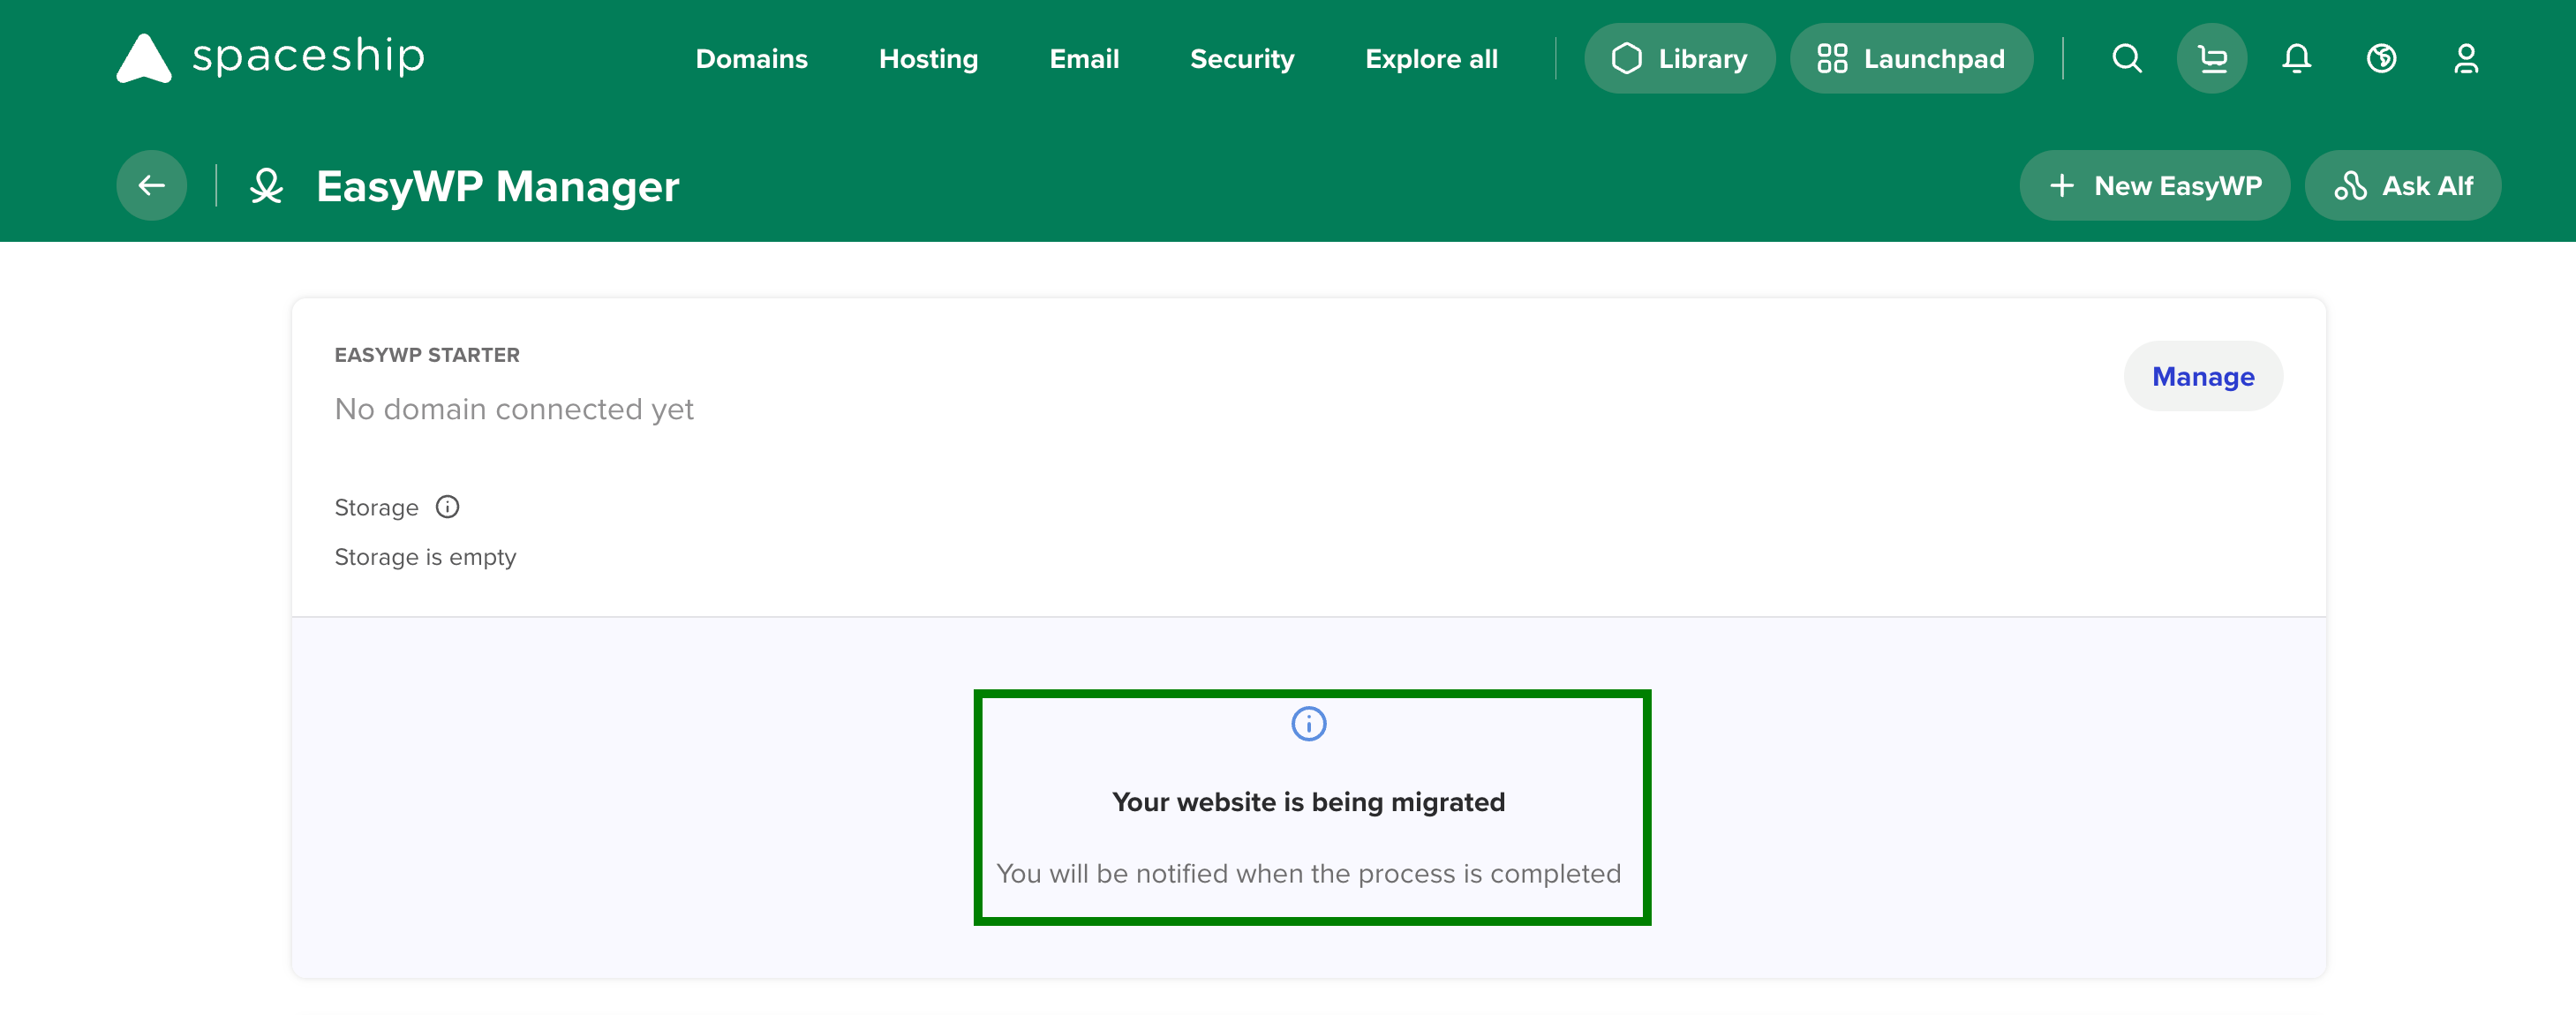
The migration process may take up to 24 hours. You can check the status of the migration in EasyWP Manager:
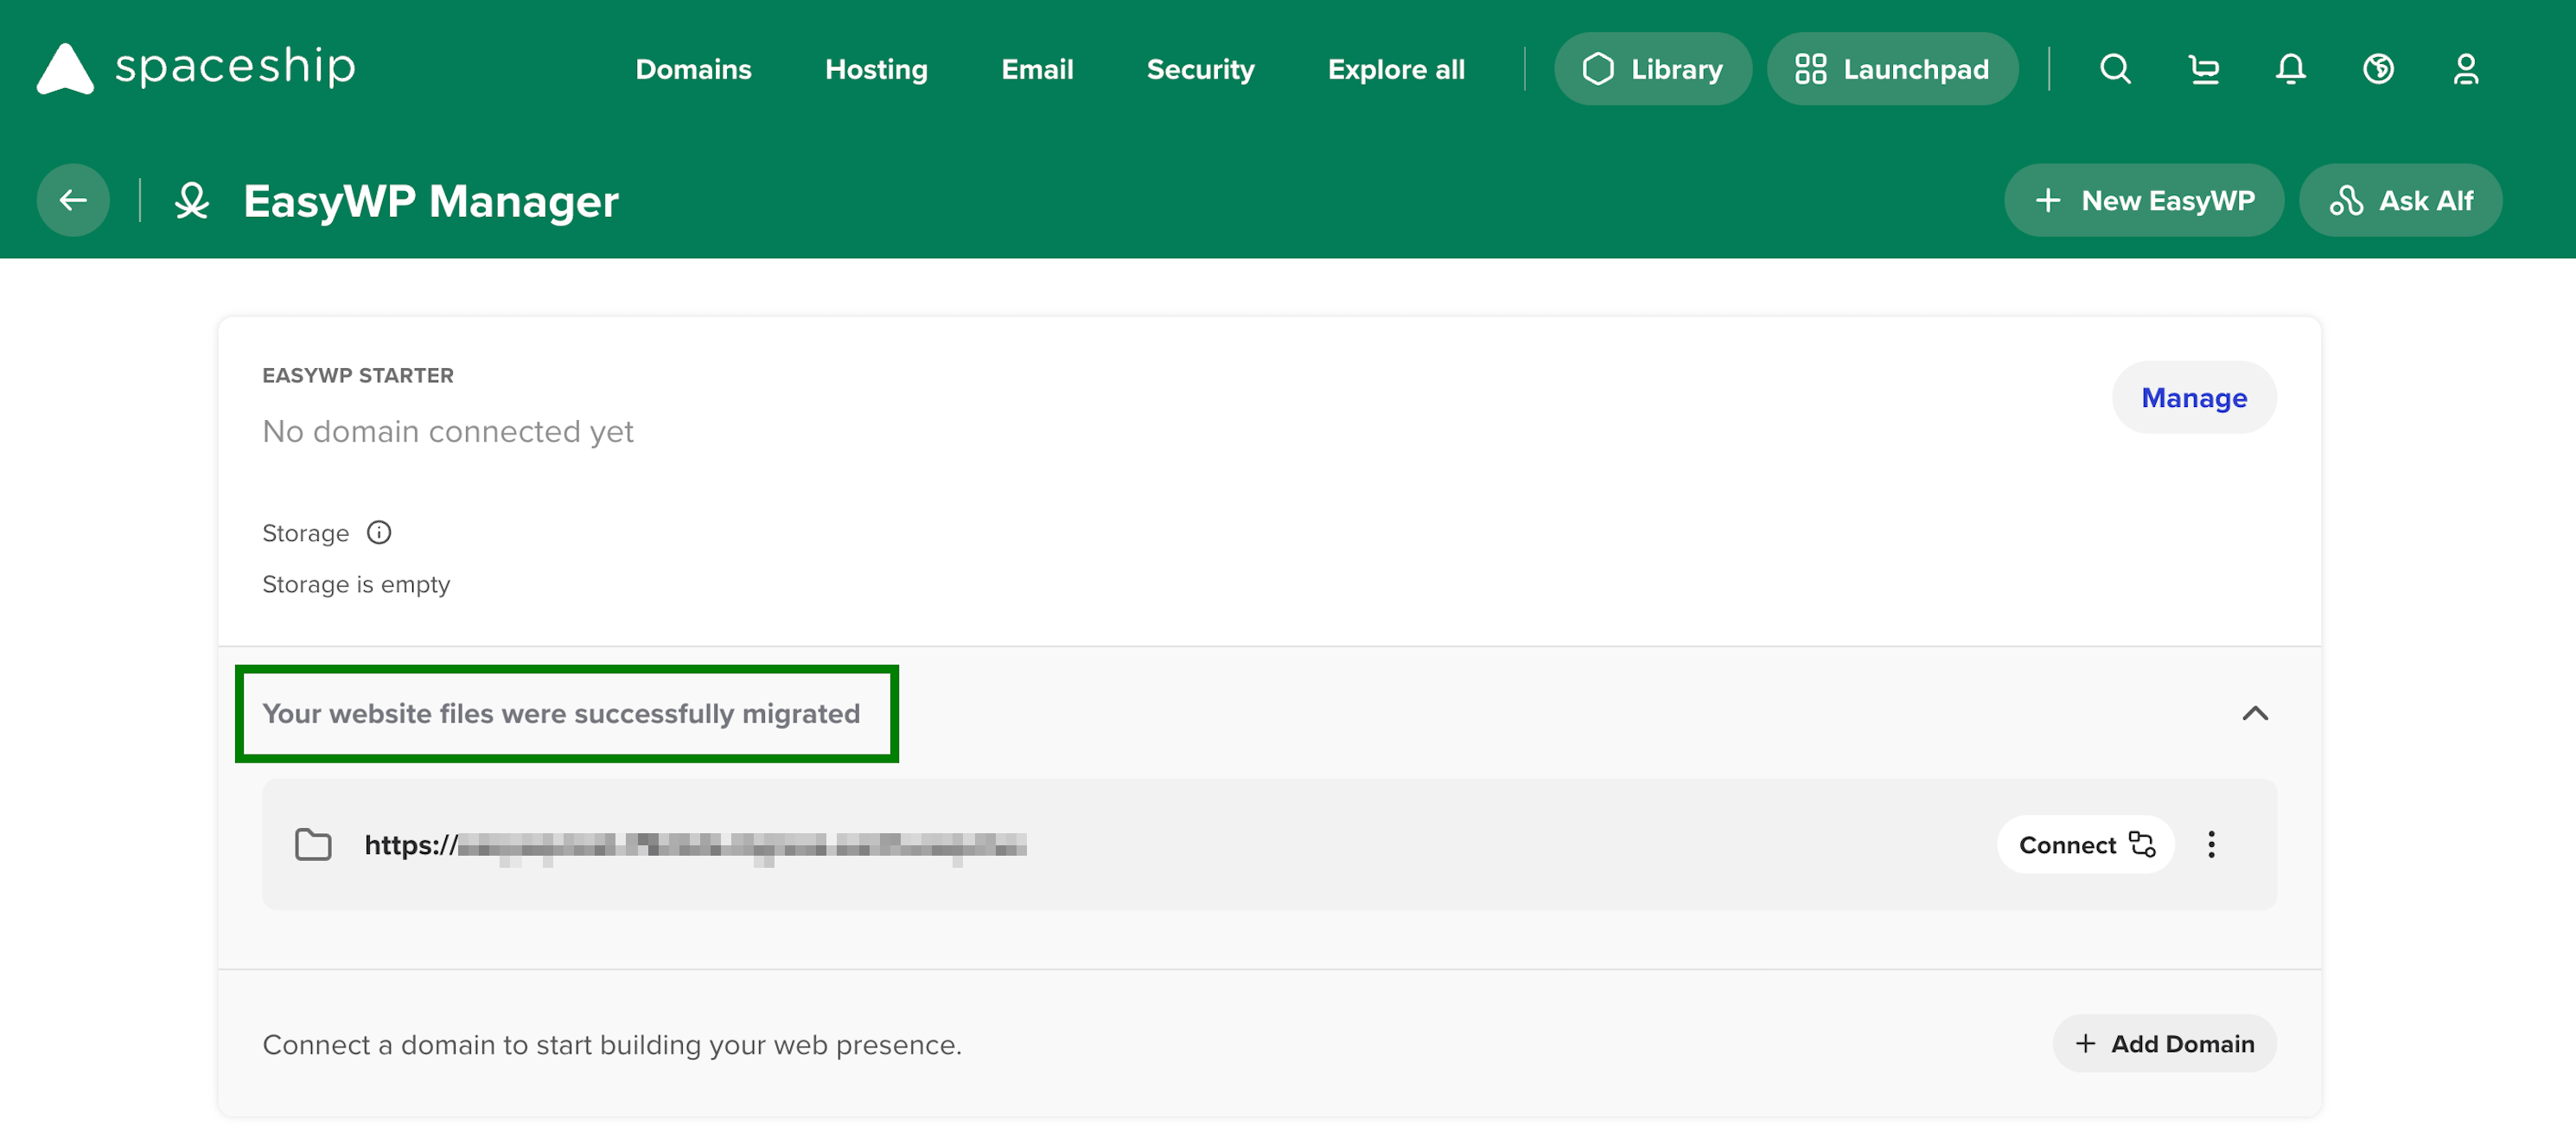
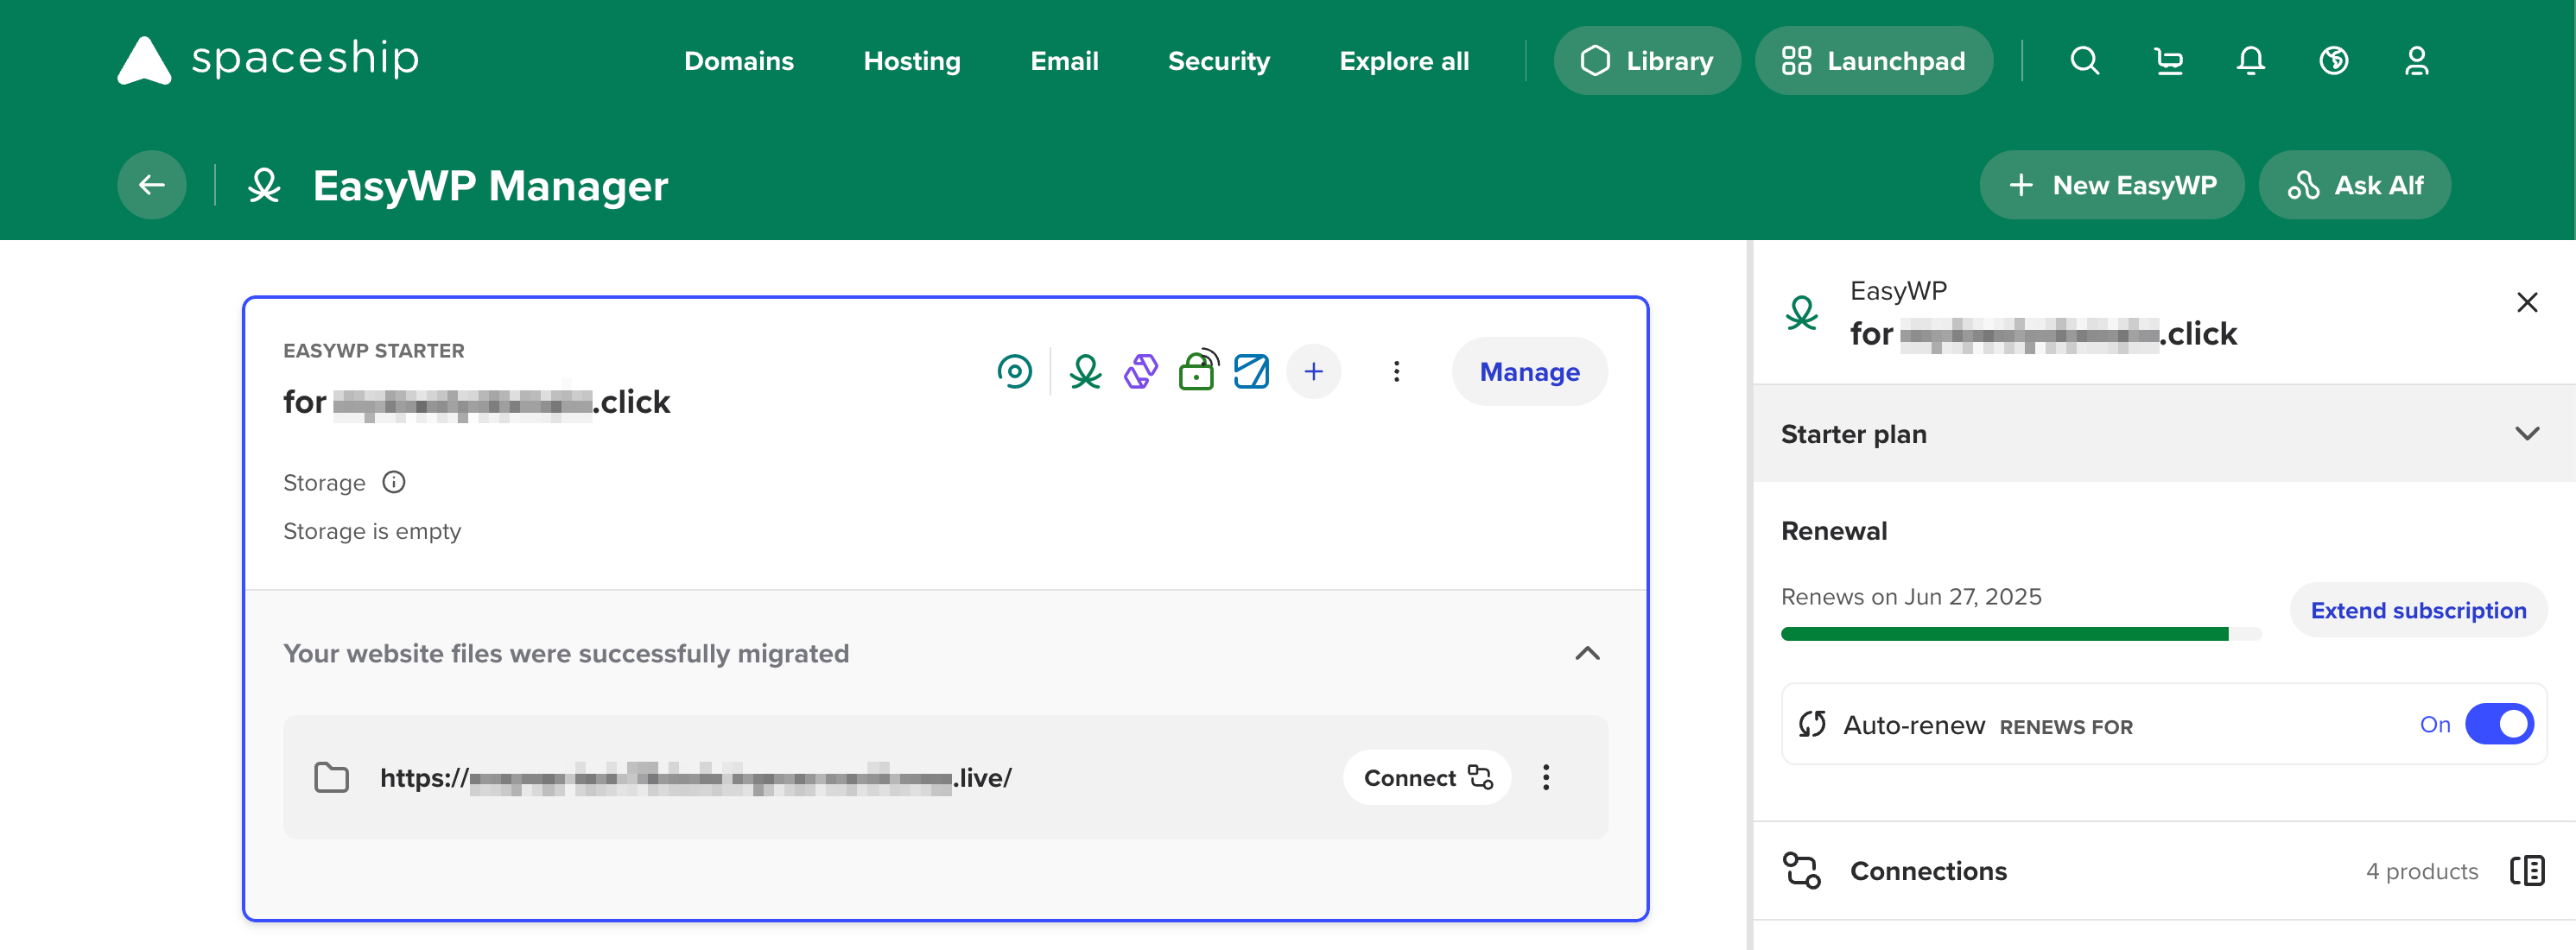
4. Once the migration is completed, you will see the corresponding status in EasyWP Manager:
Issues during the website migration process
In case of any issues during the website migration process or migration failure, you will receive the following notice in EasyWP Manager:
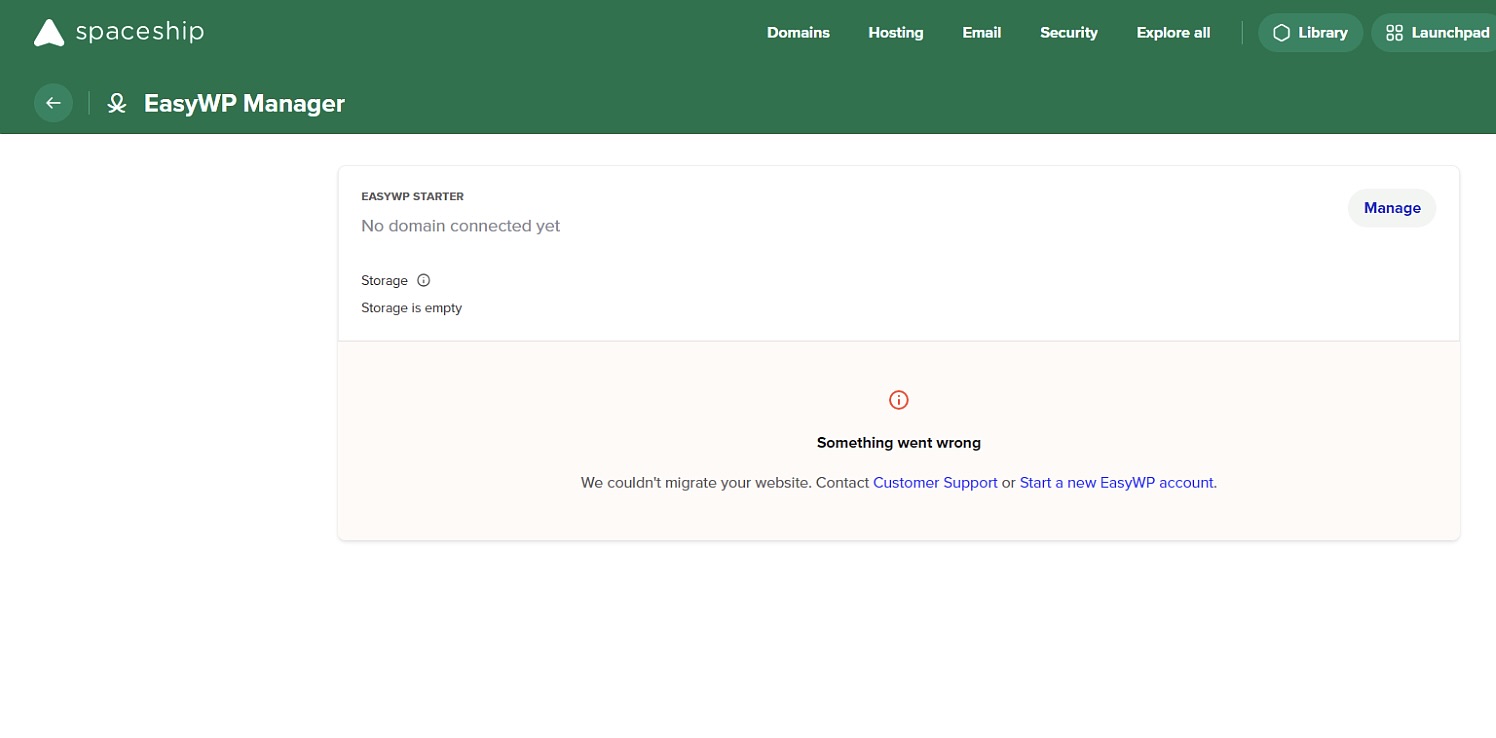
If this happens, please contact our Support Team for help.
You may see the error message “We couldn’t migrate the website” if:
You're trying to migrate the website from WordPress.com hosting. For now, it is not possible to migrate websites from WordPress.com because they use a different kind of authentication.
The source site uses Captcha/Math challenges for login.
A security Jetpack plugin is installed that prevents access.
To commence migration, you should remove these features or plugins.
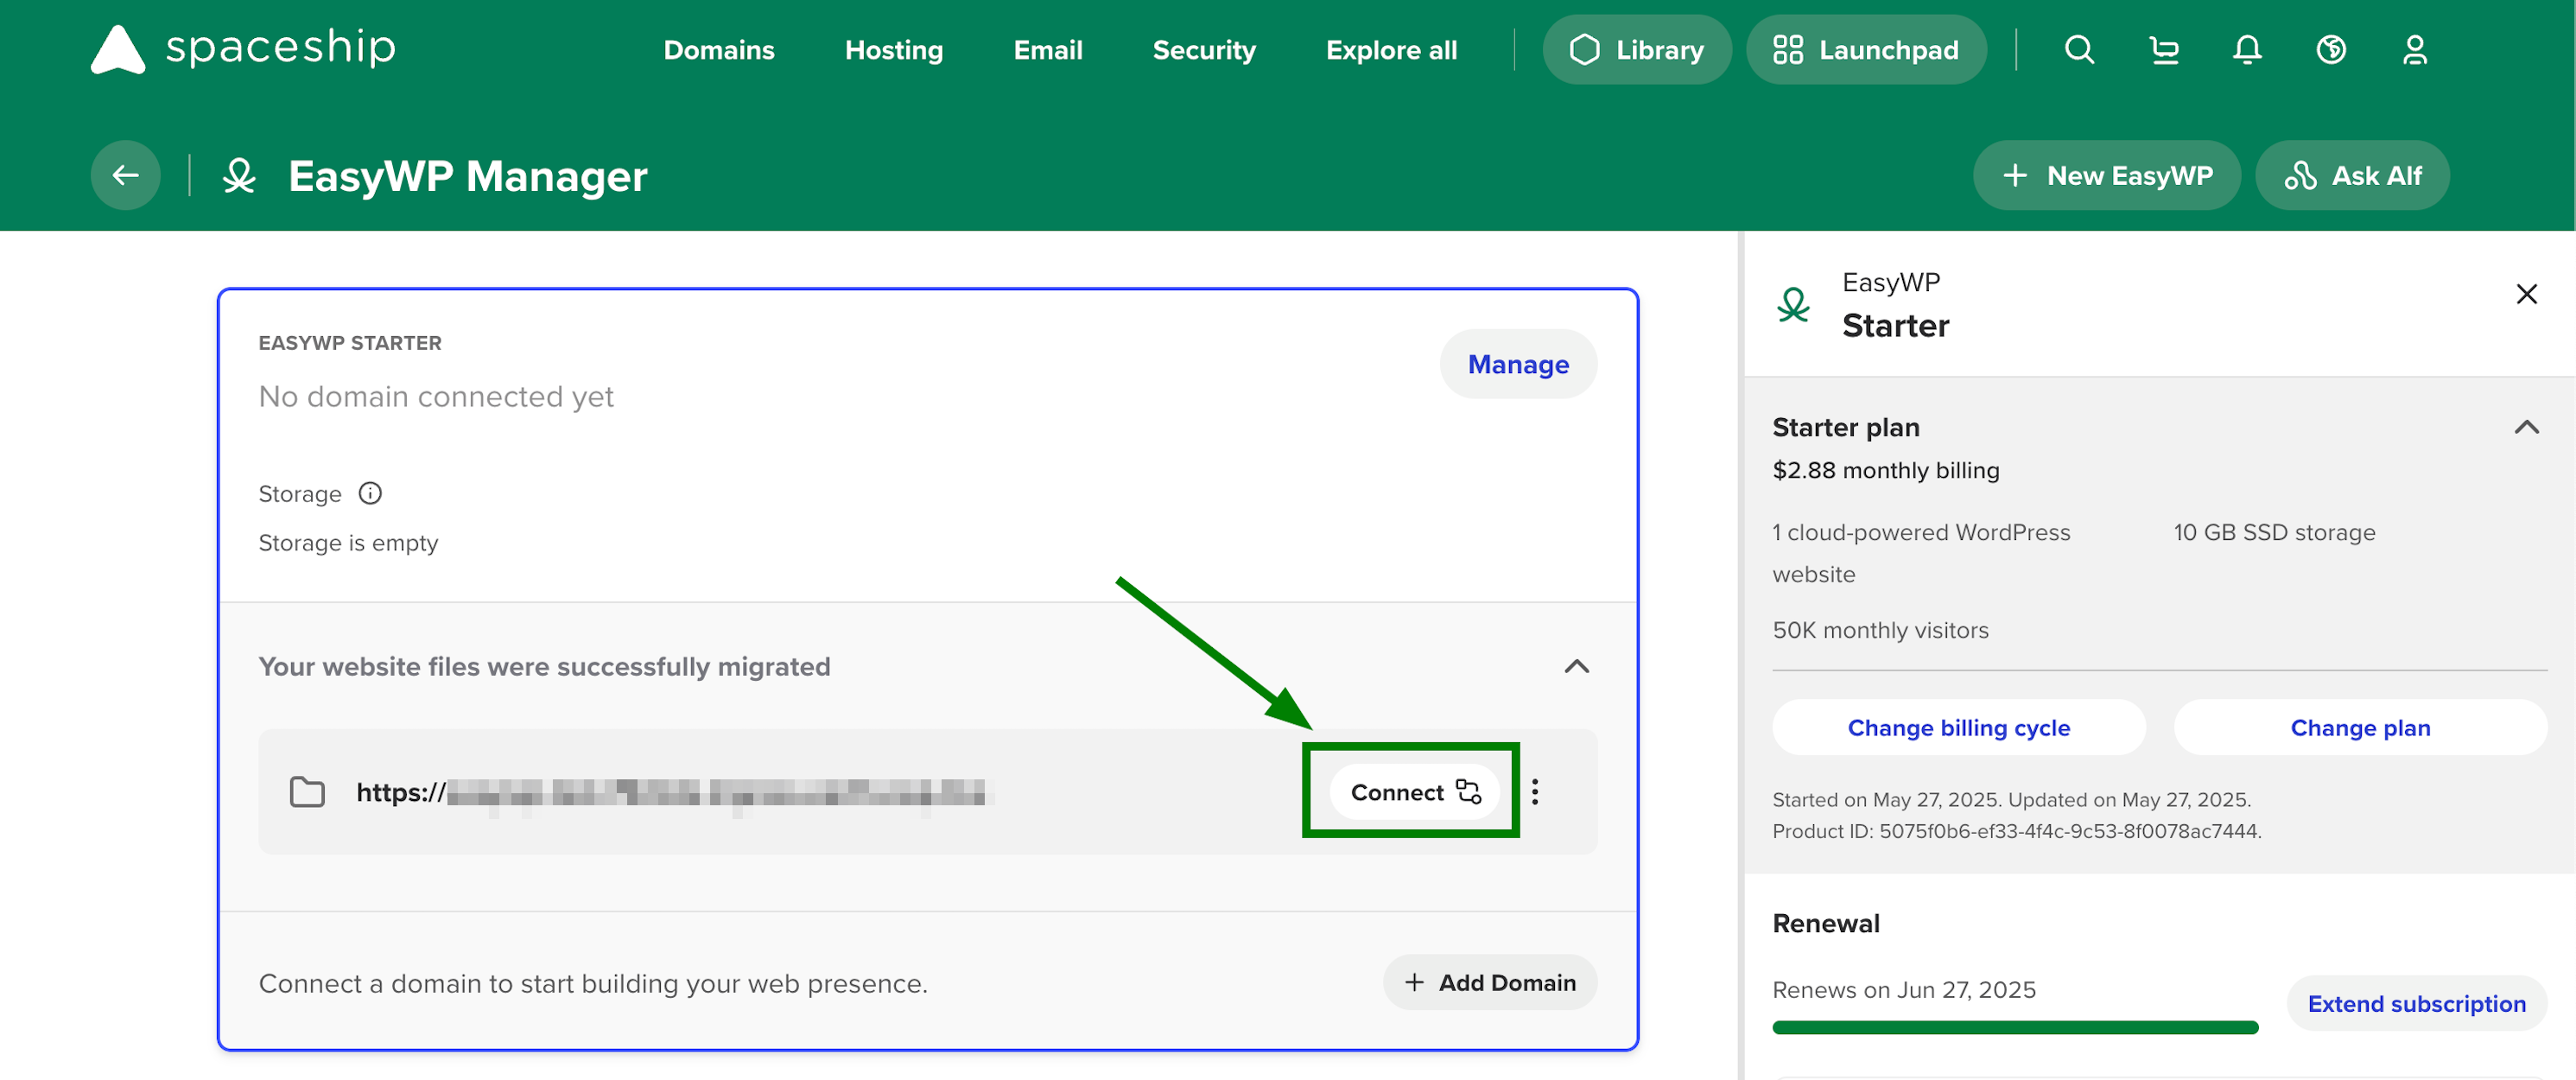
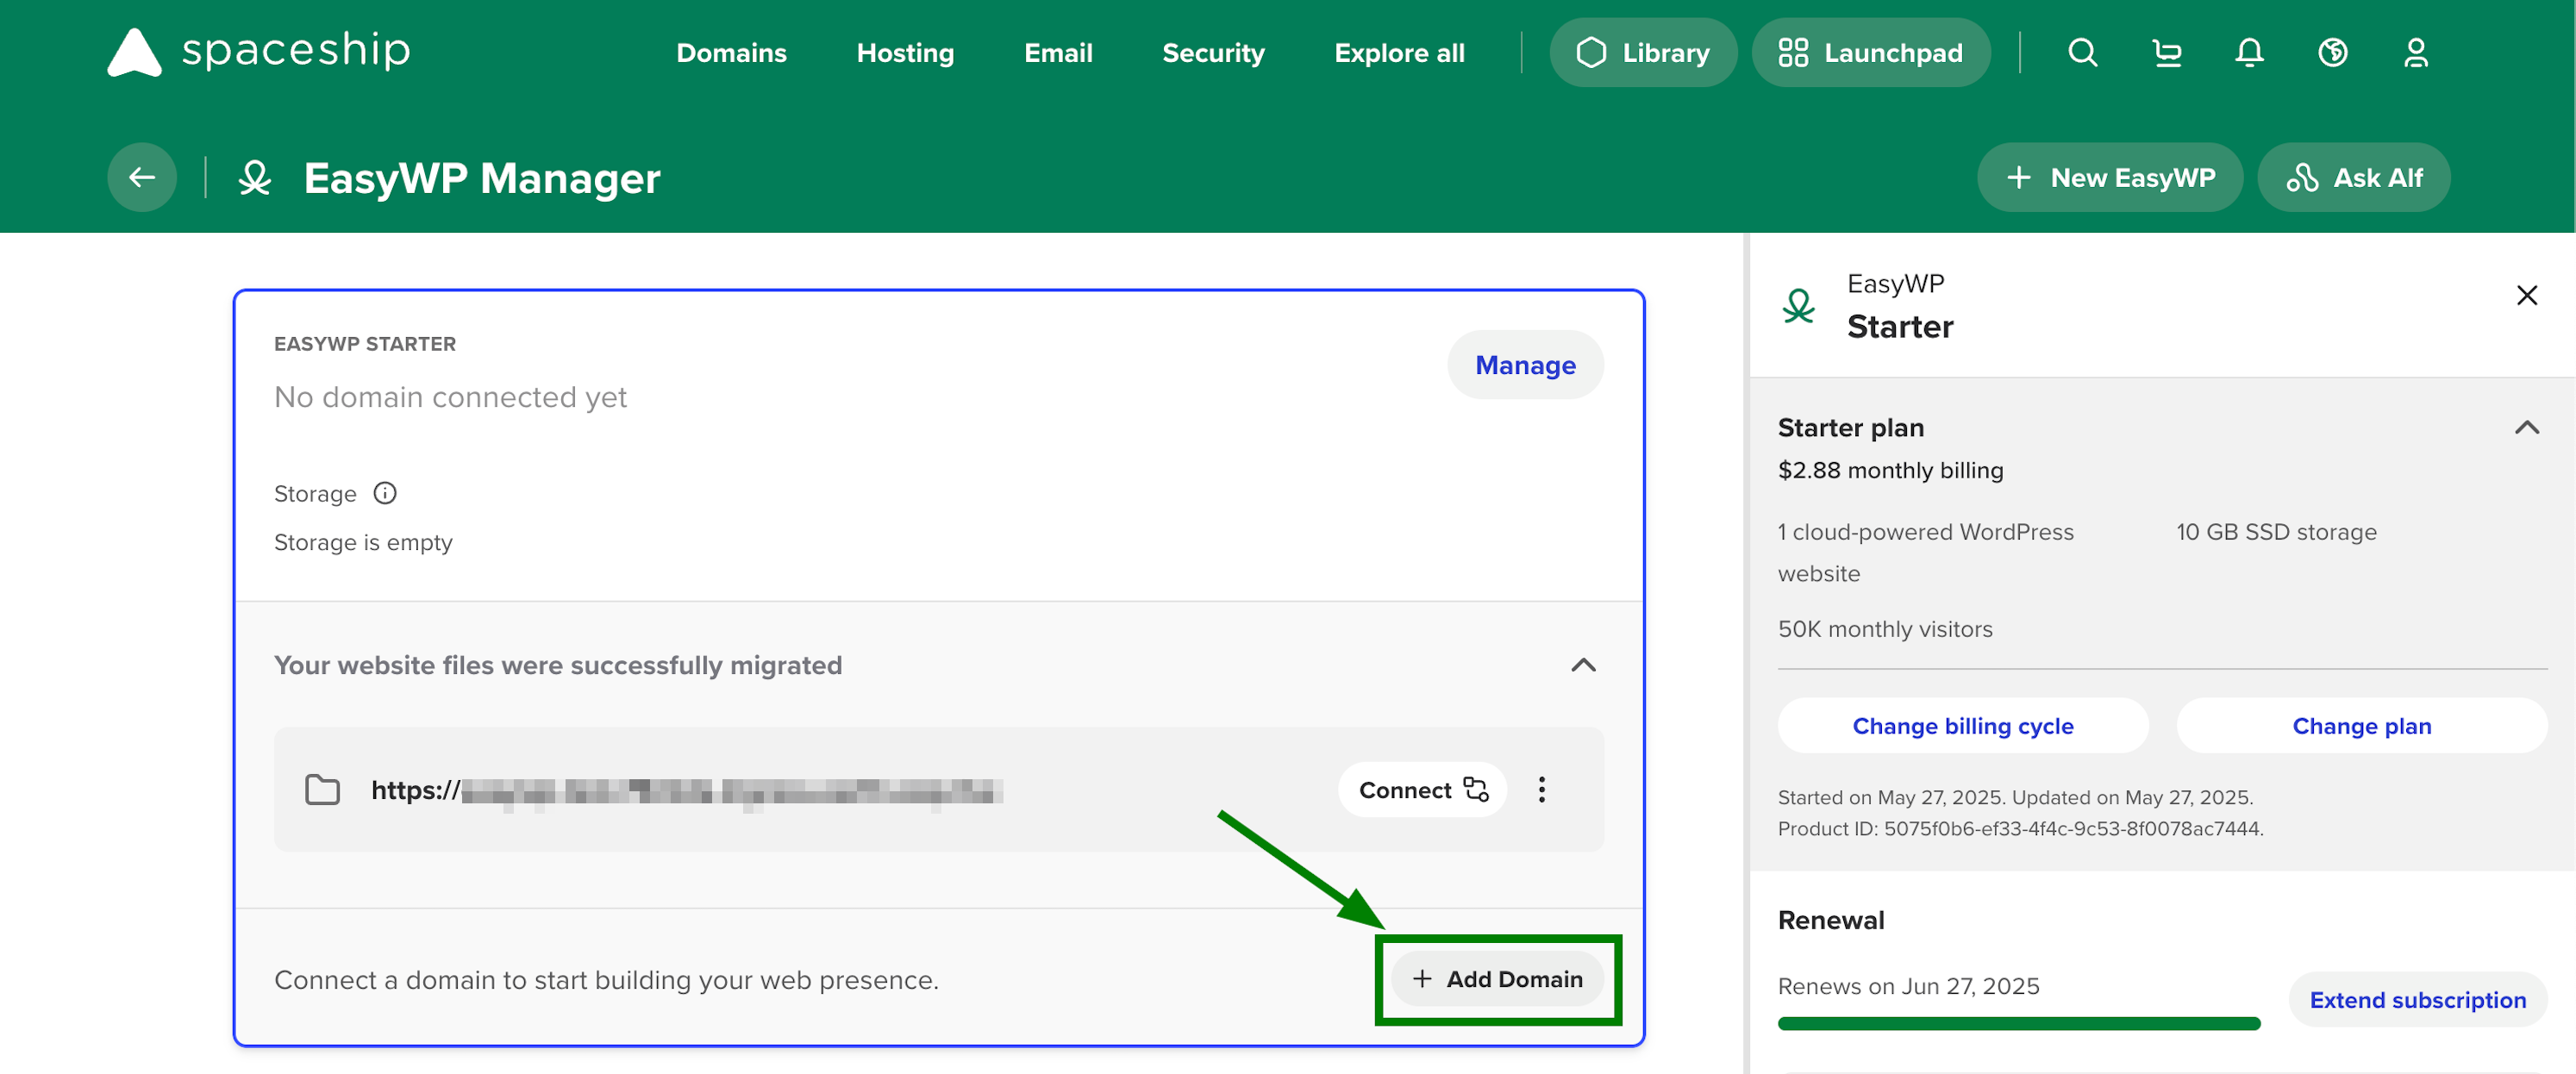
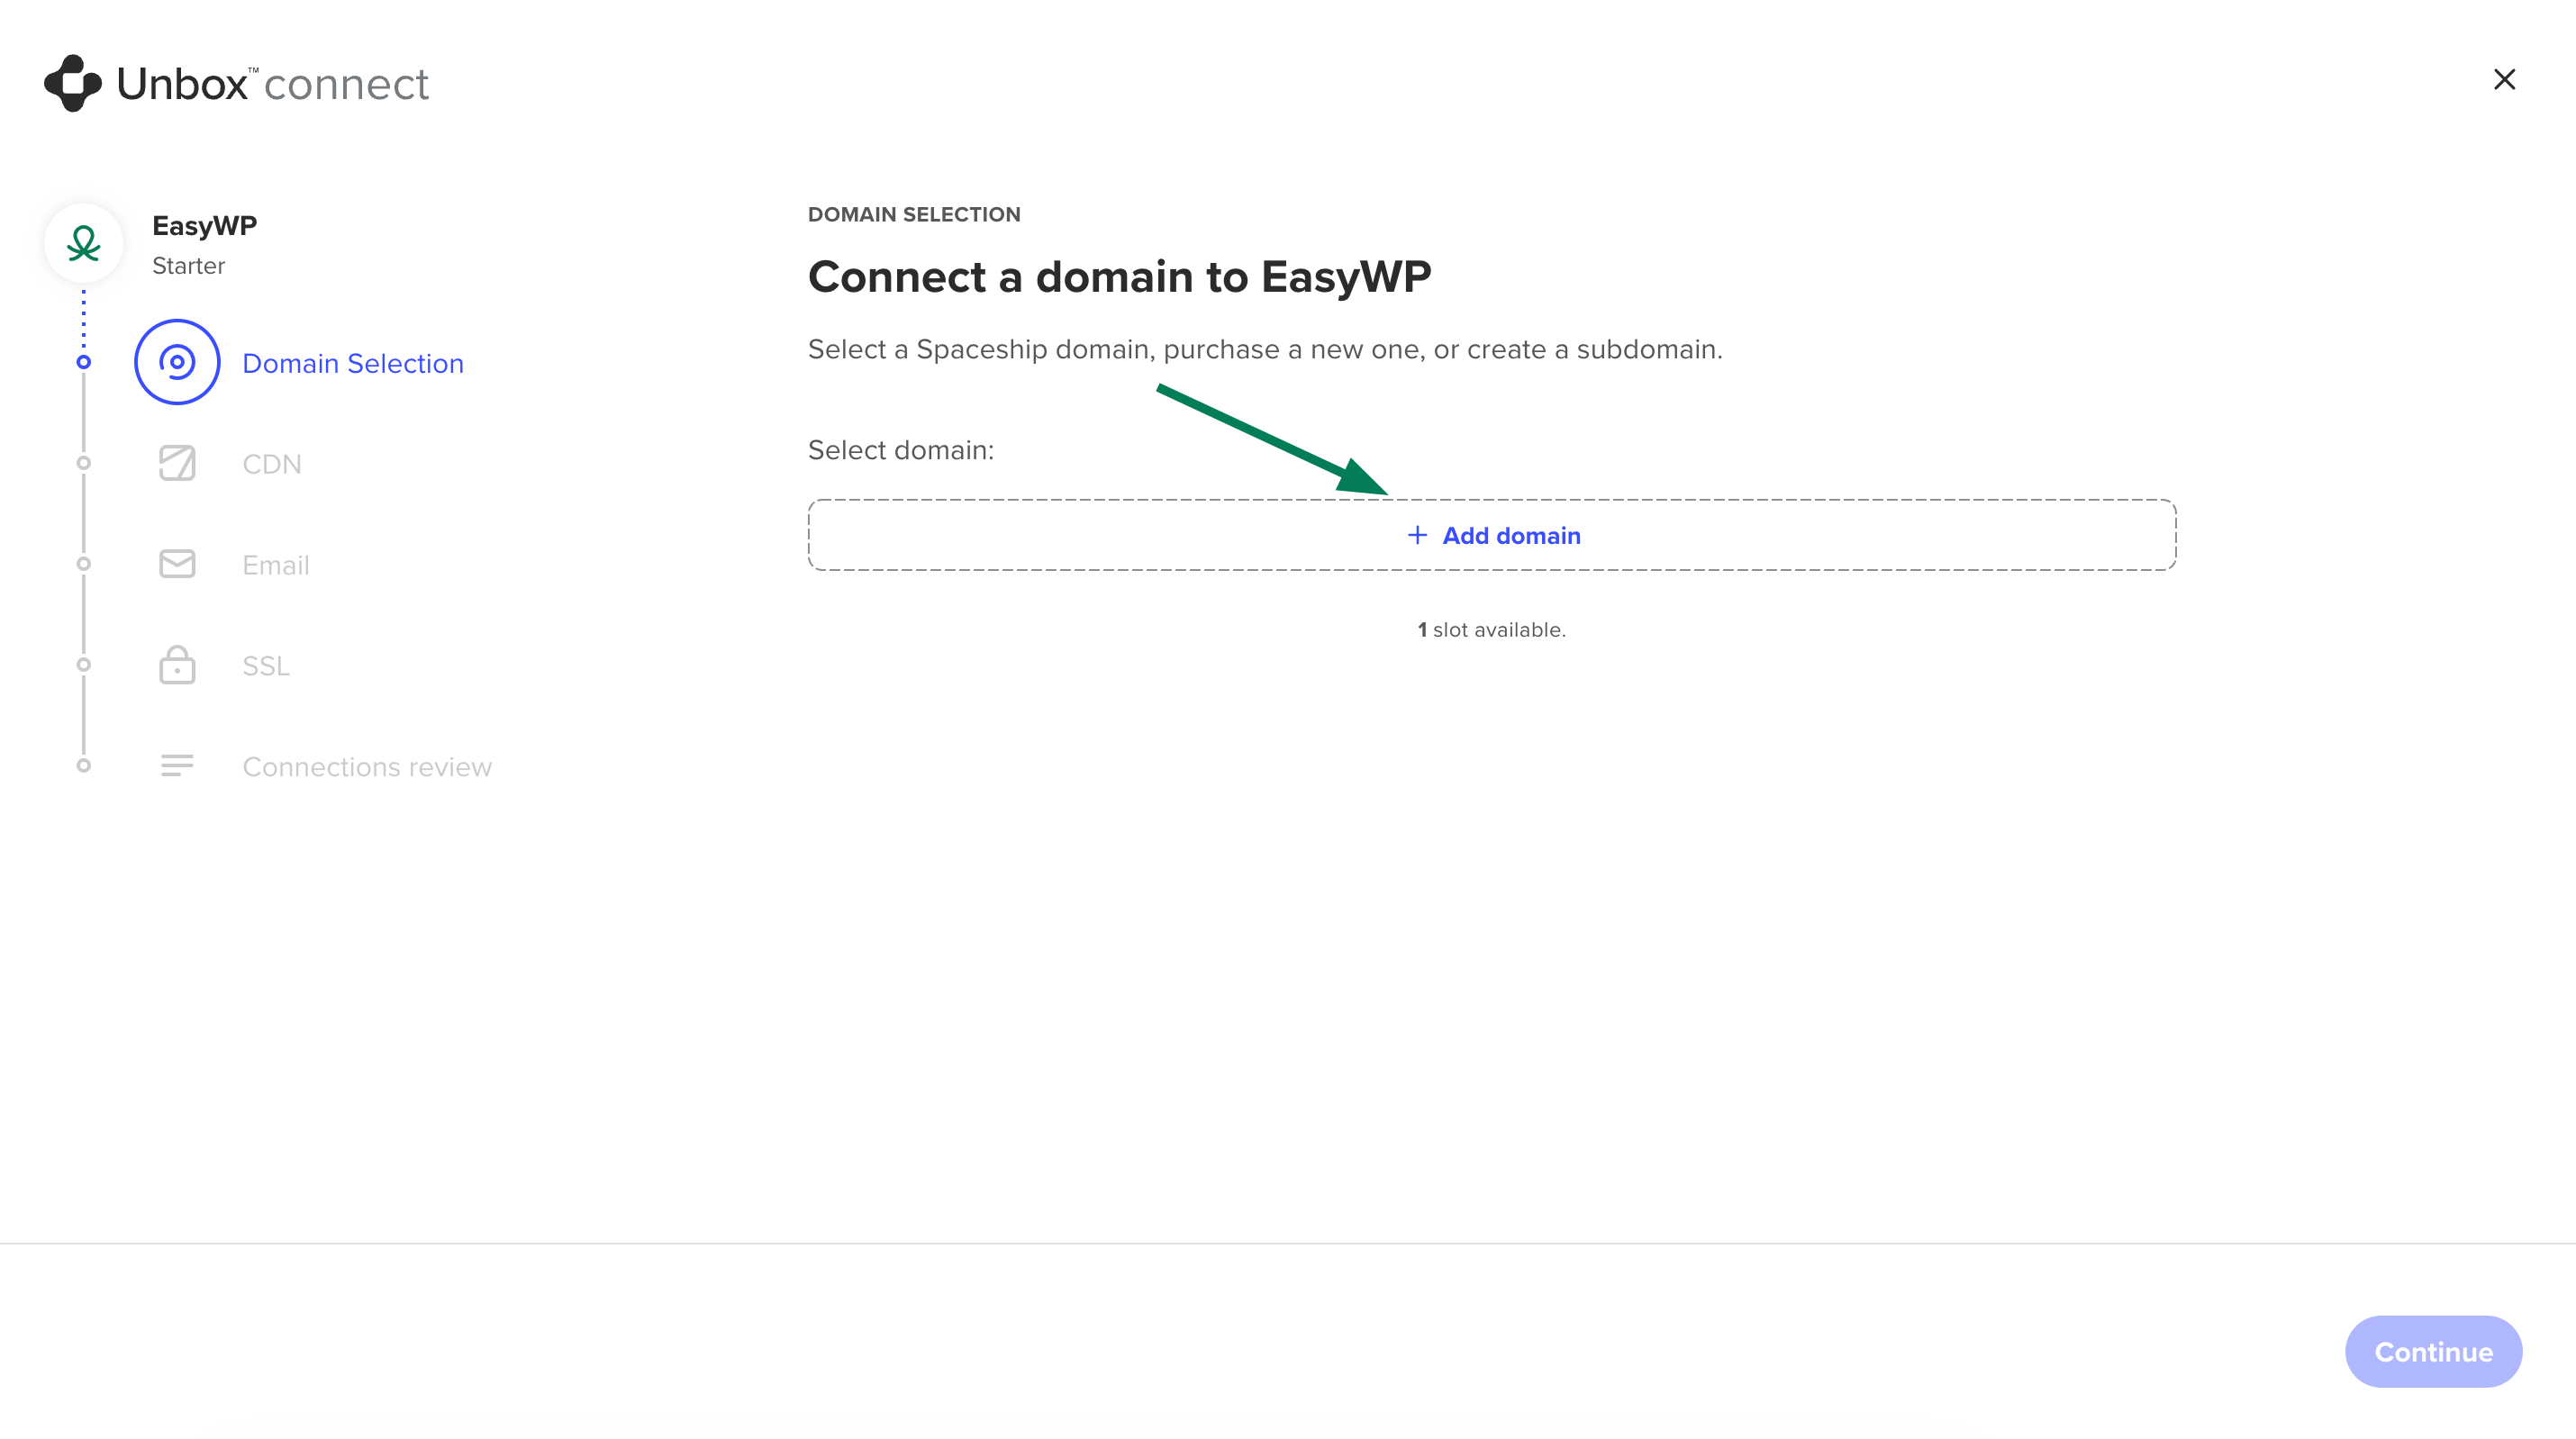
5. To finish the migration process, you should connect the domain to the EasyWP subscription. There are two options for this: Сonnect and Add Domain.
Connect button - the connection process is similar to adding a domain during the Unbox™ process, except that the domain name is already pre-selected:
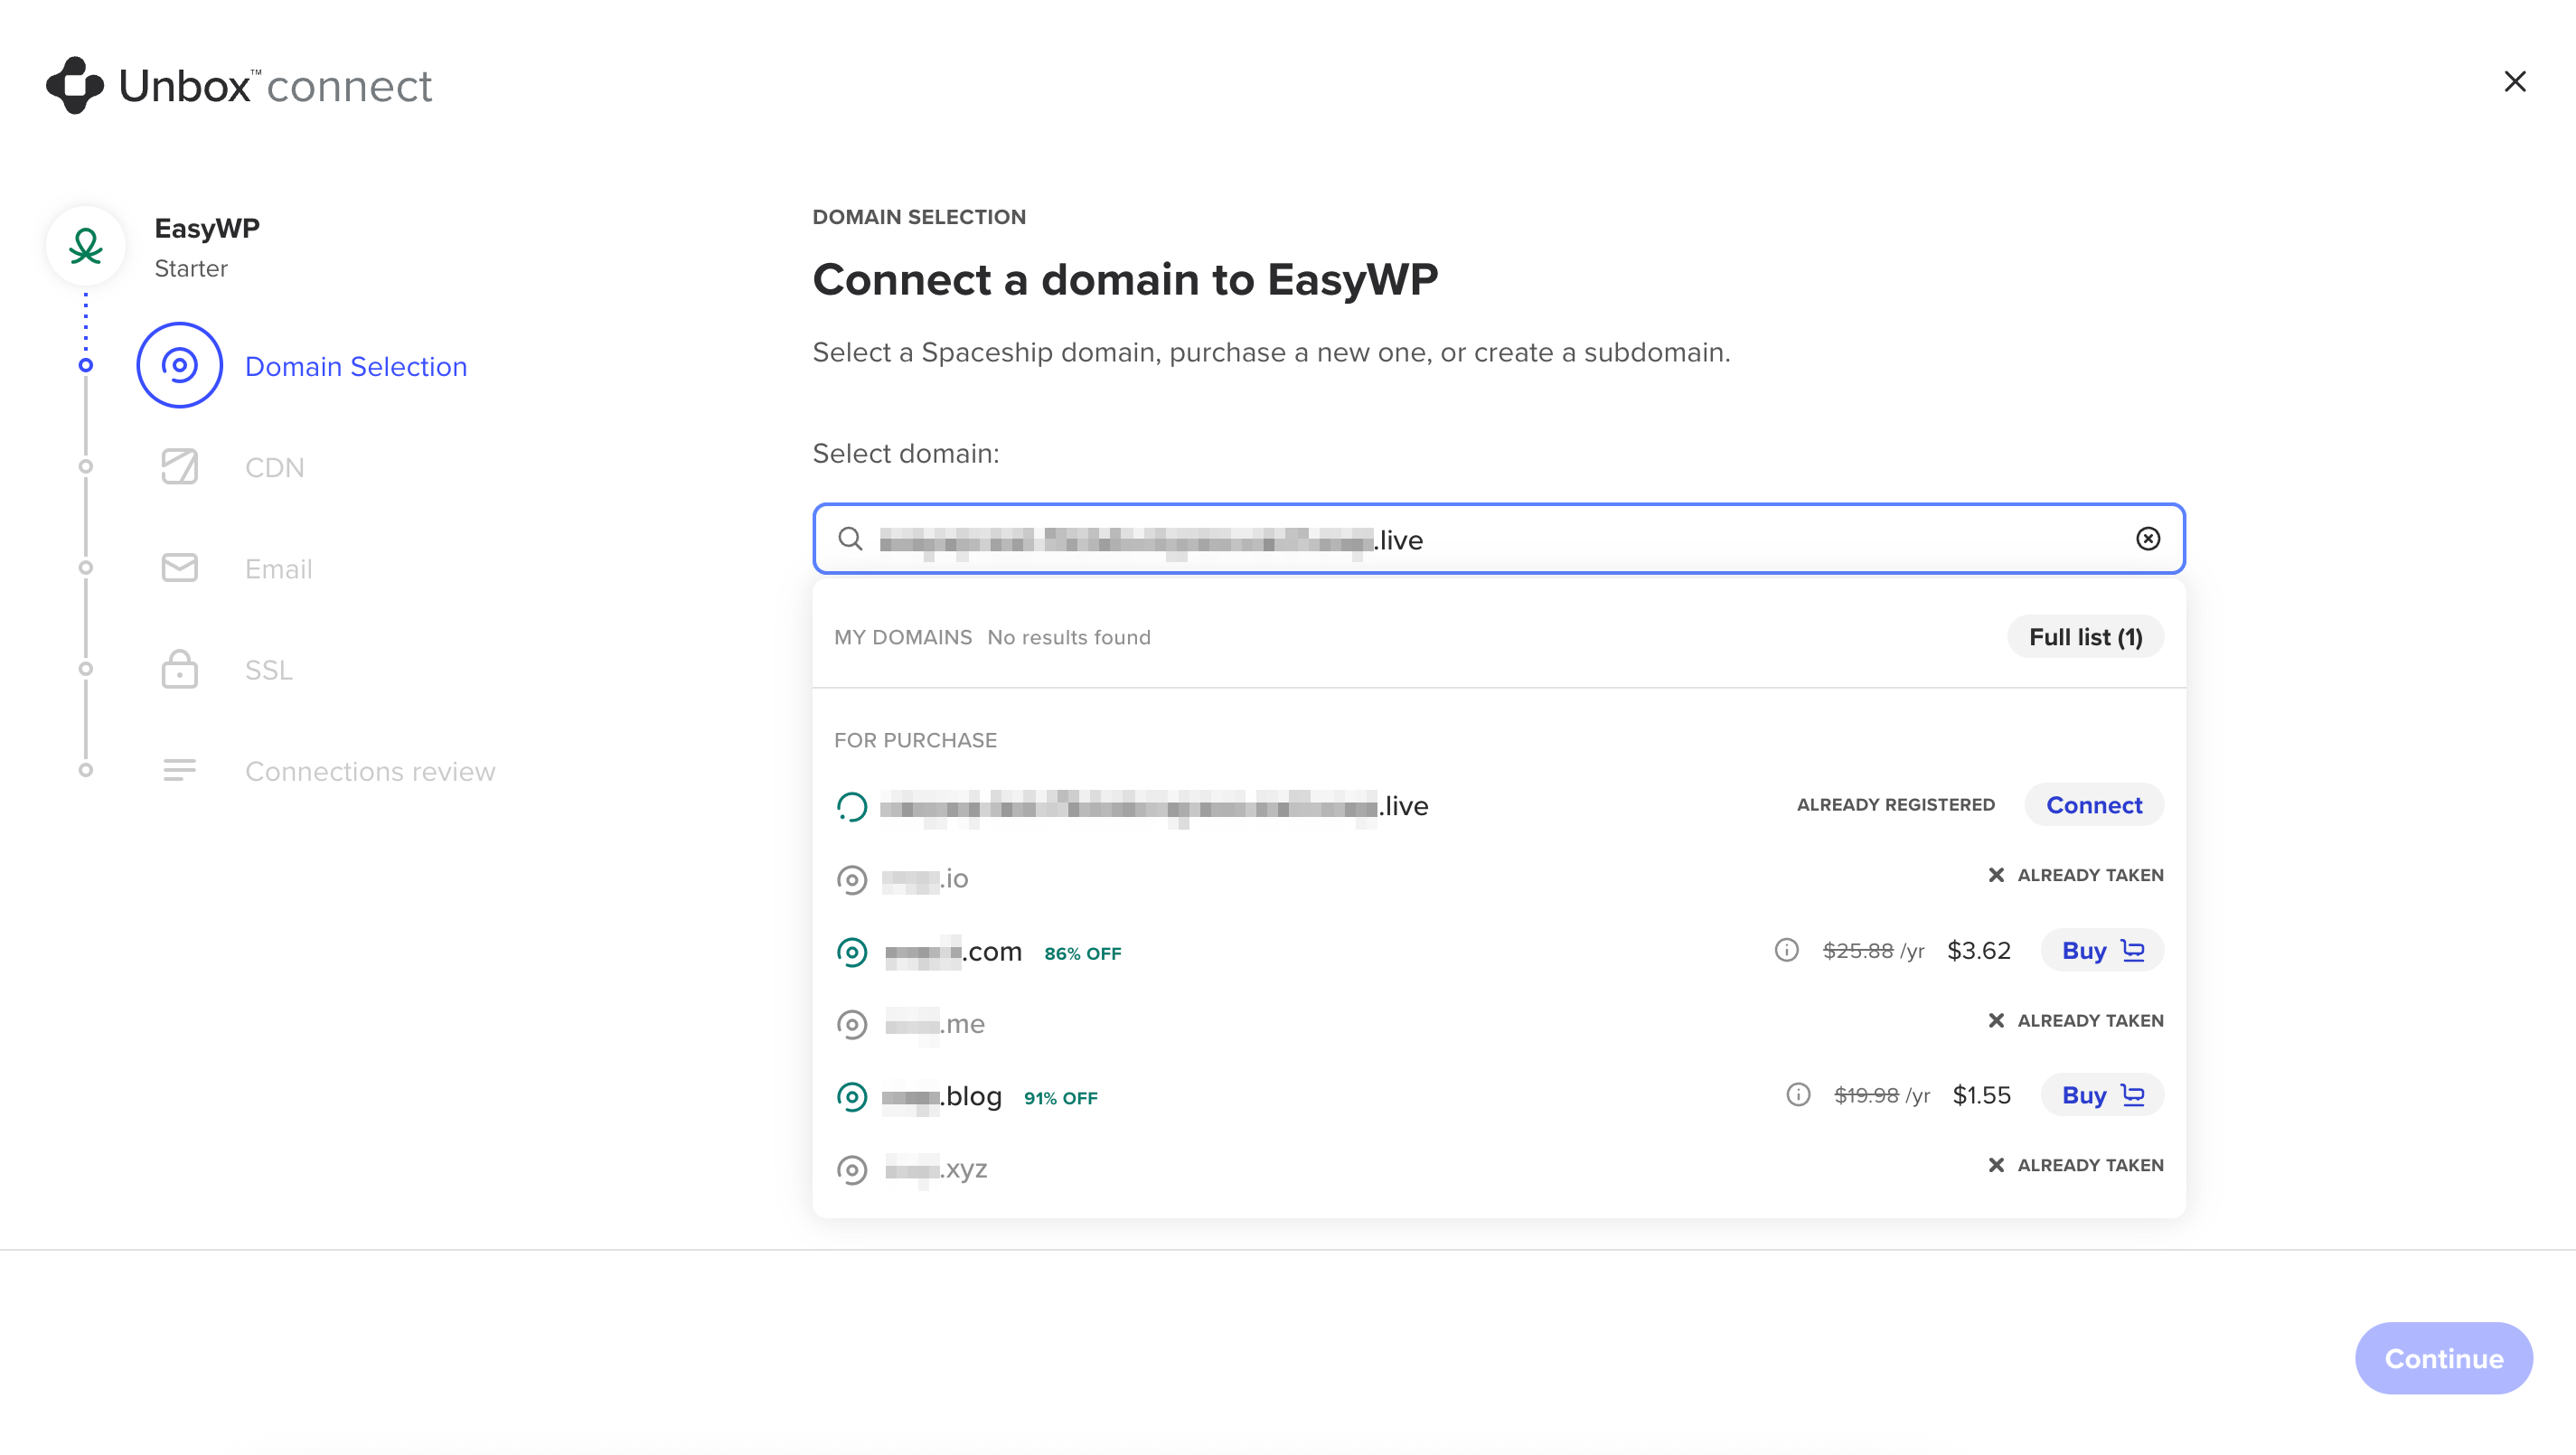
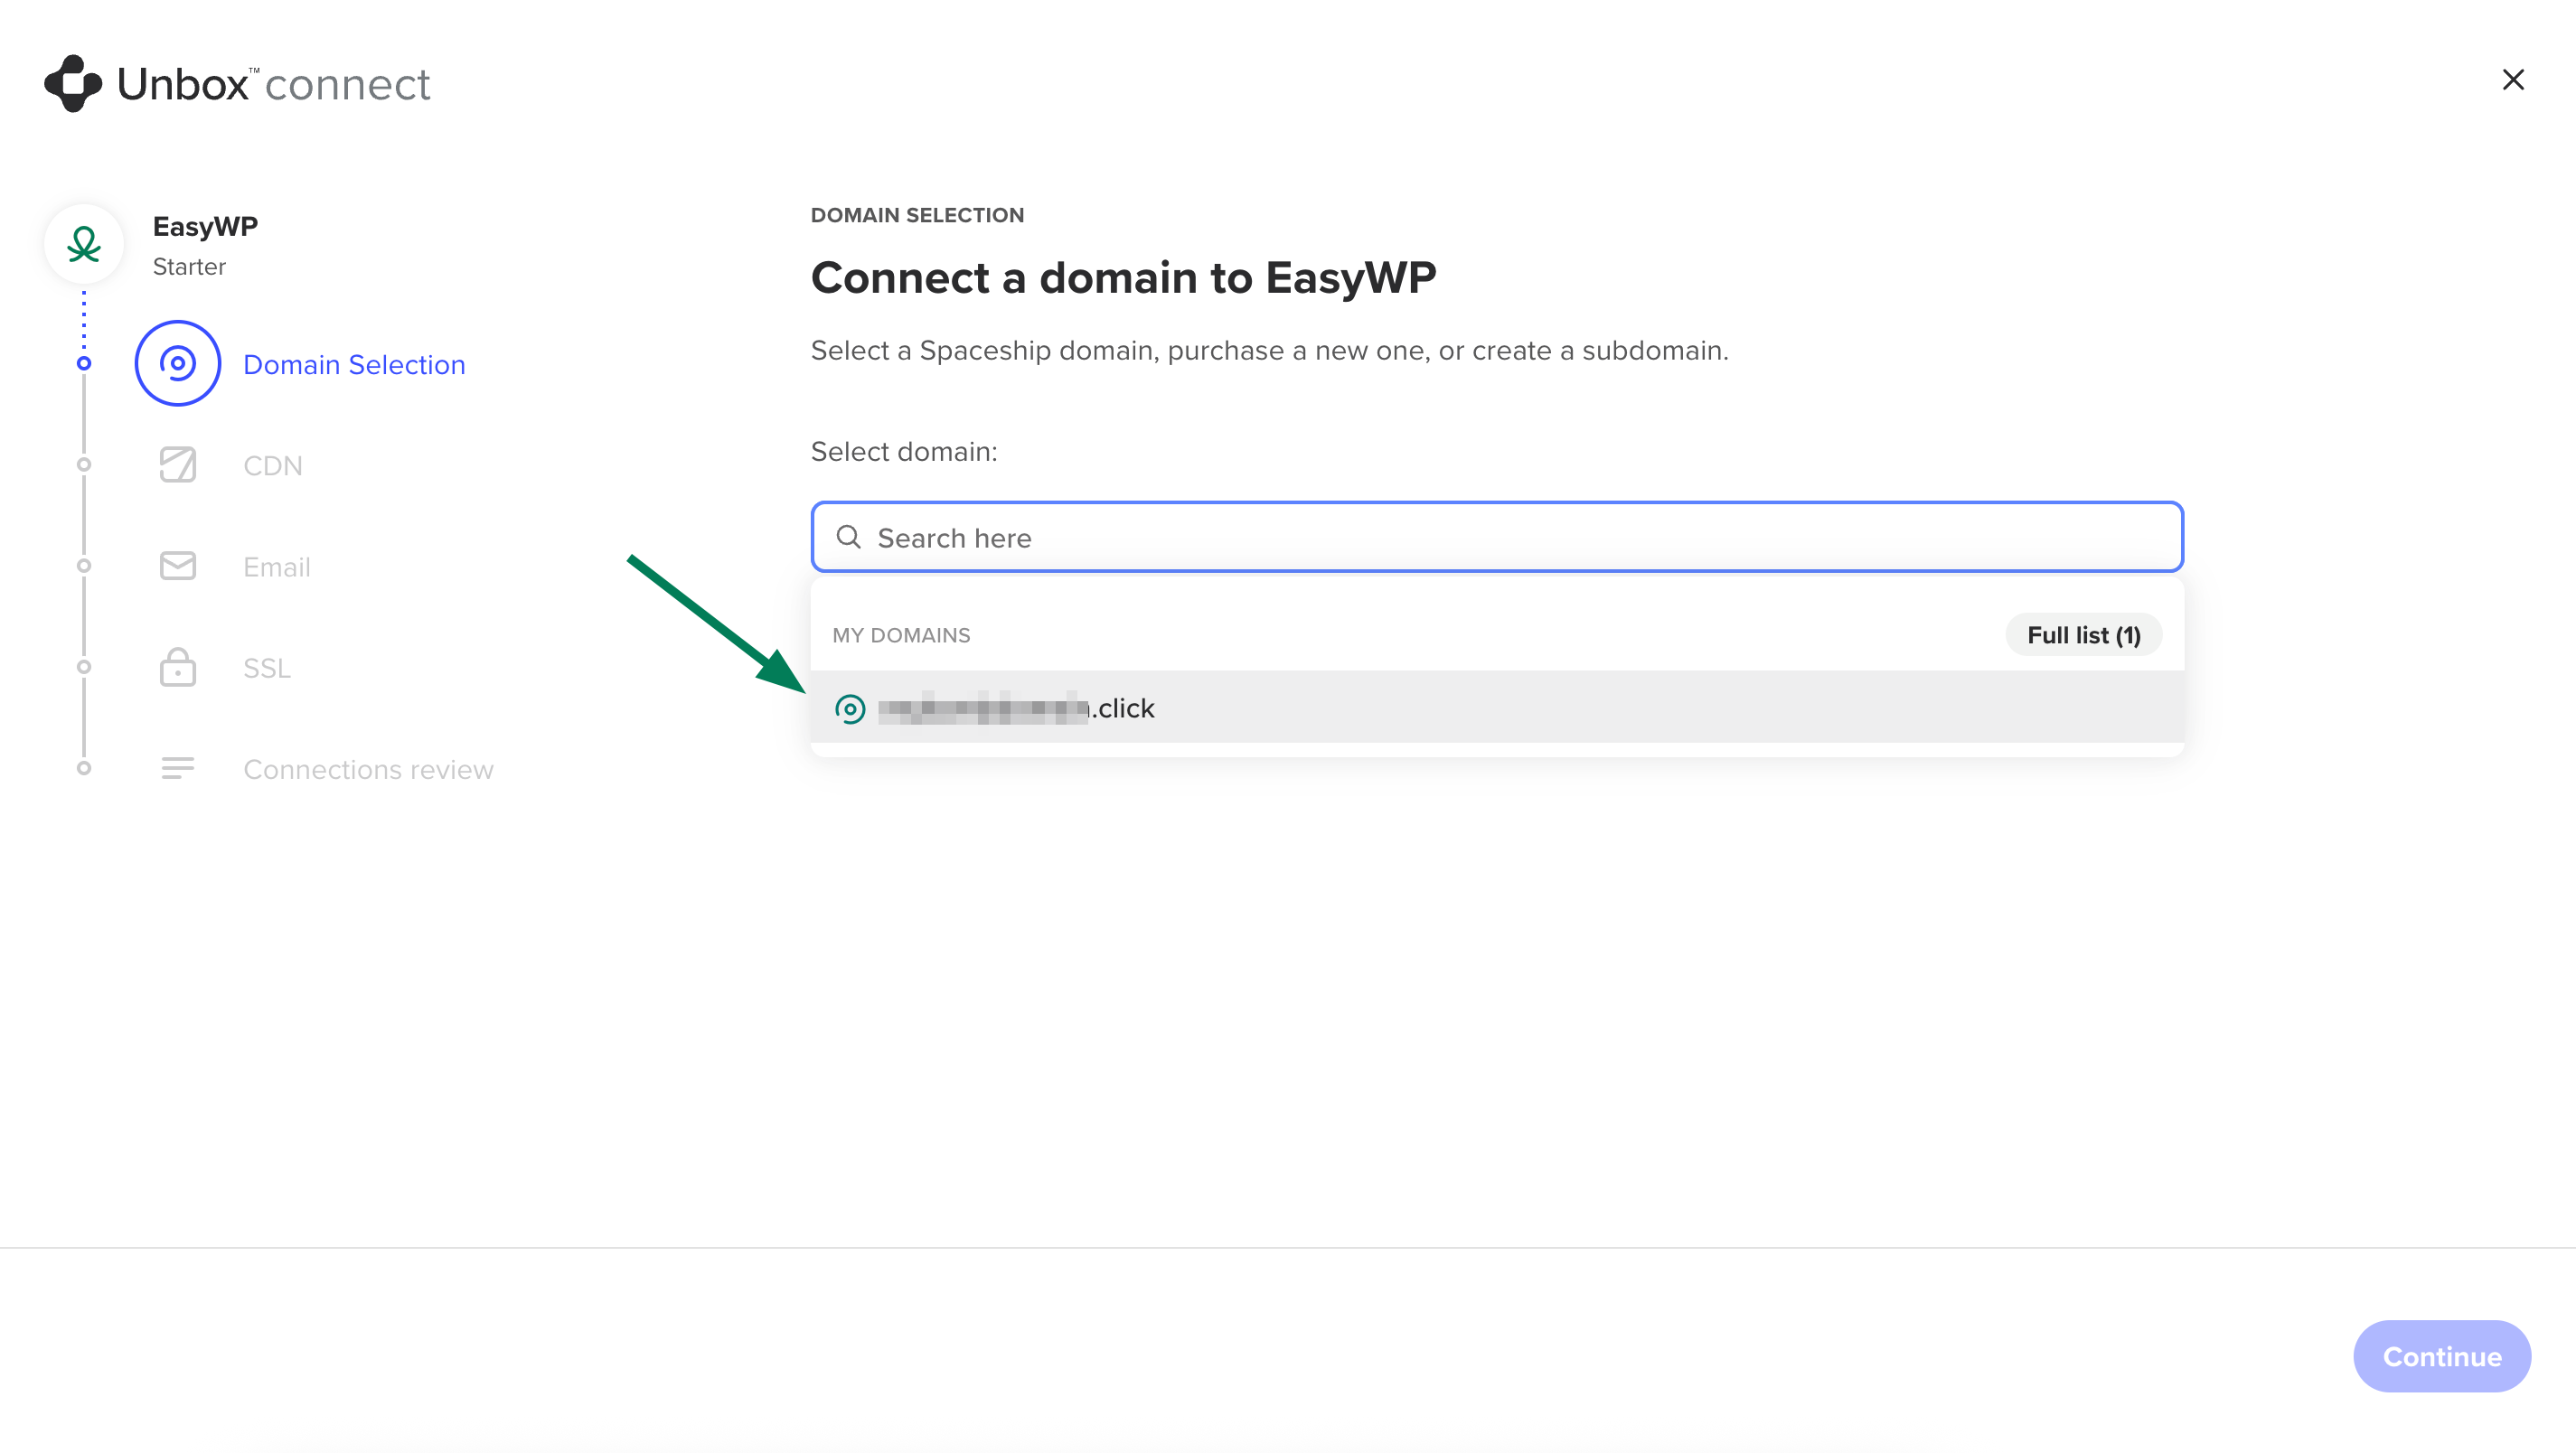
On the opened page, you should select the necessary domain:
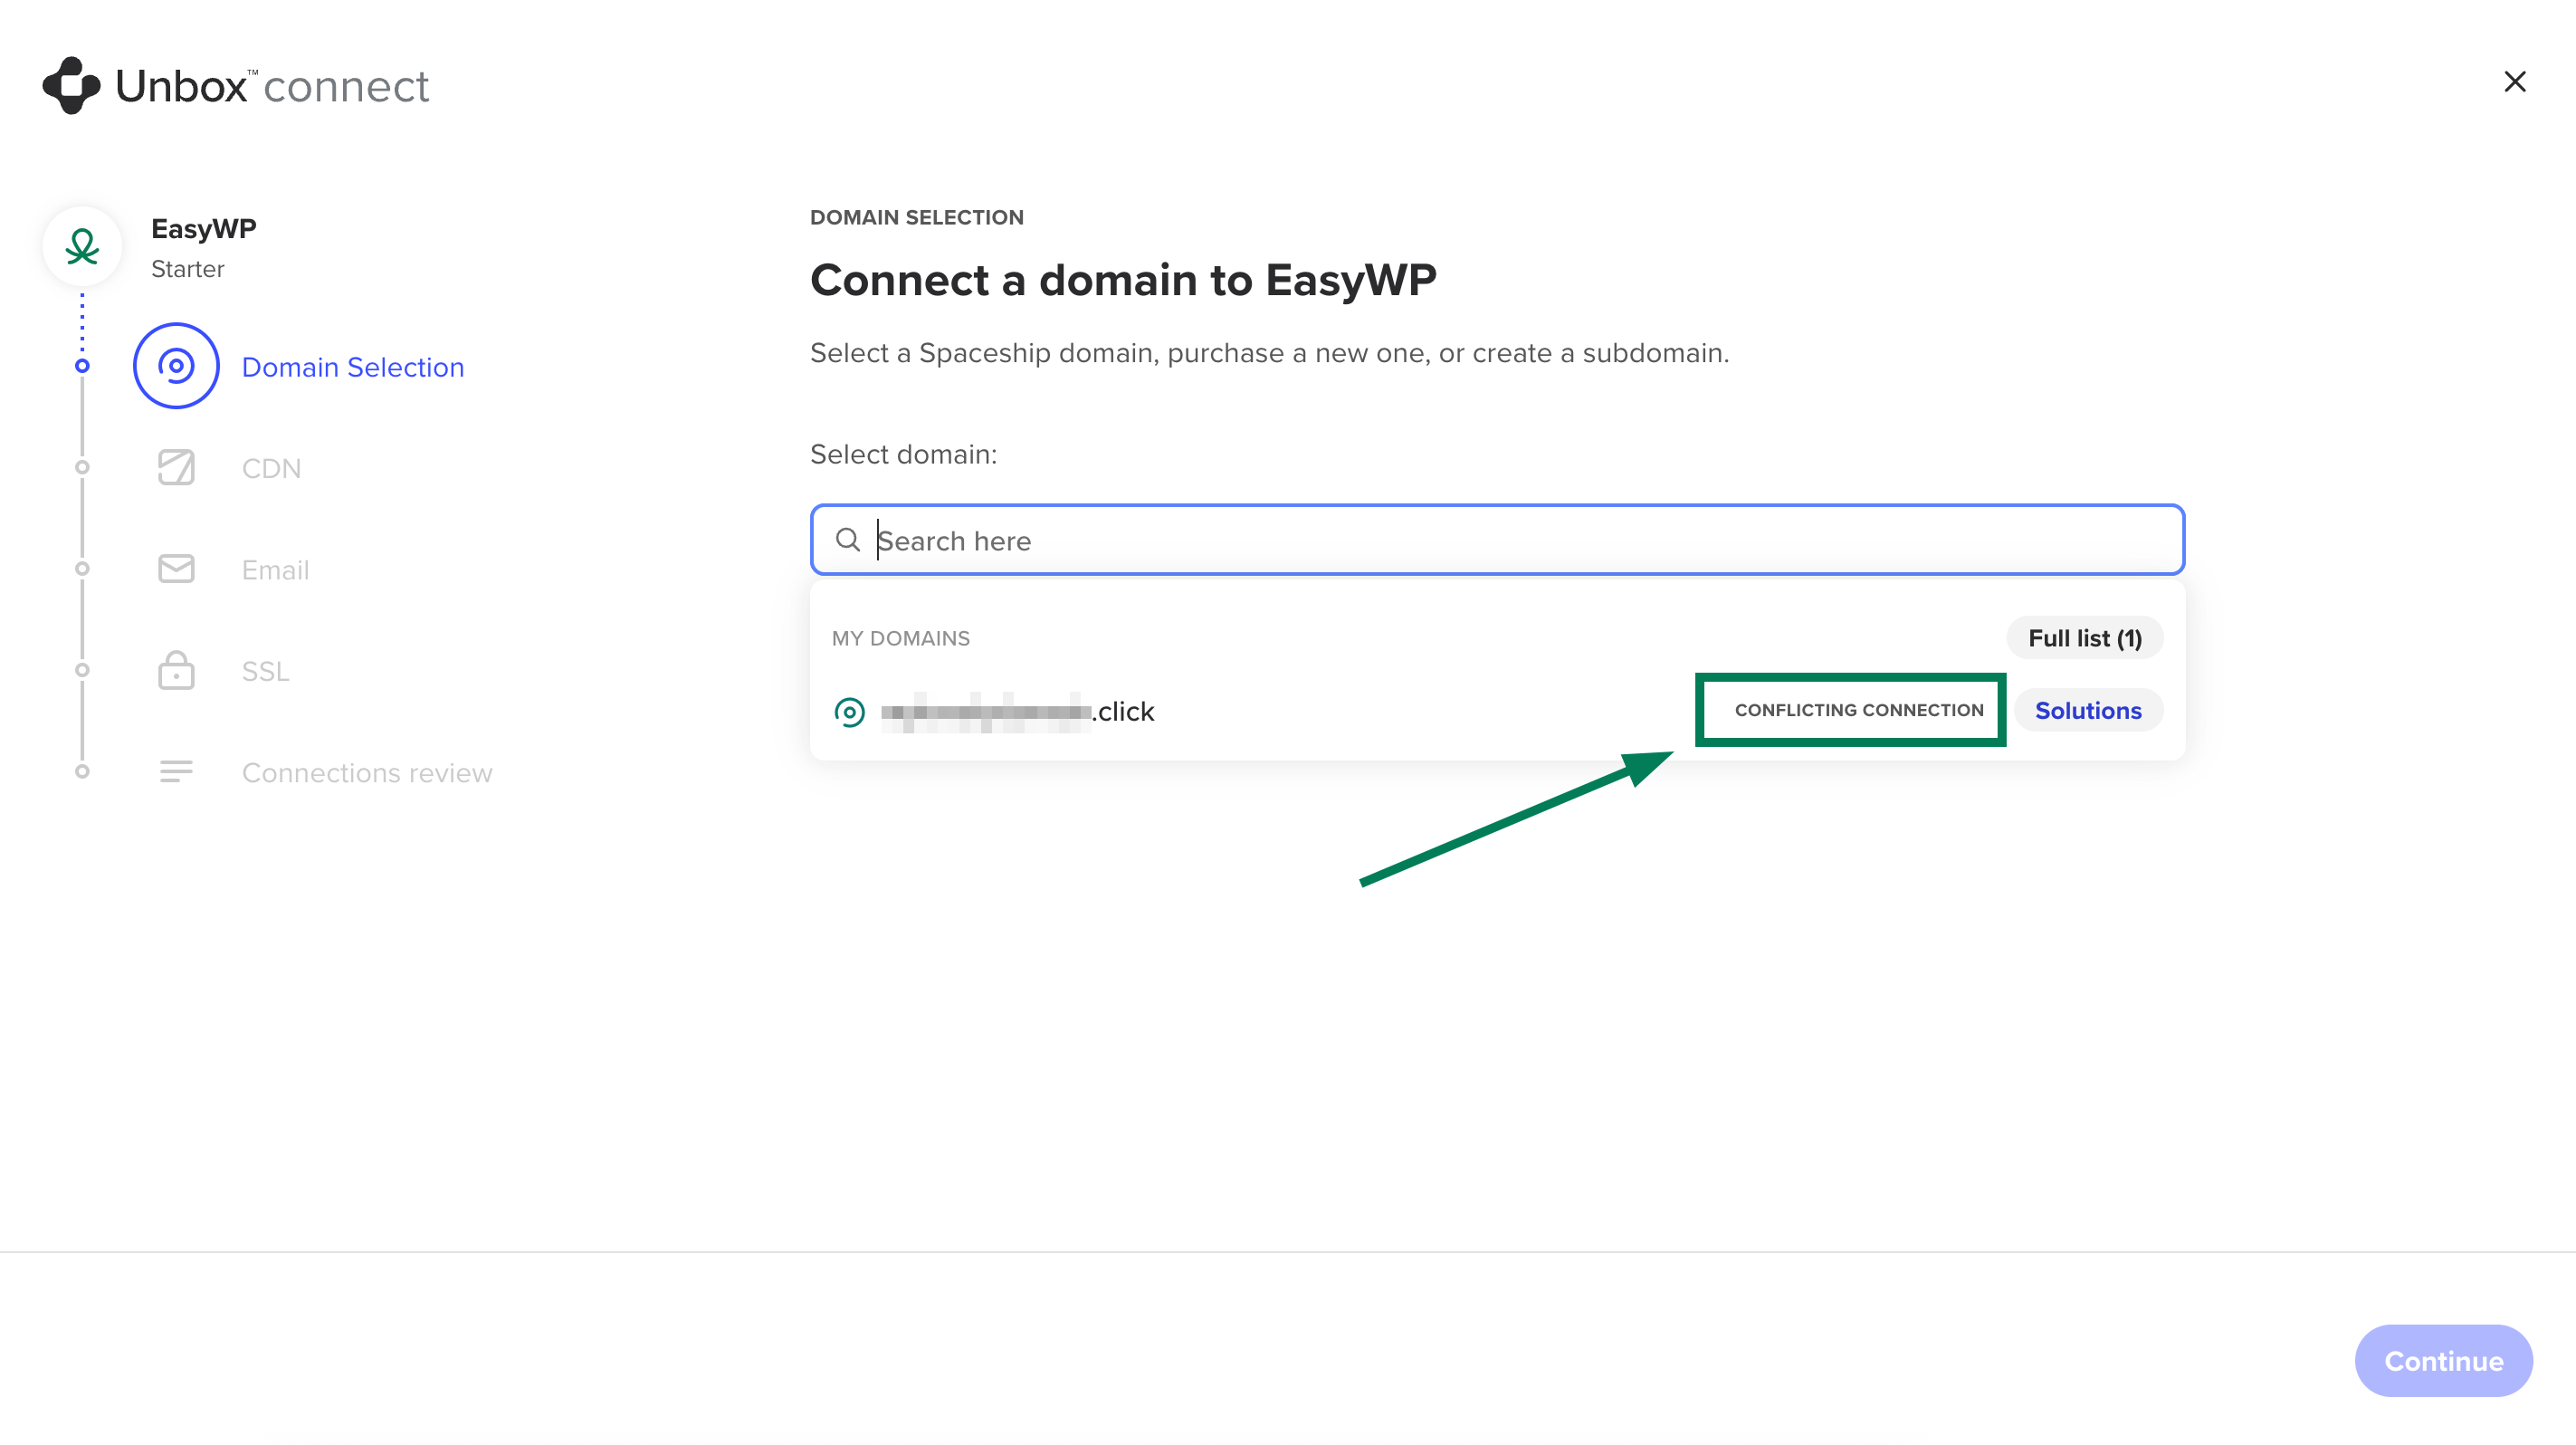
Note: Domains that are already associated with other services will be marked as Conflicting connections:
Optional steps
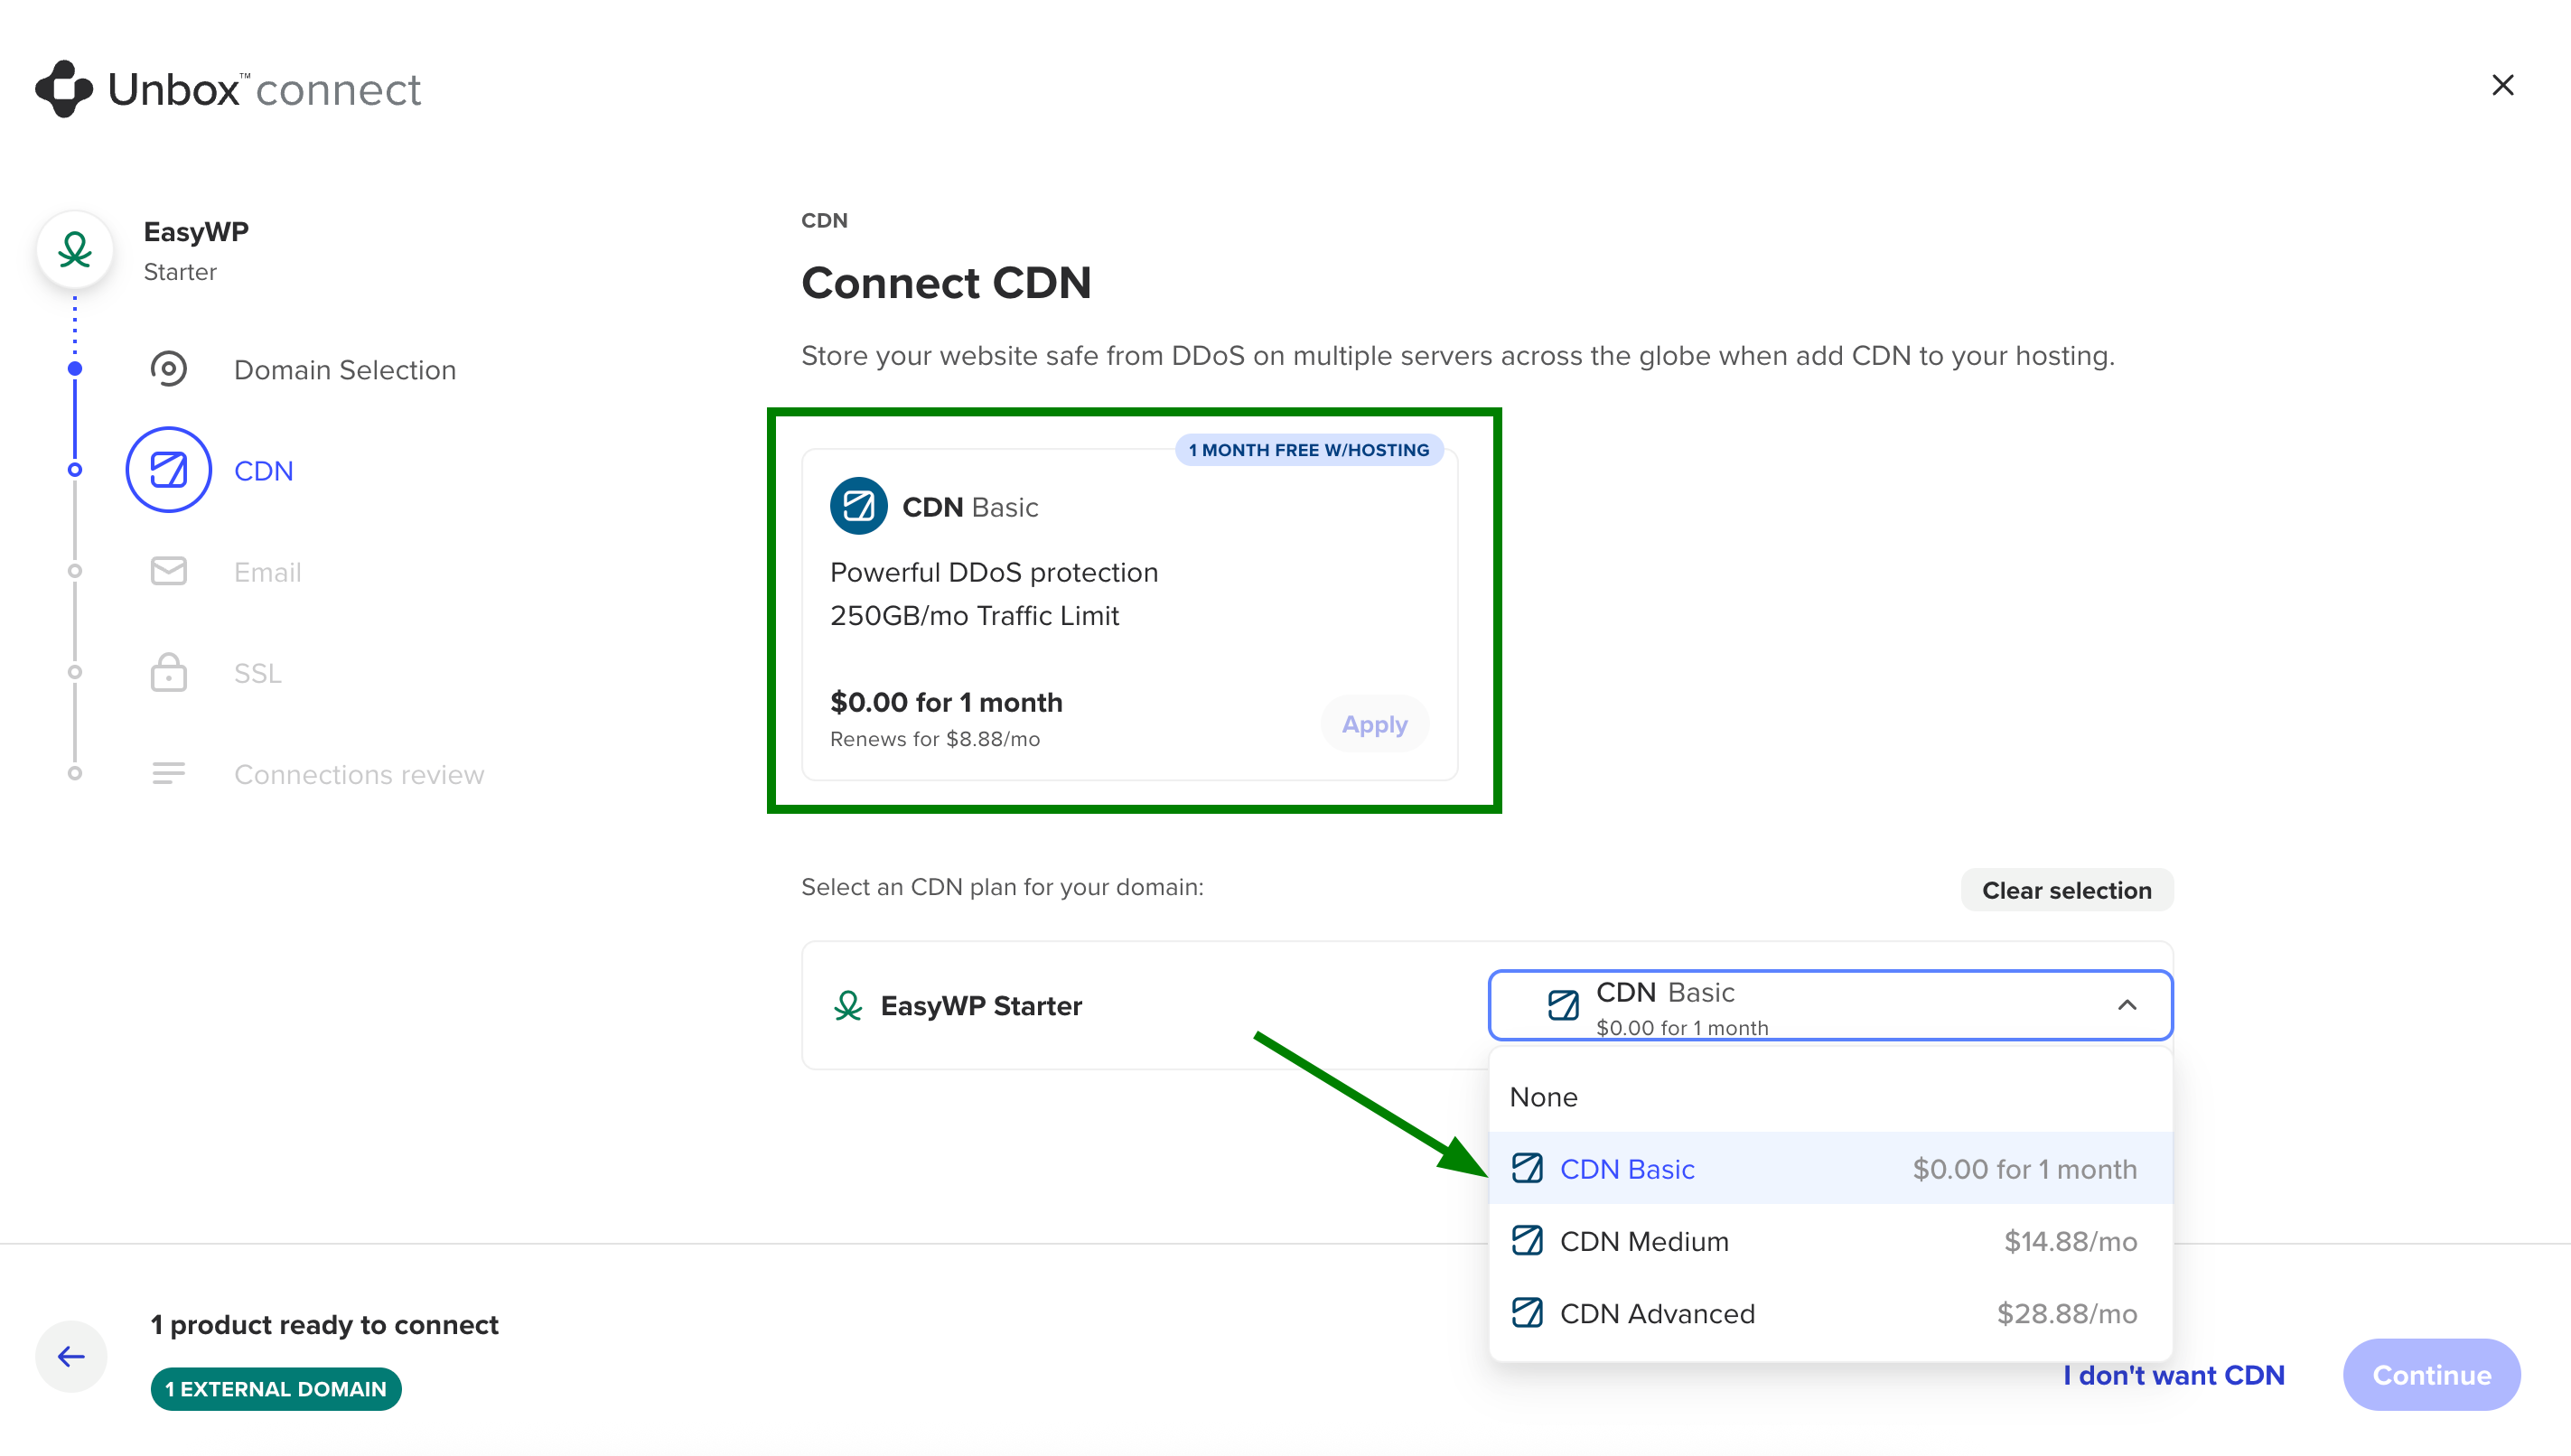
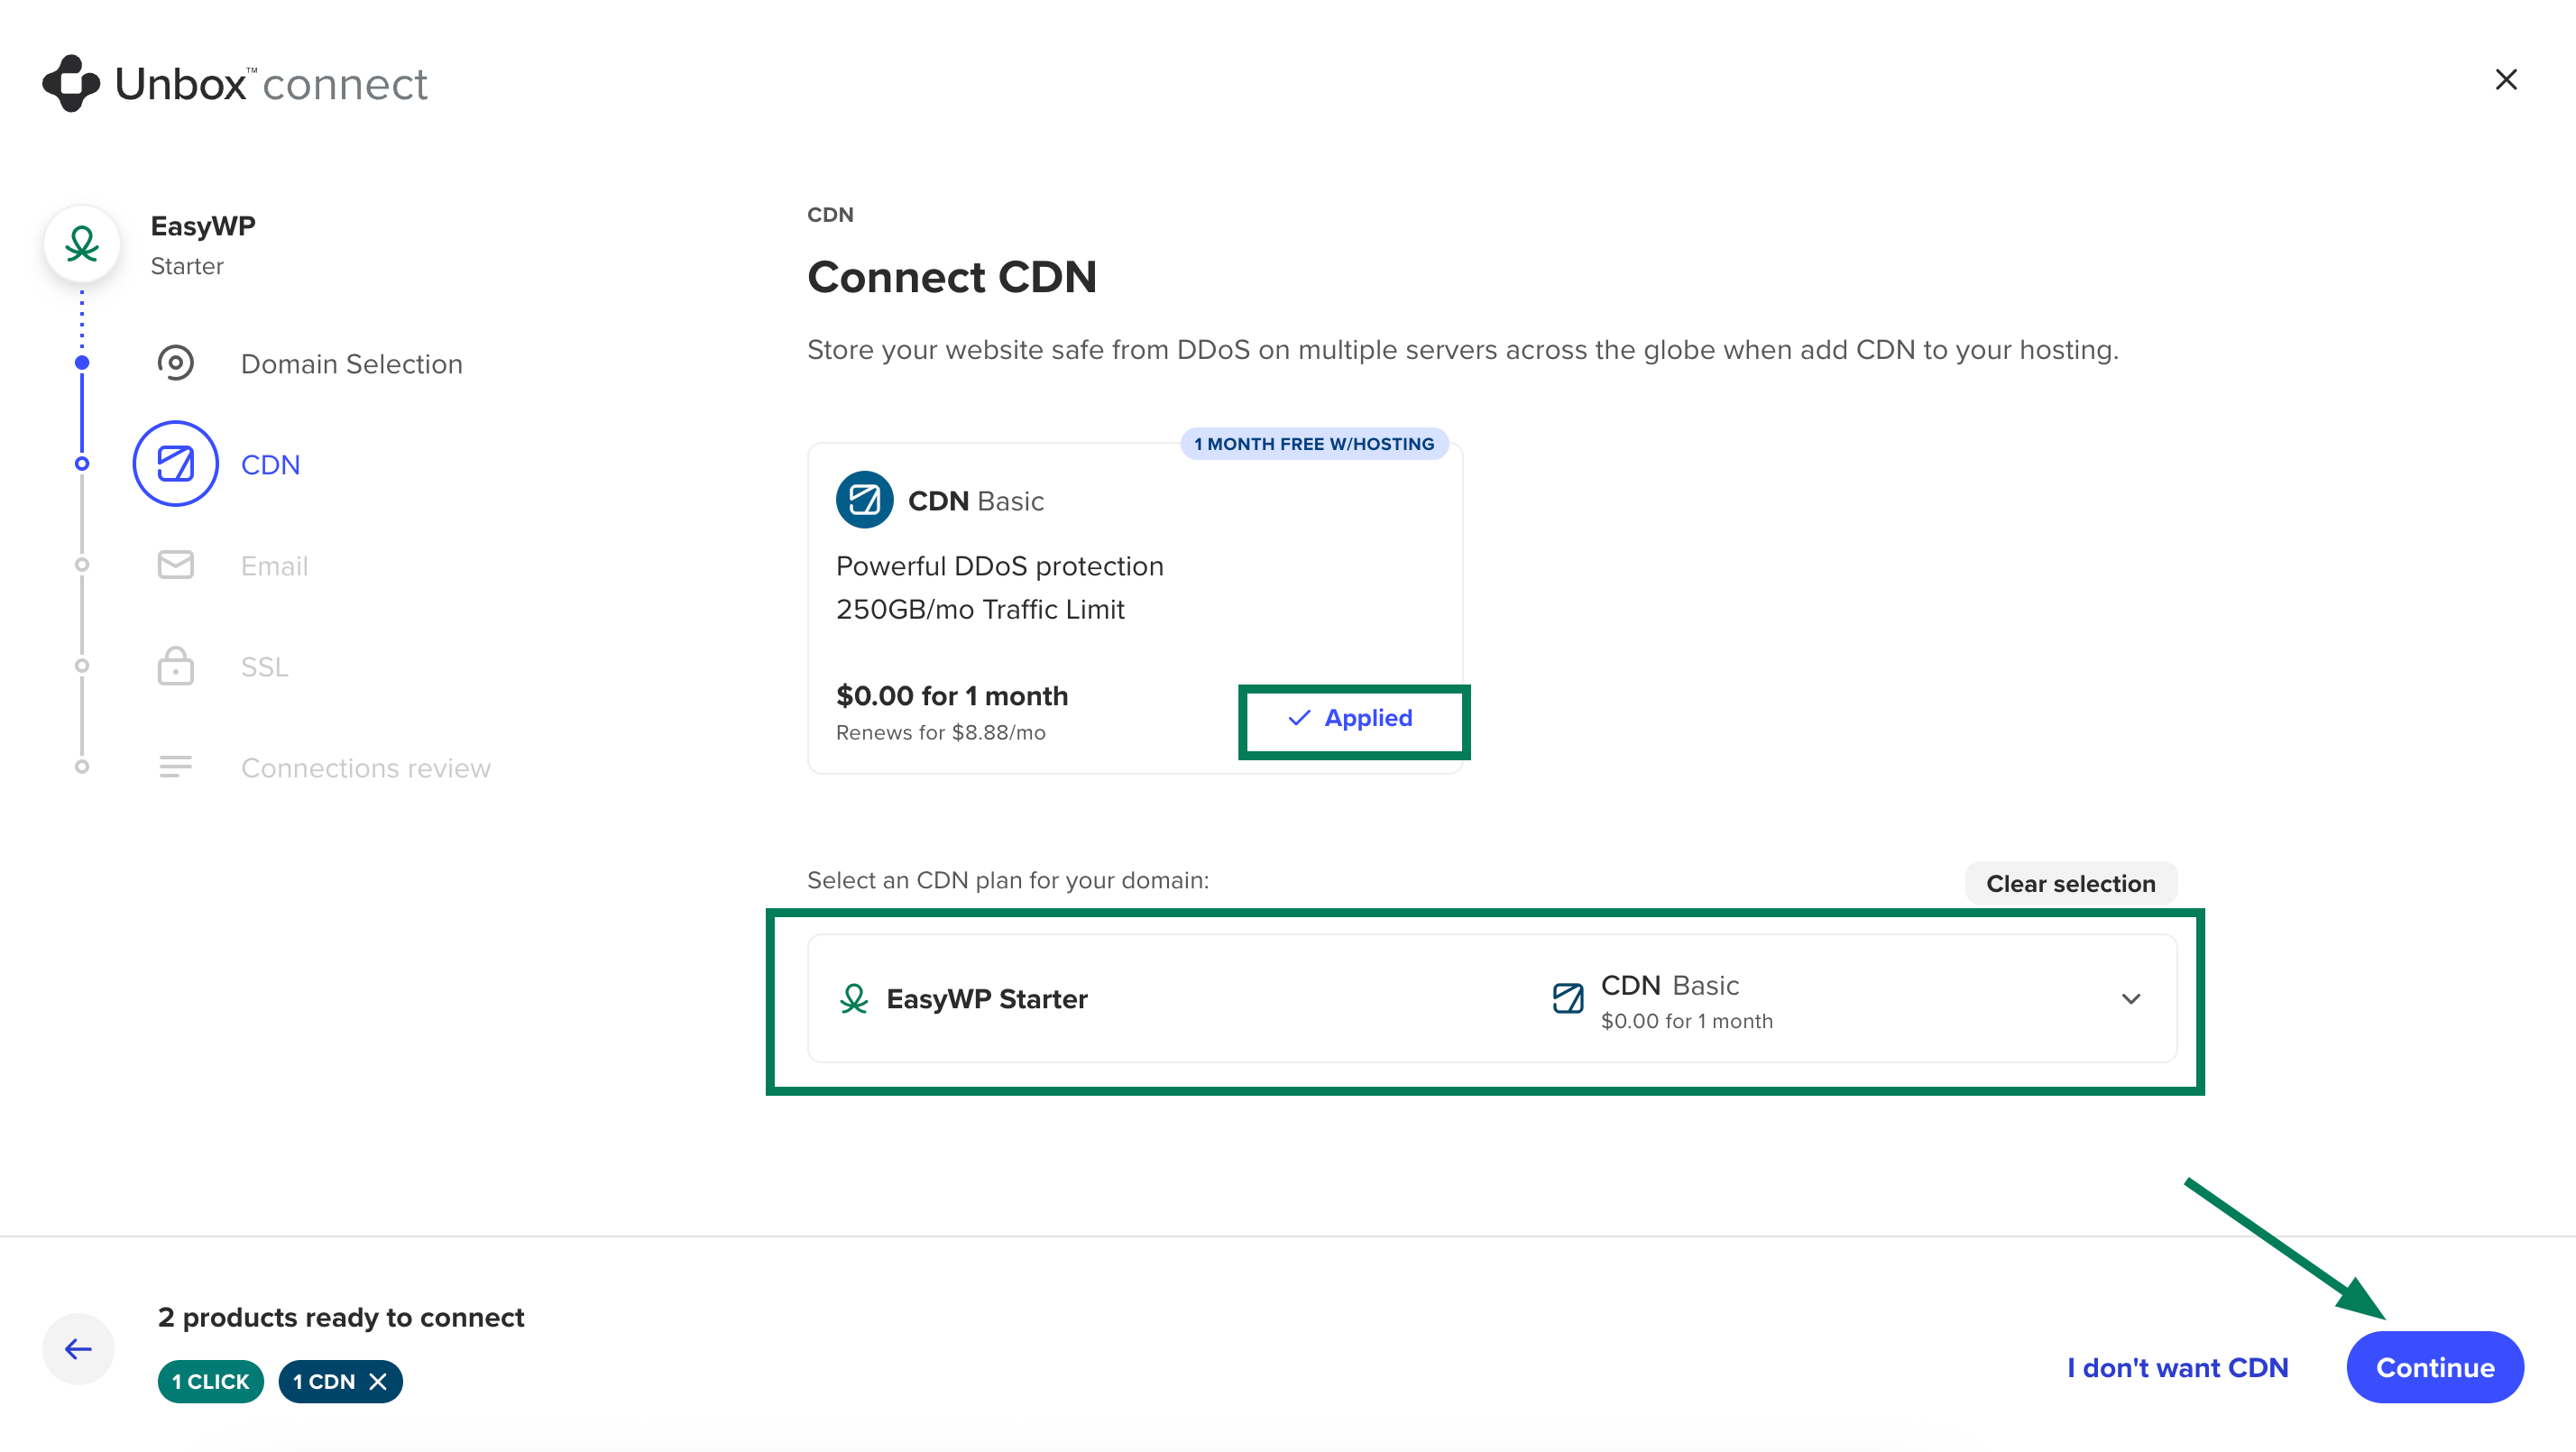
6. A free CDN subscription comes in a bundle with an EasyWP subscription and can be connected at the next step. Select the free CDN, a paid CDN plan from the dropdown menu, or hit I don’t want CDN.
Note: The CDN Basic plan can be obtained for free and then renewed at the standard renewal price. During unboxing, you can only connect the included Basic CDN plan or purchase a new subscription. Existing CDN subscriptions cannot be linked at this stage. In our example, we chose the free Basic CDN plan:
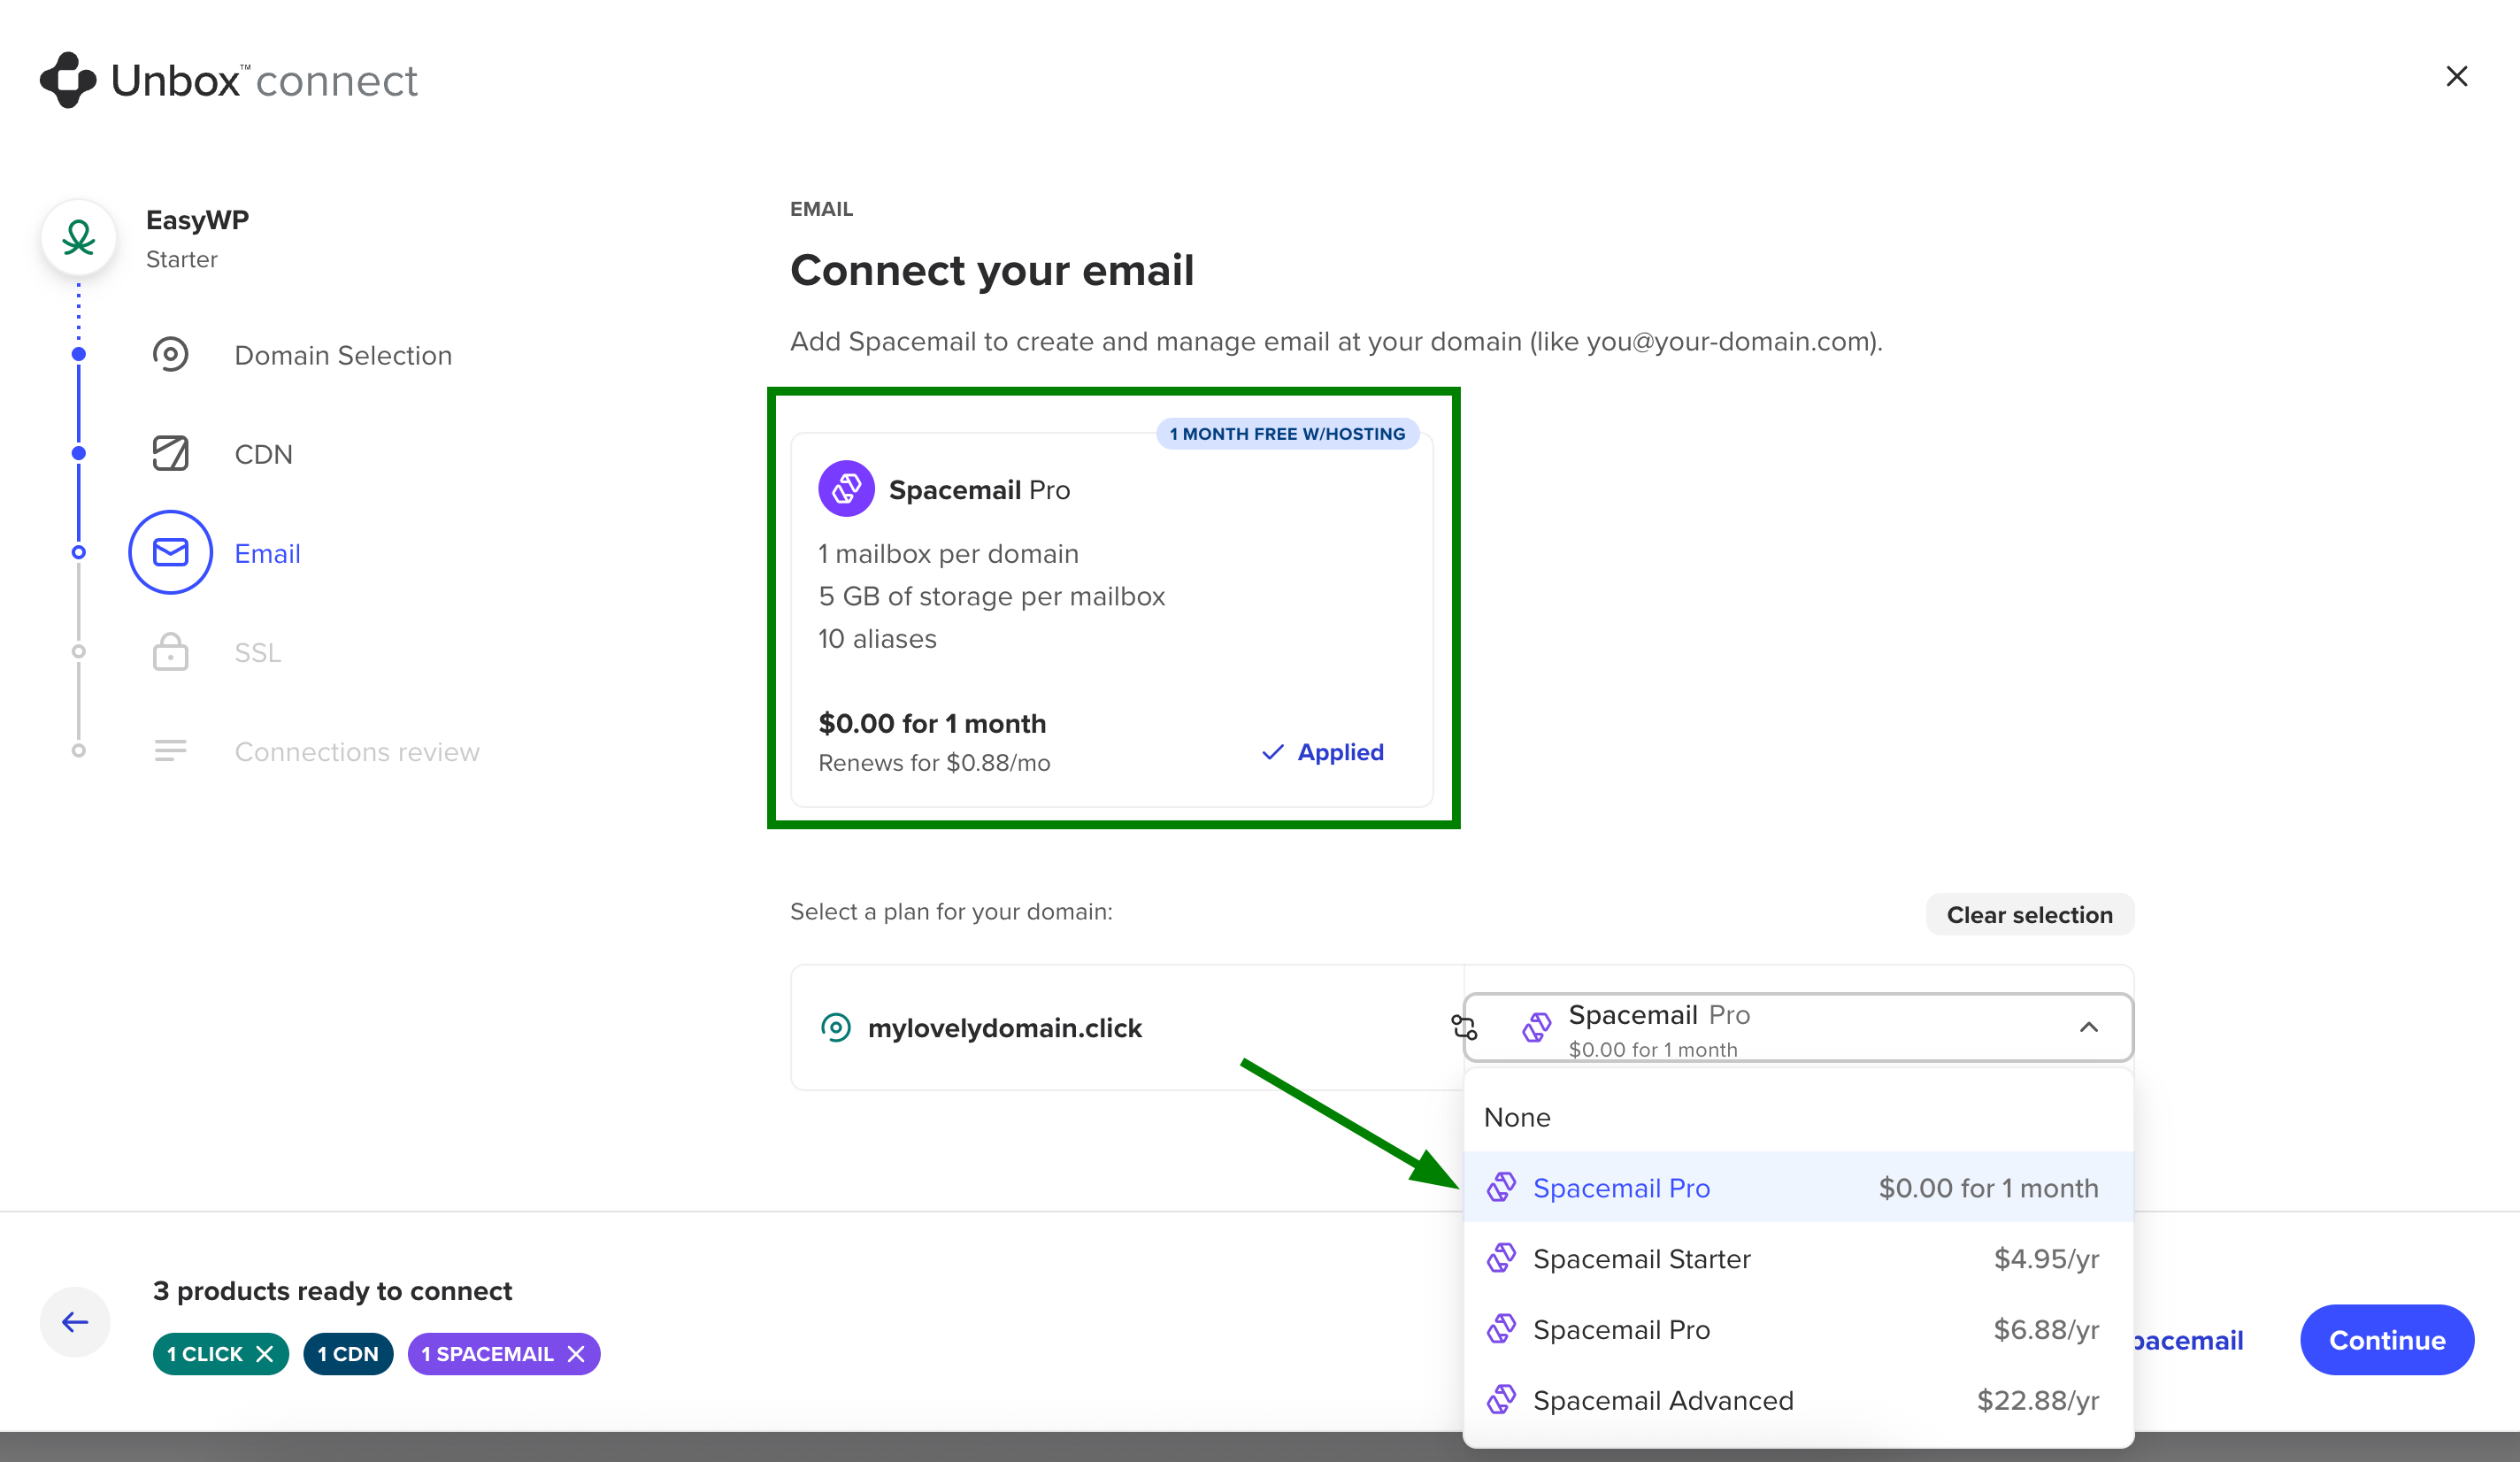
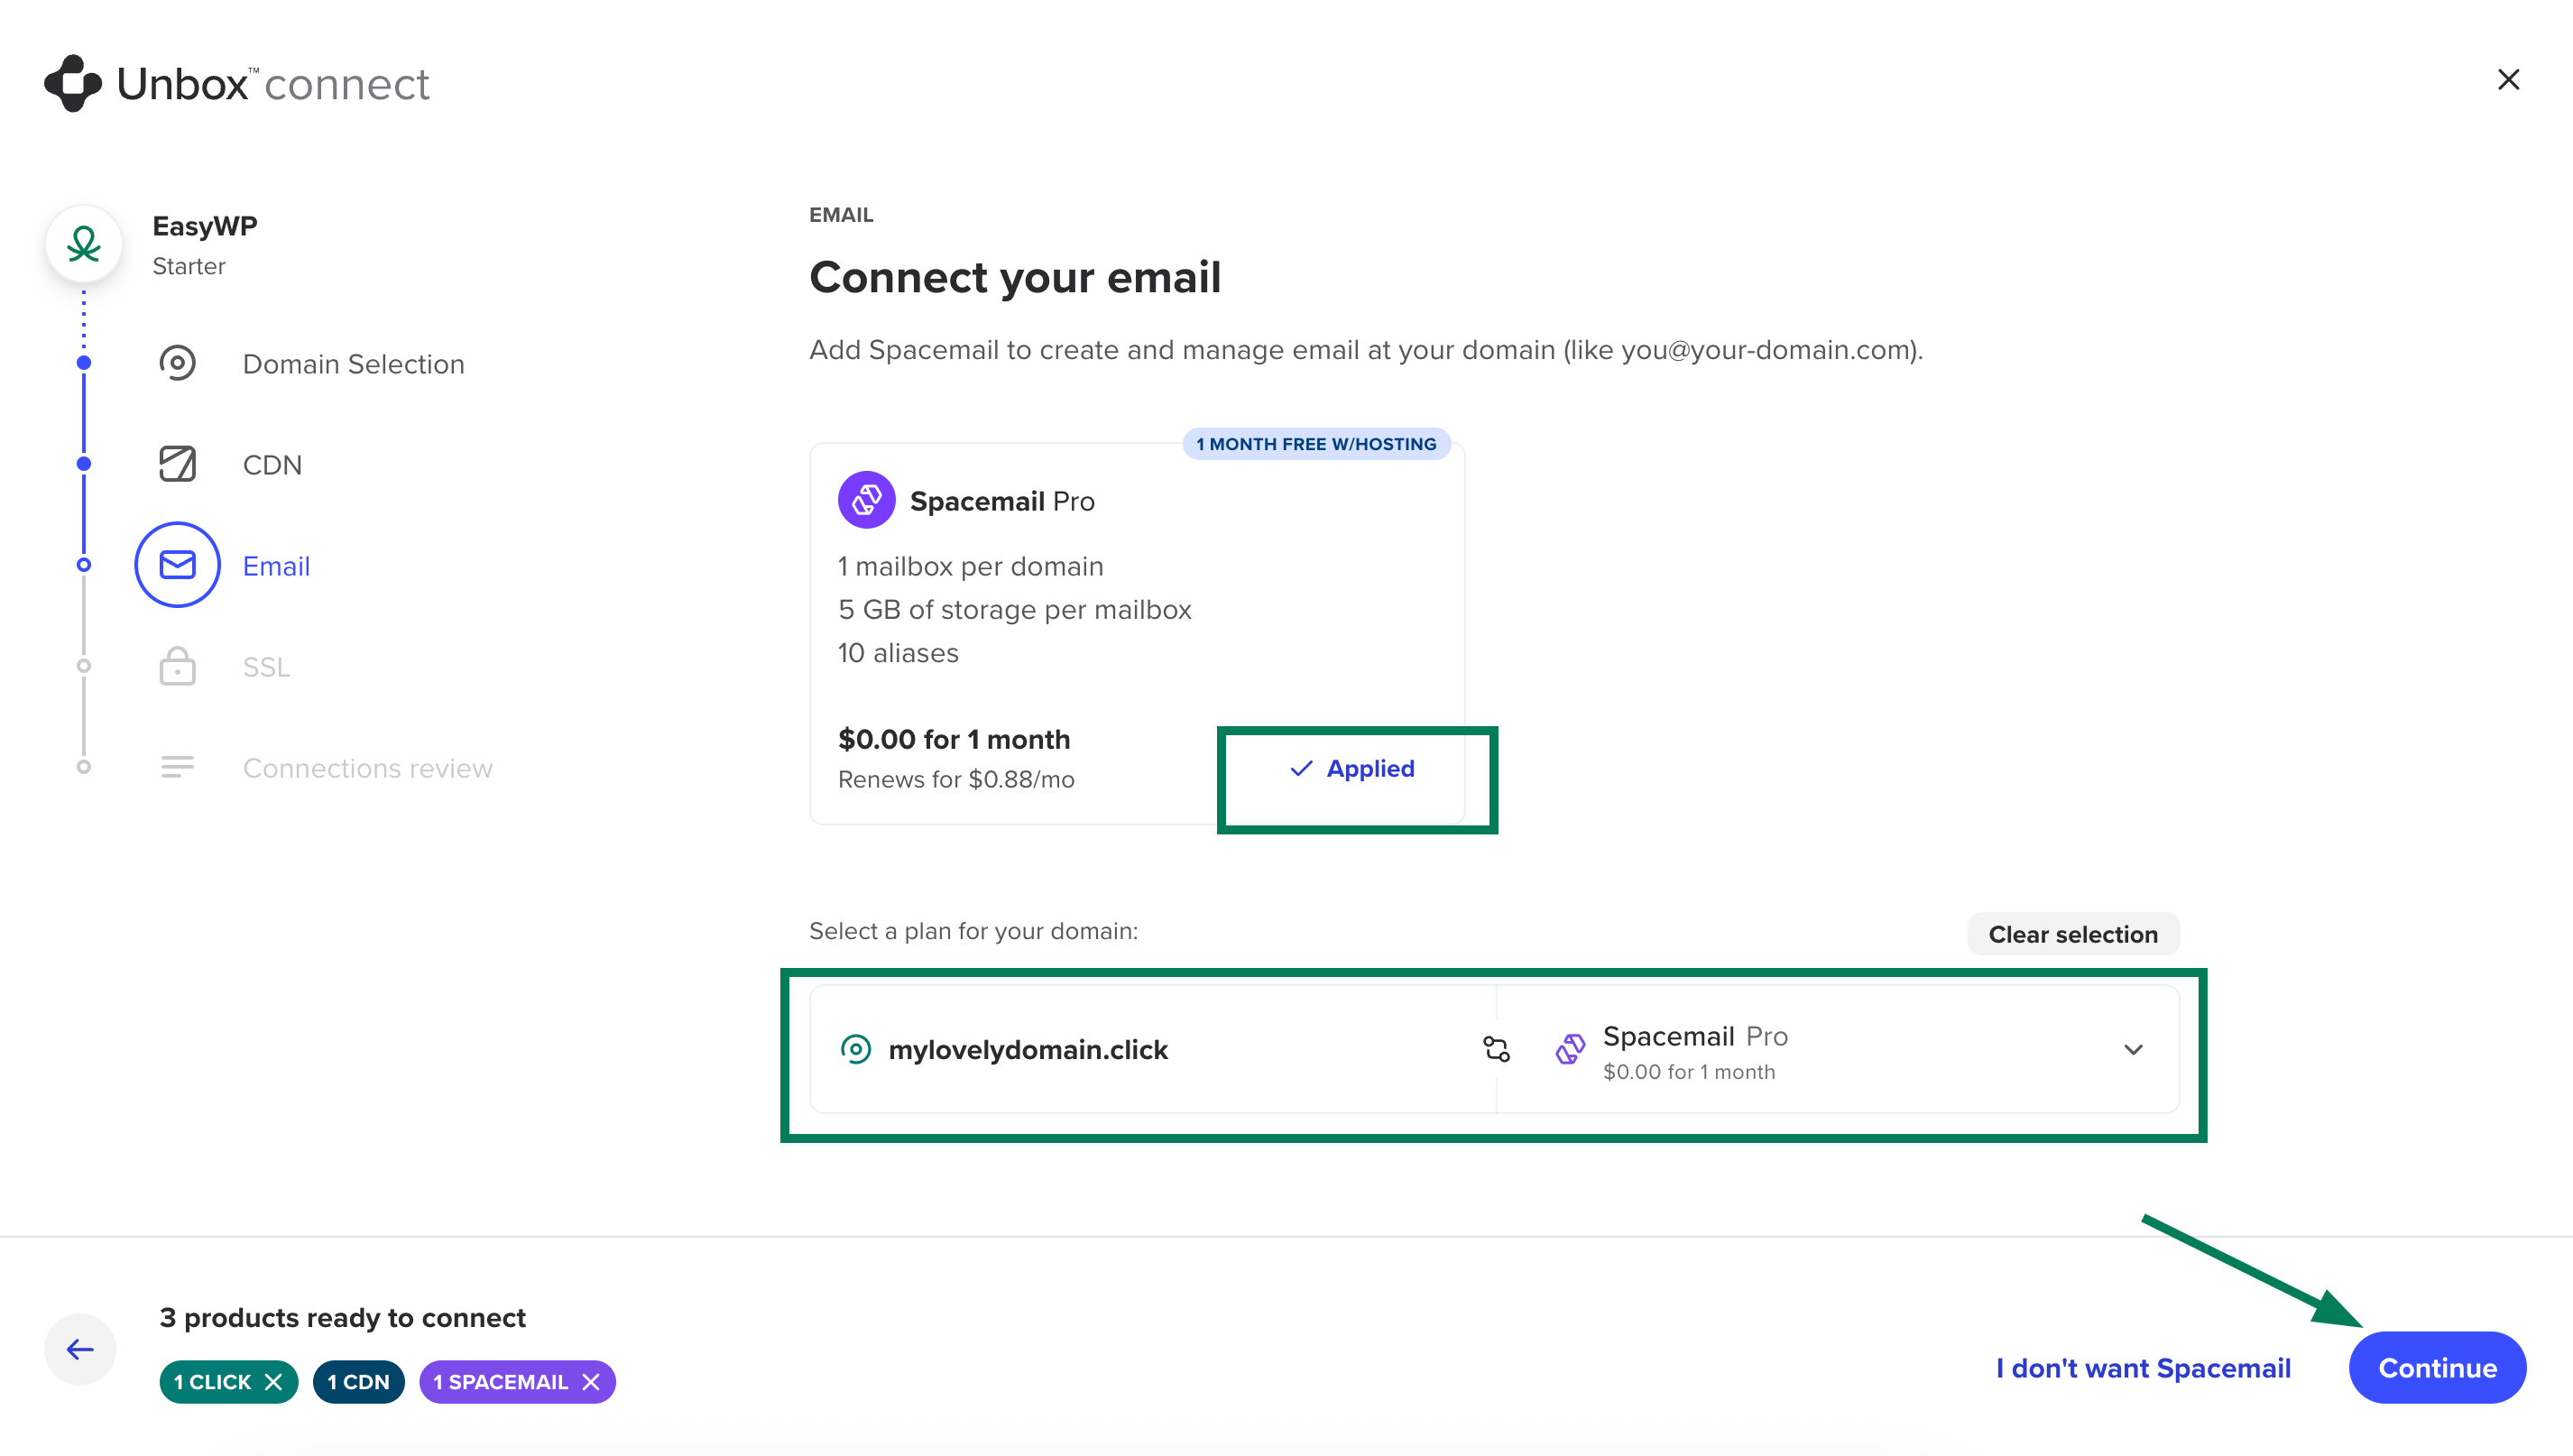
7. Then, it's possible to configure a free Spacemail subscription to create and manage email at your domain (like you@your-domain.com). You can also skip this step or select a paid Spacemail plan from the dropdown menu. In our example, we chose the free plan:
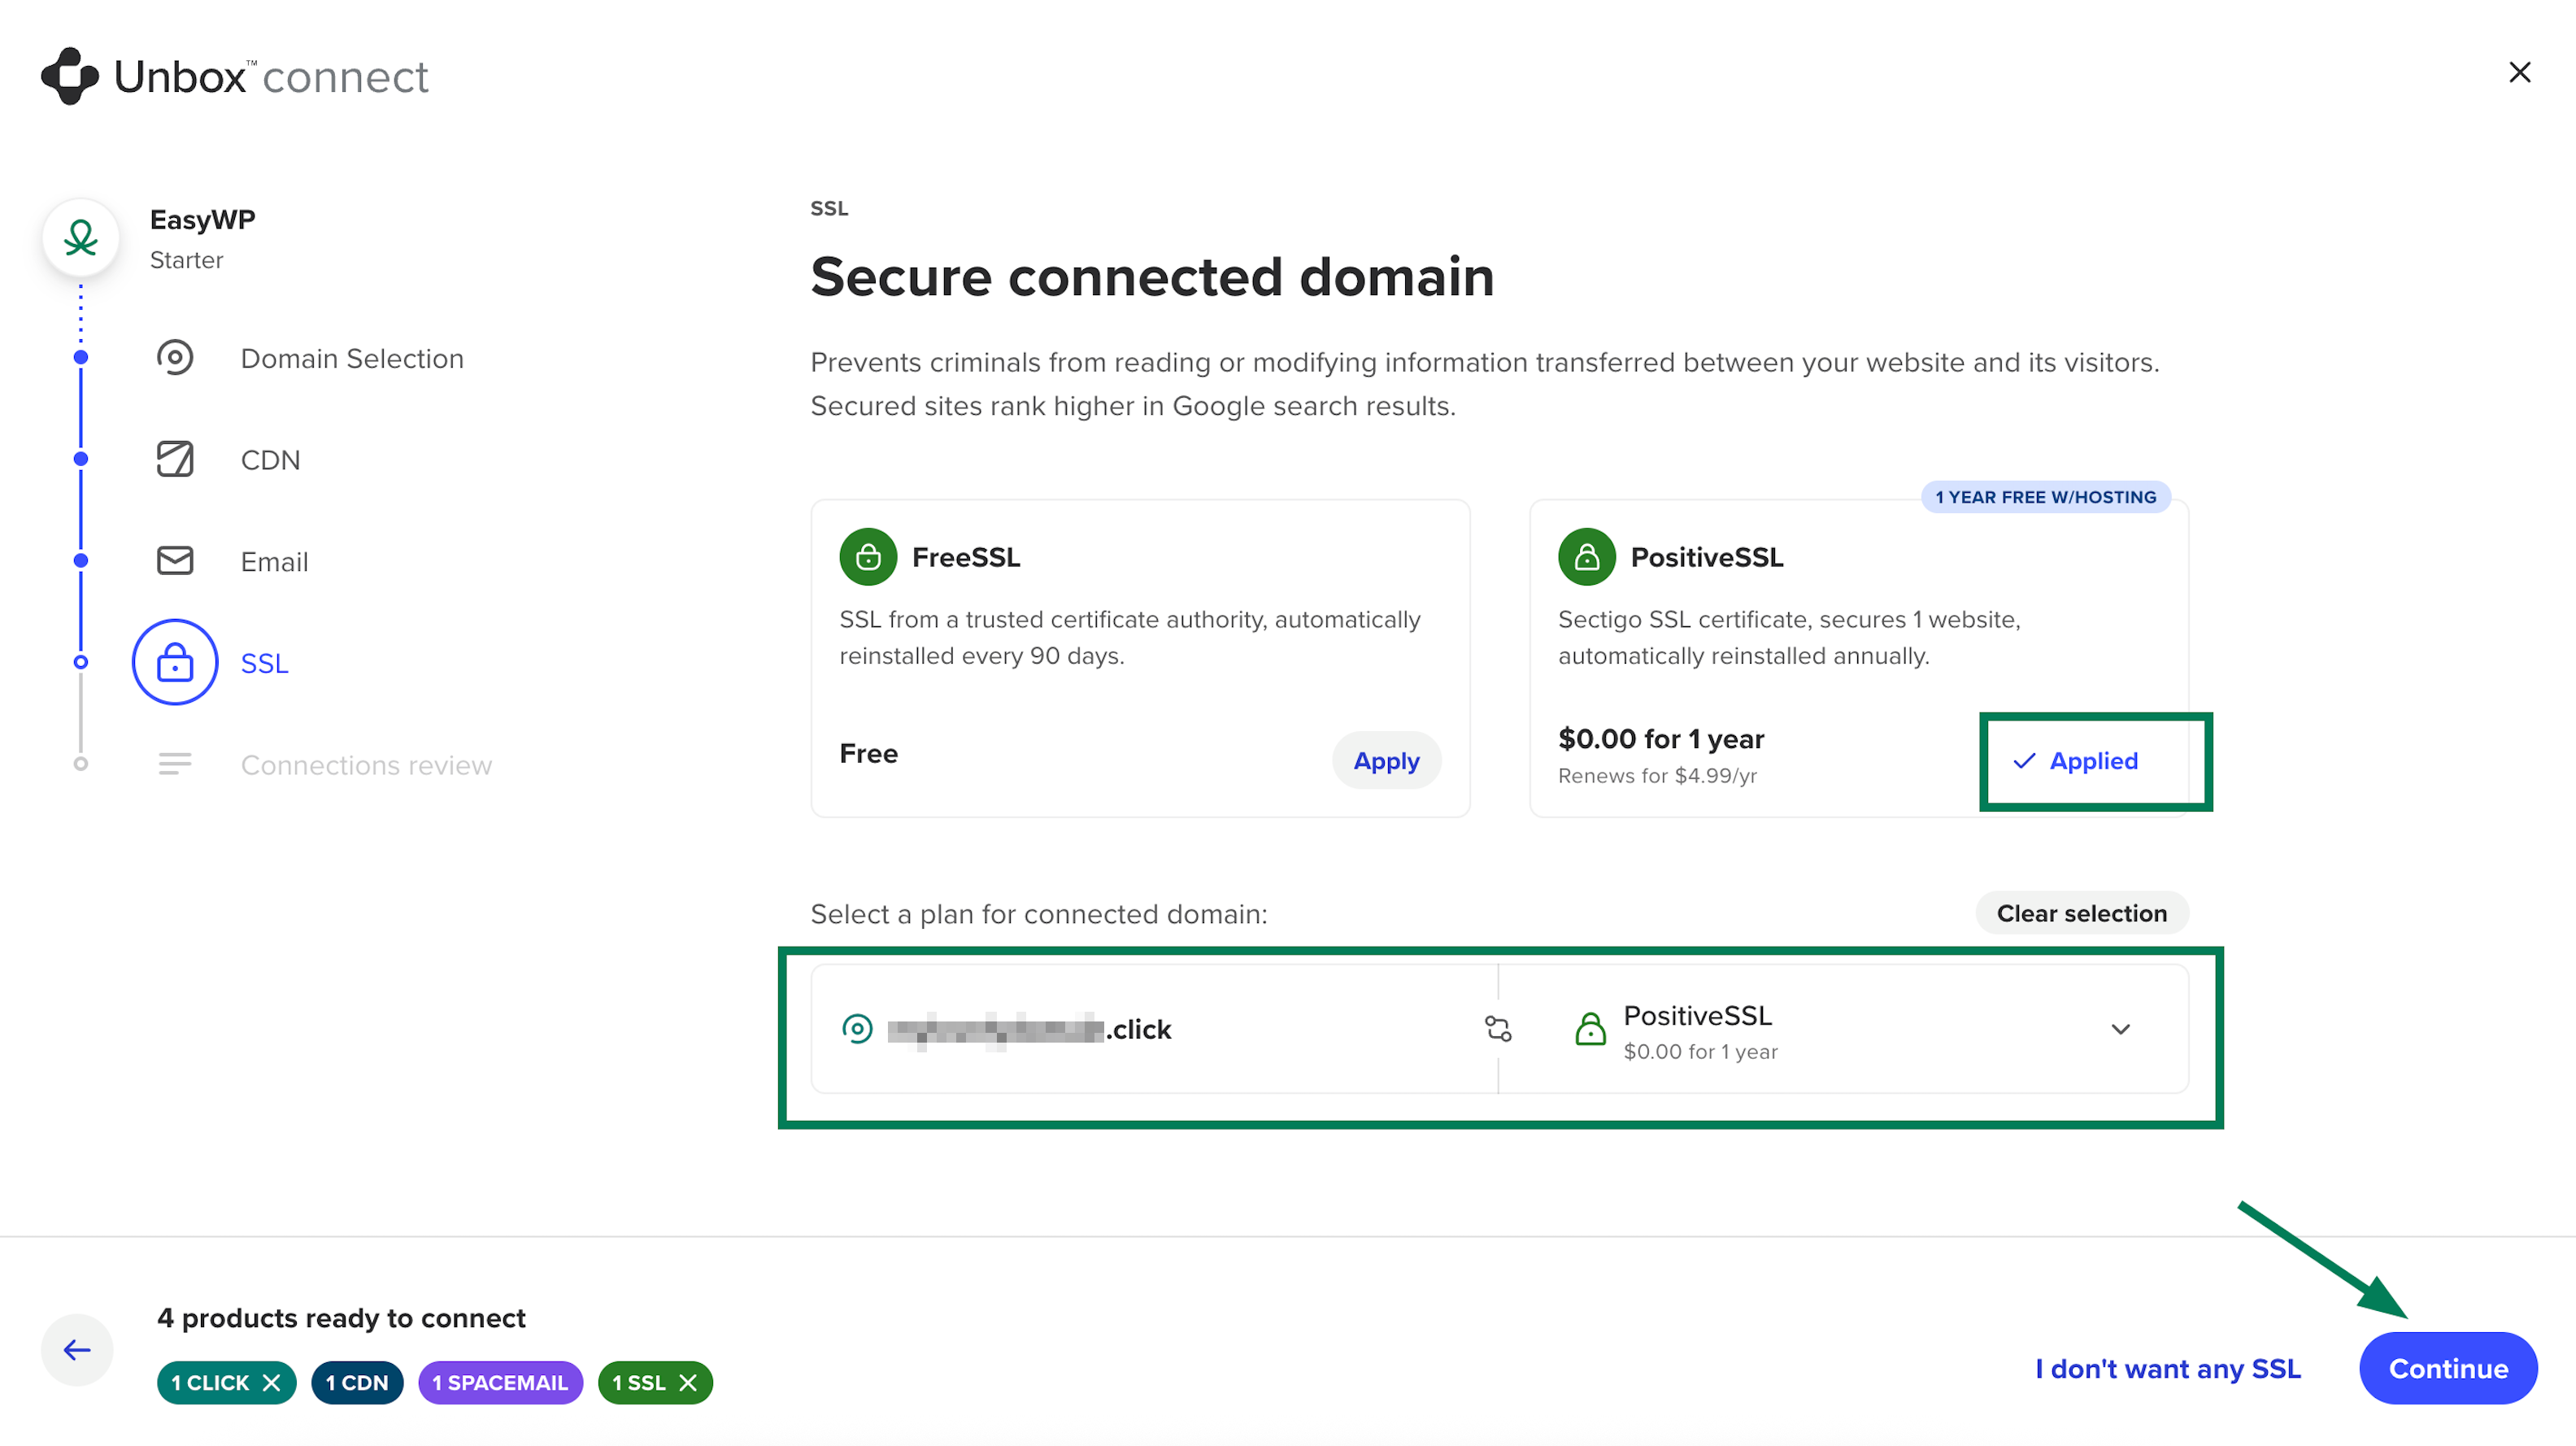
8. In the next step, it's possible to select an SSL certificate for your EasyWP subscription: Free SSL (SSL from a trusted certificate authority, automatically reinstalled every 90 days) or Positive SSL (Sectigo SSL certificate, secures 1 website, automatically reinstalled annually).
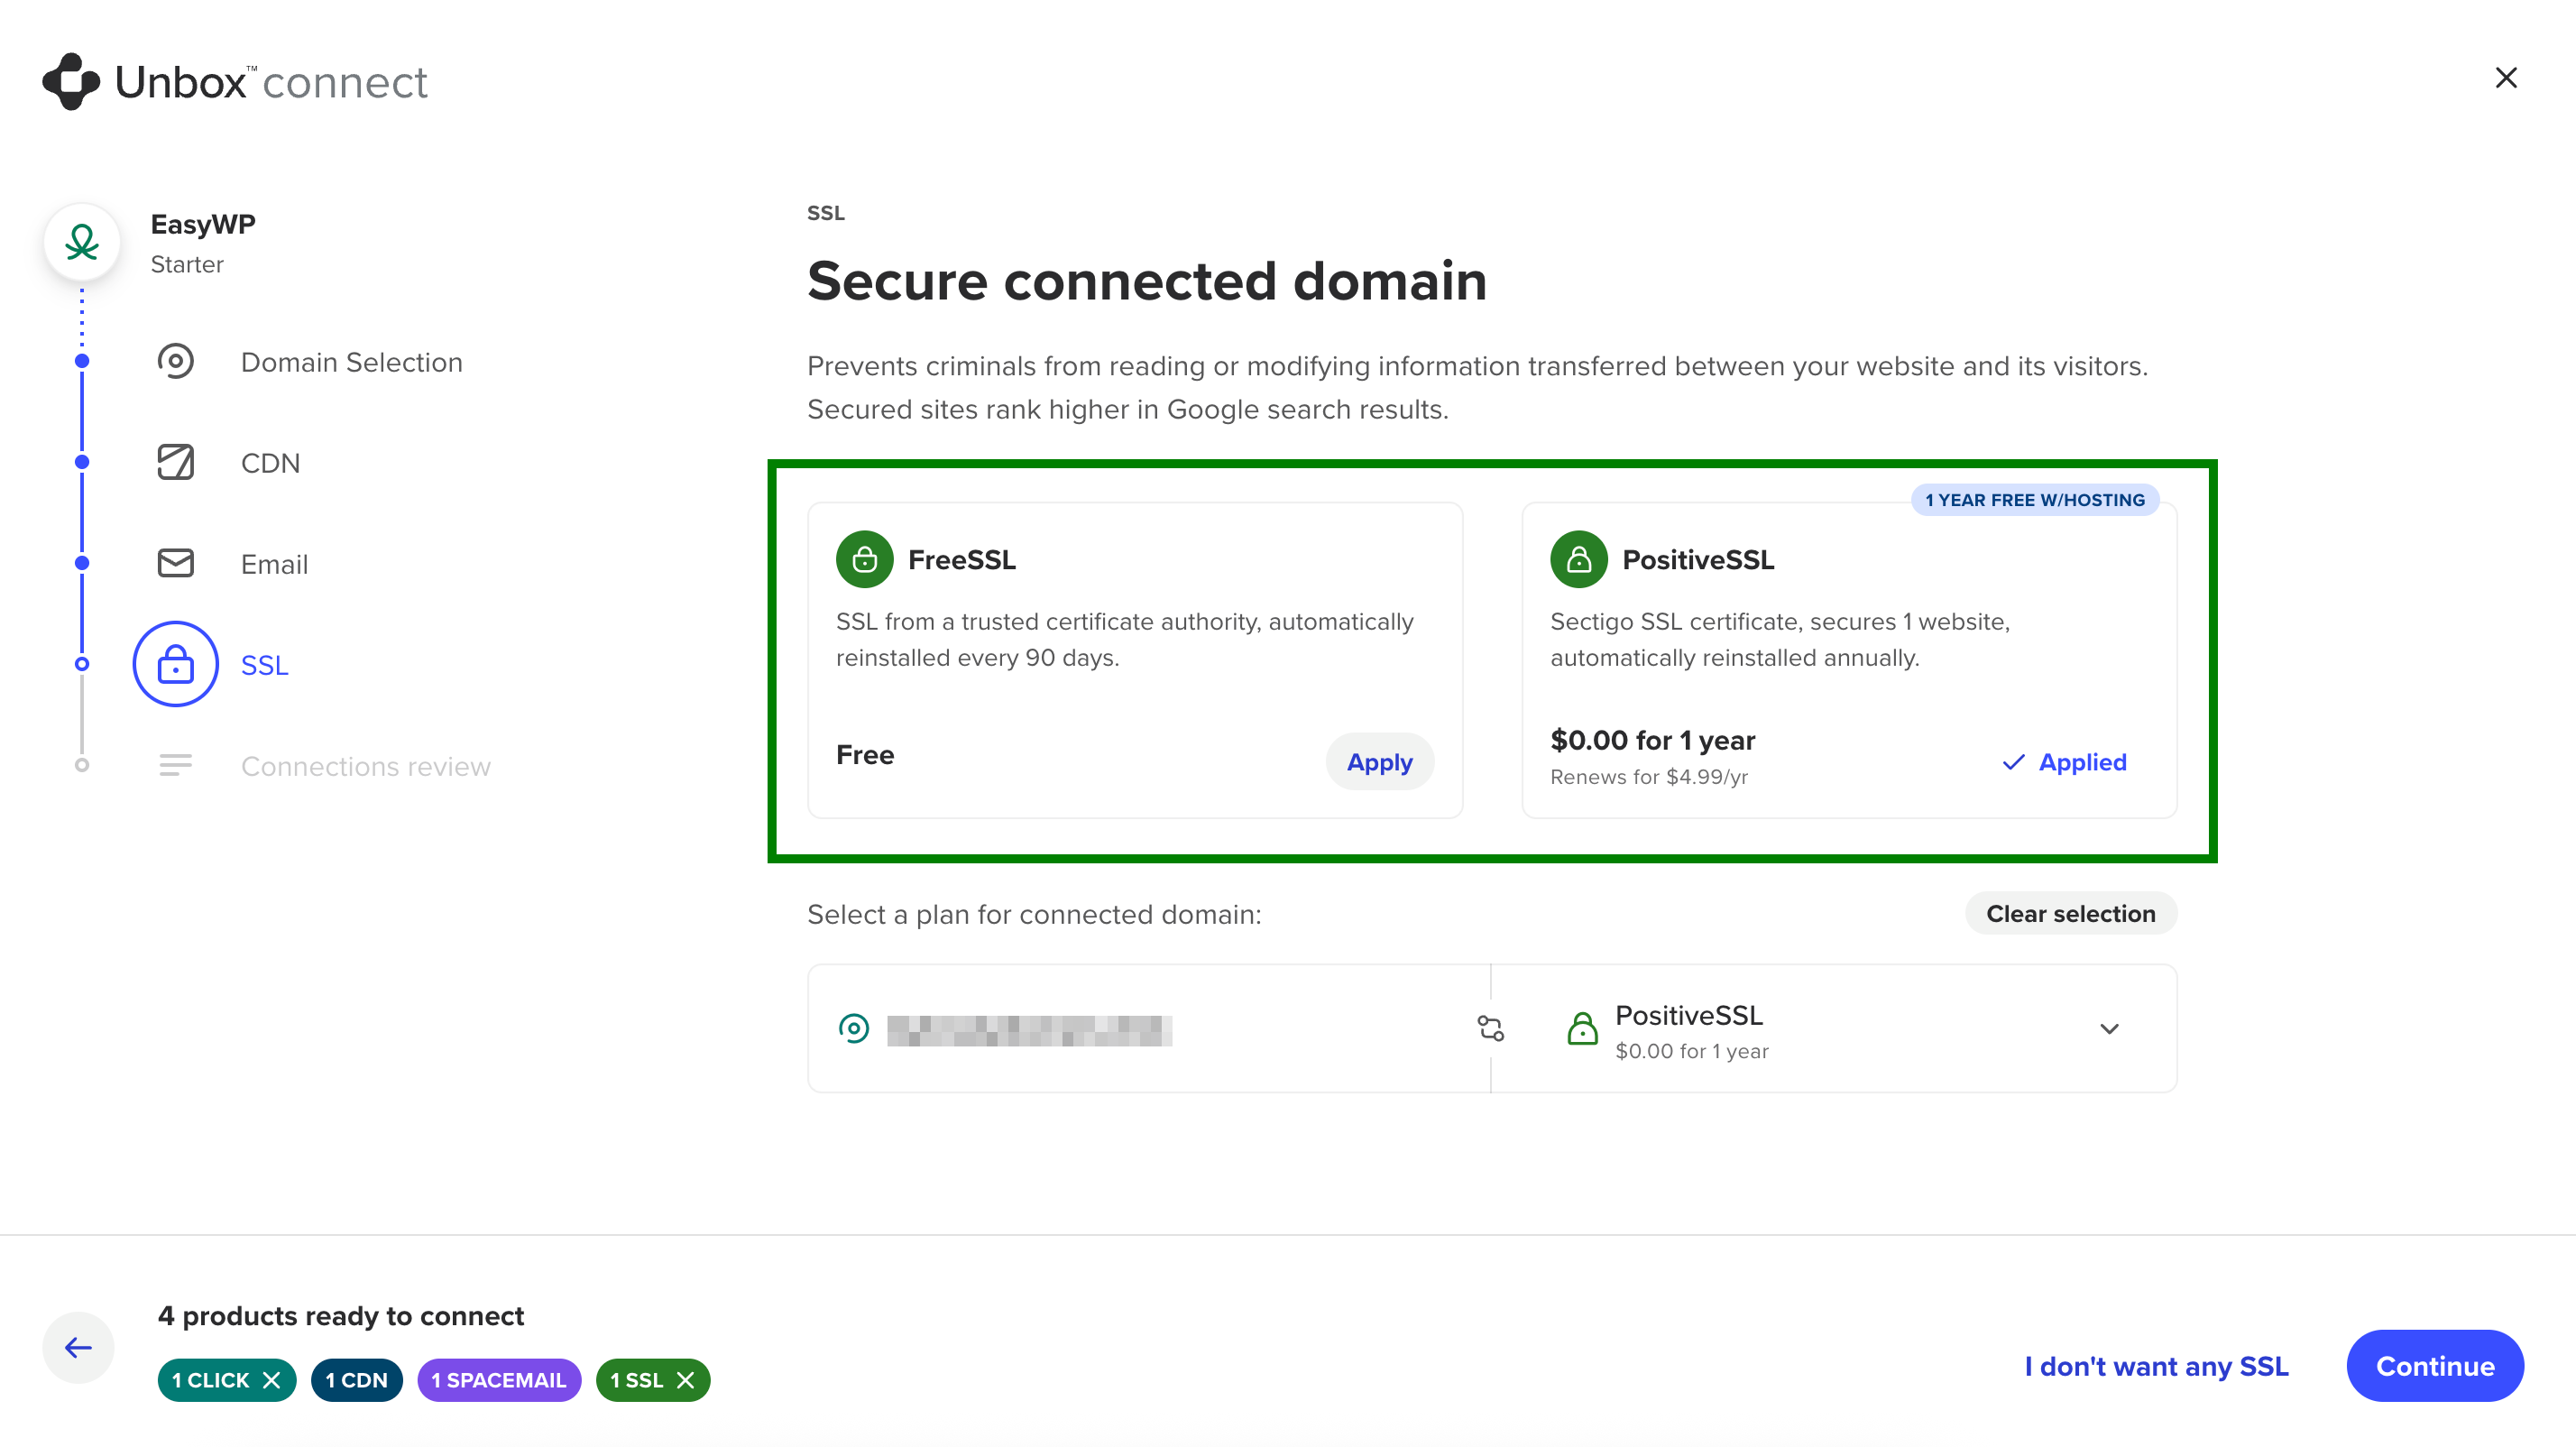
You can also opt out by selecting I don’t want any SSL. In our example, we select the FreeSSL option:
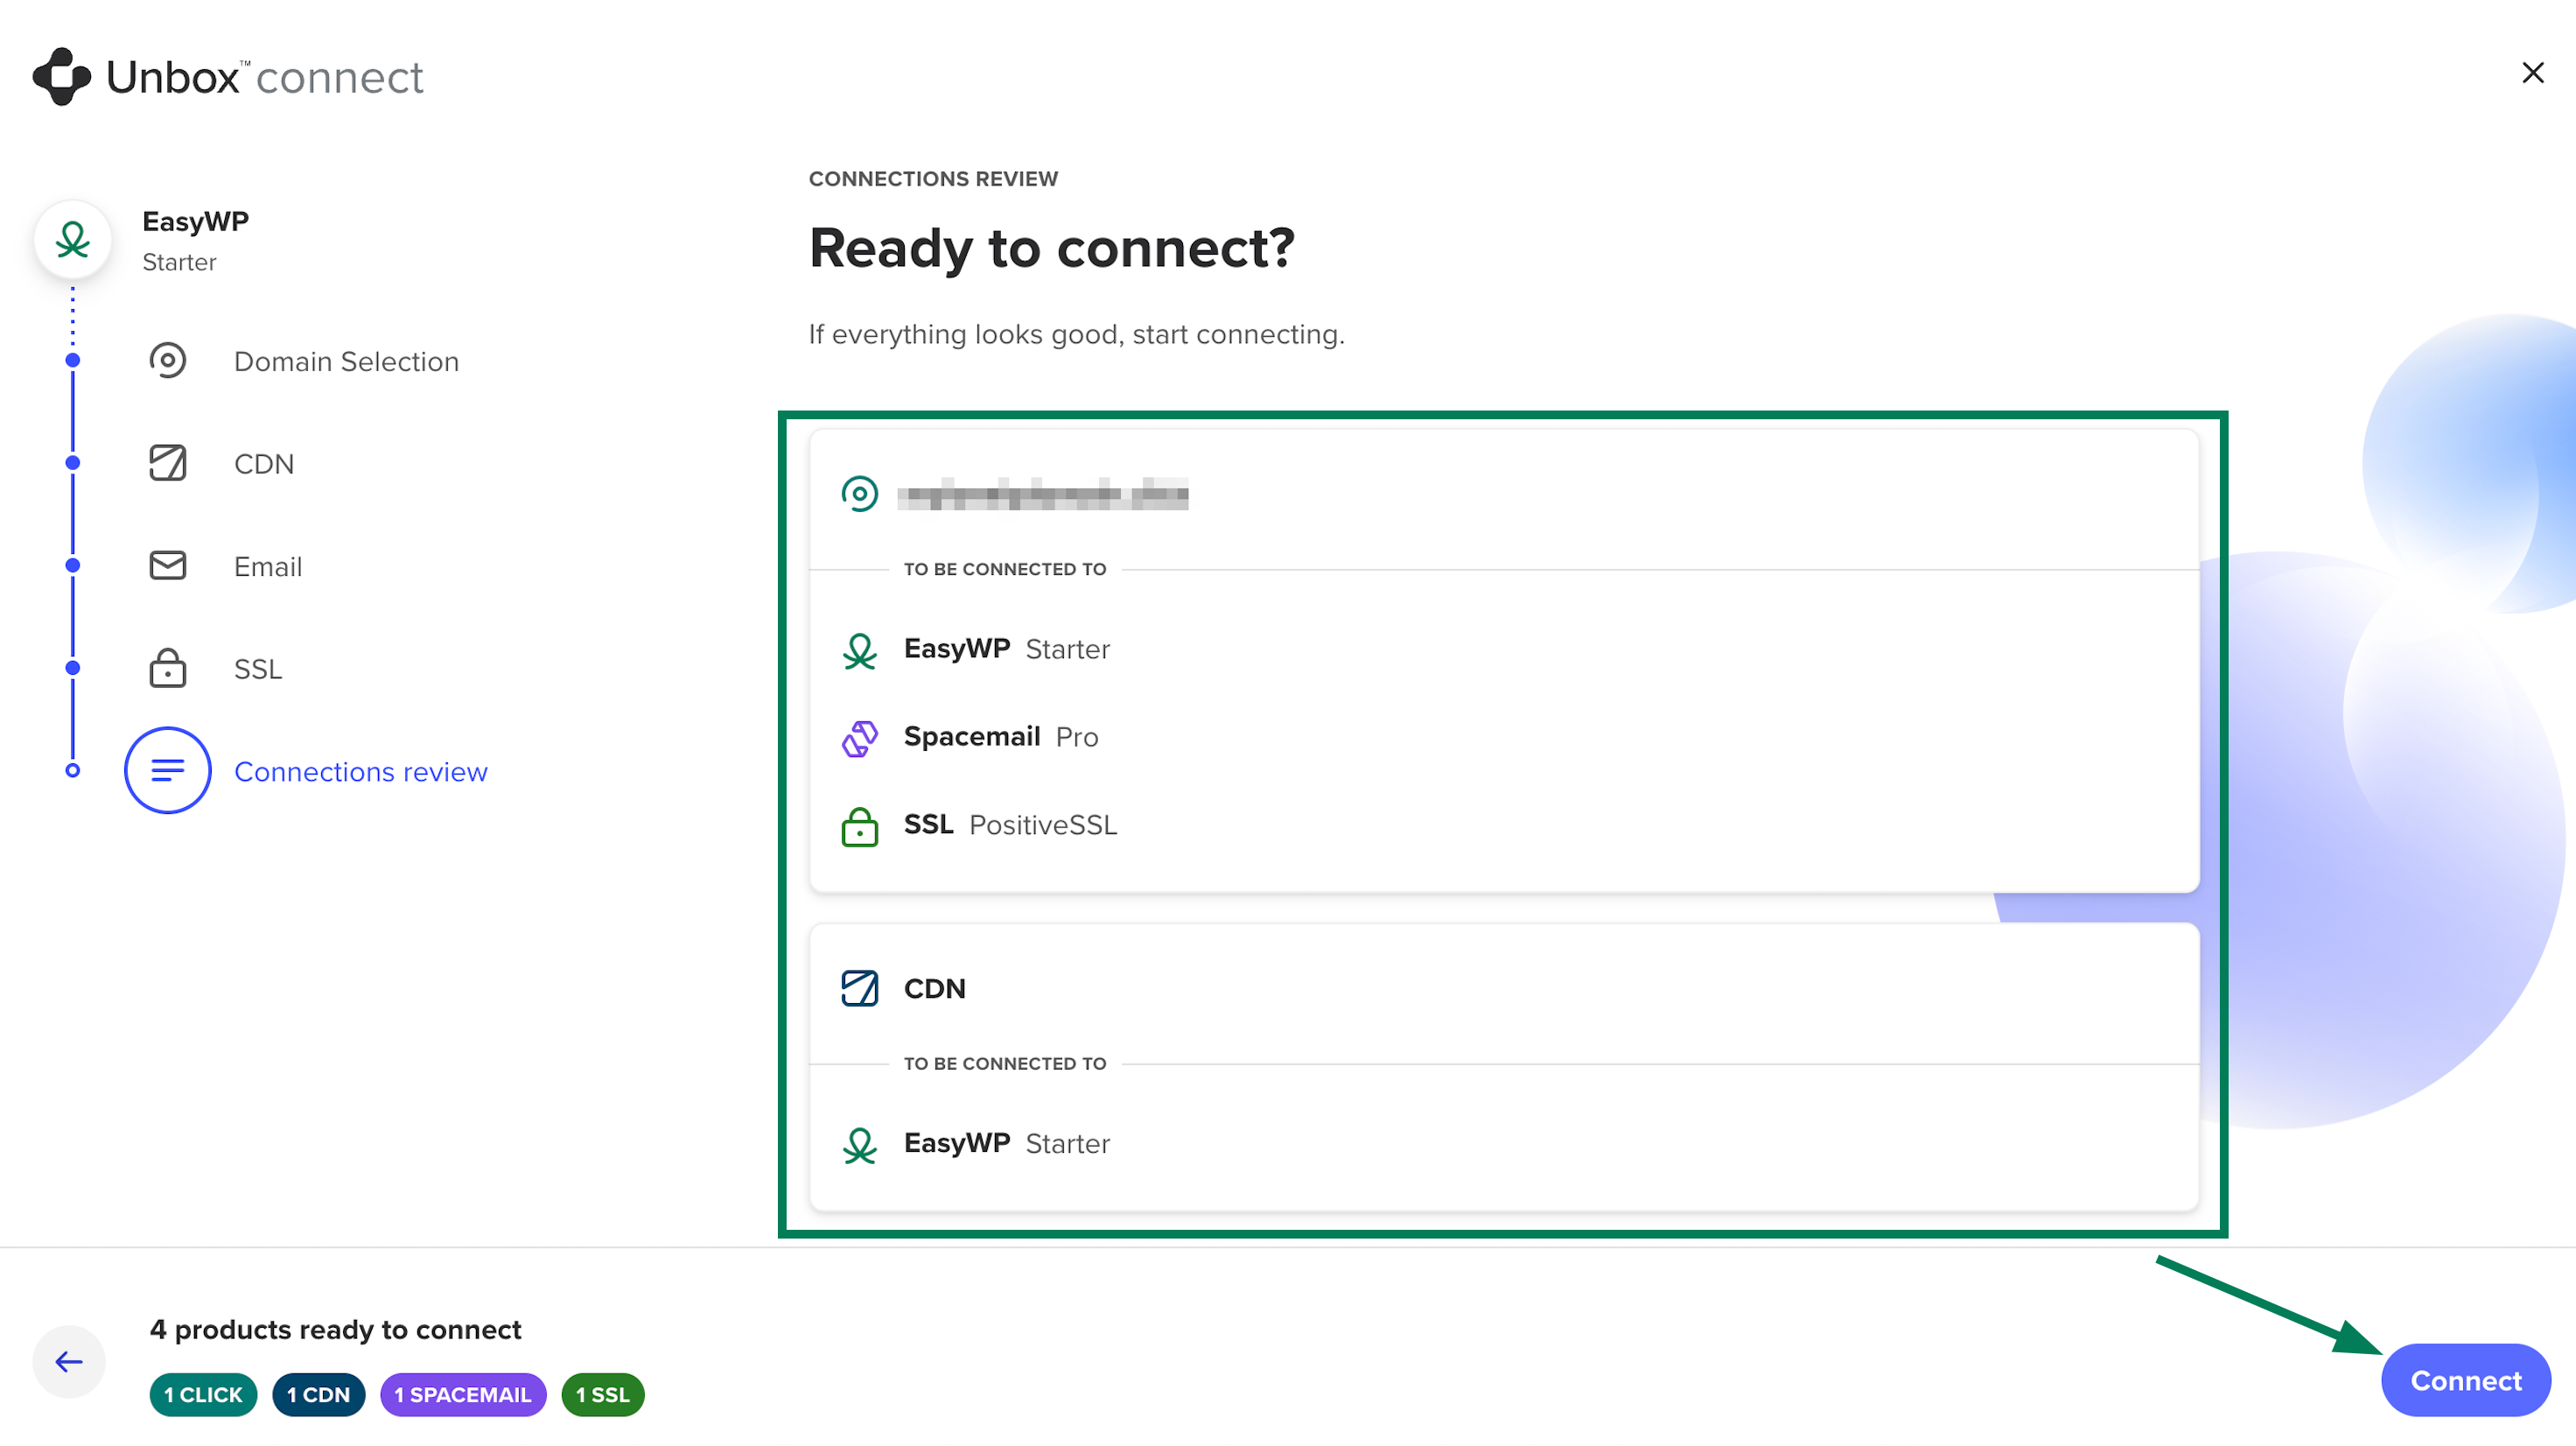
9. Then, the system provides a summary of all associated services and what they’re connected to. If everything looks good, hit Connect:
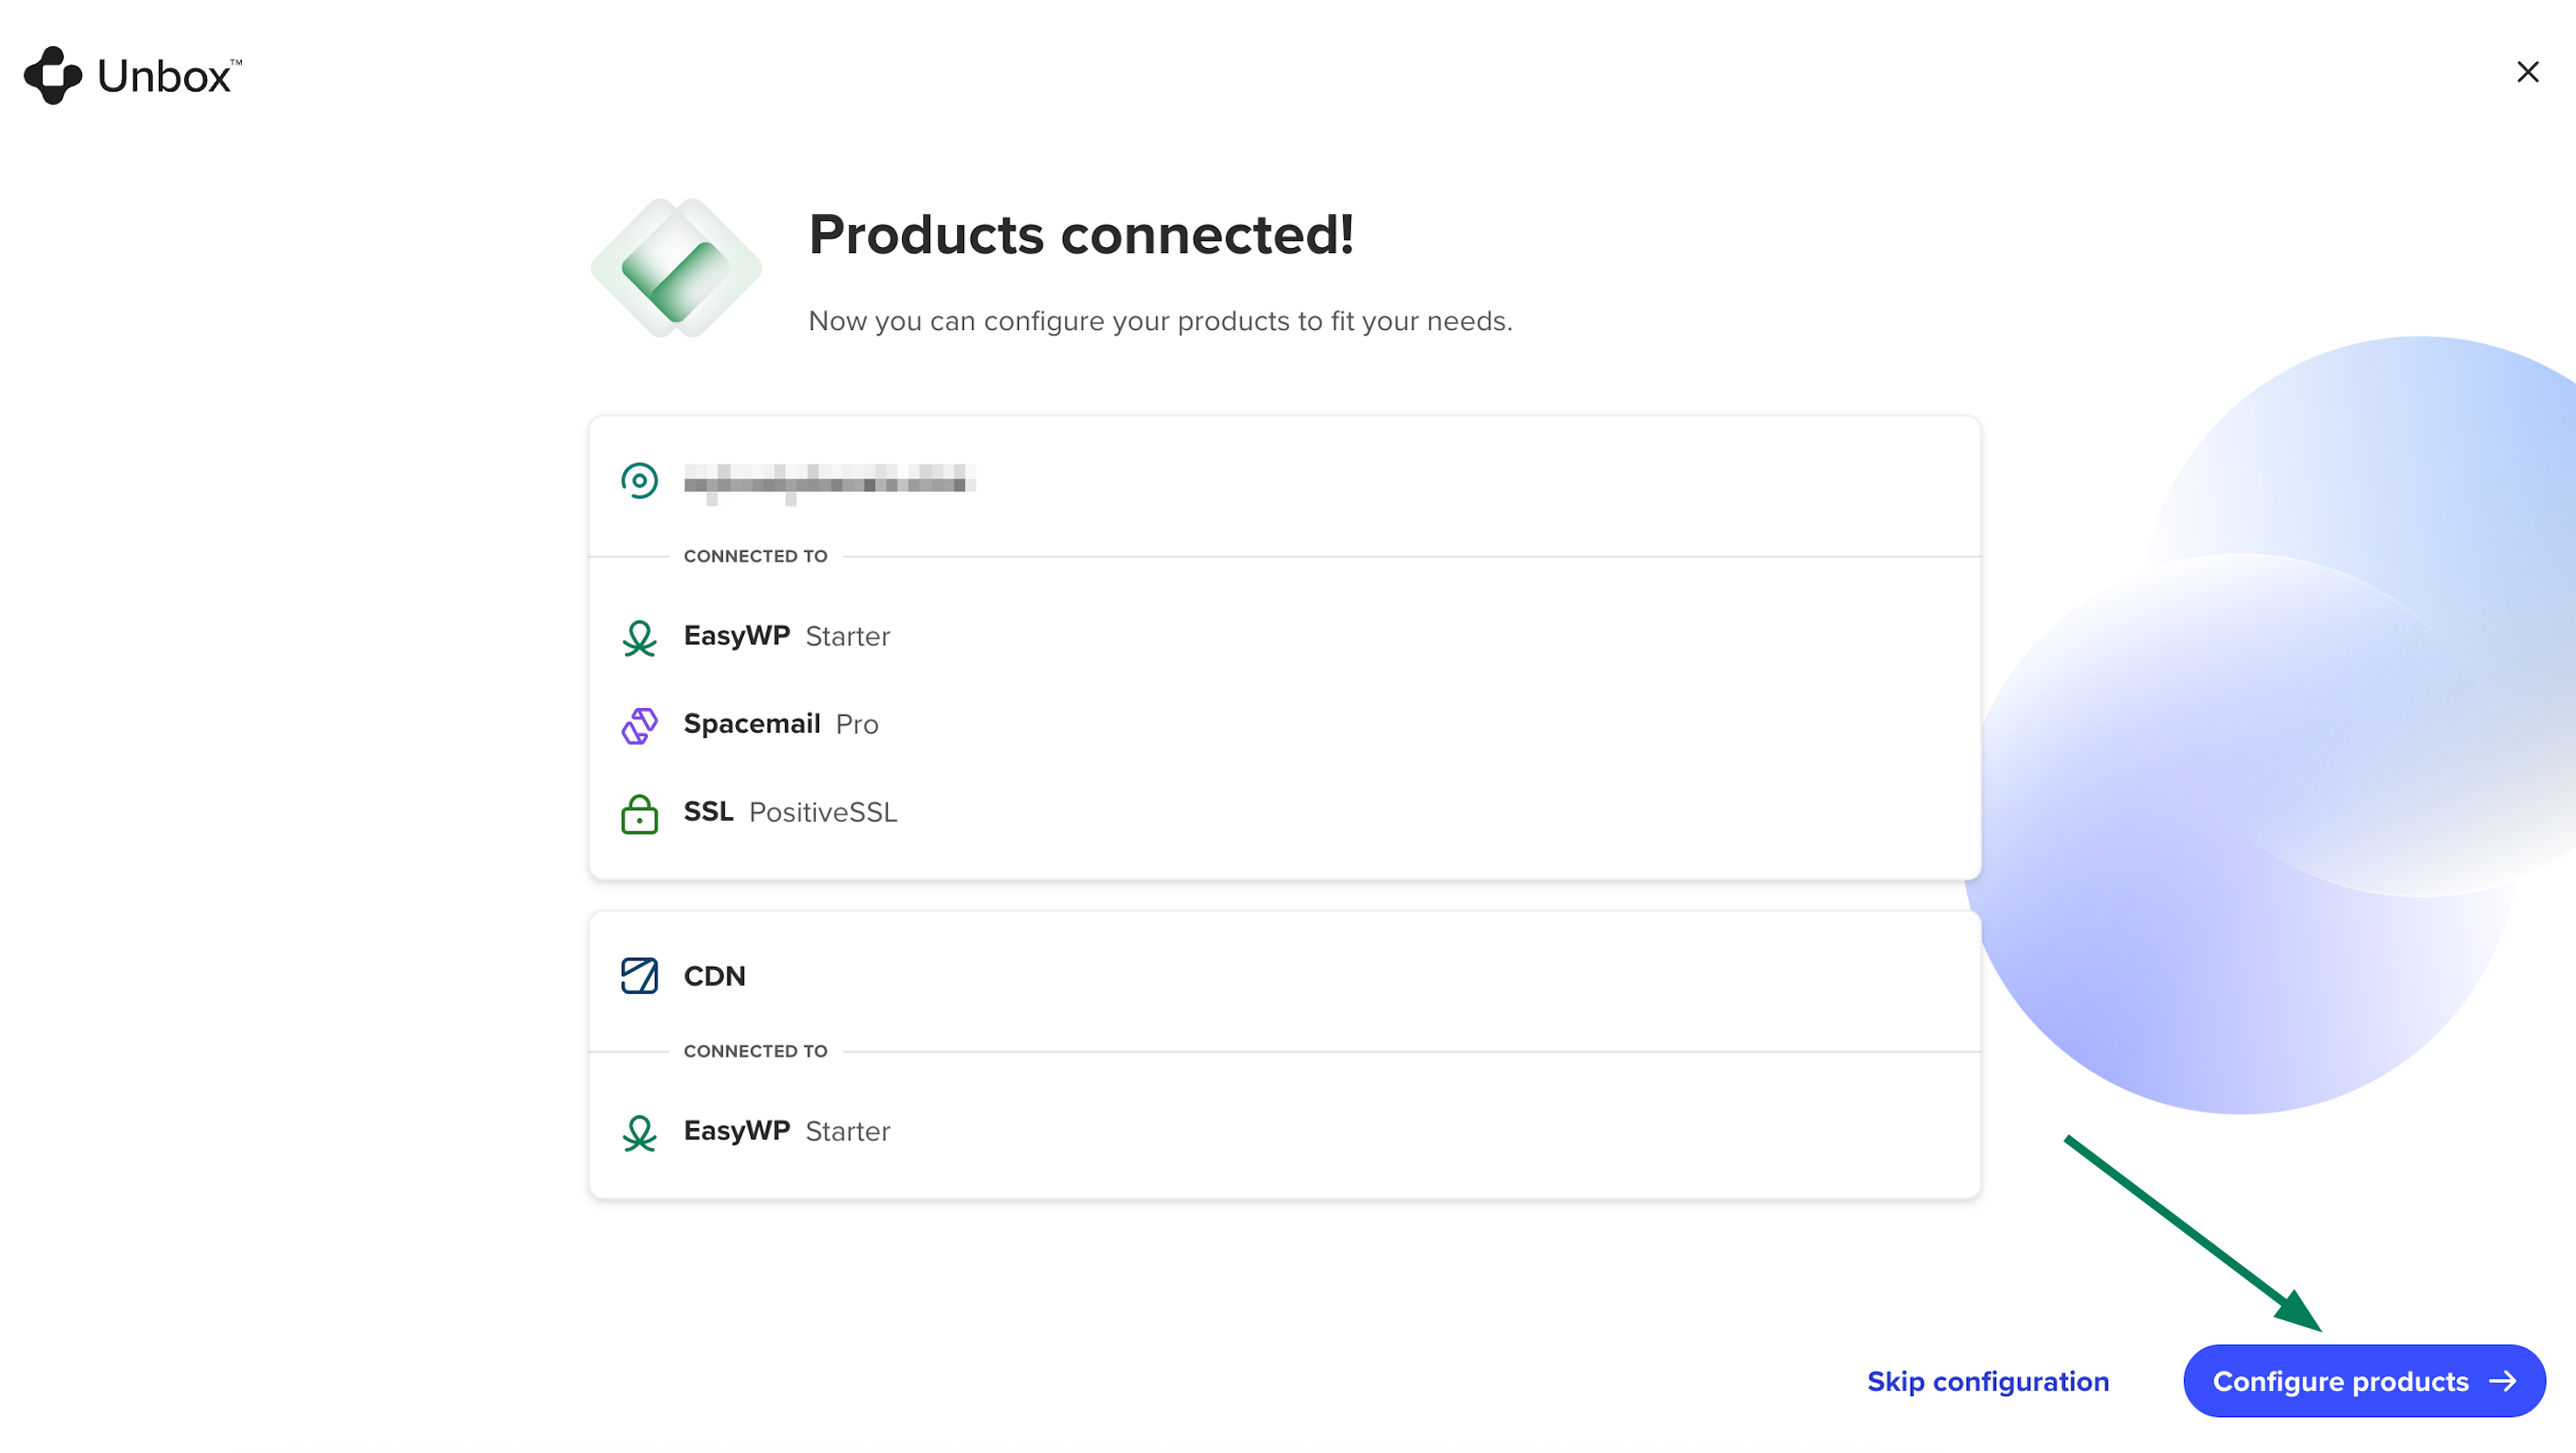
10. Once the products are connected, hit Configure products or Skip configuration. In our example, we select the Configure products option:
11. Spacemail will be configured first. Hit Configure to continue email configuration, or Skip step to proceed with the EasyWP configuration right away. In our example, we select the Configure option:
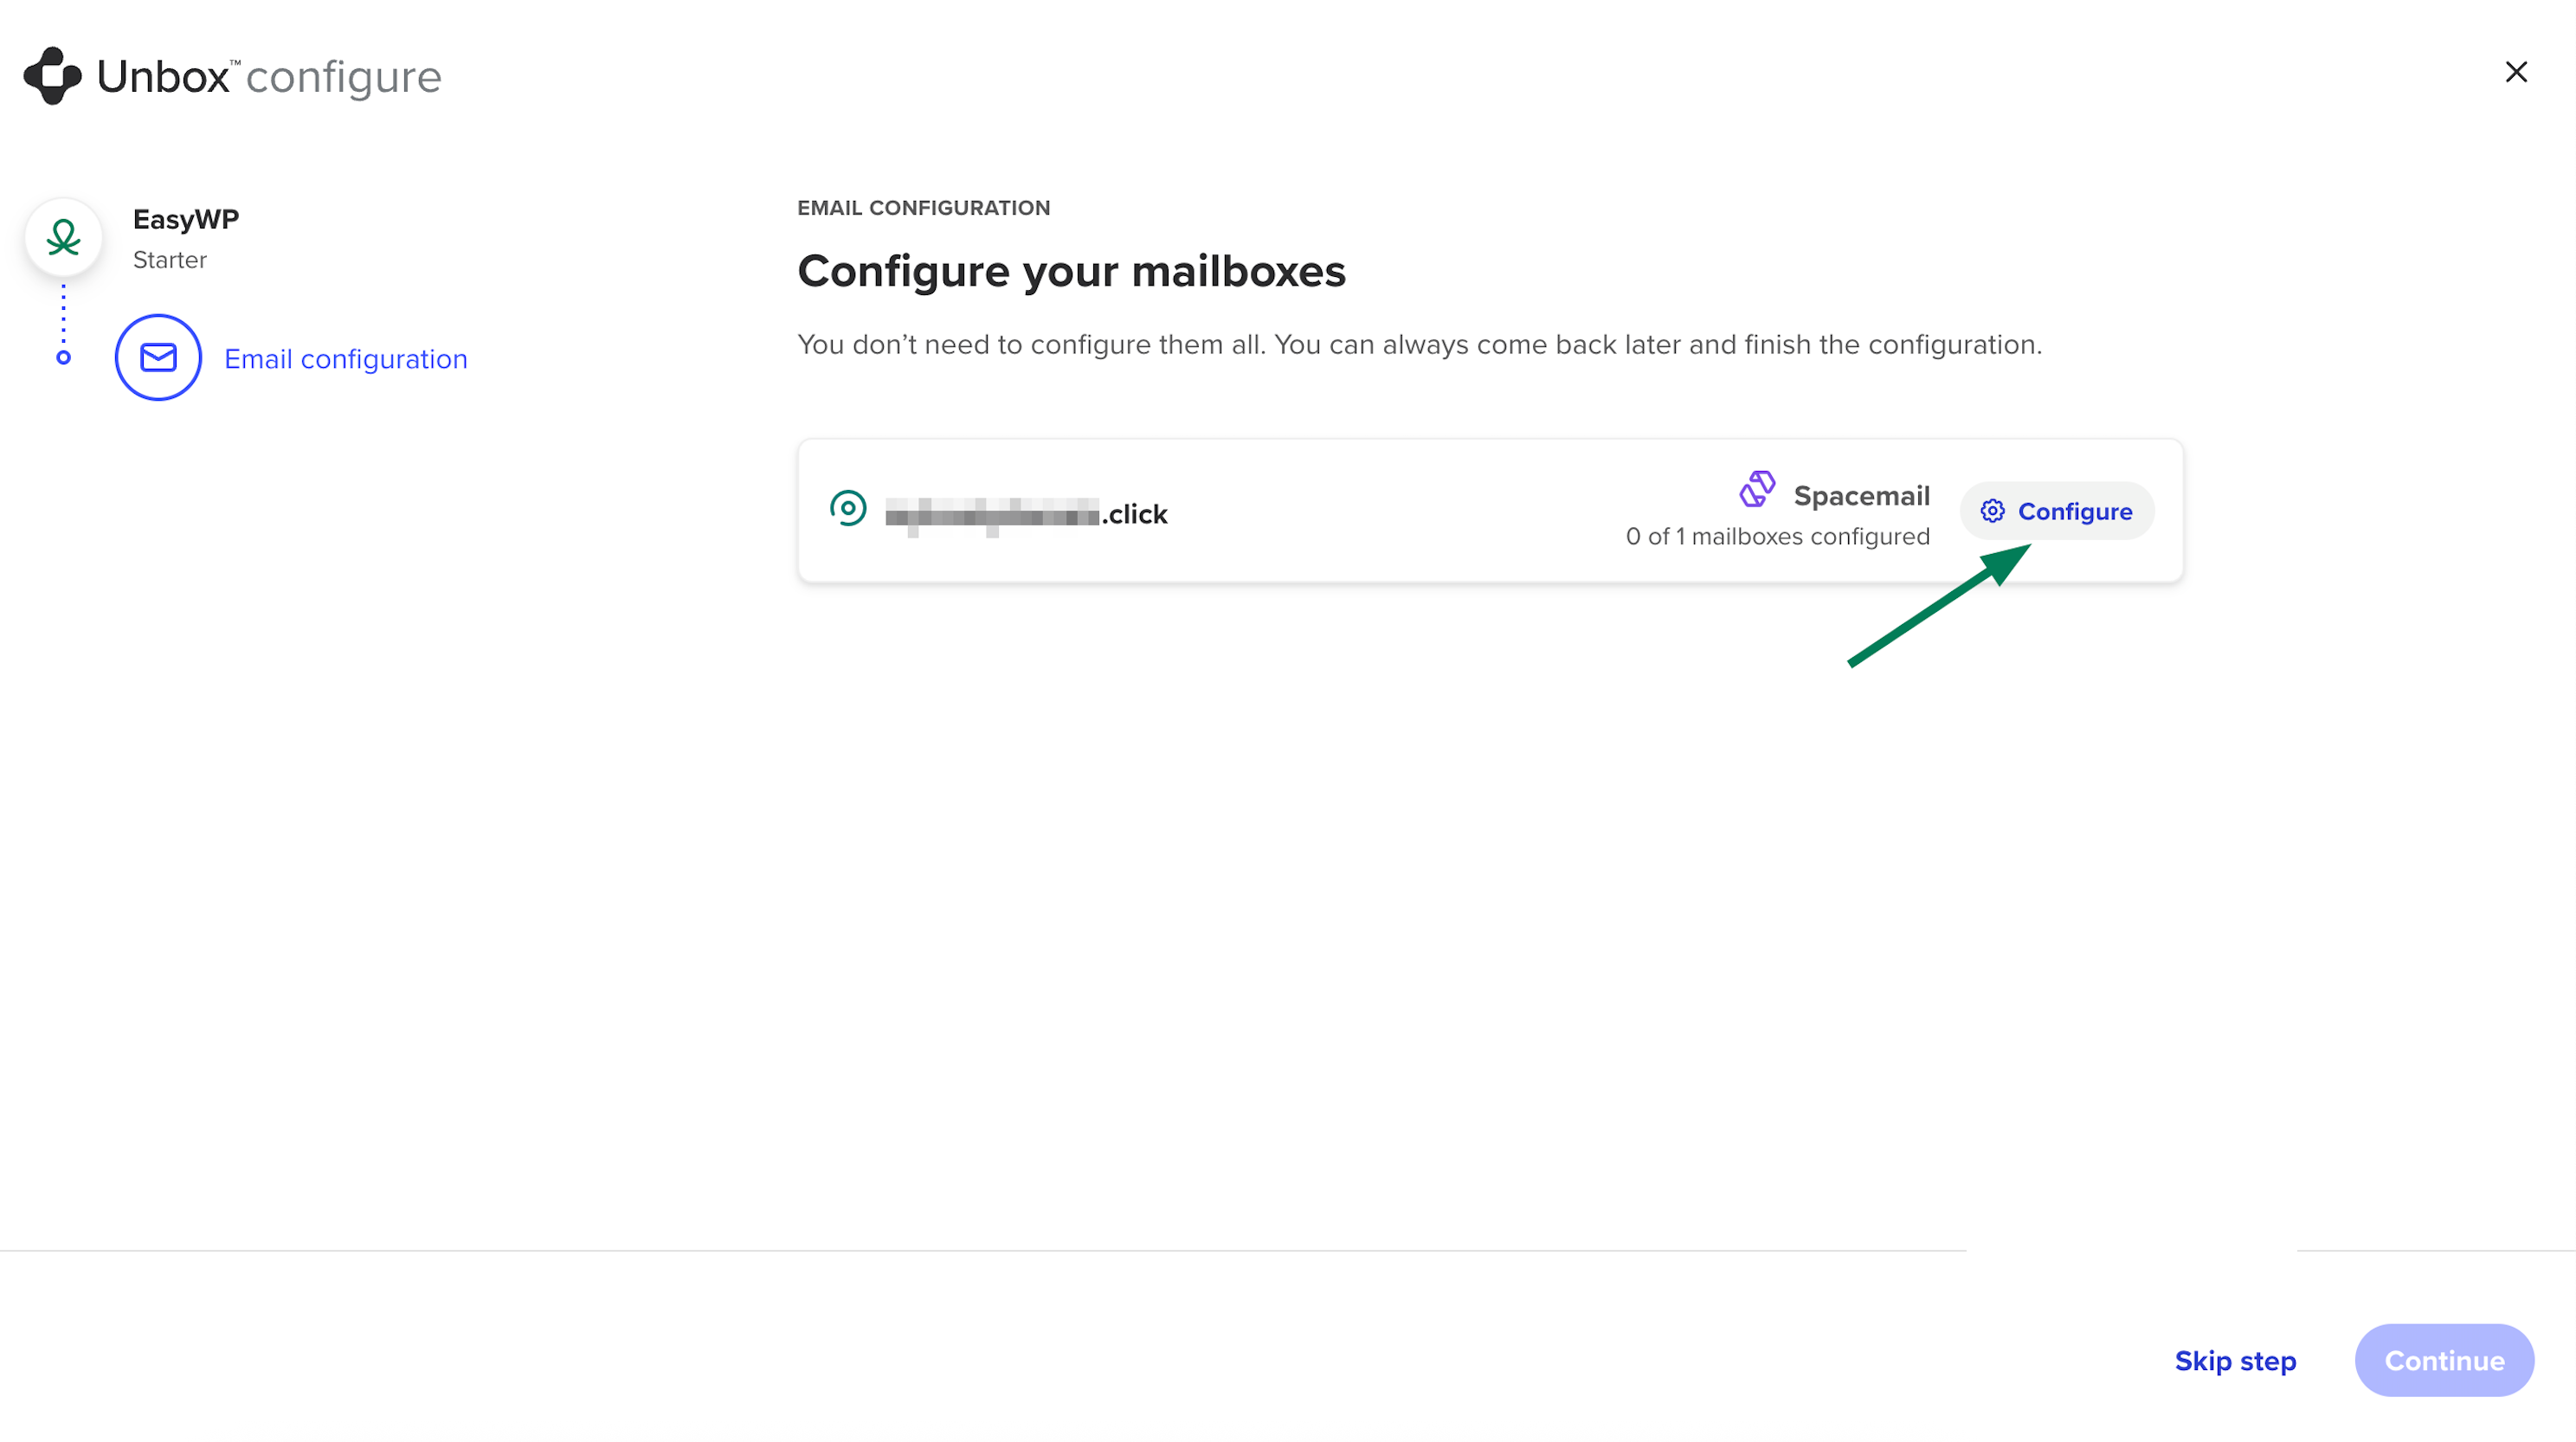
12. In the next step, you can create your mailboxes:
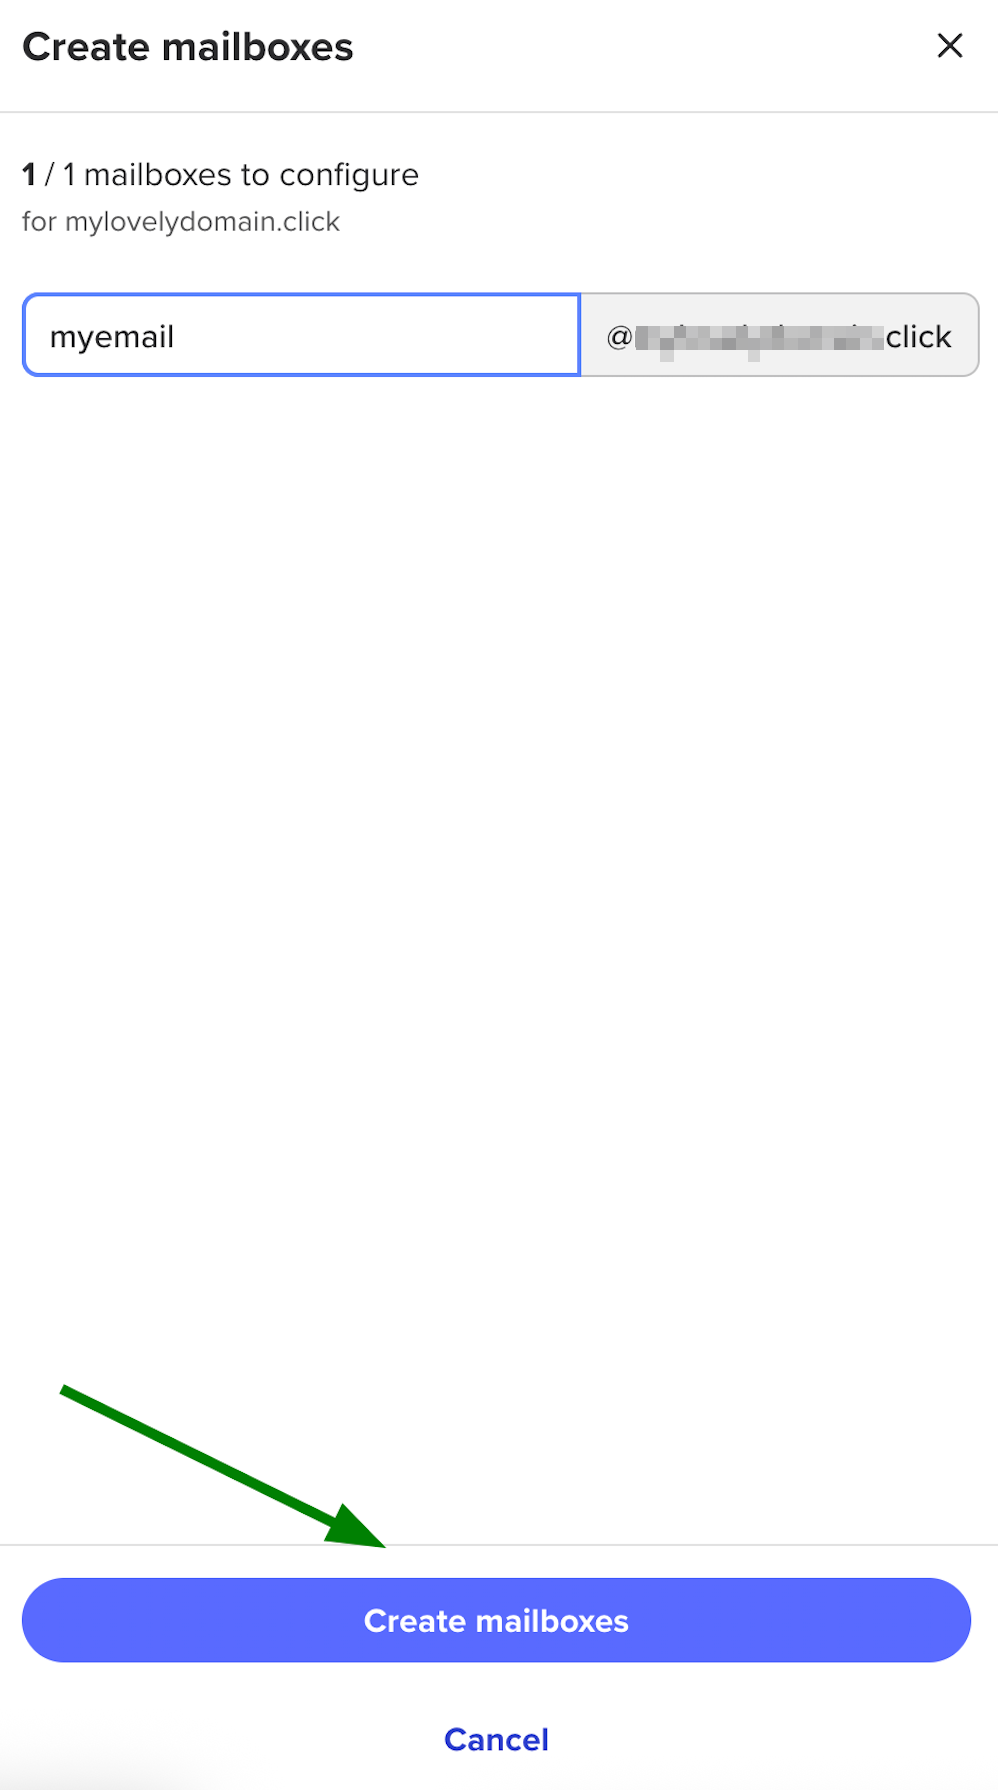
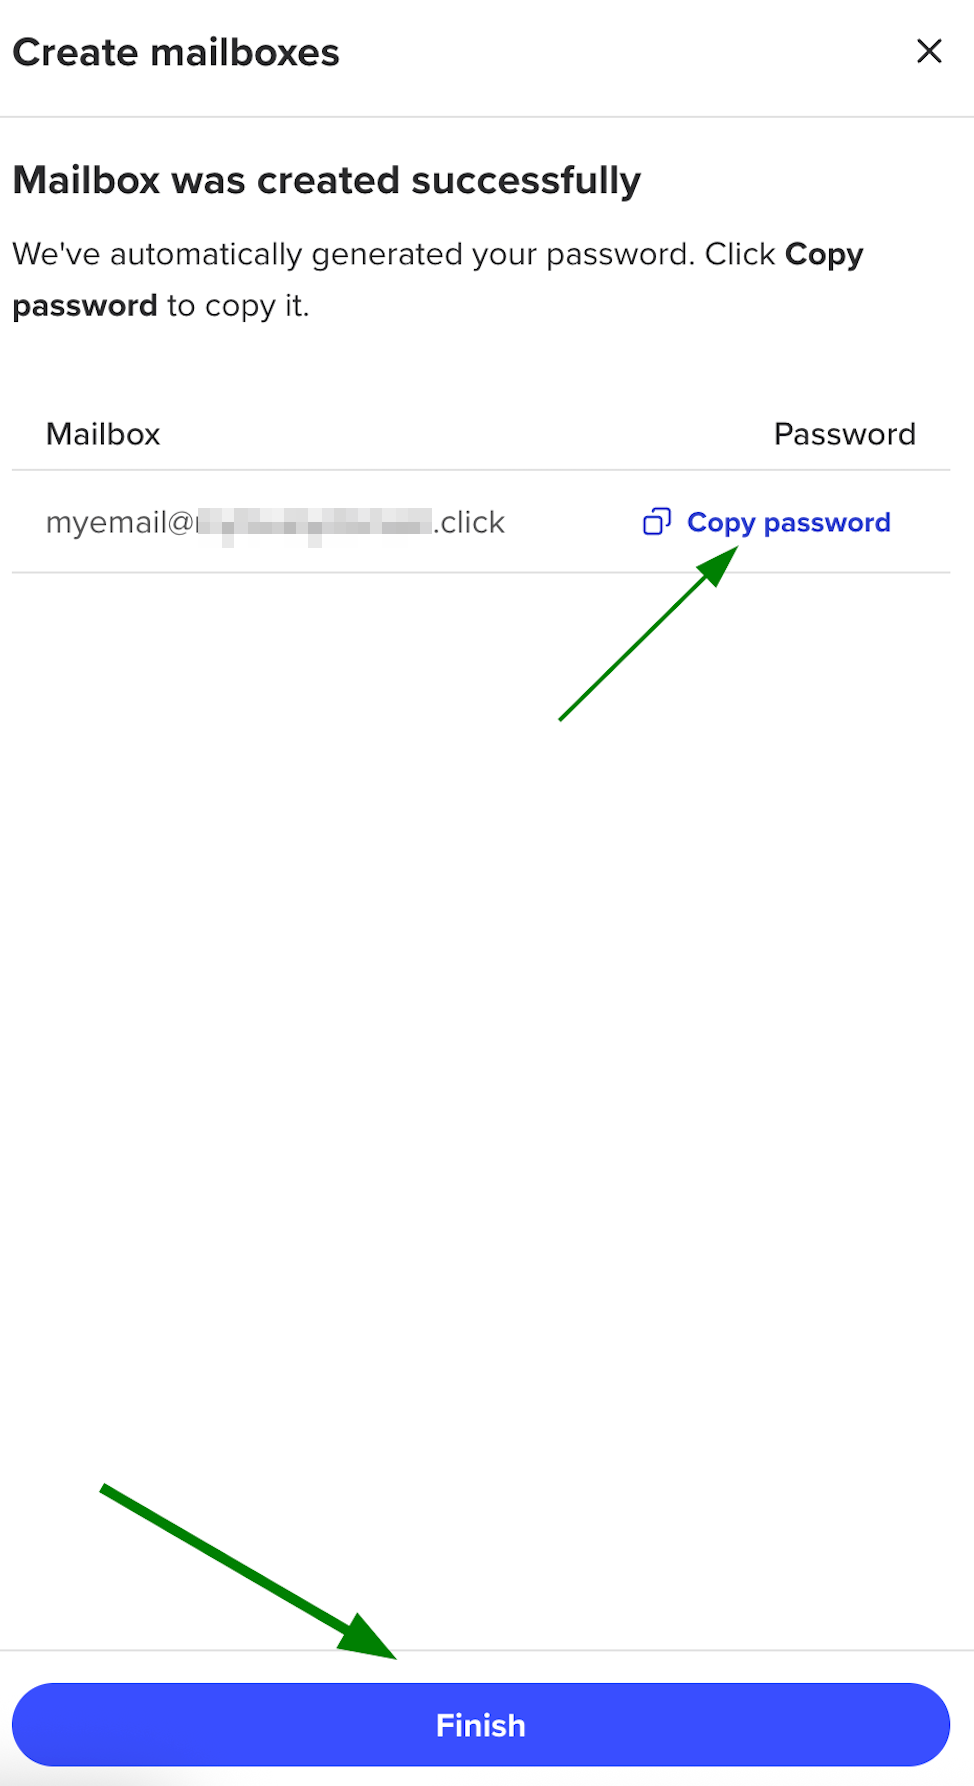
13. To finish, hit I’m done or Open in EasyWP Manager:
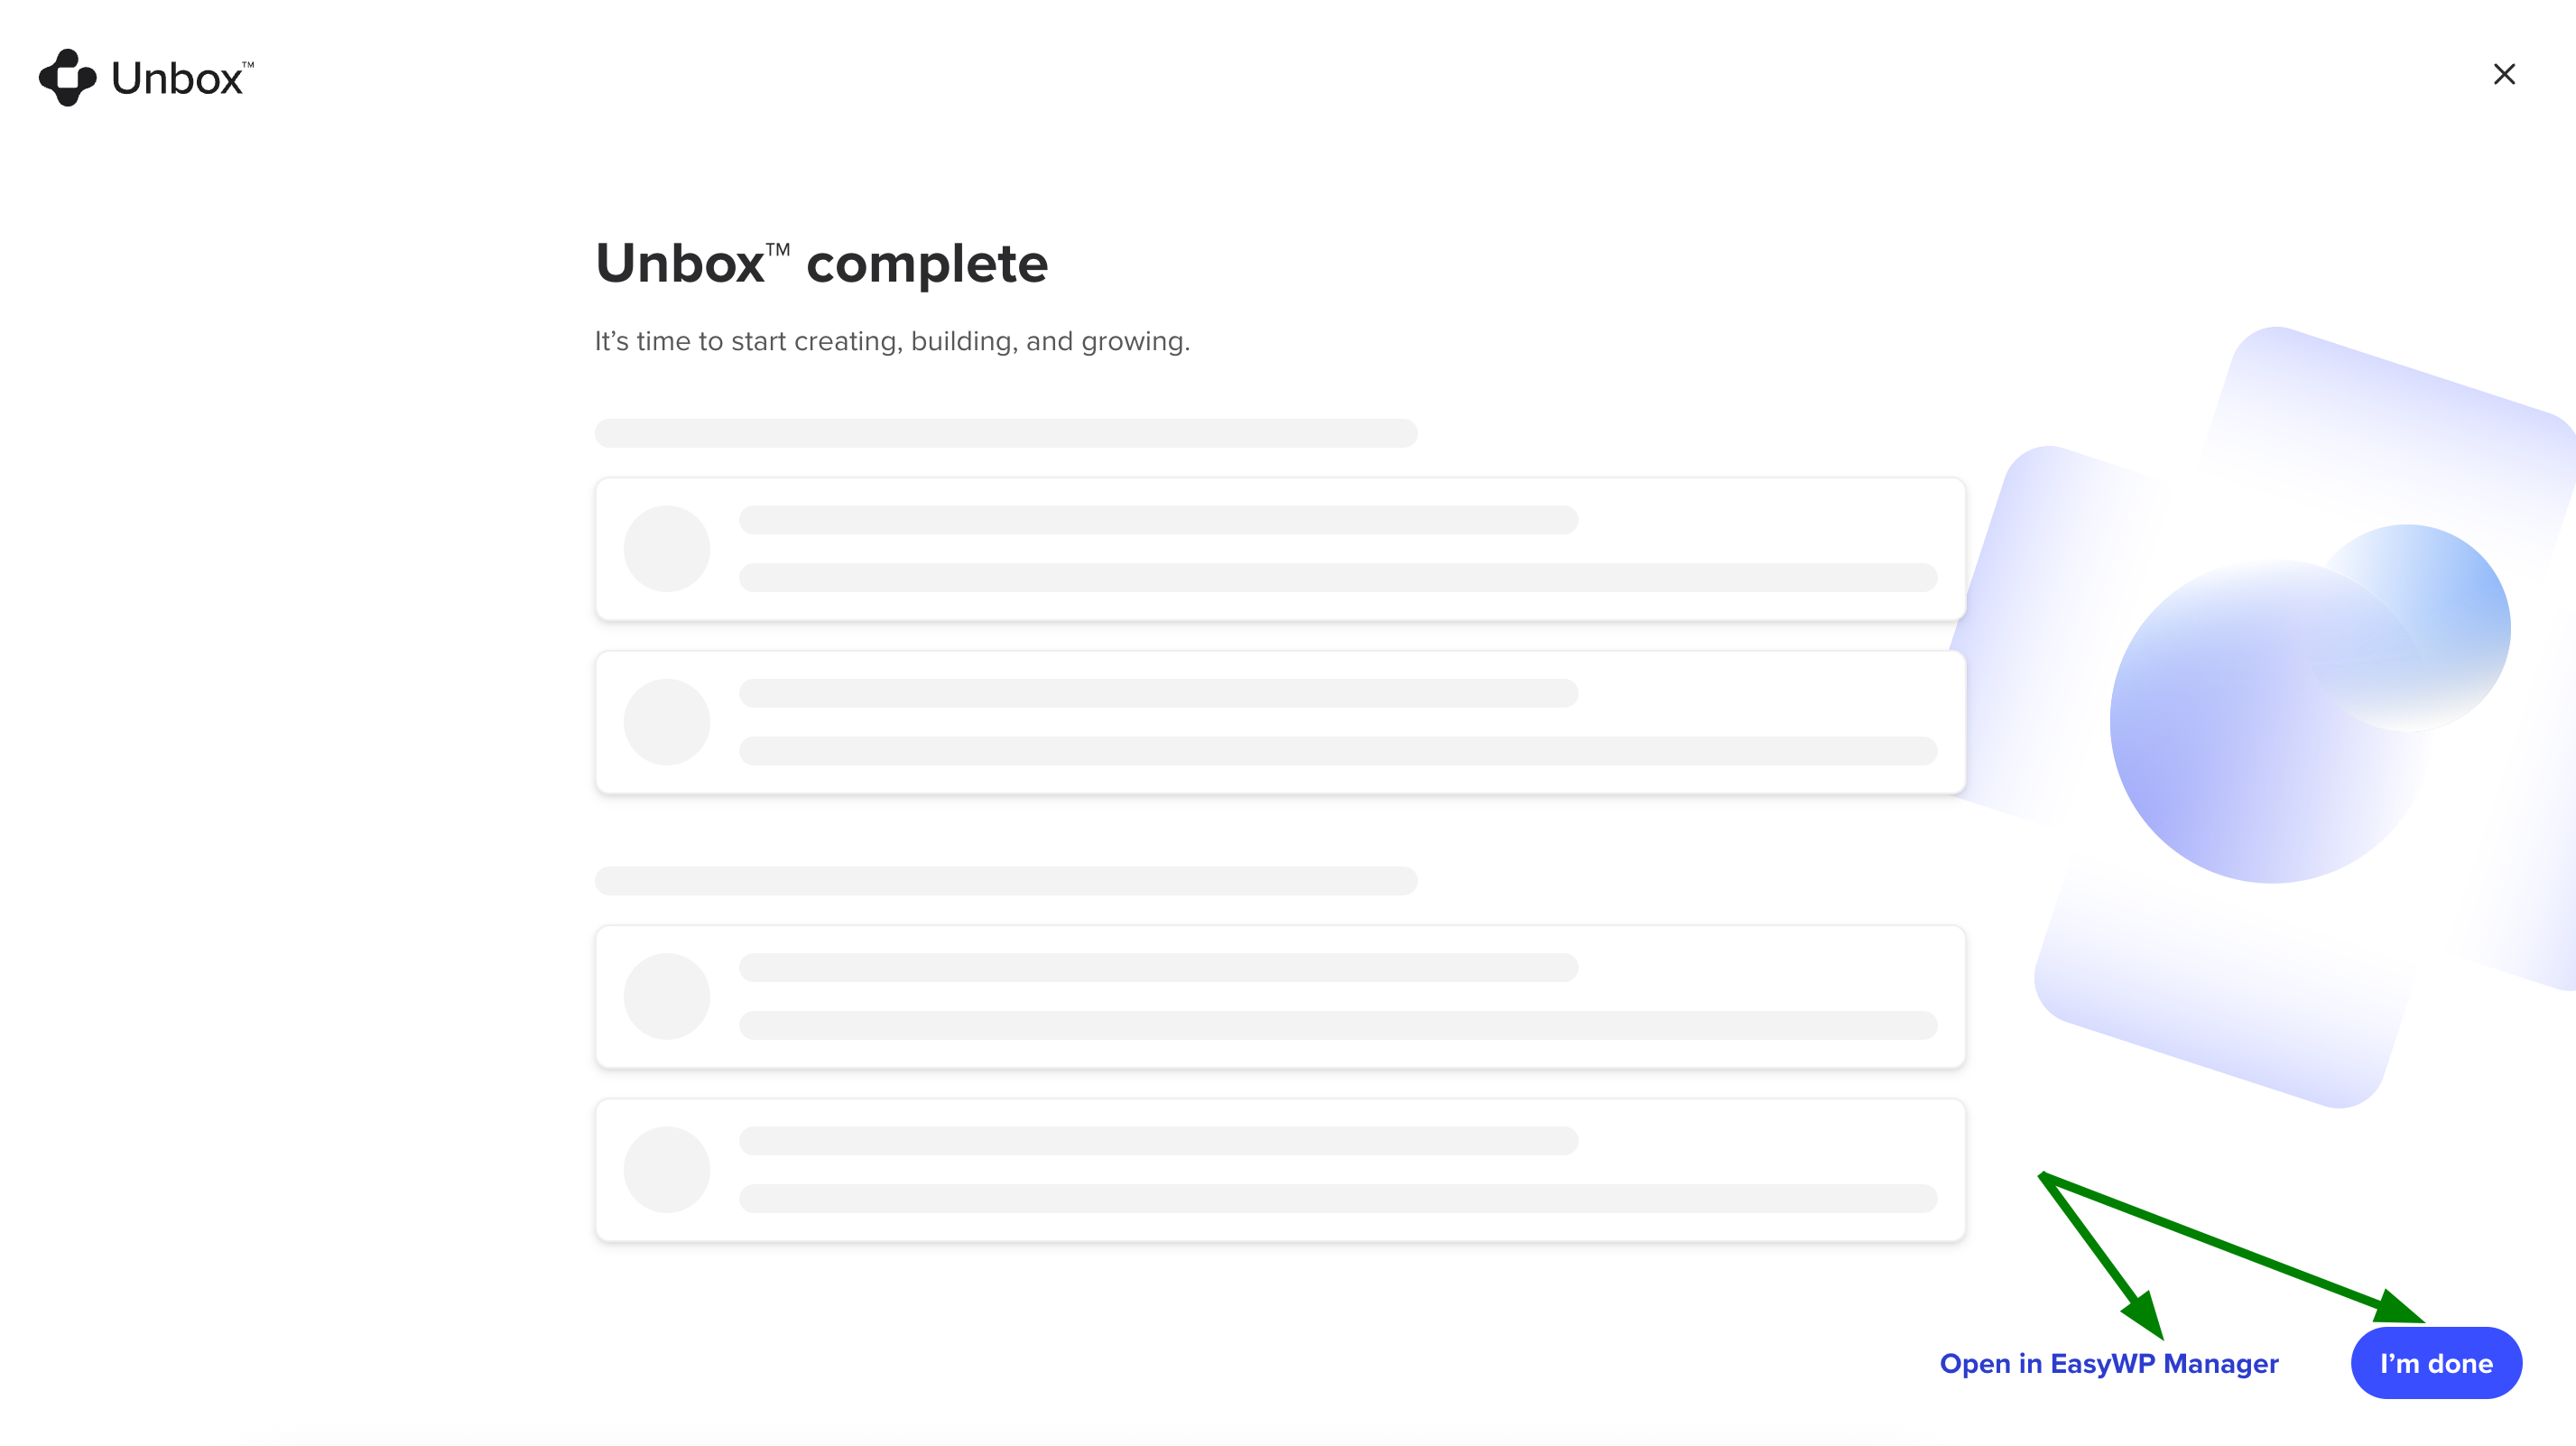
Once done, the migrated site will appear under your subscription in the EasyWP Manager:
That’s it!