วิธีการตั้งค่า Mailgun SMTP บน CyberPanel
Mailgun เป็นบริการอีเมลอัตโนมัติที่ช่วยให้คุณส่ง รับ และติดตามอีเมลจากเว็บไซต์และแอปพลิเคชันของคุณได้ นอกจากนี้ยังช่วยอำนวยความสะดวกในการจัดการอีเมลสำหรับการตลาดและวัตถุประสงค์อื่นๆ
หมายเหตุ:พอร์ต 25 ถูกปิด สำหรับการเชื่อมต่อบน VM โดยค่าเริ่มต้น หากคุณต้องการเปิดพอร์ต 25 ให้ซื้อ Mail Bridge และกำหนดค่าใน VPS Manager.
หากต้องการกำหนดค่าอีเมล MailGun บน WHM โปรดใช้คู่มือนี้.
โปรดทำตามขั้นตอนด้านล่างเพื่อกำหนดค่าบริการ Mailgun และระบบอีเมลสำหรับชื่อโดเมนของคุณในฝั่ง CyberPanel:
ขั้นตอนที่ 1 สมัครใช้งาน Mailgun โดยมีแพ็กเกจบัญชีหลายแบบในราคาที่แตกต่างกัน ซึ่งคุณสามารถดูได้ที่นี่:
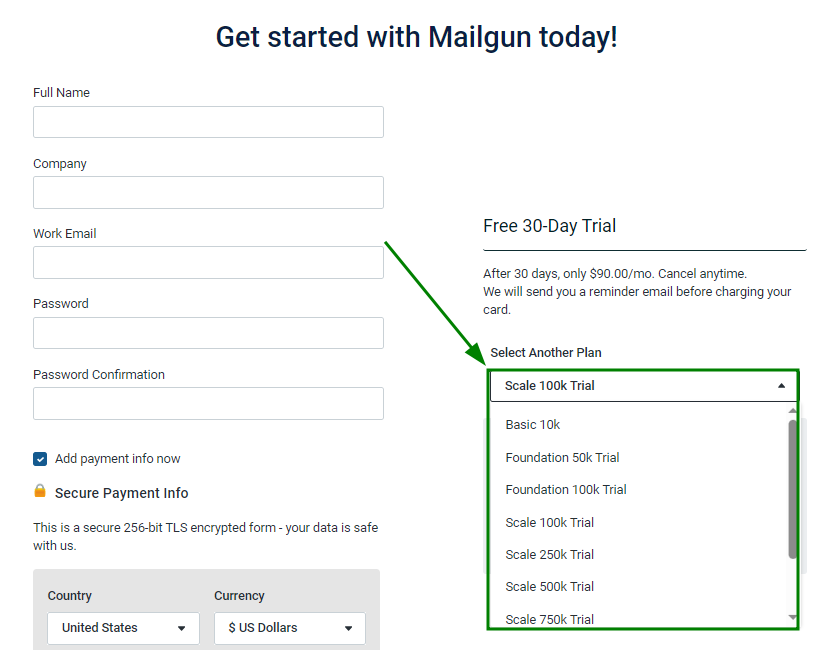
คุณสามารถสมัครและลงทะเบียนบัญชีได้ฟรี ในกรณีนี้ โปรดตรวจสอบให้แน่ใจว่าไม่ได้เลือกเครื่องหมายถูก “Add payment info”
หมายเหตุ: บัญชีที่ไม่มีบัตรเครดิตจะถูกจำกัดให้ส่งข้อความได้ 100 ข้อความต่อวัน:
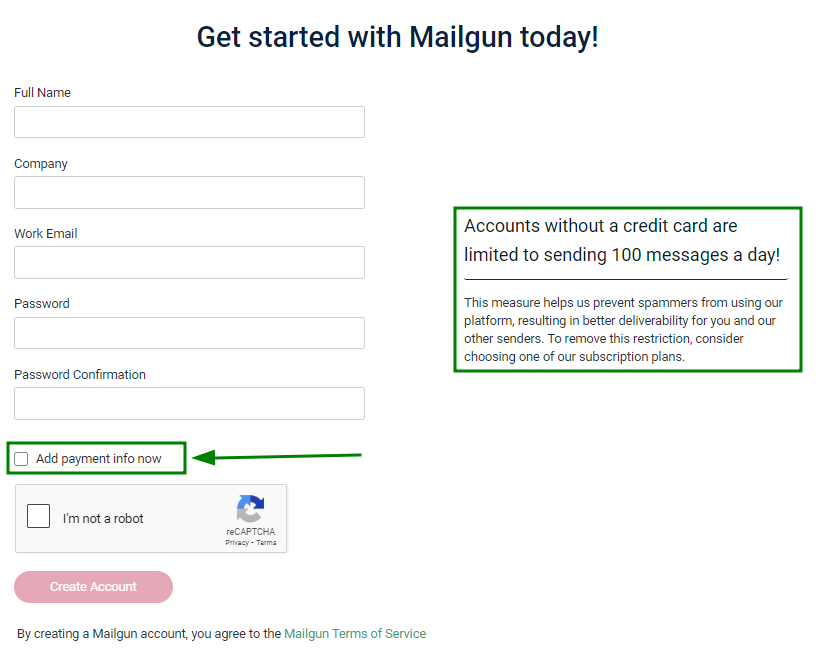
เมื่อกรอกทุกอย่างเรียบร้อยแล้ว ให้คลิก “Create Account”
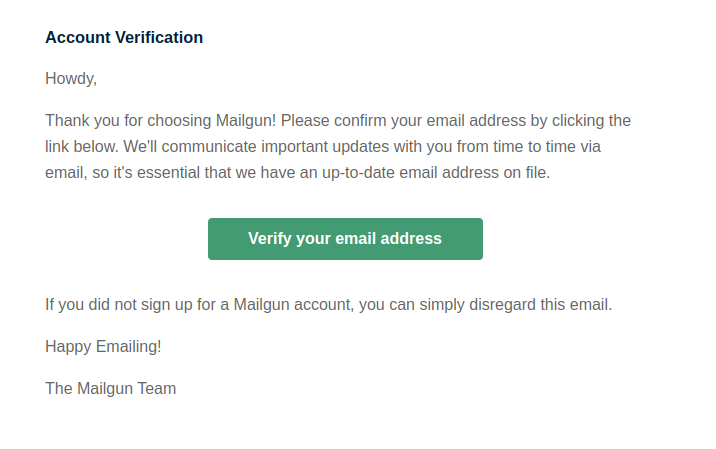
ขั้นตอนที่ 2 ยืนยันบัญชีอีเมลของคุณโดยคลิกปุ่ม “Verify your email address” ภายในอีเมลที่เกี่ยวข้องจาก Mailgun:
ขั้นตอนที่ 3 ตั้งค่า Mailgun Sender Authentication โดยมีสองวิธีในการดำเนินการ:
วิธีที่ 1:
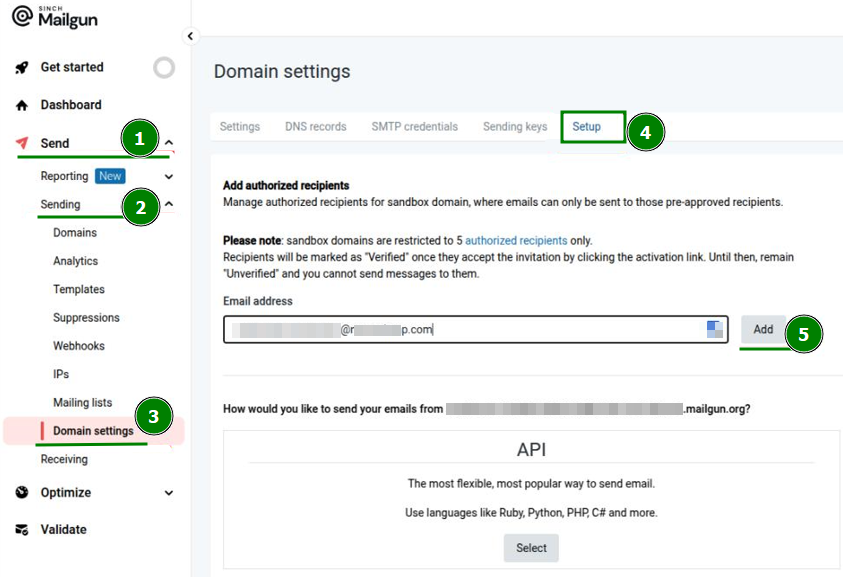
เข้าสู่ระบบบัญชี Mailgun ของคุณ >> คลิกส่วน “Send” ในเมนูด้านซ้าย >> “Sending” >> “Domain Setting;
ภายในเมนู “Domain Settings” ให้ไปที่ส่วน “Setup”;
เพิ่มผู้รับที่ได้รับอนุญาตโดยป้อนที่อยู่อีเมลที่ต้องการลงในช่อง “Email address” >> คลิก “Add”:
หลังจากนั้น คุณจะได้รับอีเมลที่ส่งไปยังที่อยู่อีเมลที่ระบุไว้ หากต้องการยืนยันการเพิ่ม ให้กดปุ่ม "I Agree":
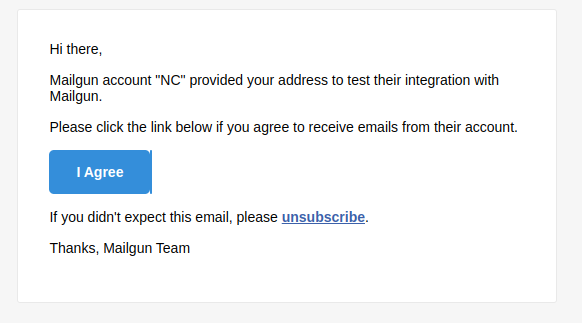
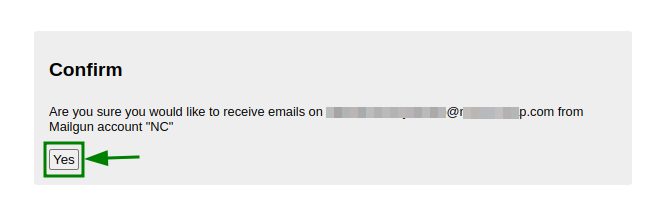
คุณจะถูกเปลี่ยนเส้นทางไปยังแท็บใหม่ในเบราว์เซอร์ คลิกปุ่ม "Yes" เพื่อยืนยันการเพิ่มที่อยู่อีเมล:
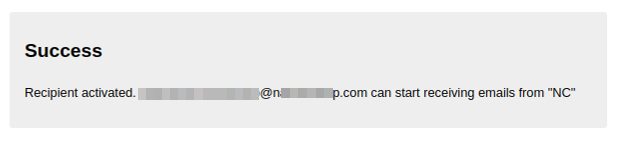
เมื่อเสร็จแล้ว คุณจะได้รับข้อความ “Success” ซึ่งหมายความว่าบัญชีอีเมลดังกล่าวถูกเพิ่มเรียบร้อยแล้ว:
วิธีที่ 2:
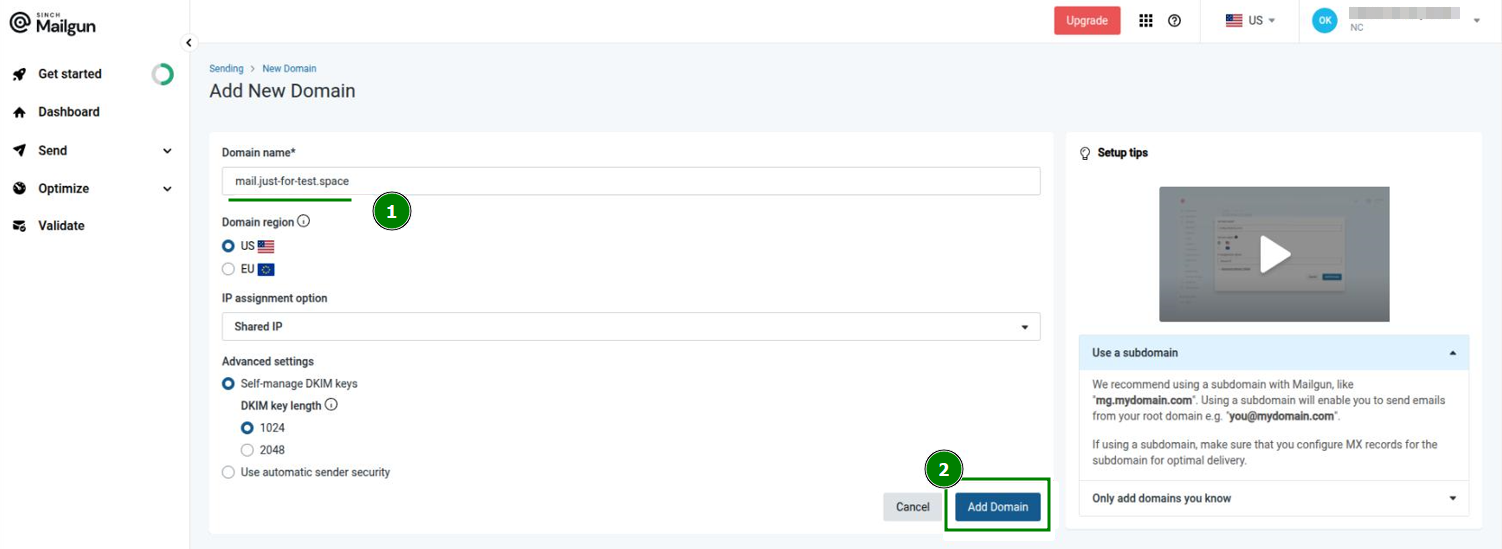
เข้าสู่ระบบบัญชี Mailgun ของคุณ >> คลิกส่วน “Send” ในเมนูด้านซ้าย >> “Sending” >> “Domains” จากส่วนนี้ ให้คลิกปุ่ม “Add new domain”:
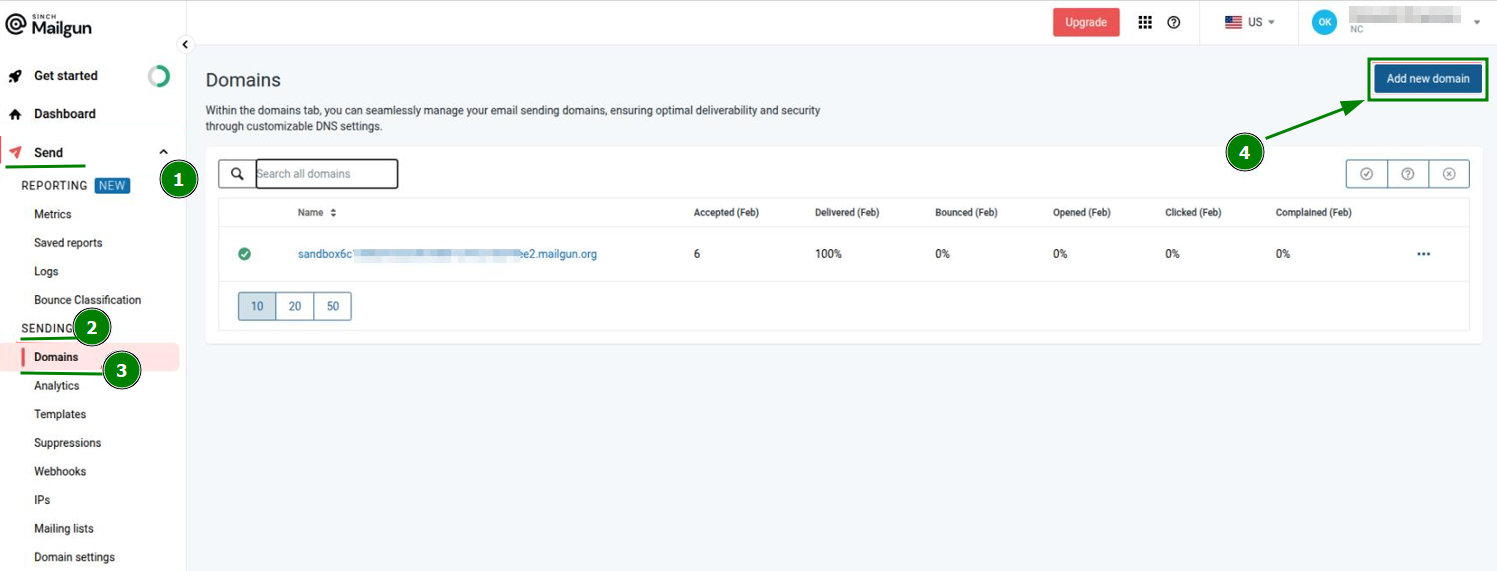
คุณจะถูกเปลี่ยนเส้นทางไปยังหน้าที่สามารถเพิ่มโดเมนใหม่เข้าสู่ระบบ Mailgun ได้ ป้อนโดเมนที่ต้องการลงในช่อง “Domain name” เลือกตัวเลือกและการตั้งค่าขั้นสูงที่ต้องการ แล้วคลิก “Add Domain”:
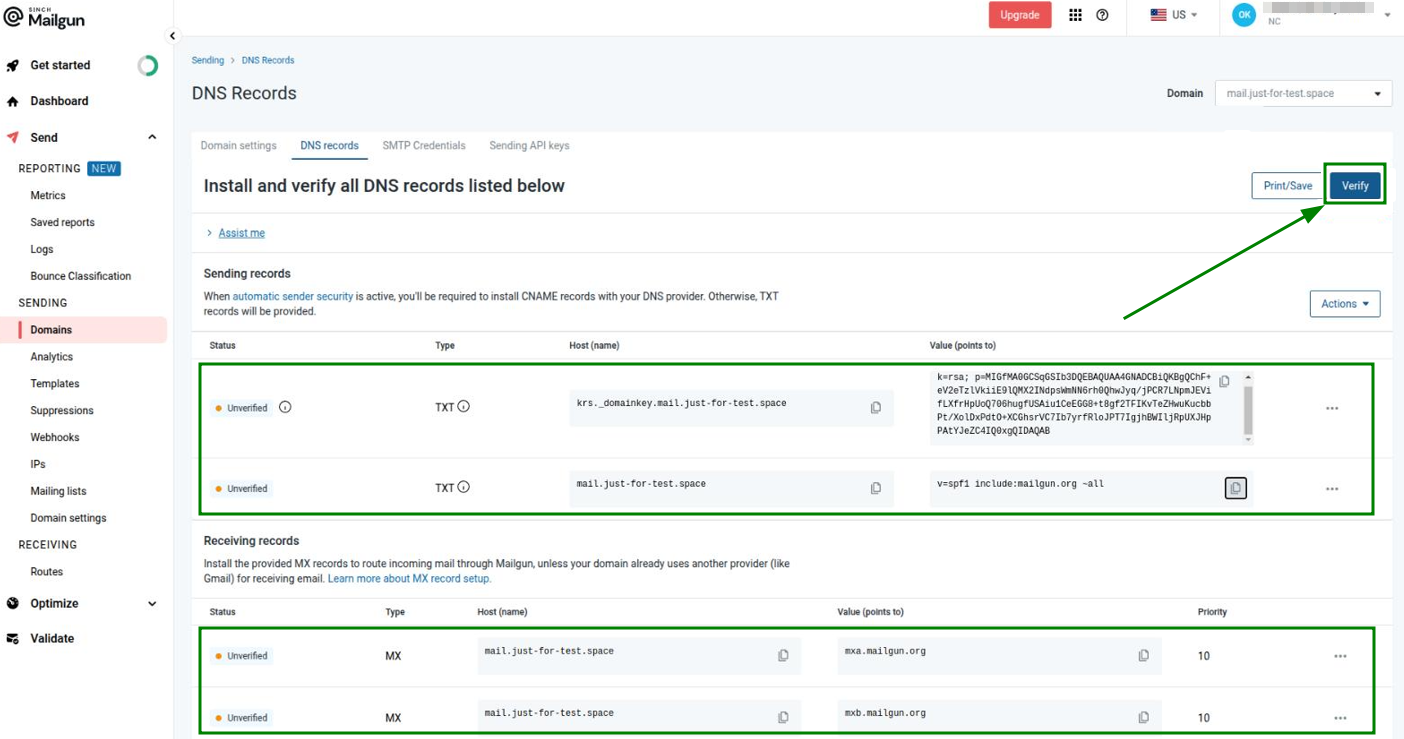
หลังจากนั้น จำเป็นต้องยืนยันชื่อโดเมนที่เพิ่มไว้โดยกำหนดค่าเรคคอร์ด DNS ประเภท TXT และ MX ที่เกี่ยวข้องสำหรับโดเมน
คุณสามารถตรวจสอบรายการเรคคอร์ดที่ควรเพิ่ม รวมถึงสถานะของเรคคอร์ดเหล่านั้นได้ในบัญชี Mailgun ของคุณ >> ส่วน “Send” ในเมนูด้านซ้าย >> “Sending” >> “Domains” >> ไปที่ส่วน “DNS Records”
เมื่อสร้างเรคคอร์ด DNS สำหรับโดเมนแล้ว ให้คลิกปุ่ม "Verify" ที่ด้านขวาบน:
หมายเหตุ: อาจใช้เวลาสูงสุด 24-48 ชั่วโมงเพื่อให้เรคคอร์ด DNS เผยแพร่ครบถ้วน
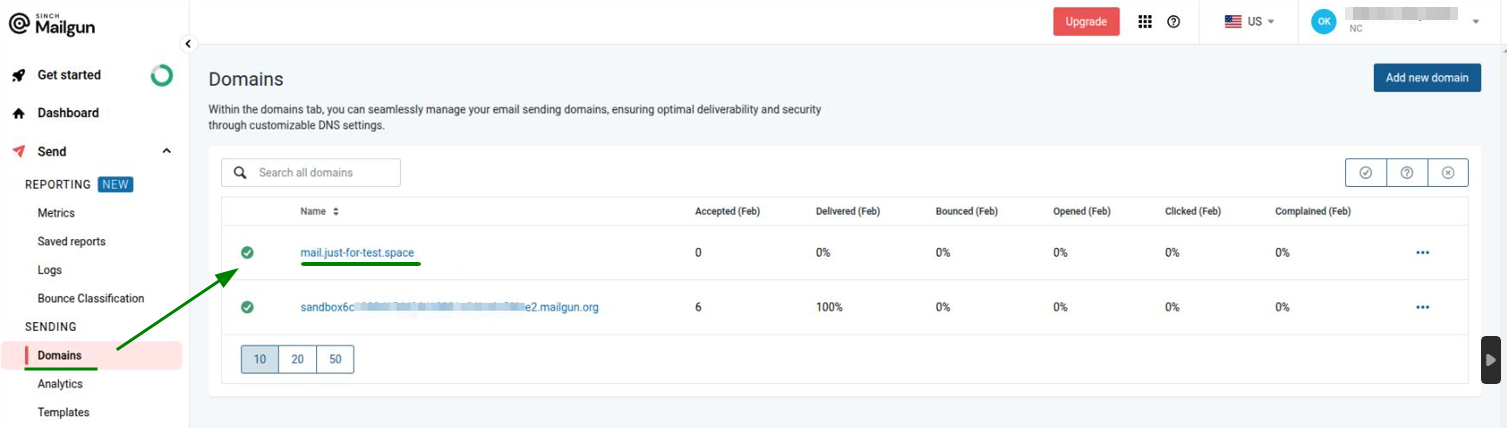
เมื่อการเผยแพร่เสร็จสิ้นและมีการเพิ่มเรคคอร์ด DNS ที่จำเป็นทั้งหมดลงในโดเมนแล้ว ระบบ Mailgun จะยืนยันโดเมนนั้น จากนั้นโดเมนจะแสดงอยู่ในส่วน “Domains” ของเมนู “Sending”:
ขั้นตอนที่ 4 ขั้นตอนถัดไปคือการกำหนดค่าการตั้งค่า SMTP สำหรับบัญชีอีเมลในฝั่ง WHM
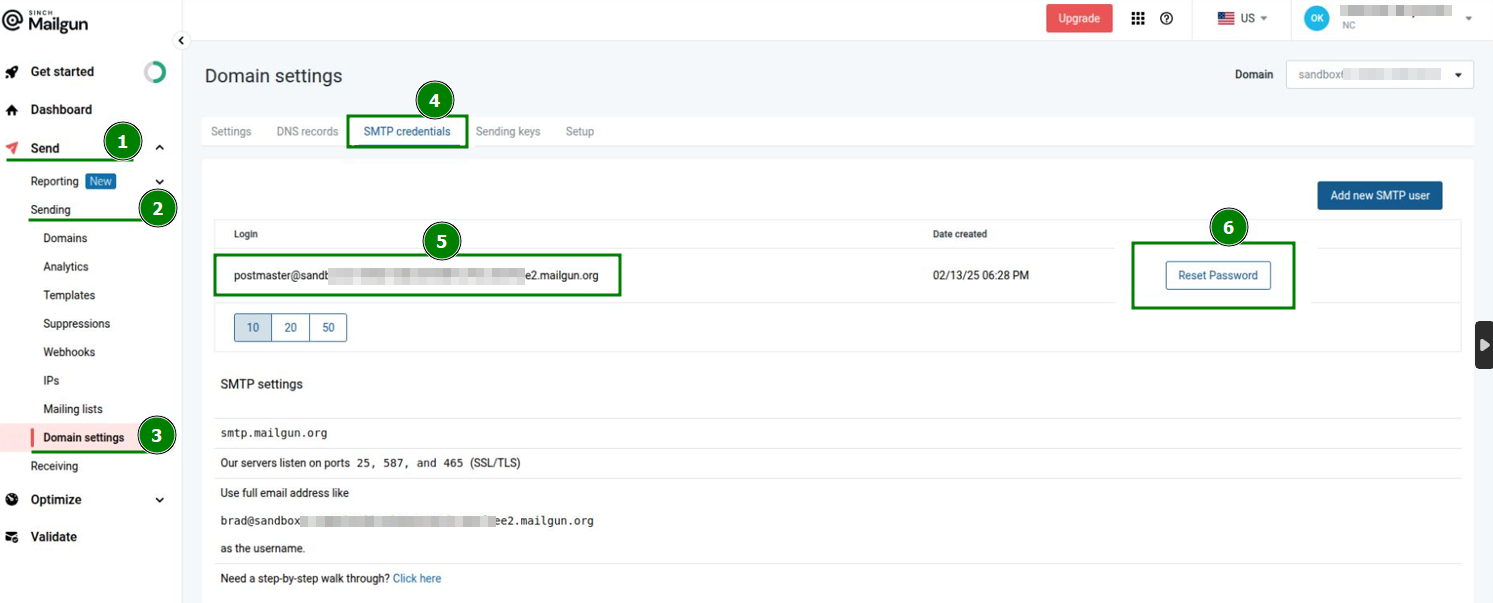
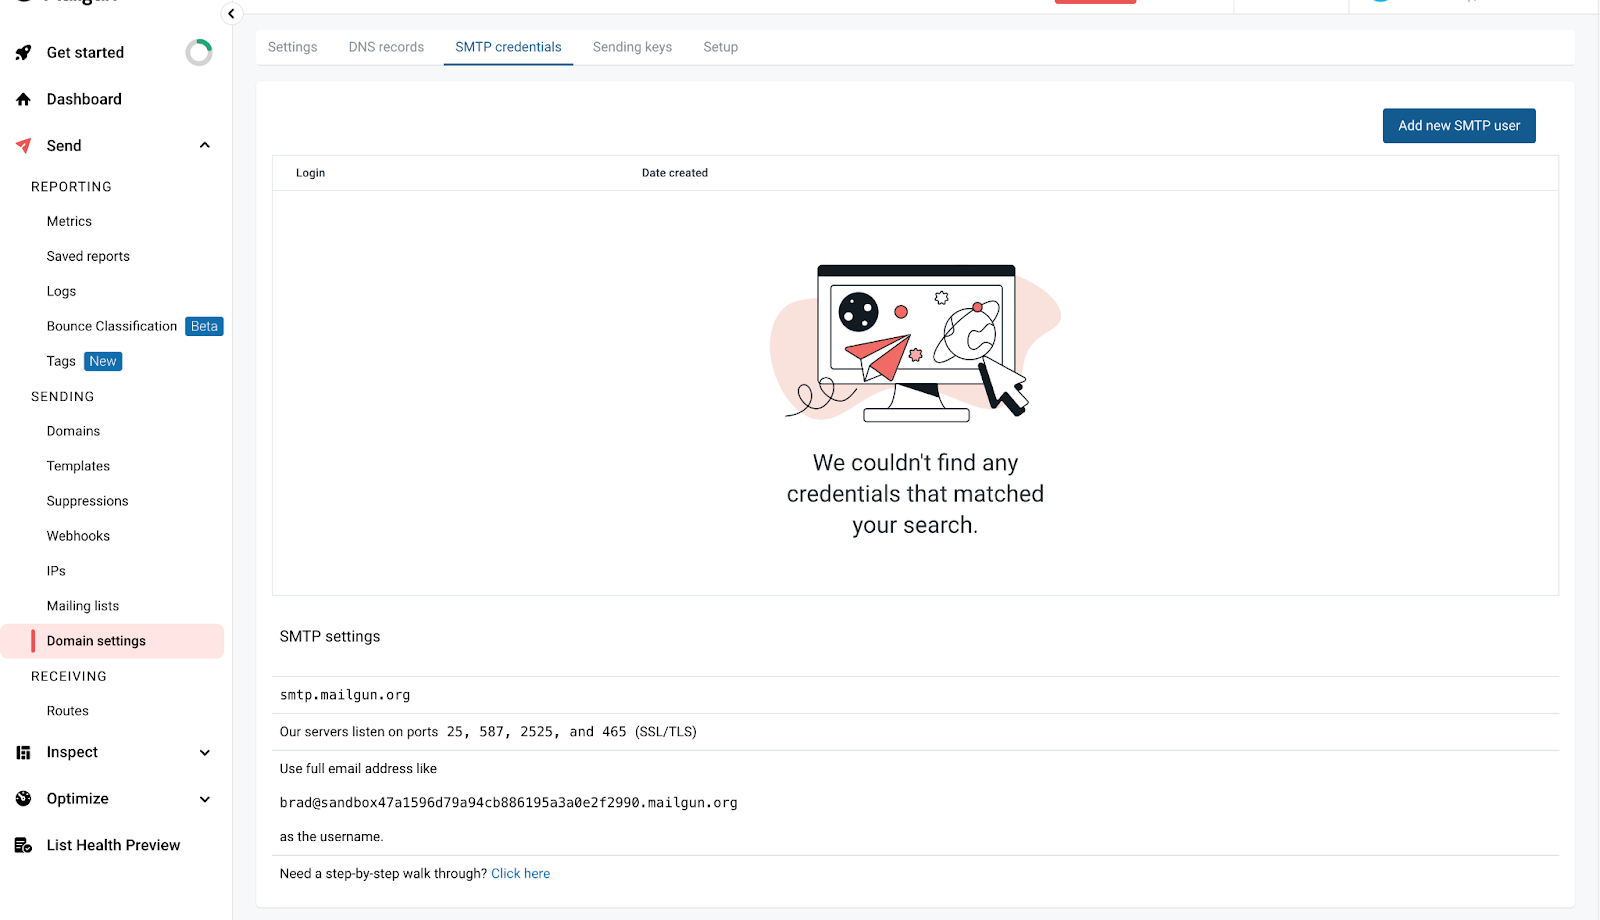
หากต้องการรับข้อมูลรับรอง SMTP ที่จำเป็น ให้เข้าสู่ระบบบัญชี Mailgun ของคุณ >> คลิกส่วน “Send” ในเมนูด้านซ้าย >> “Sending” >> “Domain Settings” จากส่วนนี้ ให้เปิดแท็บ “SMTP credentials”
คัดลอกค่าภายใต้ช่อง “Login” รีเซ็ตรหัสผ่าน และบันทึกรายละเอียดไว้สำหรับขั้นตอนถัดไป:
ขั้นตอนที่ 5 แก้ไขไฟล์การกำหนดค่า Postfix
ใน Mailgun ให้เปิด “Domain settings” จากเมนูด้านซ้าย เลือกโดเมนของคุณ แล้วคลิก SMTP credentials ที่นี่คุณจะได้รับโฮสต์ ผู้ใช้สำหรับเข้าสู่ระบบ และรหัสผ่านของคุณ คลิกรีเซ็ตรหัสผ่านเพื่อรับรหัสผ่าน จากนั้นคัดลอกและบันทึกไว้ได้เลย
เปิดไฟล์การกำหนดค่า Postfix
/etc/postfix/main.cfในโปรแกรมแก้ไขข้อความที่คุณต้องการ
nano /etc/postfix/main.cf
หรือvi /etc/postfix/main.cf
เพิ่มบรรทัดต่อไปนี้ที่ด้านล่างของไฟล์:
relayhost = MAILGUN_HOST:587smtp_sasl_auth_enable = yessmtp_sasl_password_maps = static:MAILGUN_USER:MAILGUN_PASSsmtp_sasl_security_options = noanonymous
MAILGUN_HOST คือโฮสต์ Mailgun จริงจากบัญชีของคุณ
MAILGUN_USER คือผู้ใช้ smtp ของ Mailgun จริง
MAILGUN_PASS คือรหัสผ่าน SMTP จริงจากบัญชี Mailgun ของคุณ
บันทึกไฟล์และรีสตาร์ต postfix โดยรัน
systemctl restart postfix
ตอนนี้คุณสามารถทดสอบการส่งอีเมลได้แล้ว ใน CyberPanel ของคุณ ให้เปิด Email -> Access Webmail ป้อนอีเมลและรหัสผ่านของคุณที่นั่น