How to use Starlight VM Manager
The Starlight VM Manager is an application designed to help you efficiently manage your Starlight Virtual Machines (VPS hosting). With it, you can create, terminate, reboot, and reset virtual machines, manage networking details, create or remove SSH keys, open VM consoles, and update root passwords.
Also, Starlight VM Manager offers both pay-as-you-go and prepaid billing options, giving you flexibility and cost control.
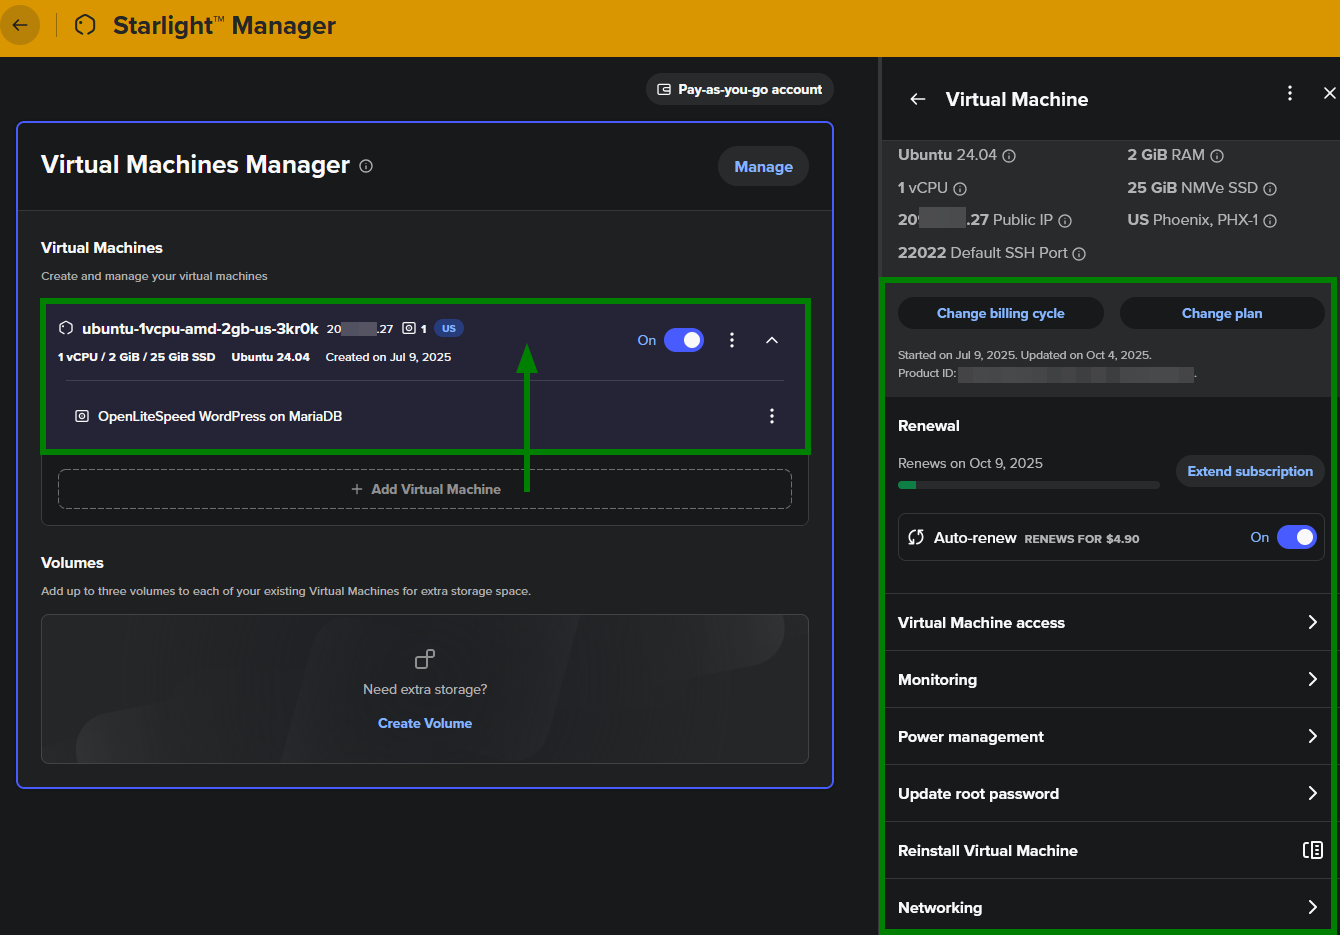
Click on your VM to open the VM Management menu:
In this article, we will walk you through how to:
Manage your VMs by switching them on/off, rebooting, or resetting as needed.
Reset your root password for VM.
Use the console access to interact directly with your VM.
Manage security by creating and removing SSH keys.
Check networking and resource analysis to monitor your VM usage.
Reinstall the VM.
1. Power management
Open the Starlight Manager, select the VM you want to work with, and go to the Power management section. From there, you can:
Switch On the VM – choose Switch on or toggle the switch to On.
Switch Off – select Switch off (or toggle to Off) and confirm when prompted.
Reboot – click Reboot VM to restart it safely.
Reset (forced restart) – choose Reset VM if the reboot doesn’t work. This forces the VM to shut down and restart immediately.
Important: Resetting is a forced shutdown and may cause data loss. Only use it if rebooting does not work.

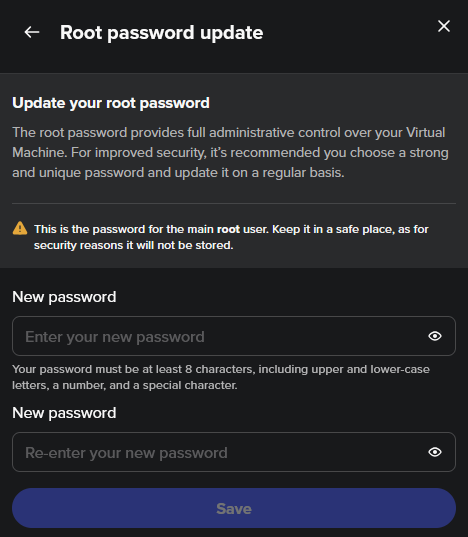
2. Root password reset
Open the Starlight Manager and select your VM.
Choose Update root password.
Enter your new password twice and save.
Note: Your new password must be strong – include uppercase and lowercase letters, numbers, and special characters.
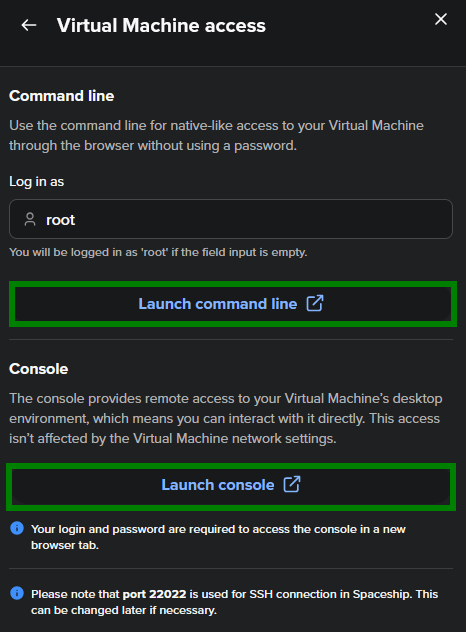
3. Console access
You can interact directly with your Starlight VM through the built-in console:
Open the Starlight Manager and make sure your VM is powered on.
Go to the Virtual Machine access section.
Click Launch console to open the VM console.
The console works even if network access (like SSH) is blocked. From here, you can install and update software, configure firewalls, run scripts, and more. It supports mouse input, keyboard shortcuts, copy-paste, and command history. The login (root) and password are needed to access the console.
If you need to use the command line interface (CLI) instead, just click Launch command line in the same section. No password is needed – the root details are prefilled for your convenience.
Refer to this detailed guide on VM access: How to access your Starlight Virtual Machine.
4. Managing SSH keys
You can add or remove SSH keys for your Starlight VMs directly from the Starlight Manager.
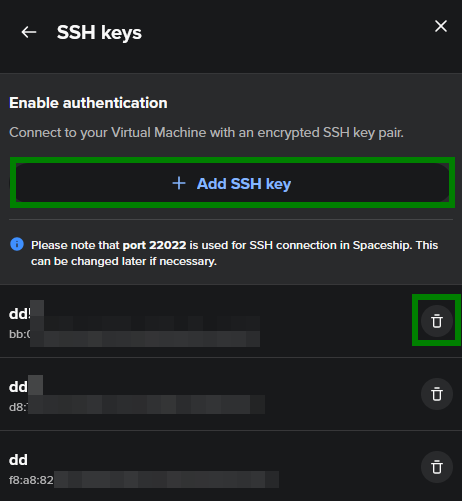
• Add a new SSH key
Open the Starlight Manager and click Manage for your VM.
Go to the Secure Shell (SSH) keys section.
Click + Add SSH key, enter a name, paste your public key, and save.
• Remove an SSH key
In the same SSH keys section, click the trash bin next to the key.
Confirm by selecting Delete SSH key.
Note: Deleting a key from the Manager doesn’t remove it from the VM itself. If you lose your SSH key, create a new one, log in with your root password, and update the authorized_keys file on the VM.
5. Checking resource usage and networking details
You can easily track your Starlight VM’s performance in the Starlight Manager:
Open the Starlight Manager and select the VM you want to check.
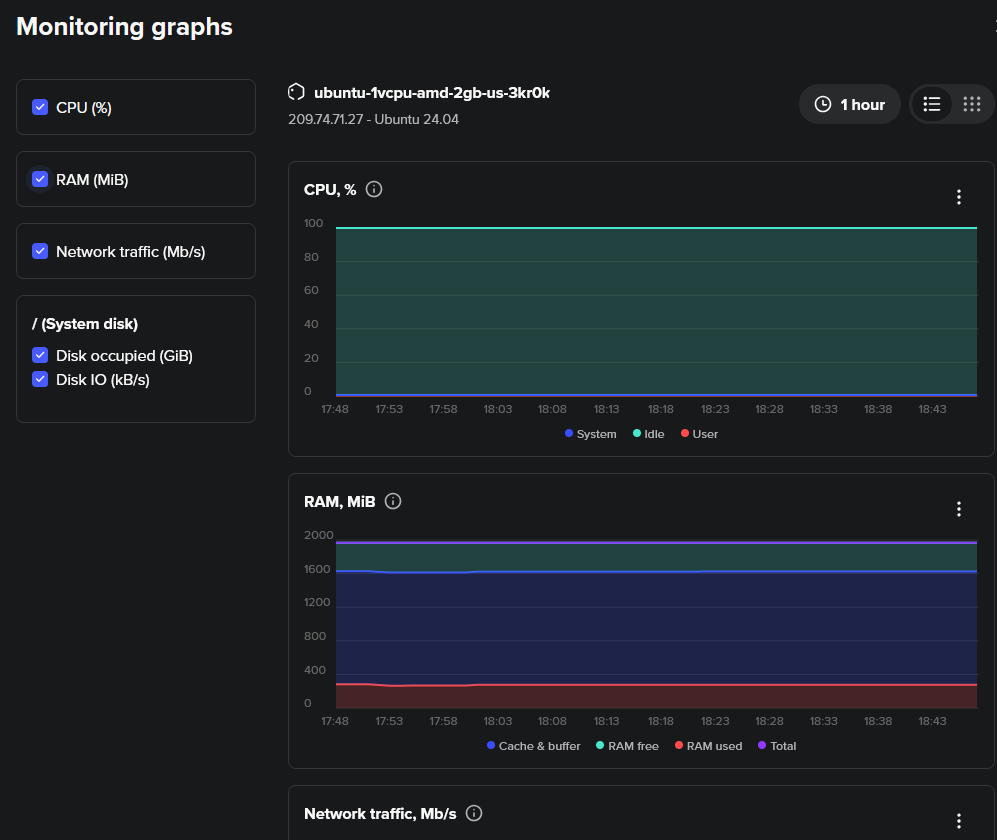
Go to the Monitoring menu and click Explore monitoring graphs to view detailed stats on CPU usage, memory, network traffic per interface, disk space, and disk I/O.
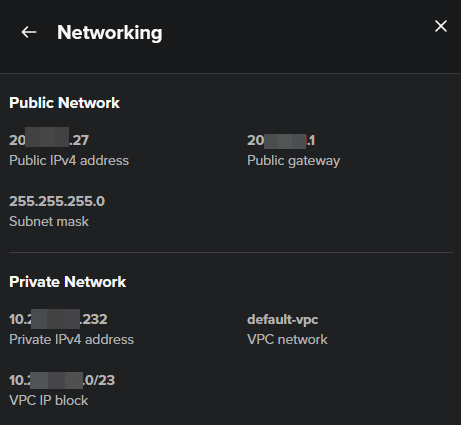
In the Networking menu, you can check the details about your Public and Private Networks:
6. Reinstalling your VM
If you need a fresh start, you can reinstall your Starlight VM with a new operating system and optional software.
Open the Starlight Manager and select the VM.
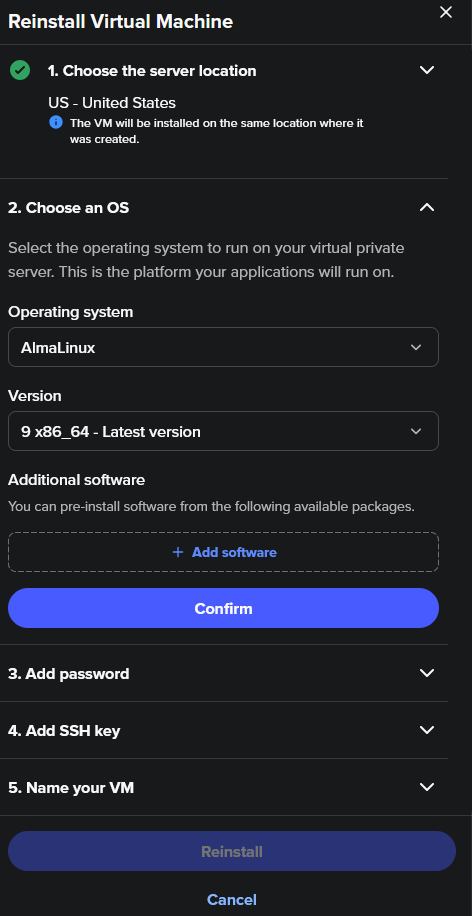
Choose Reinstall Virtual Machine.
Select the desired operating system and version.
Choose additional software packages (optional).
Set a new root user password.
Add an SSH key if needed.
Give your VM a name.
Click Reinstall and confirm.
Important: Reinstalling will erase all data and settings on the VM. Make sure to back up anything important before proceeding. This action is irreversible, so double-check your choices.
Supported Linux OS images:
AlmaLinux (versions 8, 9)
CentOS (versions 9, 10)
Debian 12
Fedora (version 42 and previously configured Fedora 40)
Rocky Linux (versions 8, 9)
Ubuntu (versions 20.04, 22.04, 24.04)
Windows OS is not supported.
Optional software packages:
OpenLiteSpeed WordPress on MariaDB (Ubuntu 24.04 only): includes WordPress, MariaDB, OpenLiteSpeed web server, PHP, and Let’s Encrypt SSL.
cPanel software package (AlmaLinux 9/10 and Ubuntu 24.04): requires a cPanel license; note that native email service via SMTP port 25 is not available.
You can choose these options during VM reinstallation in the Starlight Manager.
After reinstallation:
If you’re hosting a website, configure your domain’s DNS to point to your VM’s IP address.
Install any necessary server software (e.g., web server, database tools).