How to set up a DMARC record for your domain with Spacemail
We highly recommend setting up a DMARC record for your domain to improve email security and protect your domain’s reputation. While Spacemail does not provide DMARC records directly, you can easily create one using online tools.
In this guide, we’ll use the MX Toolbox DMARC Record Generator Tool as an example. However, you're welcome to use any other generator that suits your needs.
Note 1: spaceship.com is used as an example in this tutorial. Make sure to replace it with your actual domain name.
Note 2: When entering your domain name in the tool, do not include the www prefix.
How to generate a DMARC record for your domain
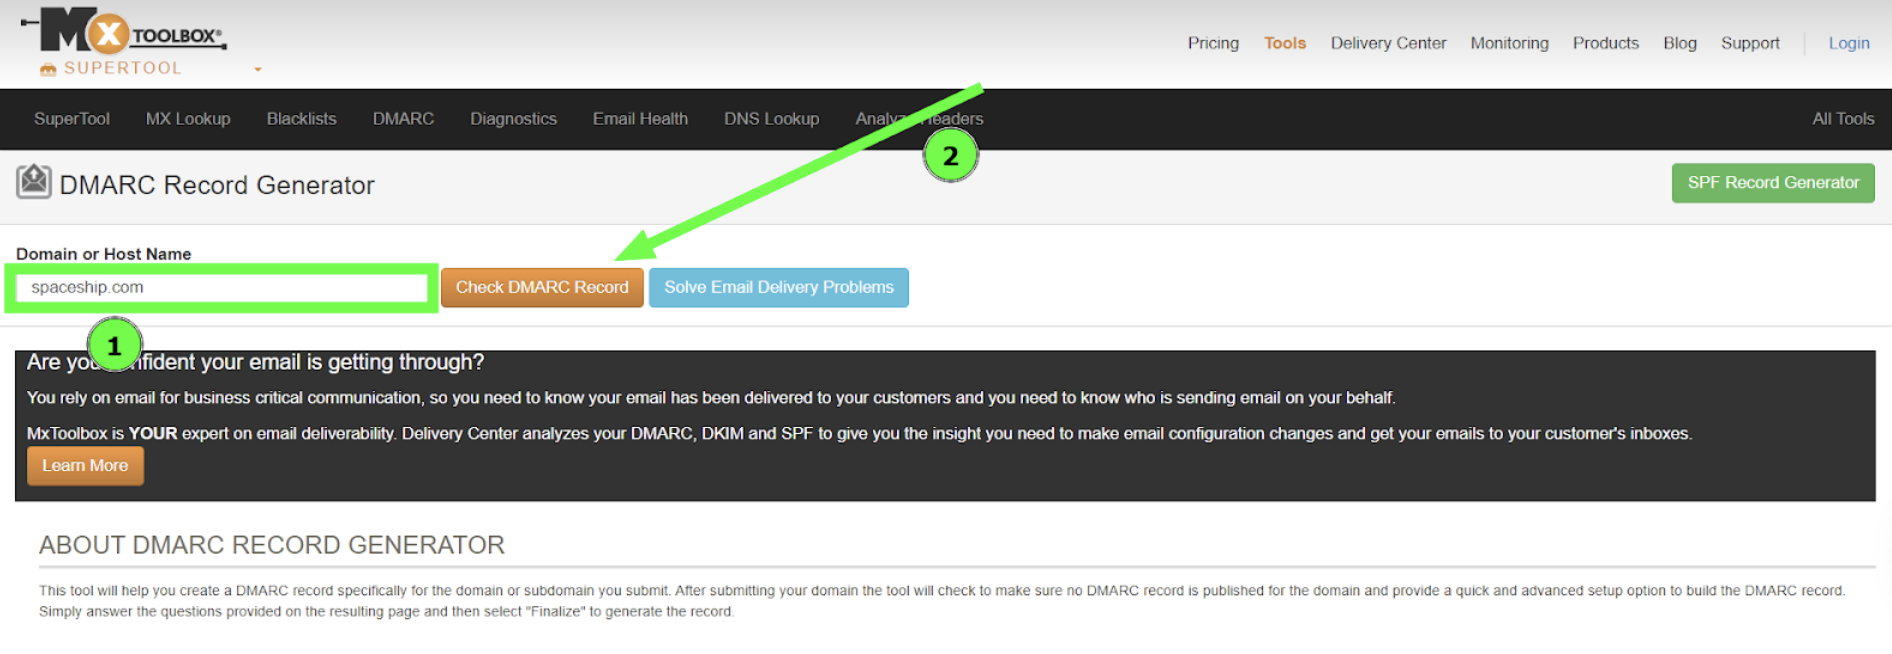
Step 1. Open the DMARC Record Generator tool and fill in your domain name in the search bar. Once done, click on the Check DMARC Record button:
Step 2. You’ll be redirected to a configuration page where you can customize the DMARC settings according to your needs:
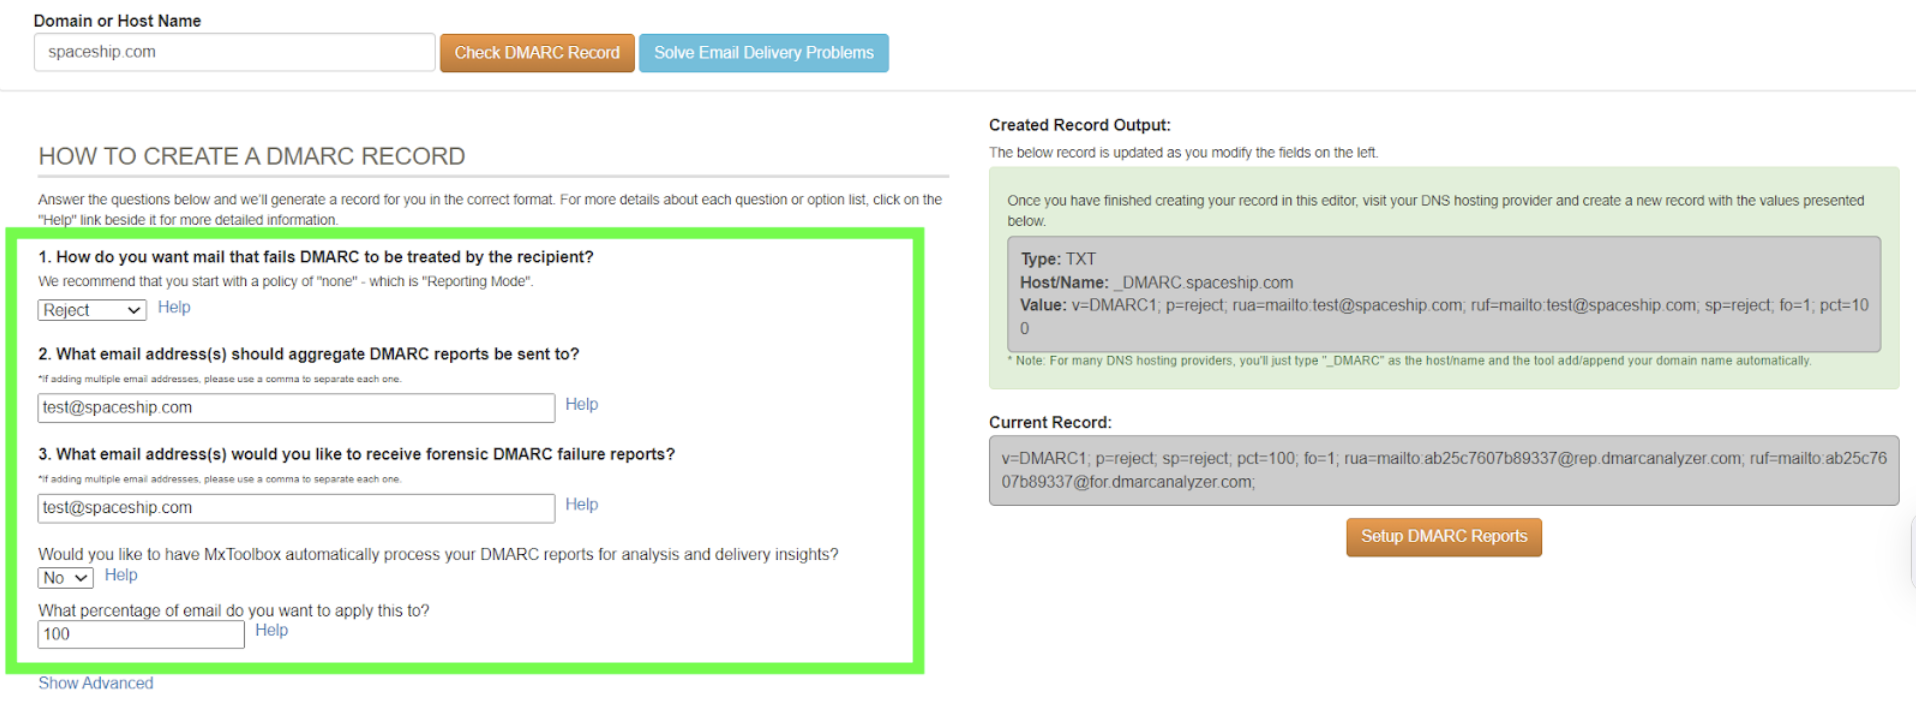
Explanation of the DMARC settings:
How do you want mail that fails DMARC to be treated by the recipient?
The policy “p=...”defines how receiving mail servers should handle emails that fail DMARC authentication checks.
p=none– No action is taken on failed email. This option is useful for monitoring but does not protect against spoofing.
p=quarantine – Email is treated as suspicious and may be sent to the recipient’s spam or junk folder.
(Recommended) p=reject – Email is rejected outright and not delivered. This offers the highest level of protection and helps prevent spoofed messages from reaching recipients.
What email address(s) should aggregate DMARC reports be sent to?
Specify the email address to receive daily aggregate DMARC reports, summarizing authentication results for emails sent from your domain.
What email address(s) would you like to receive forensic DMARC failure reports?
Enter the email address for real-time forensic reports sent when an email fails DMARC checks.
Would you like to have MxToolbox automatically process your DMARC reports for analysis and delivery insights?
This is an optional service offered by MxToolbox. It’s not required to generate the record. We recommend selecting No, especially if you prefer to manage your own reports or use another analysis tool.
What percentage of emails do you want to apply this to?
Define the percentage of your domain's email traffic to which the DMARC policy applies. Setting this to 100% fully enforces the policy across all outgoing mail.
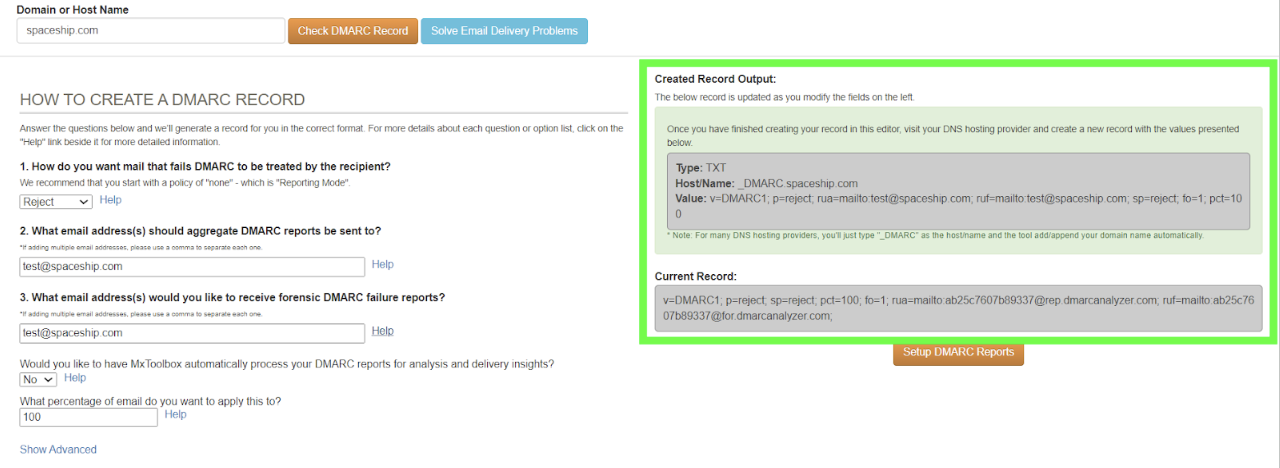
Step 3. After completing these fields, the generated DMARC record will appear on the right side of the page:
How to add a DMARC Record
If your domain is pointed to our Spaceship nameservers, you can add the record by following these steps:
Note: If your domain is pointed to third-party nameservers, then the DMARC record should be added on the side of your domain’s DNS provider.
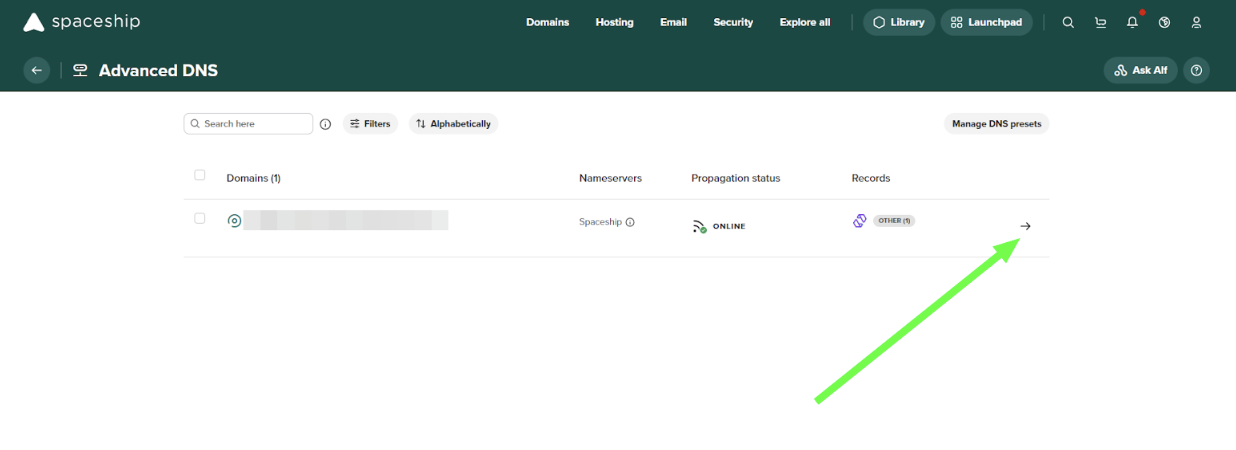
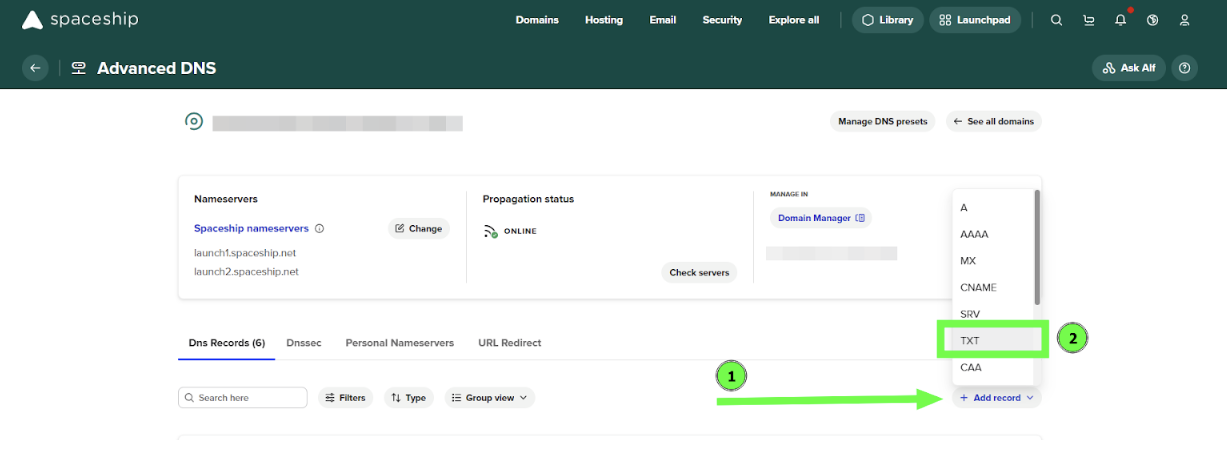
Step 1. Navigate to your Advanced DNS application and click on the small arrow next to your domain name:
Step 2. Click on the Add record button and select TXT Type:
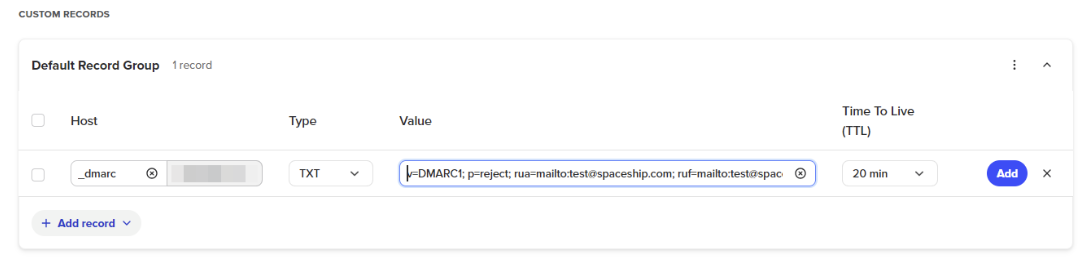
Step 3. Fill in the following information:
Host: _dmarc
Type: TXT
Value: the one you generated previously
TTL: 20 minutes
Click on the Add button to save the record:
Once done, please wait up to 30 minutes for the changes to be updated.
That's it. If you have any questions or require any help, feel free to contact us anytime.