Spacemail CalDav beállítás Outlookhoz Windowsra
Ez a cikk lépésről lépésre útmutatást ad a Spacemail naptár Outlookban történő beállításához a CalDAV protokoll használatával.
Mivel az Outlook alapértelmezetten nem támogatja a CalDAV-ot, egy ingyenes, harmadik féltől származó bővítményt, a Caldavsynchronizer-t kell használnod a beállítás befejezéséhez.
Felhívjuk figyelmedet, hogy a Caldavsynchronizer nem kompatibilis az Új Outlookkal.
A beállításhoz kövesd az alábbi lépéseket:
Látogass el a(z) https://caldavsynchronizer.org oldalra.
Kattints a(z) Letöltés gombra, és válaszd ki a rendszerarchitektúrádnak megfelelő verziót.
Futtasd a telepítőt, és kövesd a képernyőn megjelenő utasításokat a beállítás befejezéséhez.
A telepítés után nyisd meg az Outlookot. Egy új fül, a(z) CalDav Synchronizer jelenik meg a menüsoron.
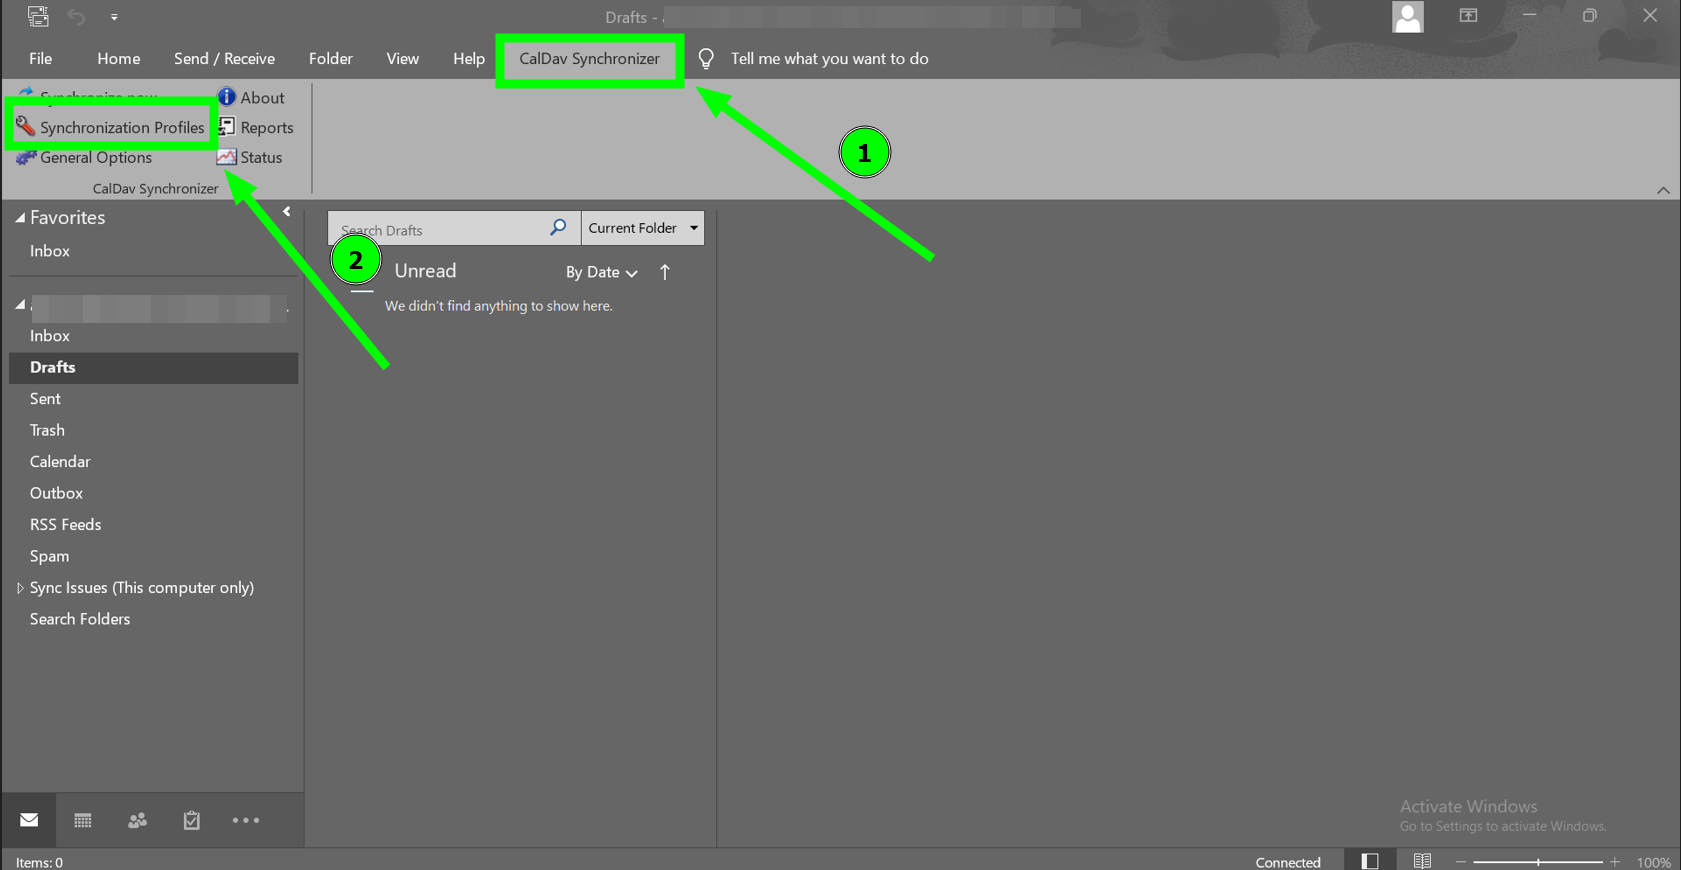
Megjegyzés: Microsoft Outlook 2013 vagy újabb verzió szükséges.Kattints az Outlookban a(z) CalDav Synchronizer fülre, majd válaszd a(z) Szinkronizálási profilok lehetőséget:
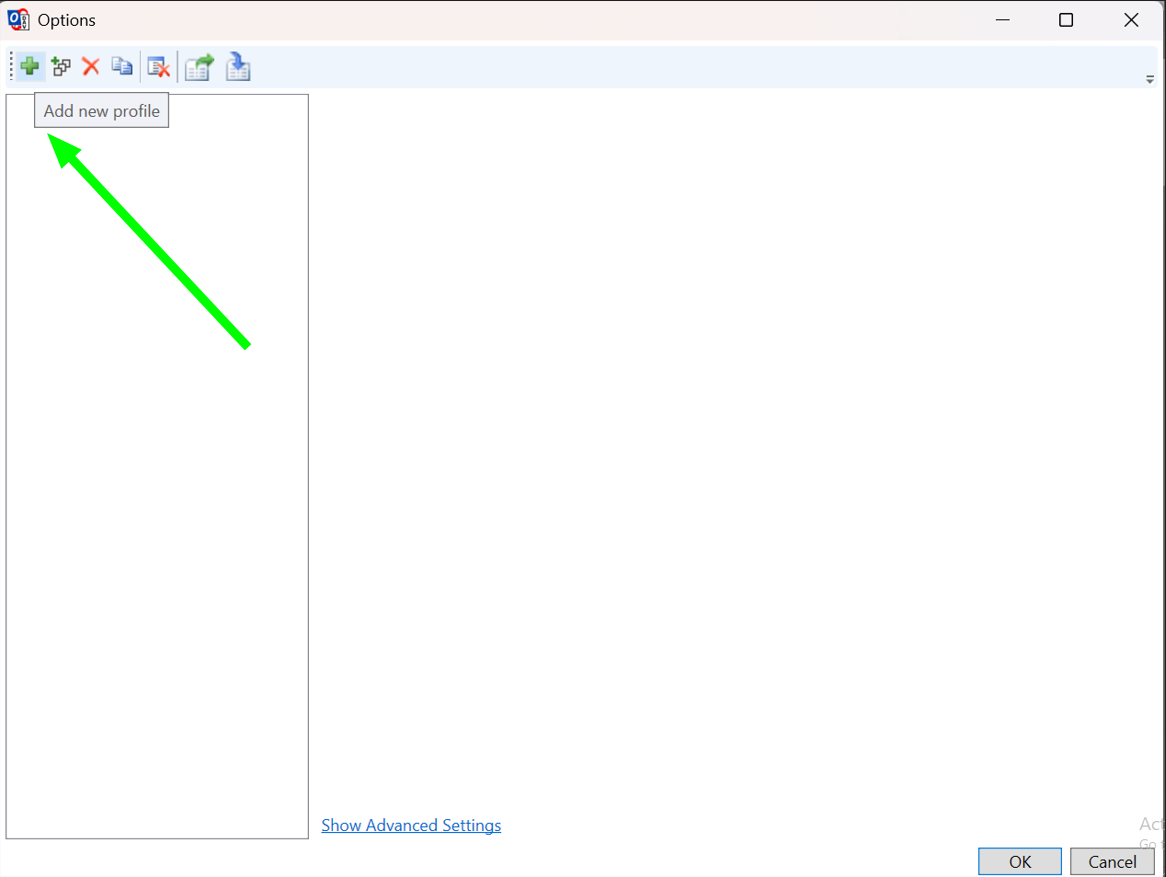
Kattints a(z) Új profil hozzáadása gombra:
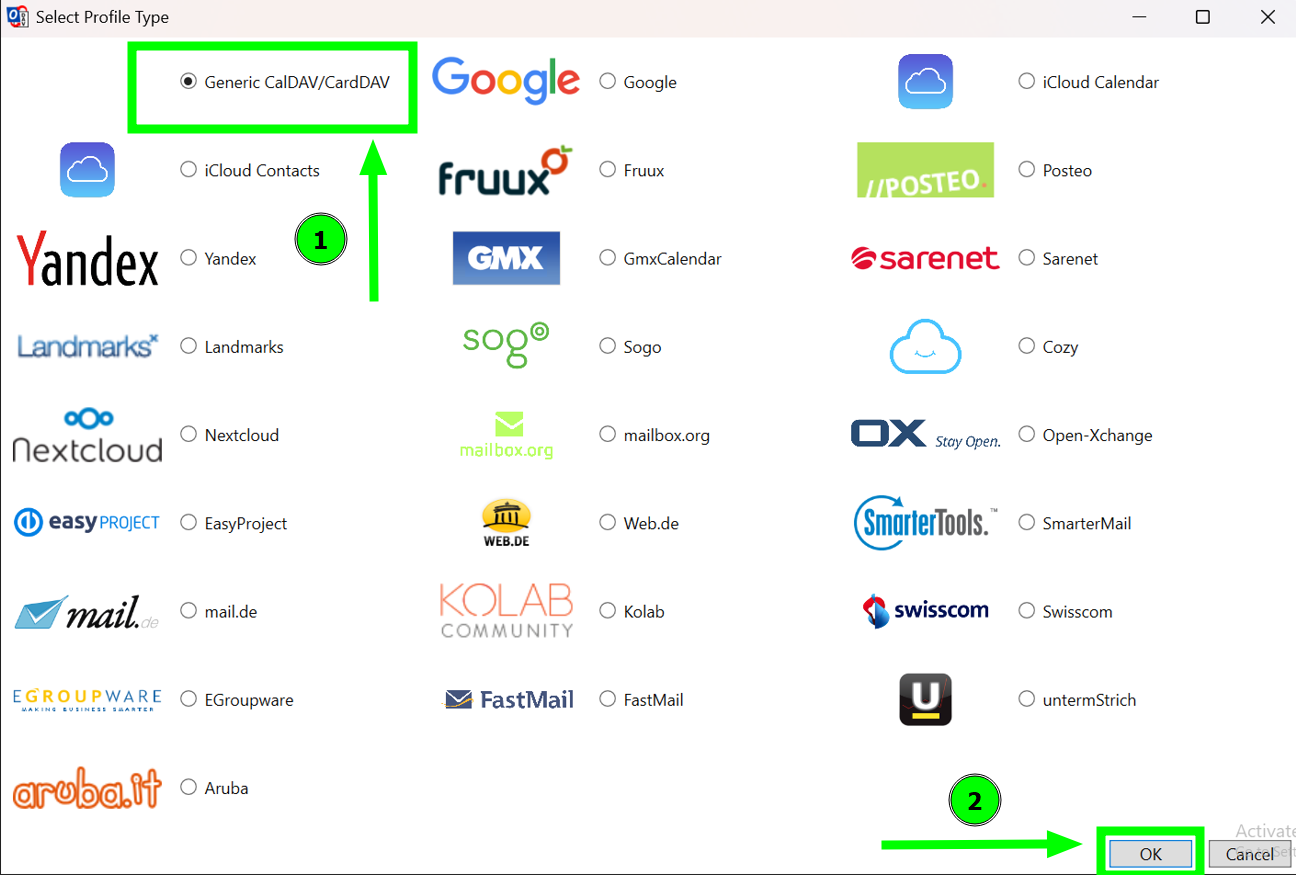
A rendelkezésre álló profil típusok listájából válaszd a(z) Generic CalDAV/CardDAV lehetőséget:
Add meg a szükséges CalDAV naptáradatokat:
Név: Adj meg egy könnyen felismerhető nevet ehhez a profilhoz.Outlook mappa: Válaszd ki vagy hozd létre azt a naptármappát az Outlookban, ahol az események megjelenjenek.
DAV URL: https://caldav.spacemail.com/
Felhasználónév: A teljes Spacemail e-mail címed (pl. info@example.com)
Jelszó: Az e-mail fiókhoz tartozó jelszó
E-mail cím: A teljes Spacemail e-mail címed (pl. info@example.com)
Állítsd be a szinkronizálási beállításokat:
Szinkronizálási mód: Kétirányú szinkronizálás (ajánlott)
Szinkronizálási intervallum: Válassz egy preferált intervallumot (pl. 15 percenként)
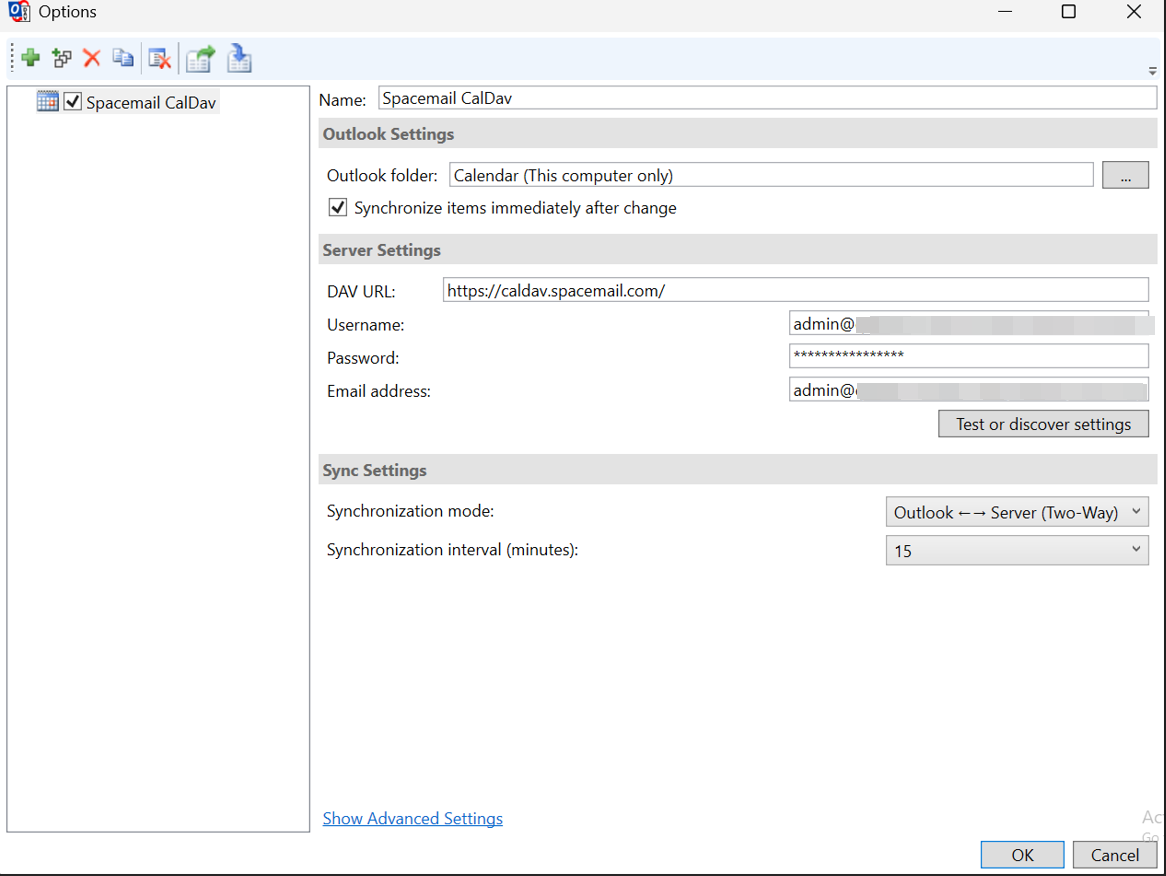
Ezután kattints a "Beállítások tesztelése vagy felfedezése" gombra. A következő ablak jelenik meg:
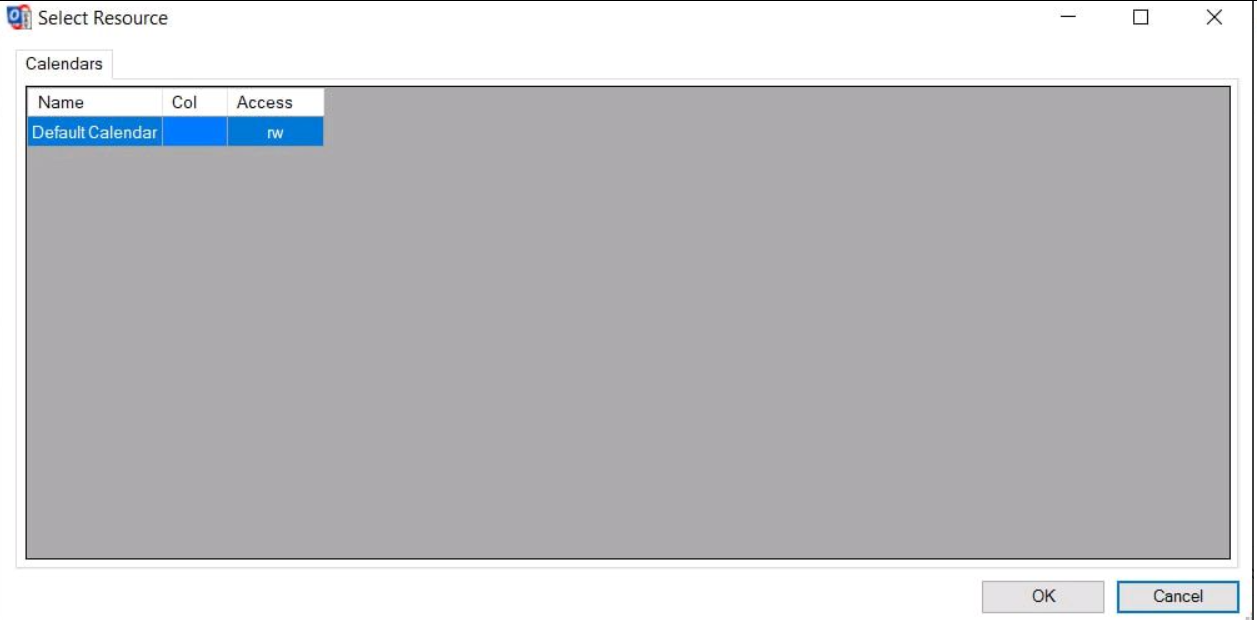
Kattints a(z) OK gombra a profil mentéséhez:
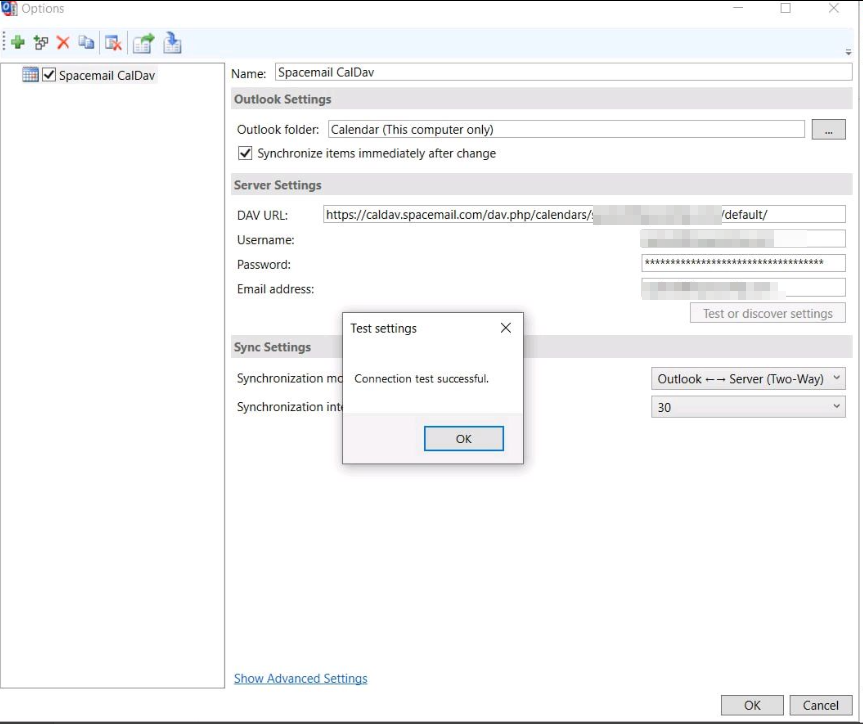
A CalDAV naptárad most már sikeresen csatlakozott az Outlookhoz, és kétirányúan szinkronizálódik!