Spacemail CalDAV setup in Thunderbird
In this article, you will find the step-by-step instructions on how to set up the Spacemail calendar in the Thunderbird email client using the CalDAV protocol.
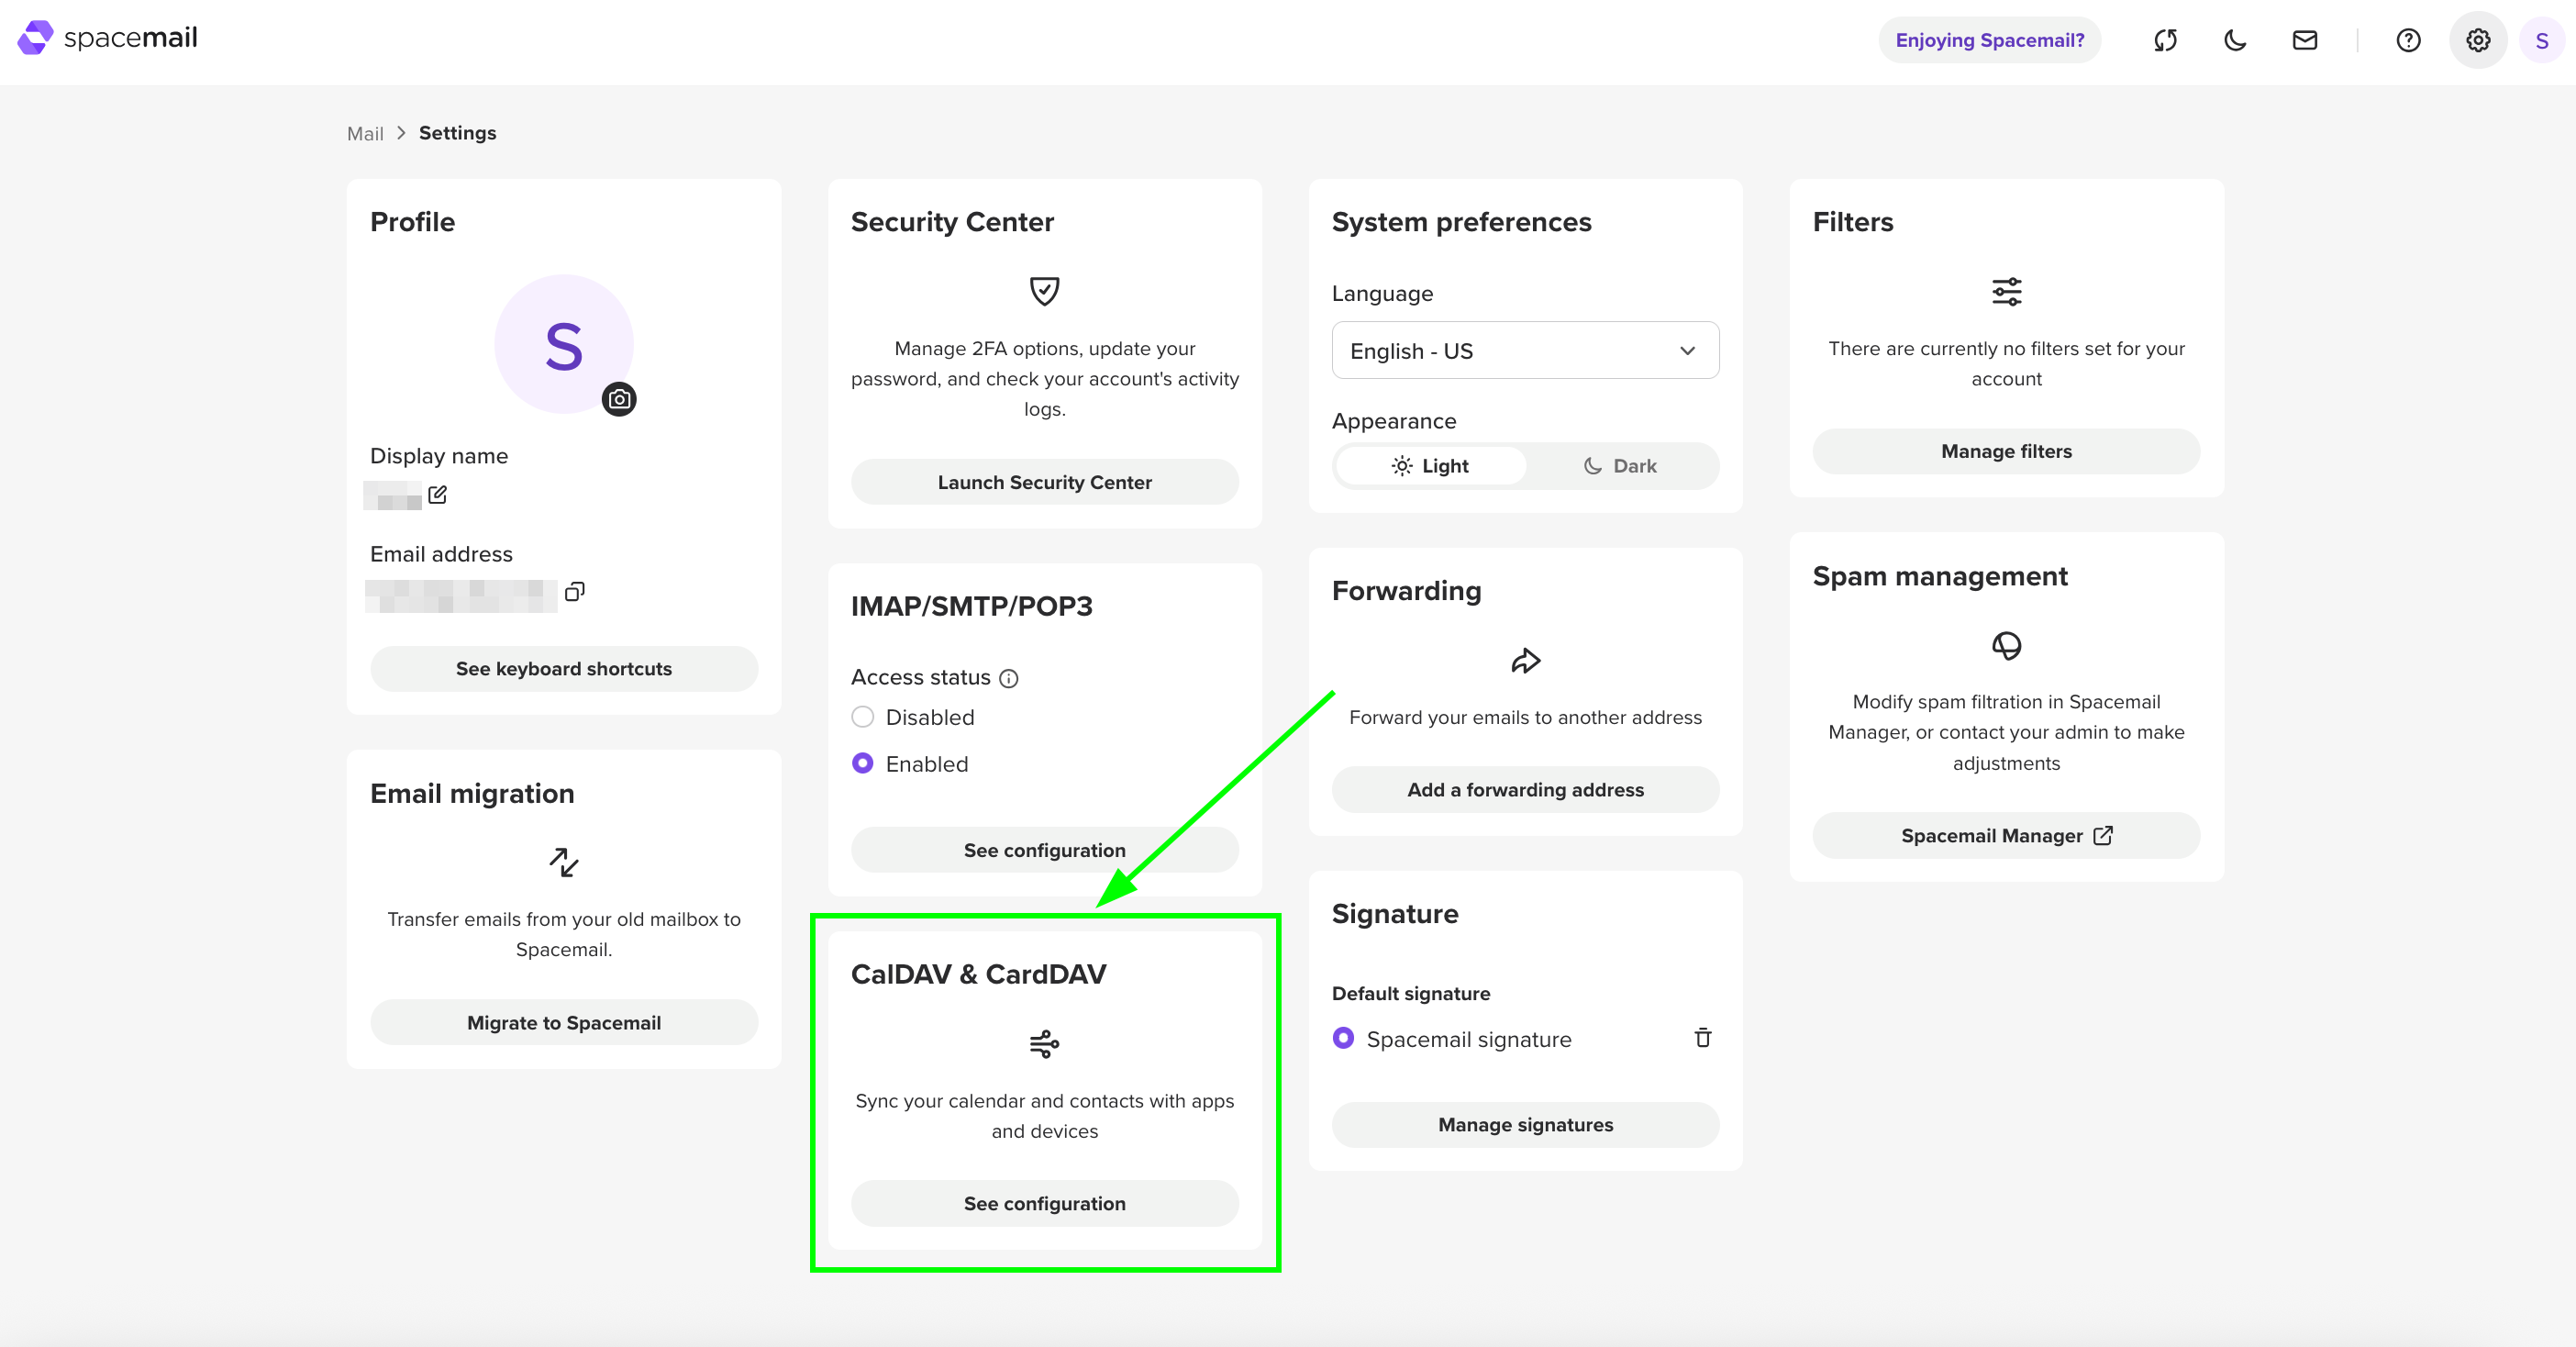
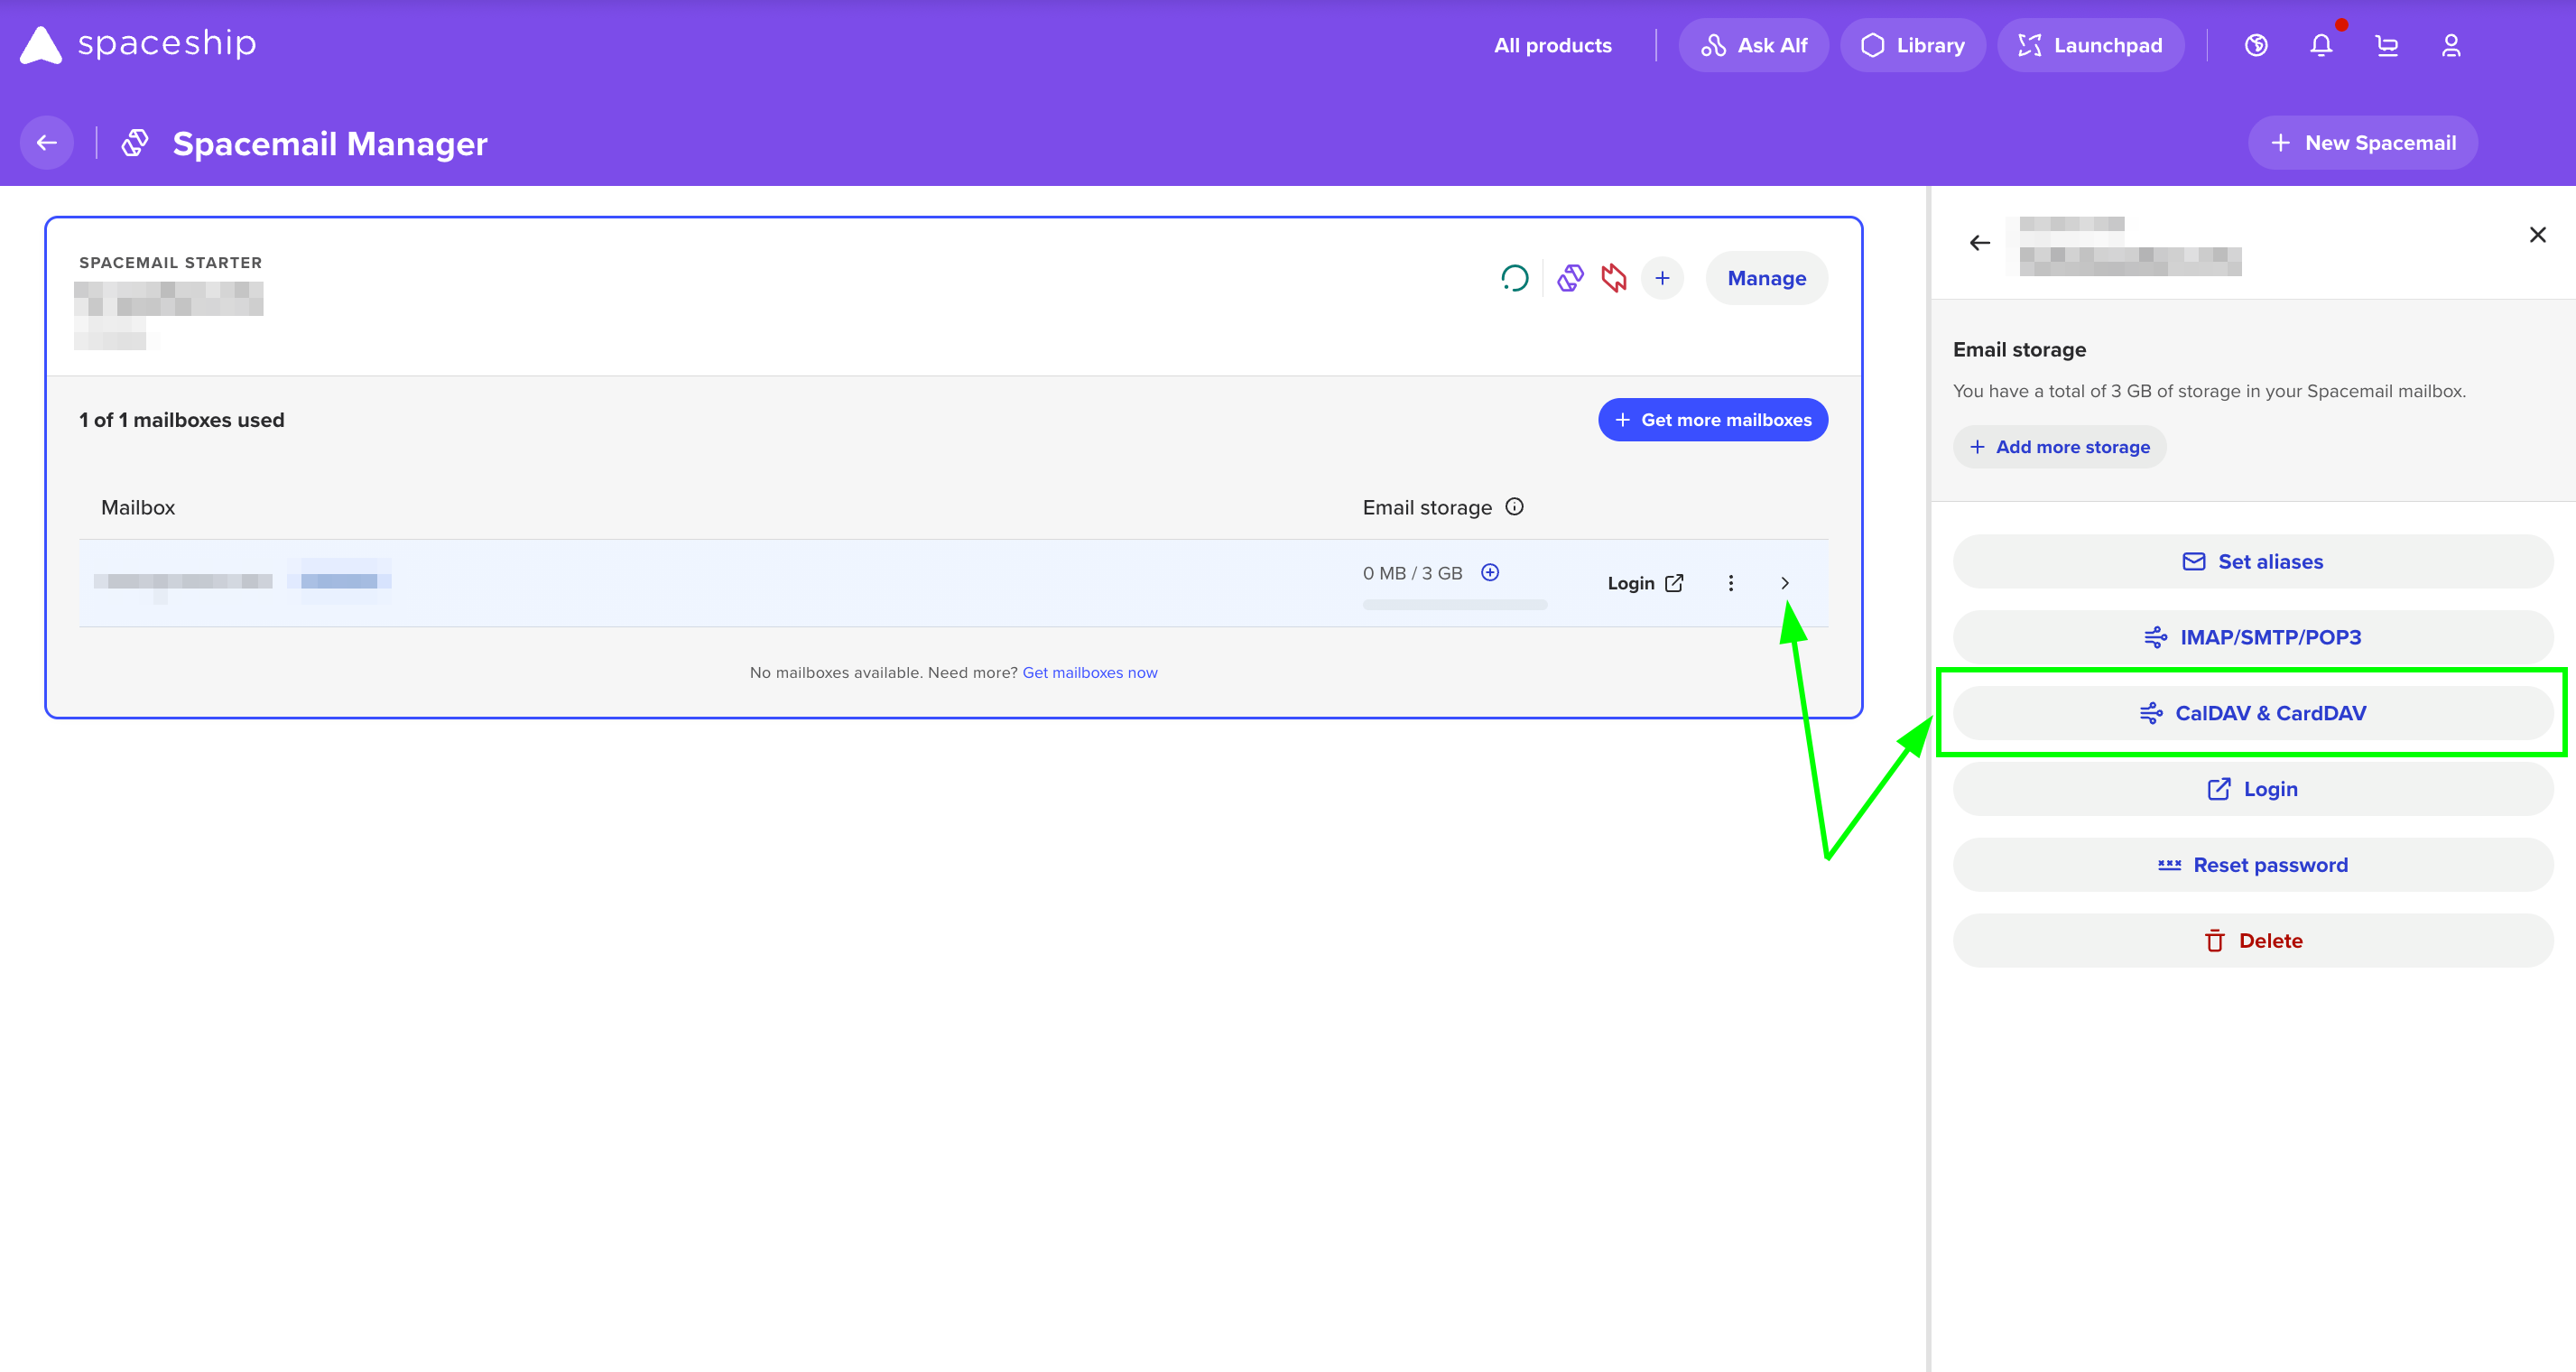
Here is how you can find the settings required for this connection:
In the Settings of Spacemail webmail:
Once the required details are fetched, please follow these steps to proceed with the setup:
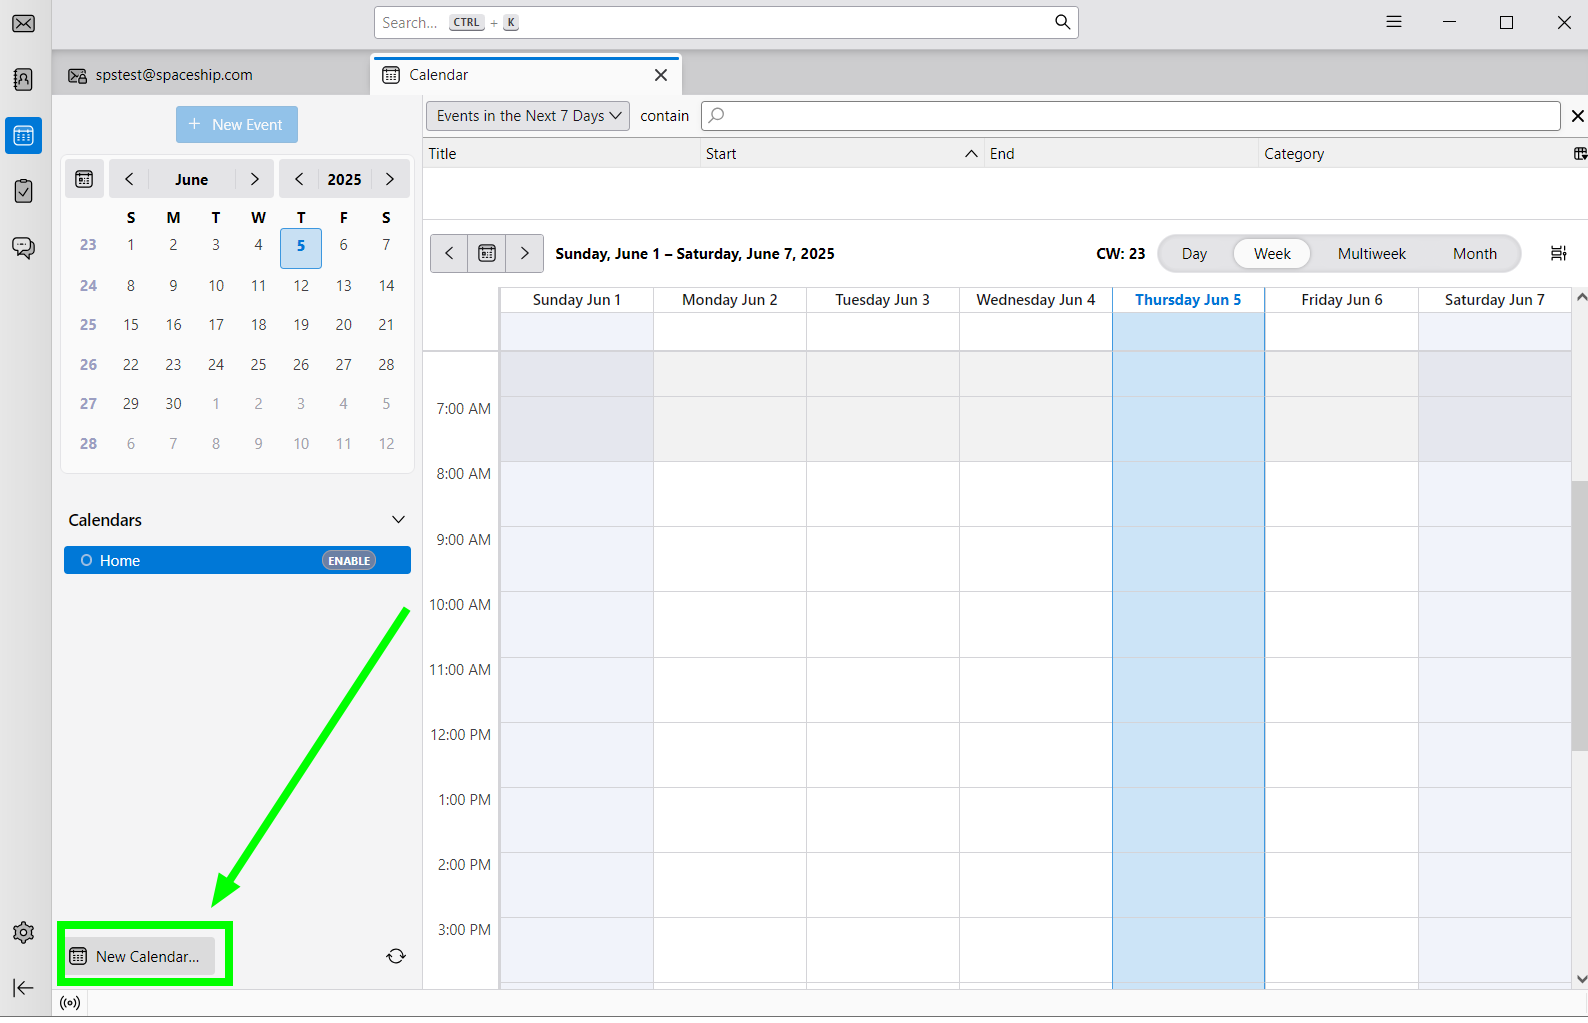
Open Thunderbird and click on the Calendar button:

Then click New Calendar, which is located in the bottom left corner of the page:
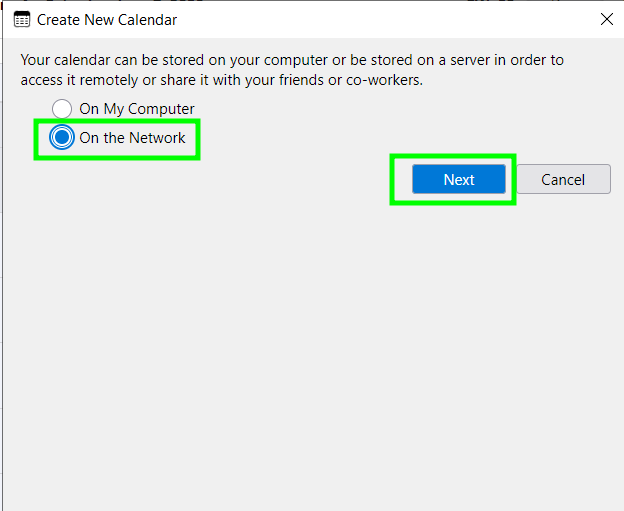
Select On the Network and press Next:
Then enter the Spacemail CalDav details:
Username: your full Spacemail email address (we use our test email address spstest@spaceship.com as an example)
Location: caldav.spacemail.com
Offline Support: check
This location doesn’t require credentials: should not be checked
Once the settings are entered, click Find Calendars: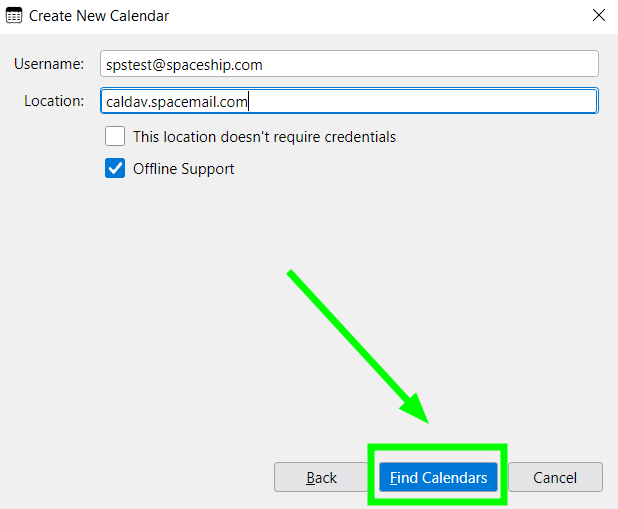
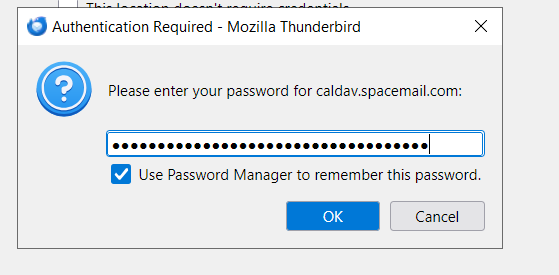
On the next step, Thunderbird will ask you to enter the Spacemail password. Please enter your Spacemail mailbox password in the Password field and click OK:
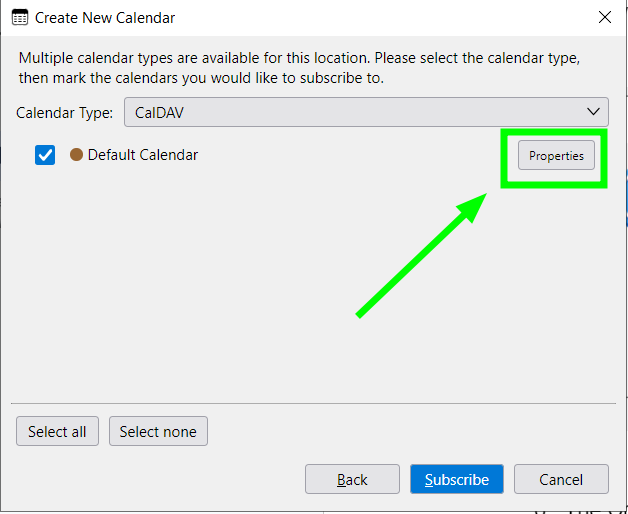
The Create New Calendar settings message will appear.
Select CalDAV as the Calendar type. You may also set it as the default Calendar.Next step: click Properties to expand the Calendar settings:
Here you can change the Calendar name (it is Spacemail Calendar in our screenshot), change synchronization frequency of your calendar (in the Refresh Calendar field), change the events color, and set up notifications:
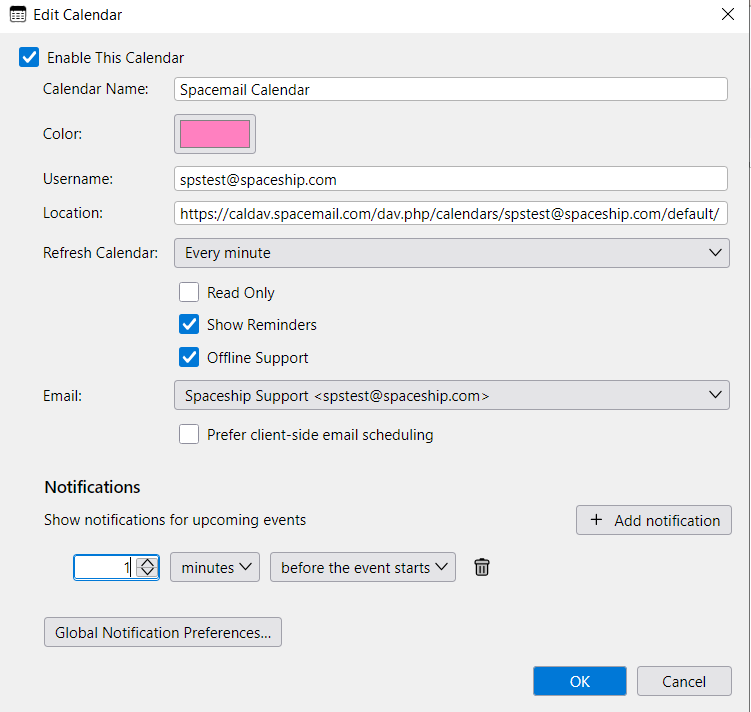
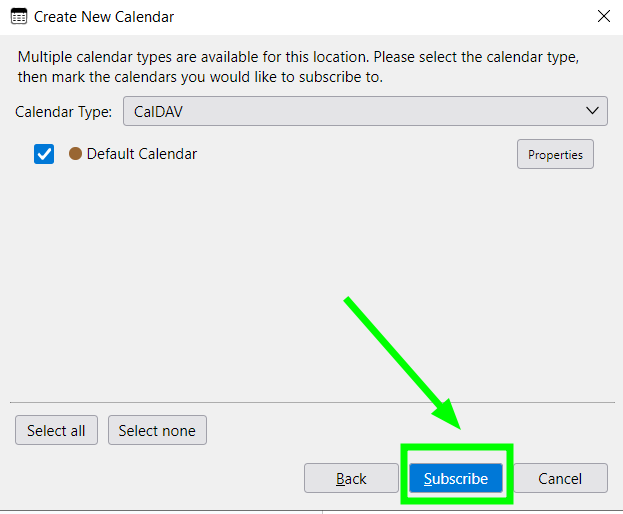
Once done, please click OK.You will be redirected back to the Create New Calendar menu. Click Subscribe and give Thunderbird a few moments to sync your Calendar:
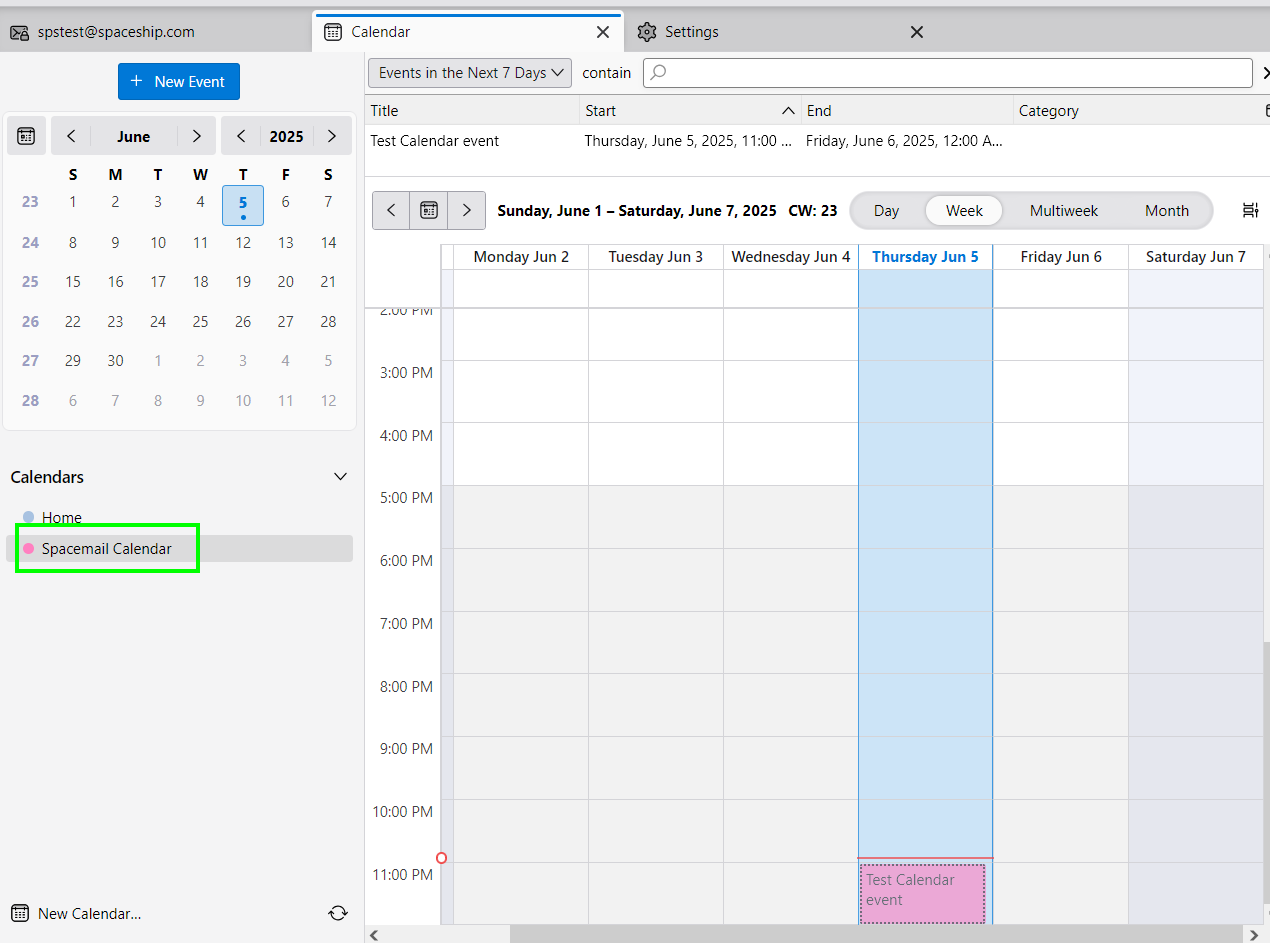
That’s it! The Spacemail Calendar will appear in your Thunderbird Calendars list: