What is Split Tunneling in FastVPN for iOS
VPN split tunneling is an advanced feature of virtual private network software, designed to help you better manage and control your VPN traffic. This guide explains how split tunneling works.
Split tunneling in FastVPN allows you to determine which websites use a secure connection through FastVPN, and which ones can use a regular connection through your internet service provider. This flexibility allows you to enhance security for sensitive activities like remote work or banking, while still enjoying faster speeds and local services for other tasks like streaming readily available content.
How to enable split tunneling on FastVPN?
To enable split tunneling in the FastVPN app on your iOS device, follow the steps outlined below.
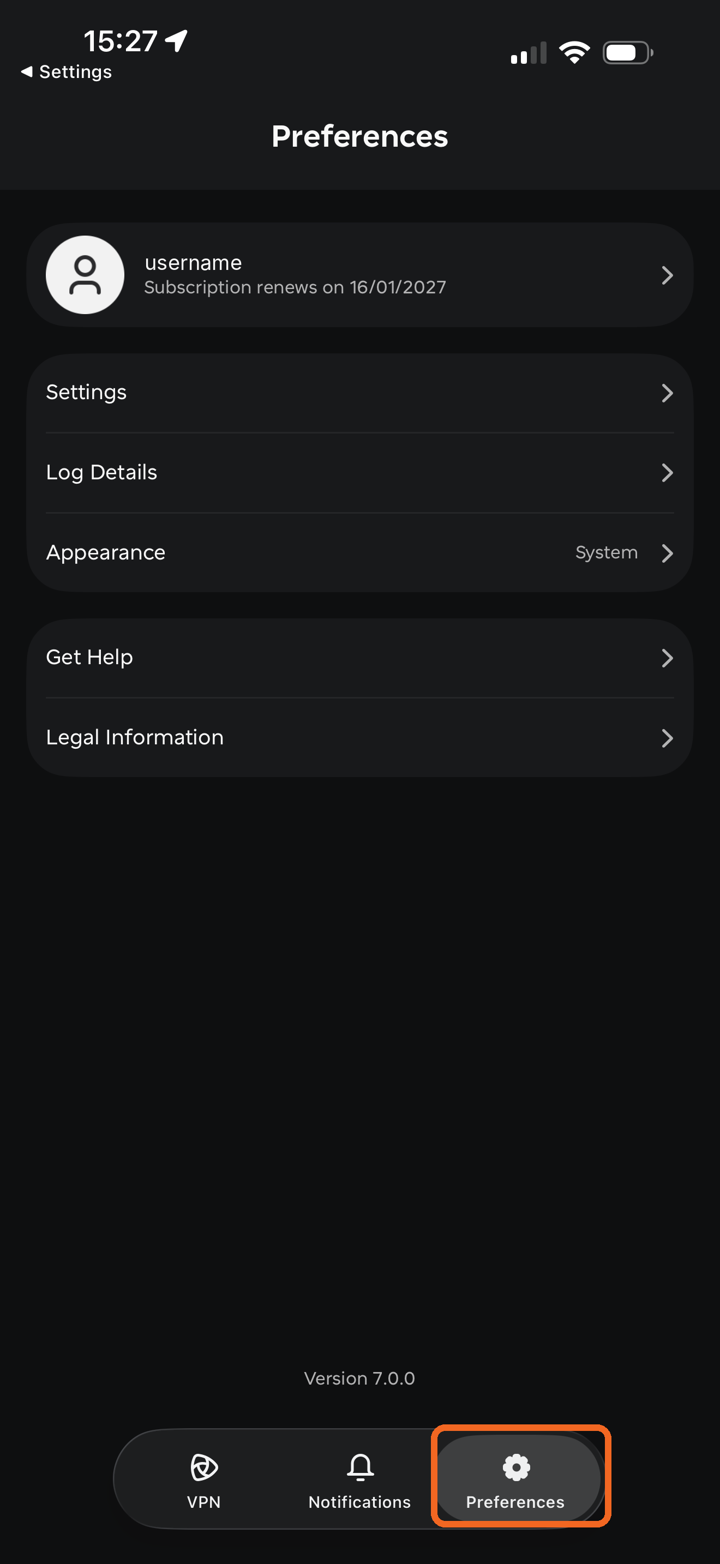
1. Before proceeding, please make sure that you are disconnected from FastVPN. Tap Preferences in the bottom navigation bar of the app.
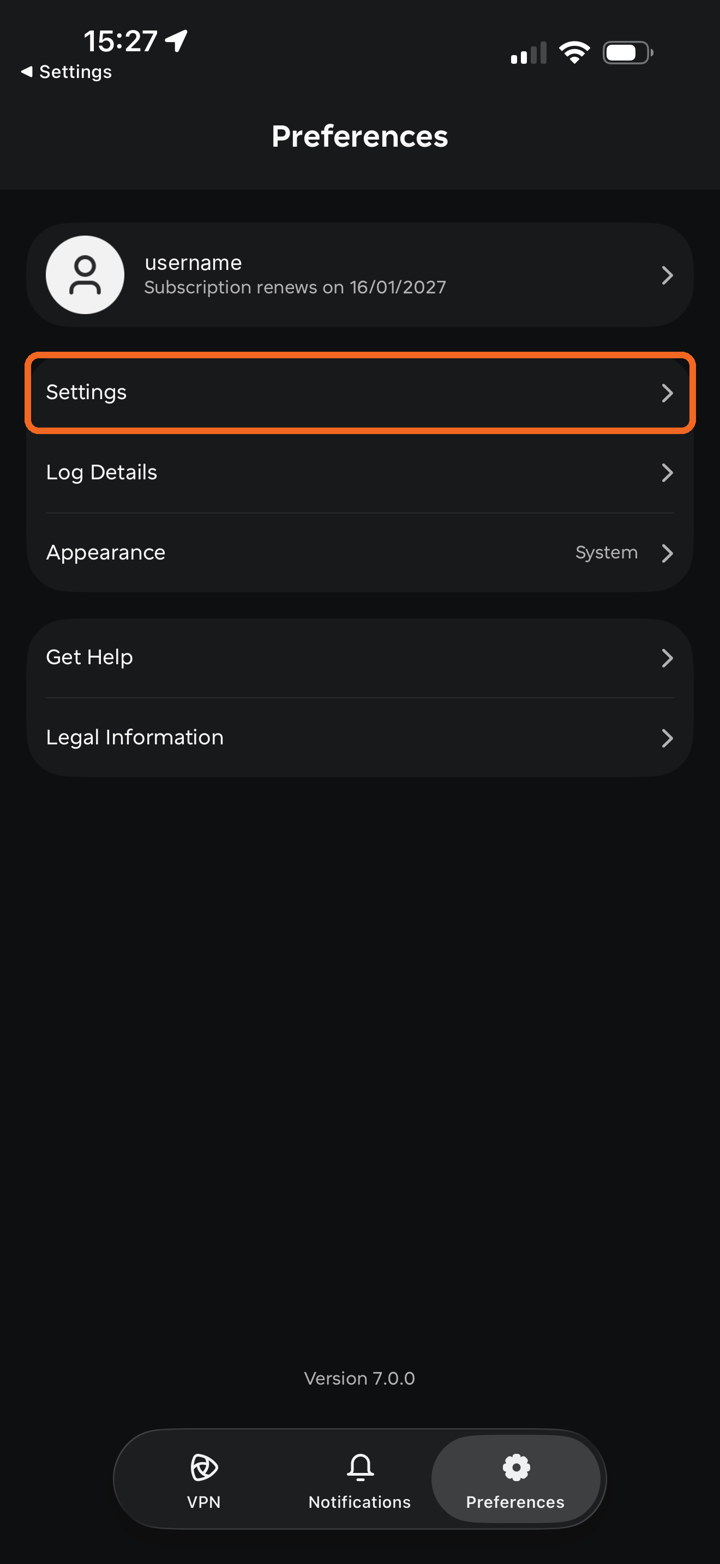
2. Tap Settings in the Preferences menu.
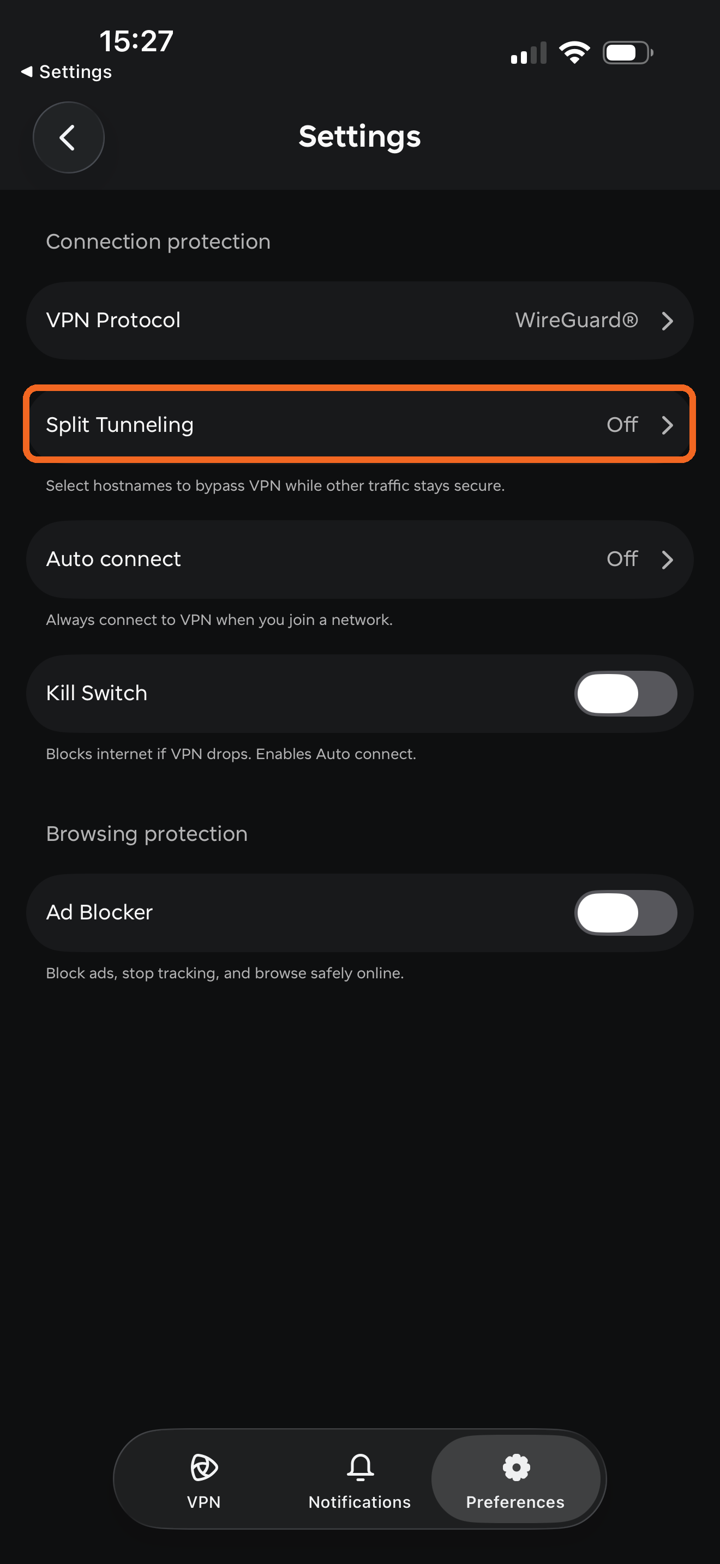
3. Under Connection protection, tap Split Tunneling.
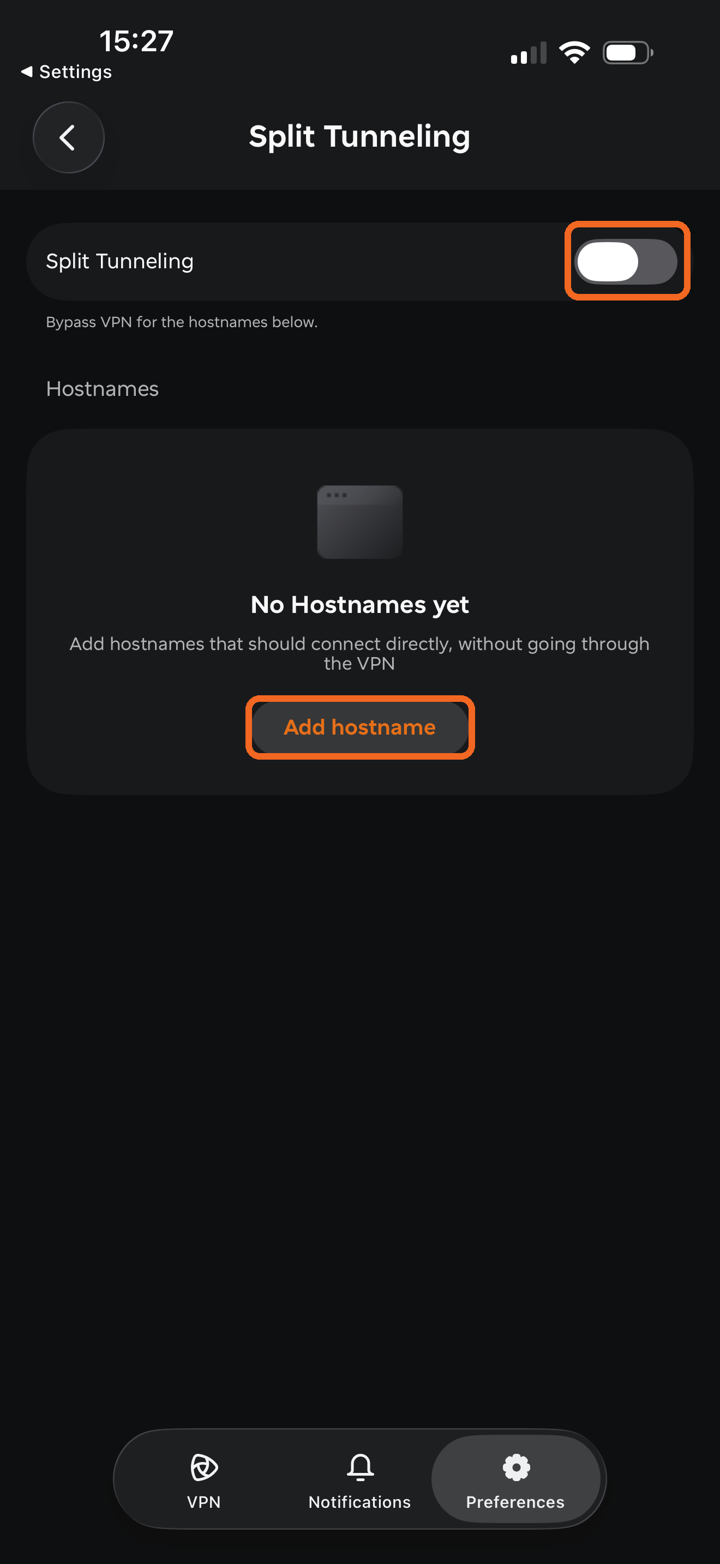
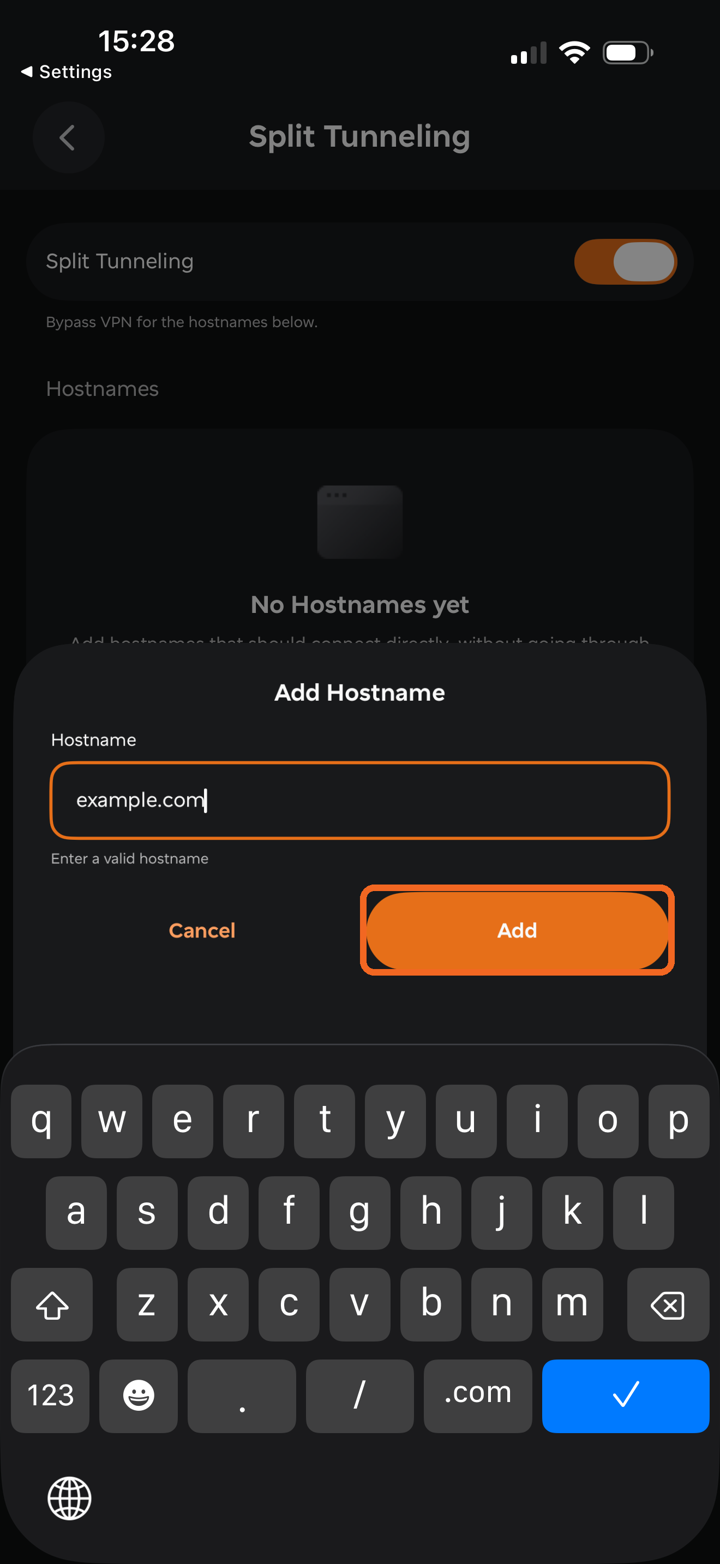
4. Turn on the Split Tunneling switch, then tap Add hostname.
5. Enter the hostname that you would prefer to be routed via your Internet Service Provider and not use the FastVPN connection (for example, example.com), and tap Add.
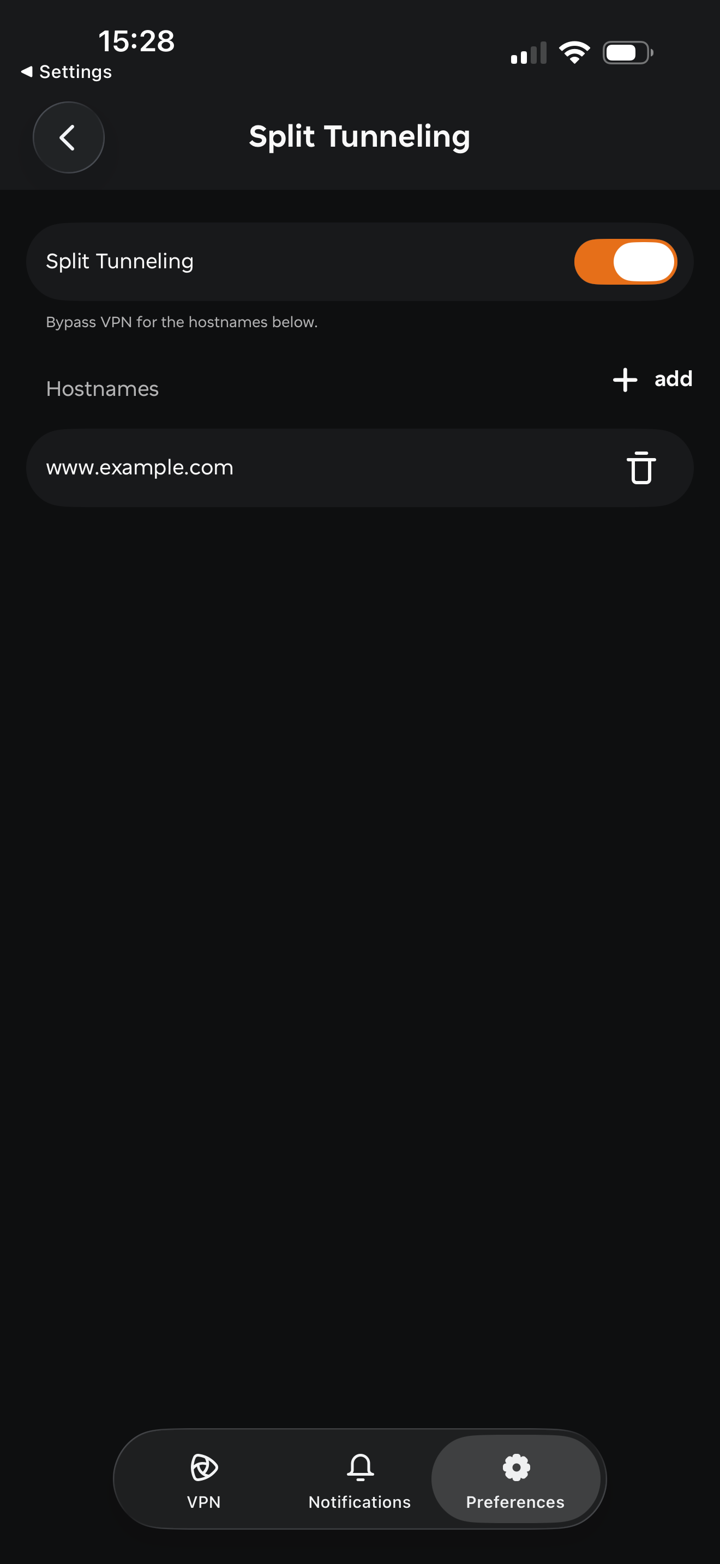
6. The hostname appears in the Hostnames list and will not use the VPN connection. To add more hostnames, tap + add. To remove a hostname, tap the trash icon next to it.
7. Go back to the VPN tab and tap Connect.
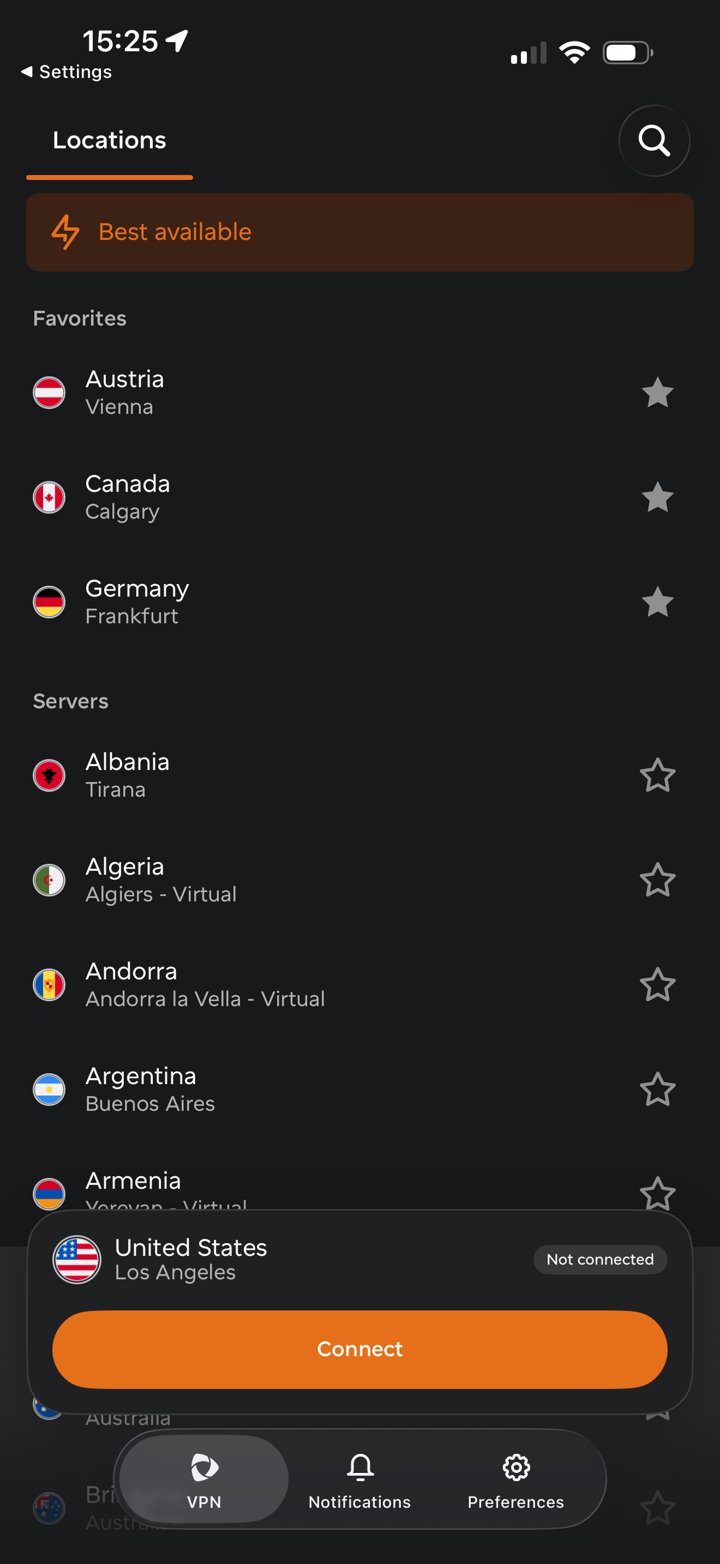
Now, when you connect to FastVPN, everything except the selected hostnames will be tunneled through FastVPN.
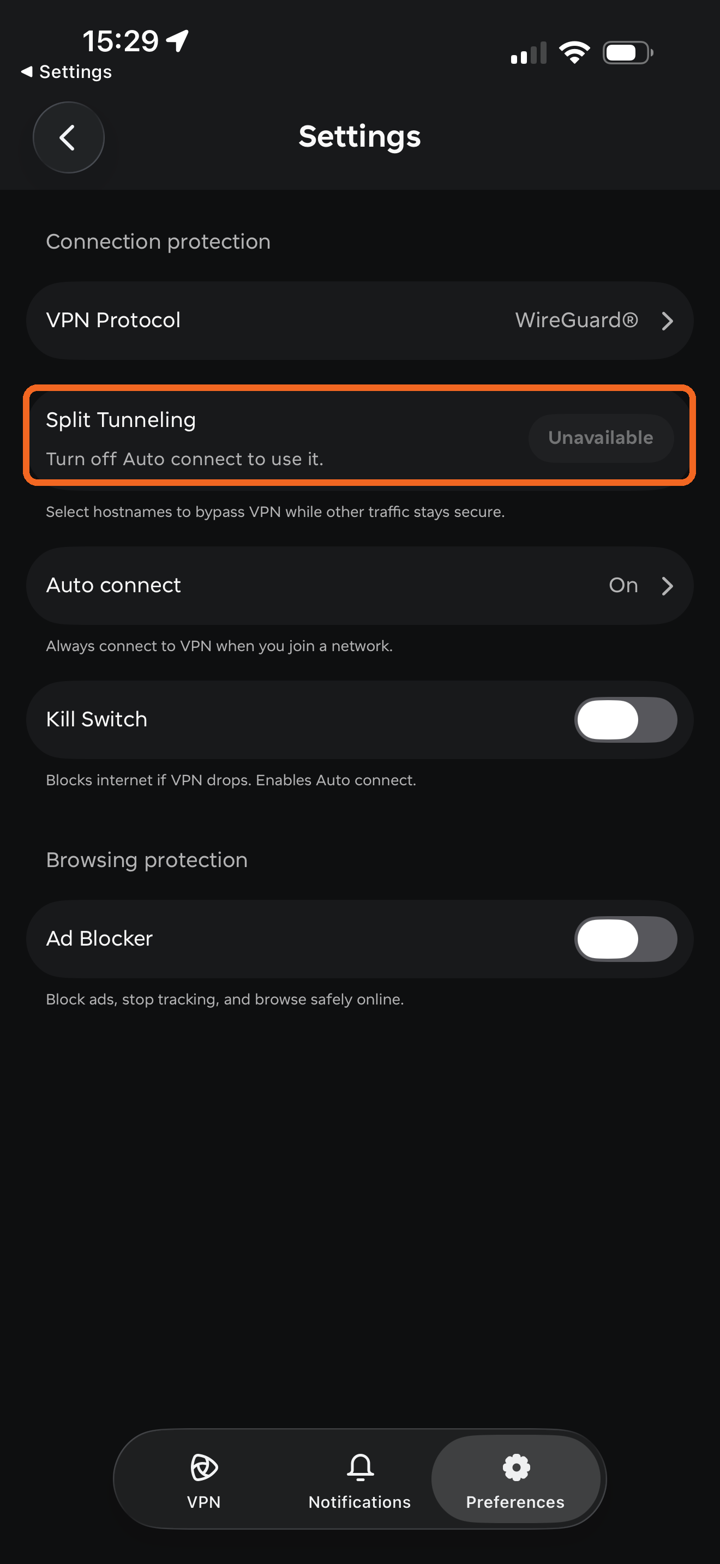
Note: Split Tunneling can't be used together with Auto connect (or Kill Switch, which turns on Auto connect). If Auto connect is on, Split Tunneling shows as Unavailable in Settings. Turn off Auto connect to use Split Tunneling.
If you need any further assistance, please contact our Support Team.