How to back up and restore a WordPress site
Backing up a website is essential for any owner, no matter how experienced they are. Websites can get compromised by an outside party, crash after an upgrade, or fail as a result of human error. This is when a saved copy of your files and data comes in handy. Keeping a recent backup of your website saves time and reduces stress and downtime.
This guide describes how to manage EasyWP backups:
How to create a backup of a WordPress application
How to download a backup of a WordPress application
How to restore a backup of your WordPress application
Getting started:
Log in to your Spaceship account and head over to the Launchpad.
Choose EasyWP Manager.
Locate the needed EasyWP subscription and click on the Manage button:
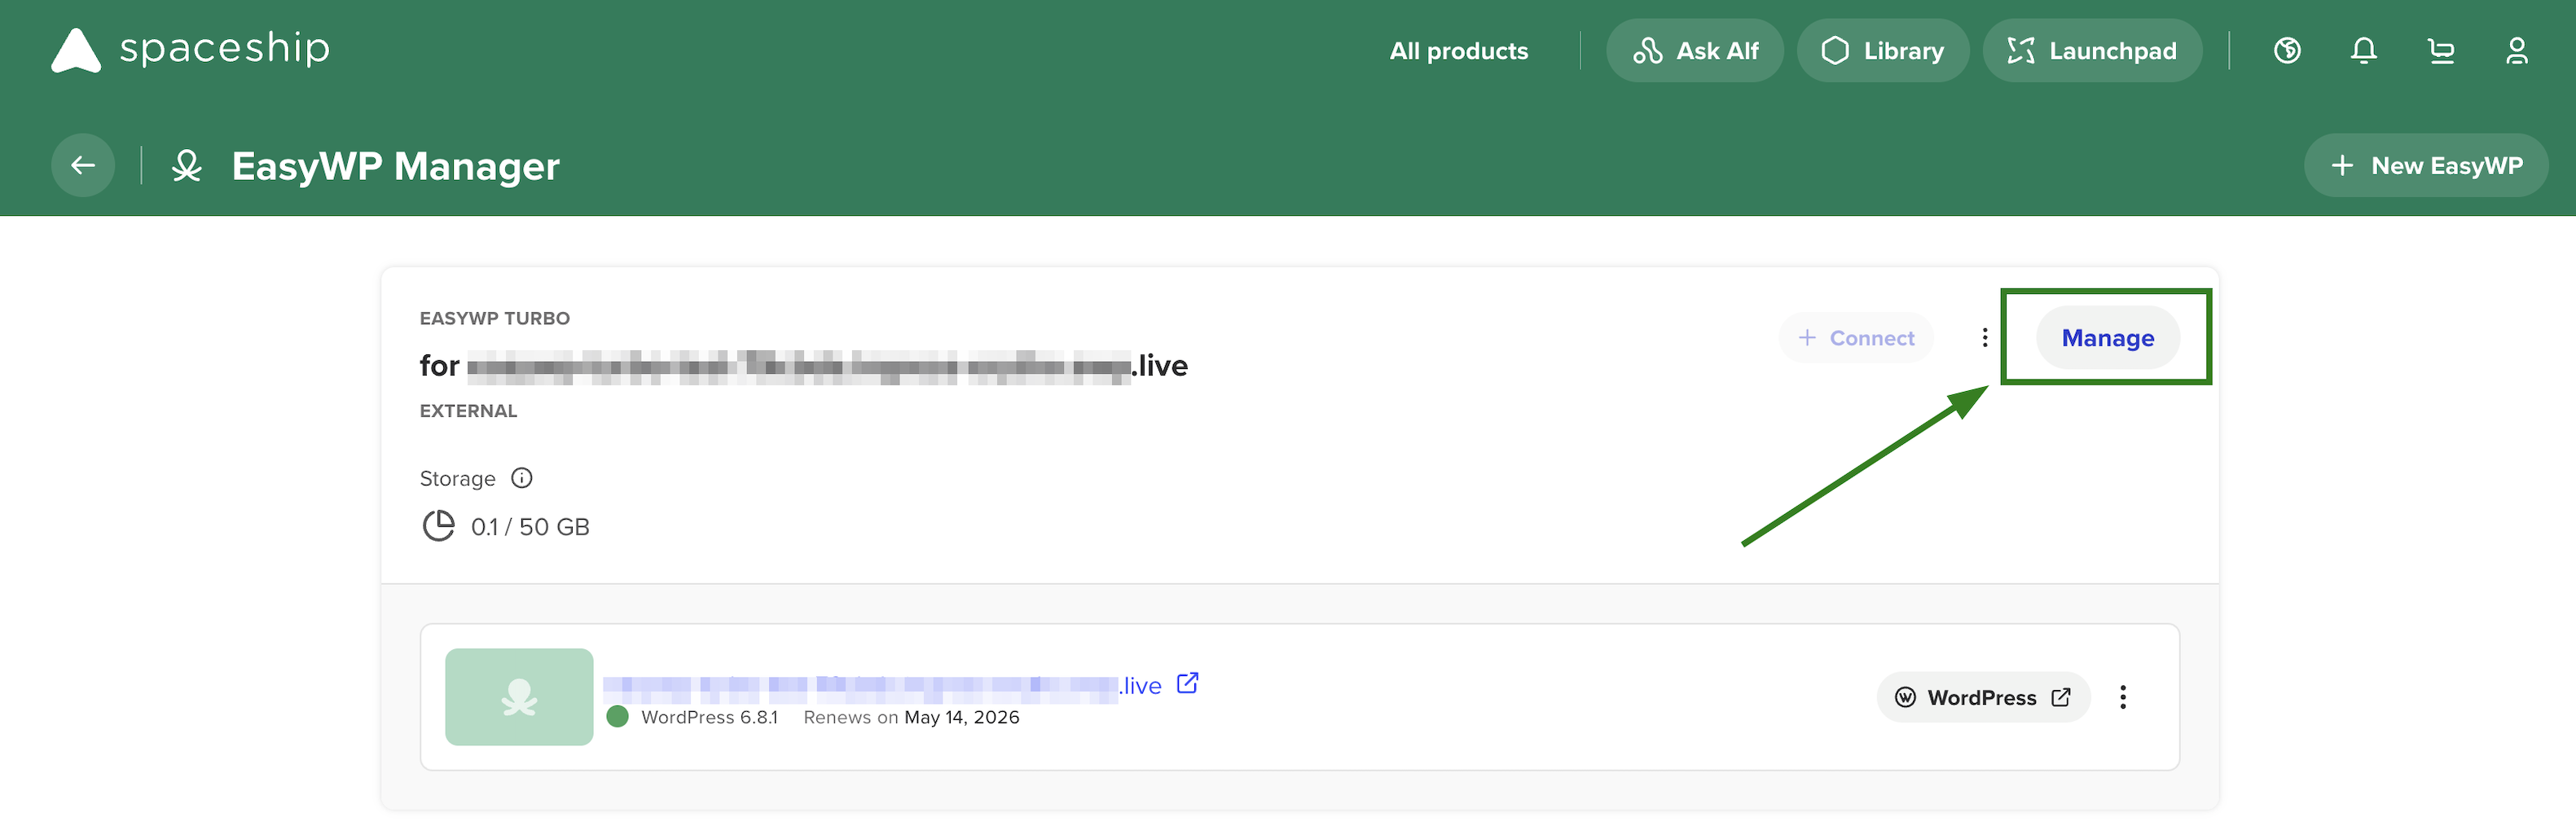
3. Navigate to the Backups section:
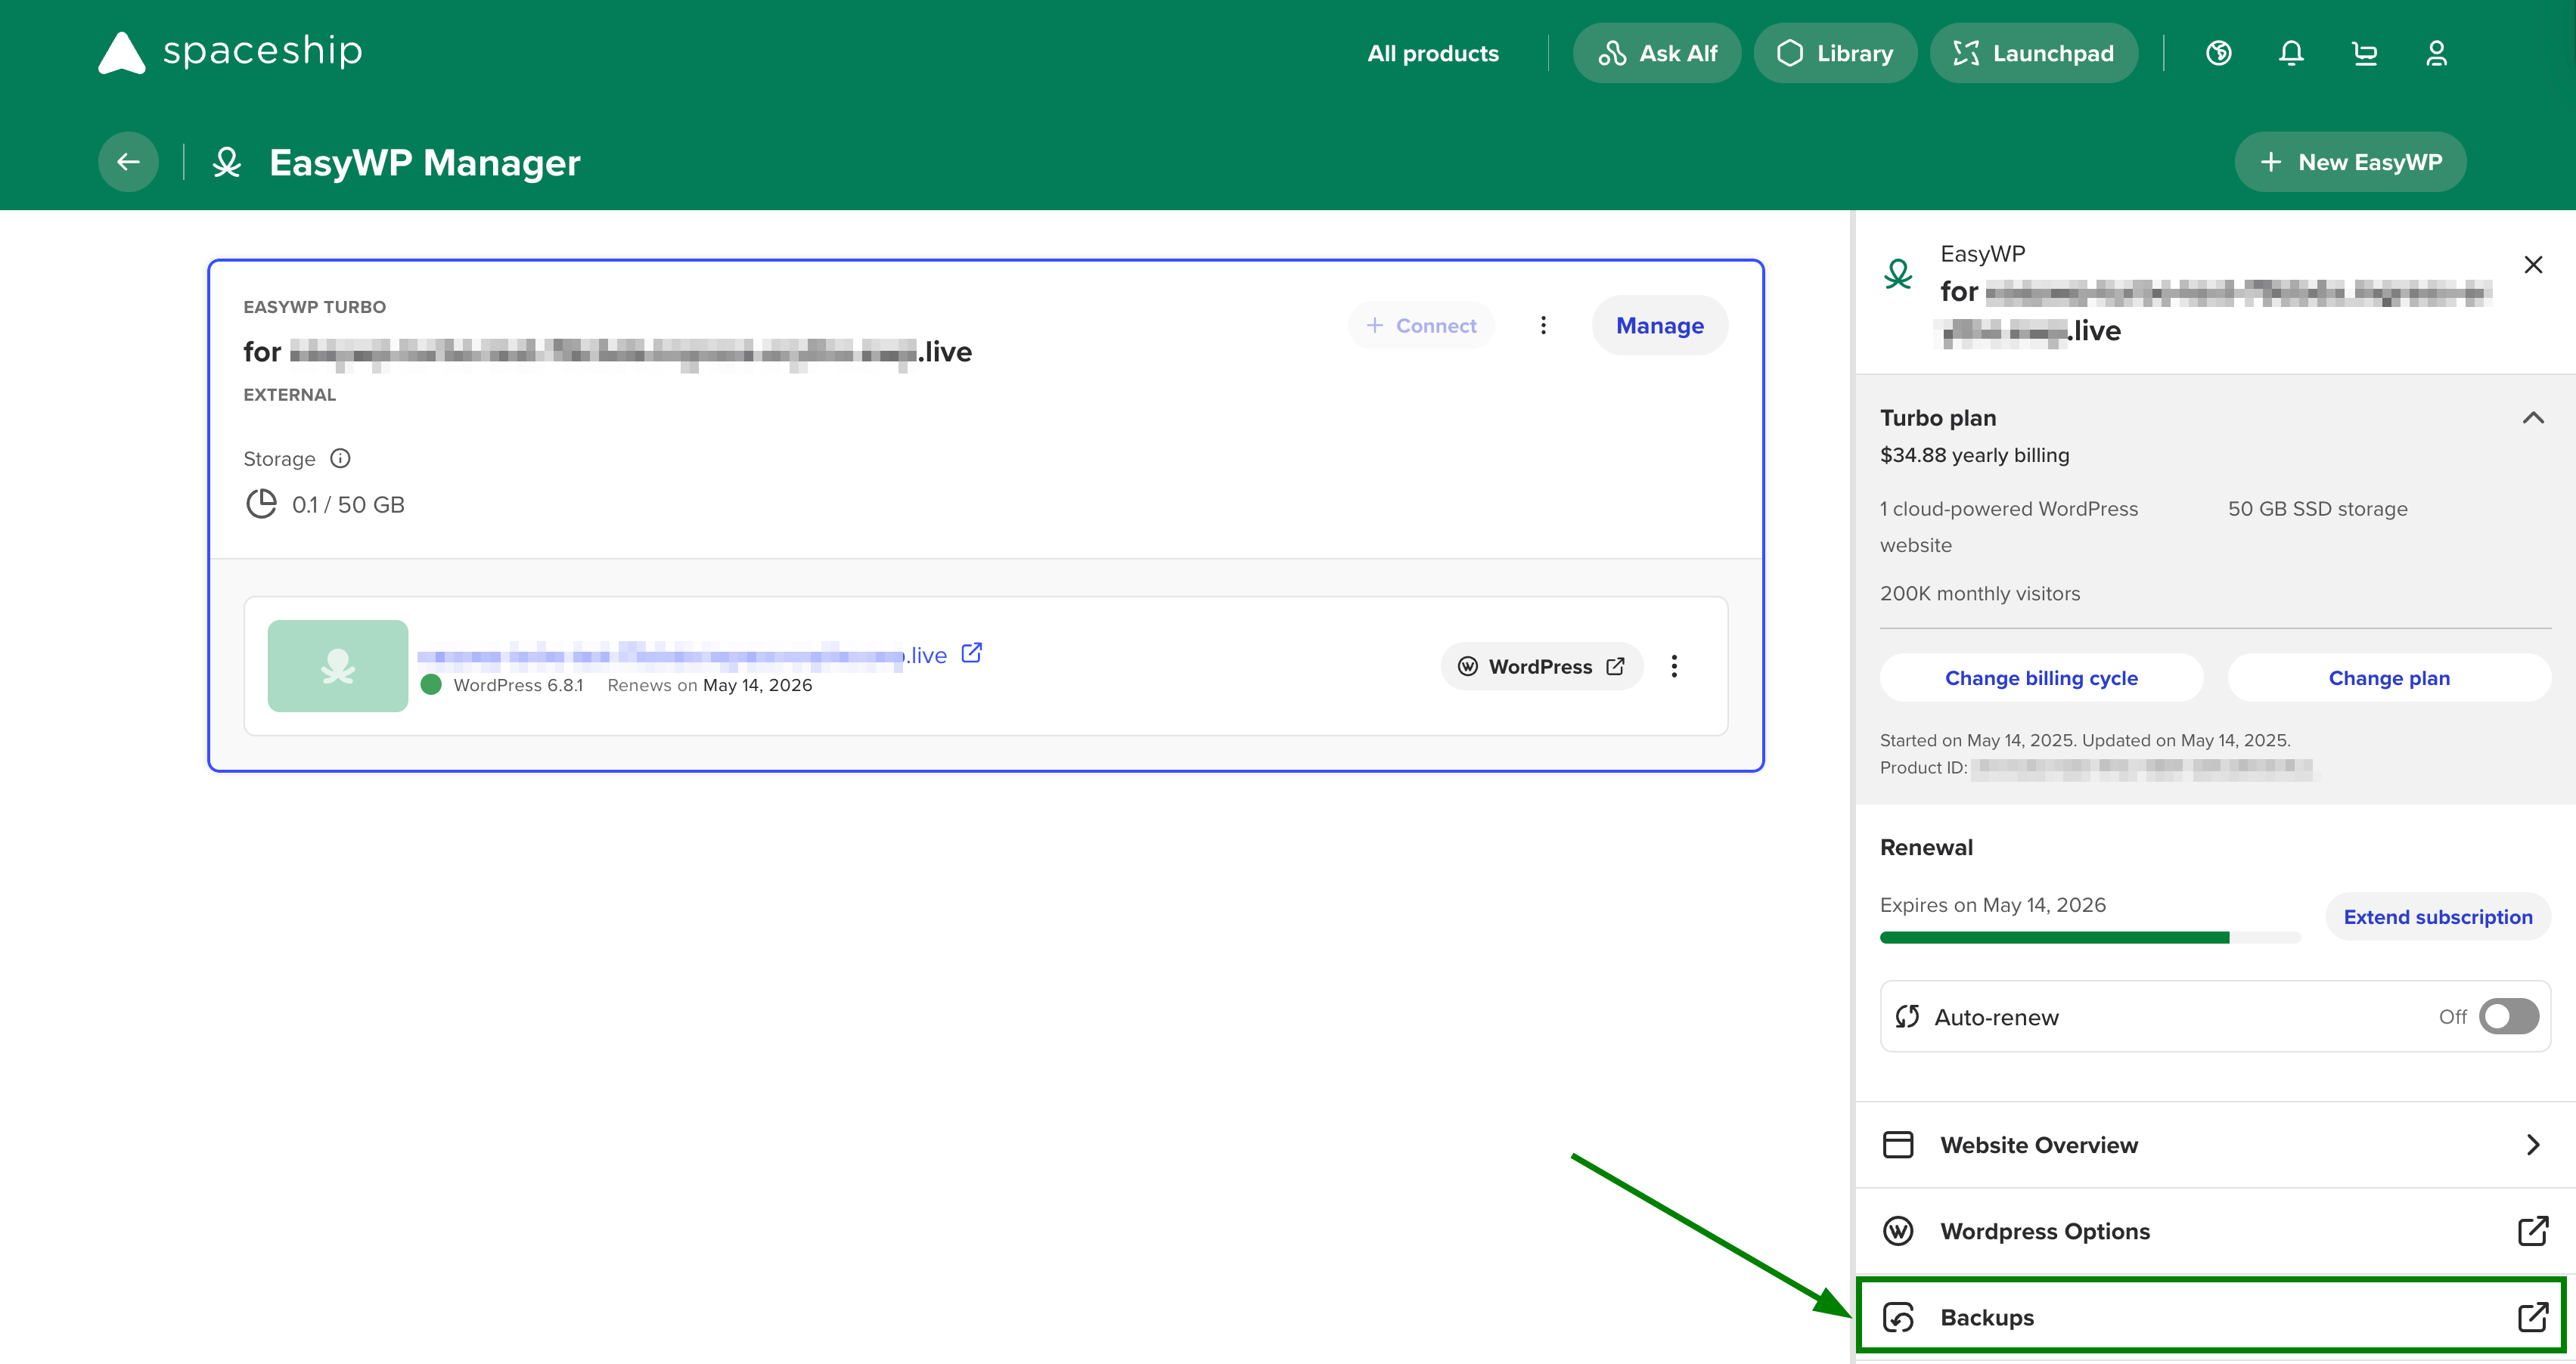
The Backups section allows you to create a new backup, restore a previous backup, download a backup of a database and/or files, and review your backup list:
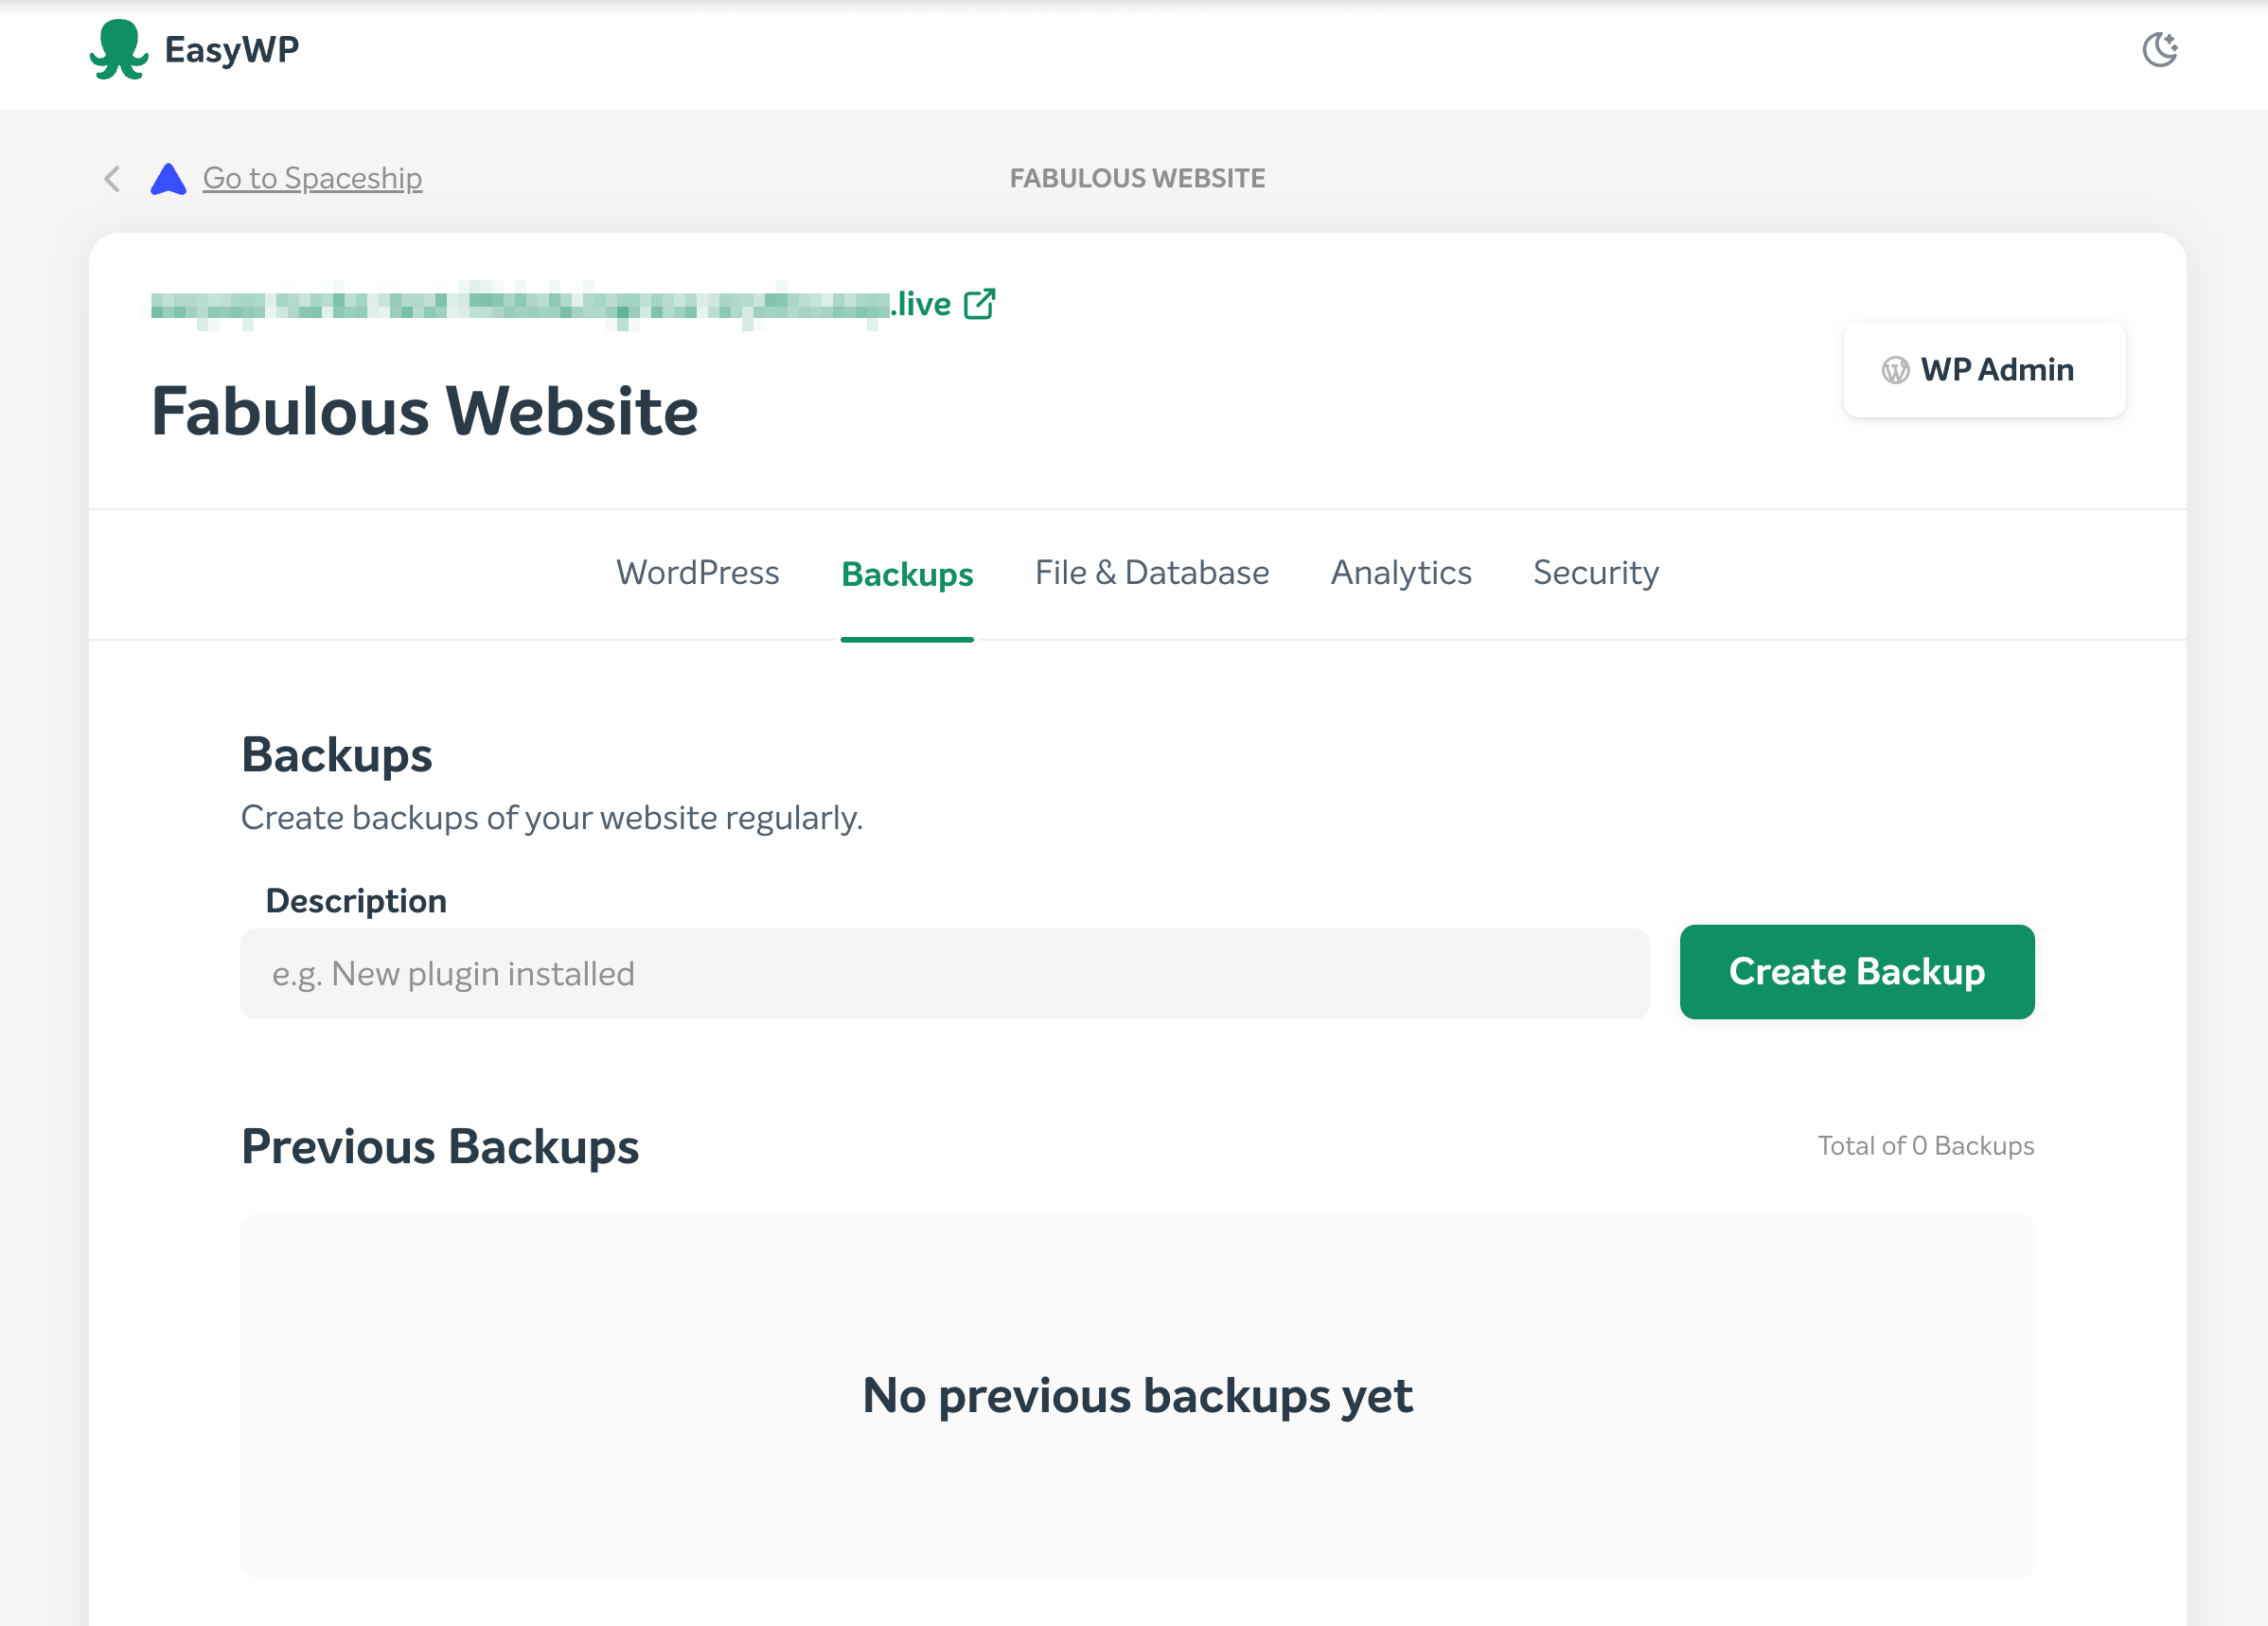
How to create a backup of a WordPress application:
1. Inside the Backups section, enter the desired backup name in the Description field, then click Create Backup:
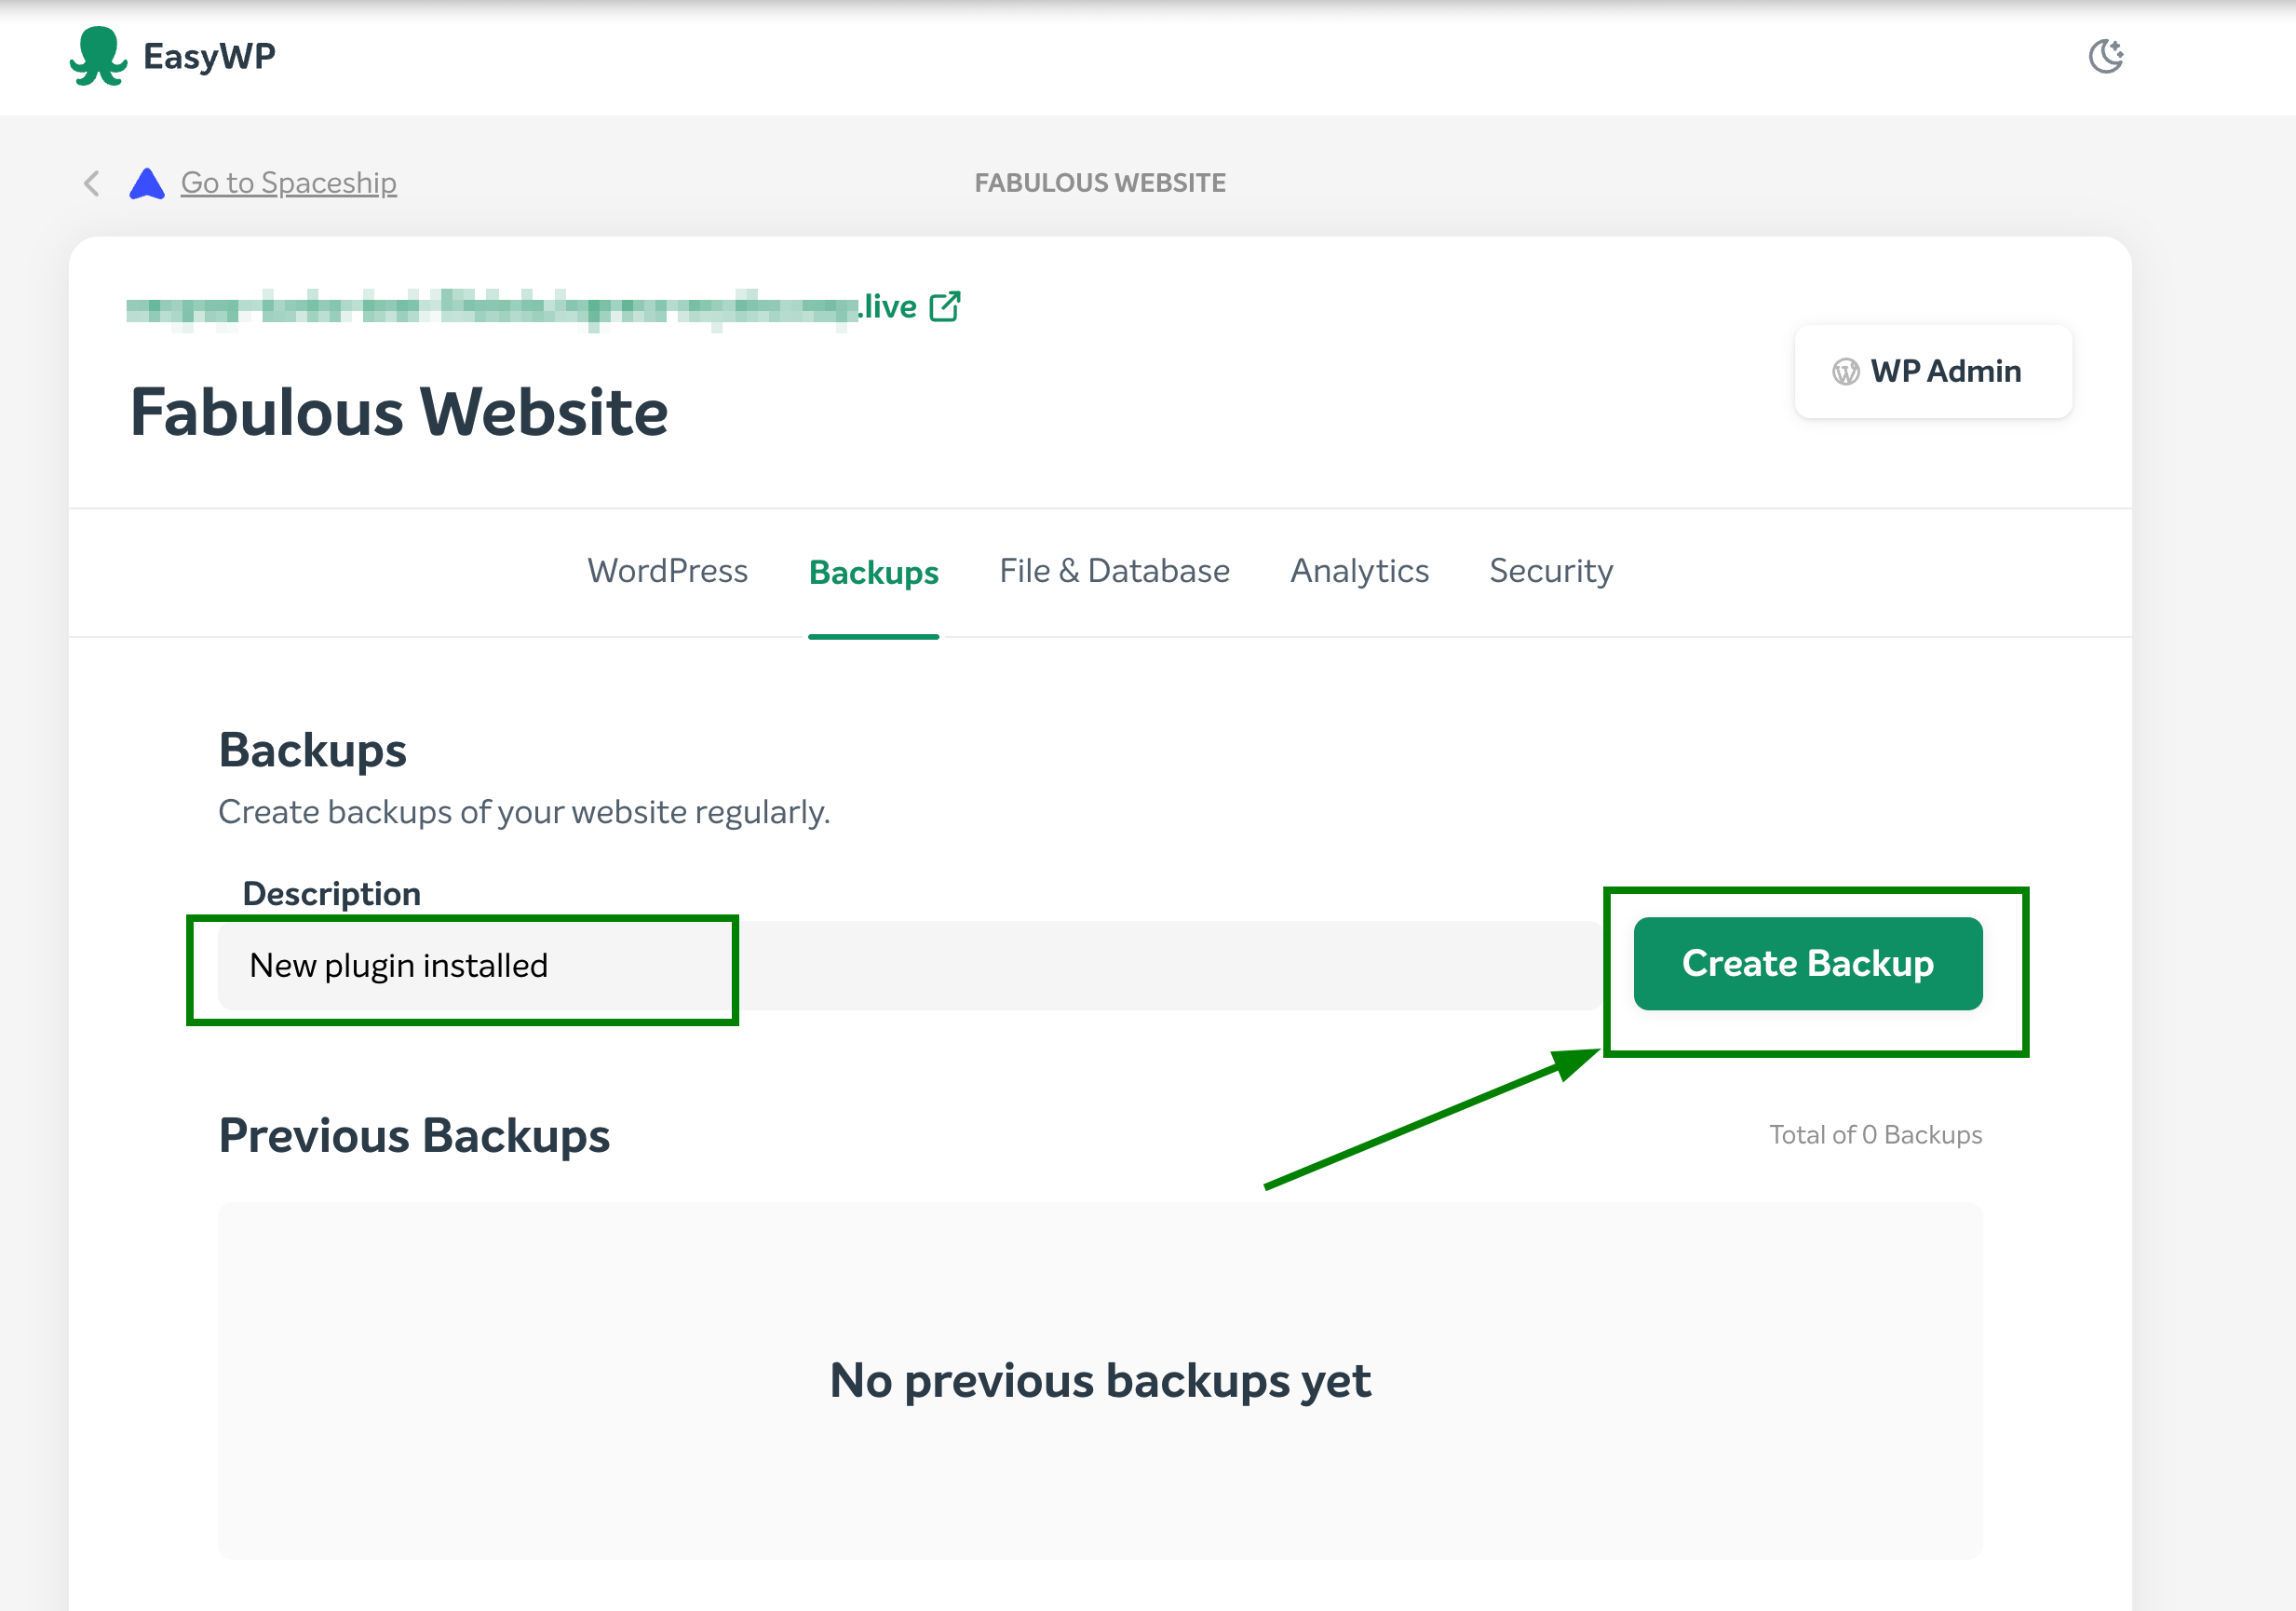
2. Once a backup is generated, it will be visible in the list of available backups:
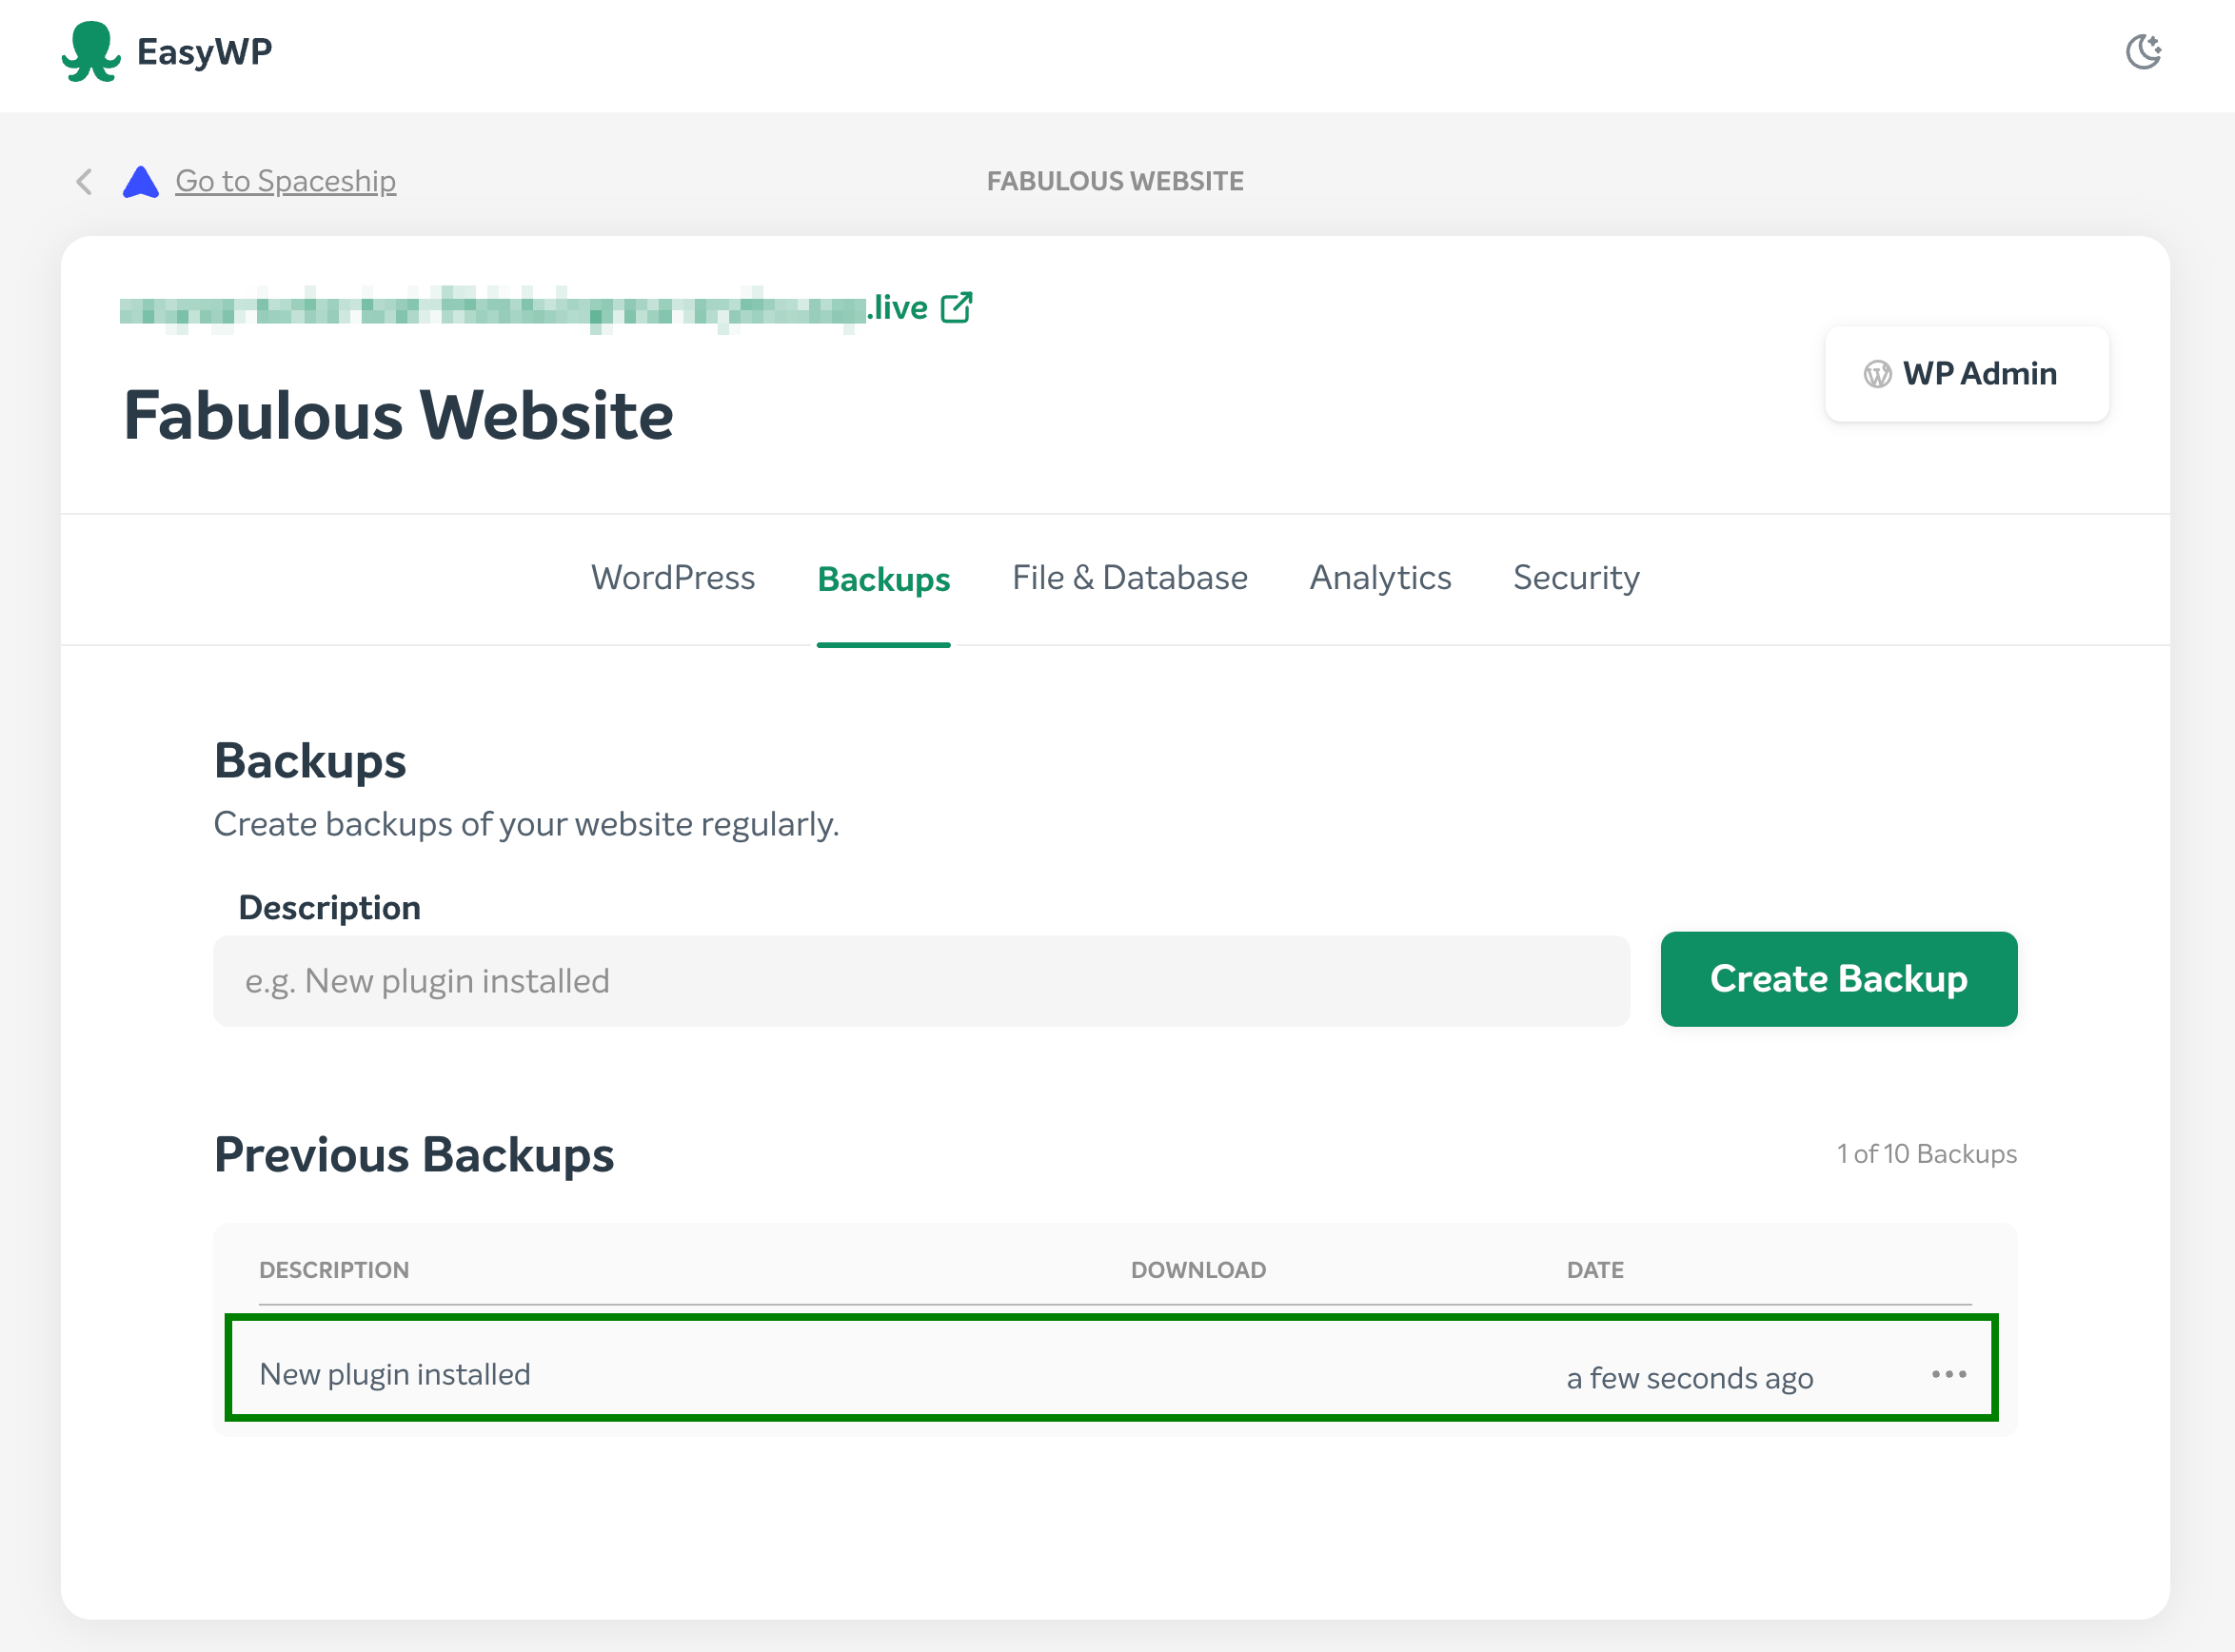
3. You will receive a corresponding notification inside the Backups section:

NOTE: A maximum of 10 backups can be stored. The backup size does not count towards the subscription's overall disk usage.
How to download a backup of a WordPress application:
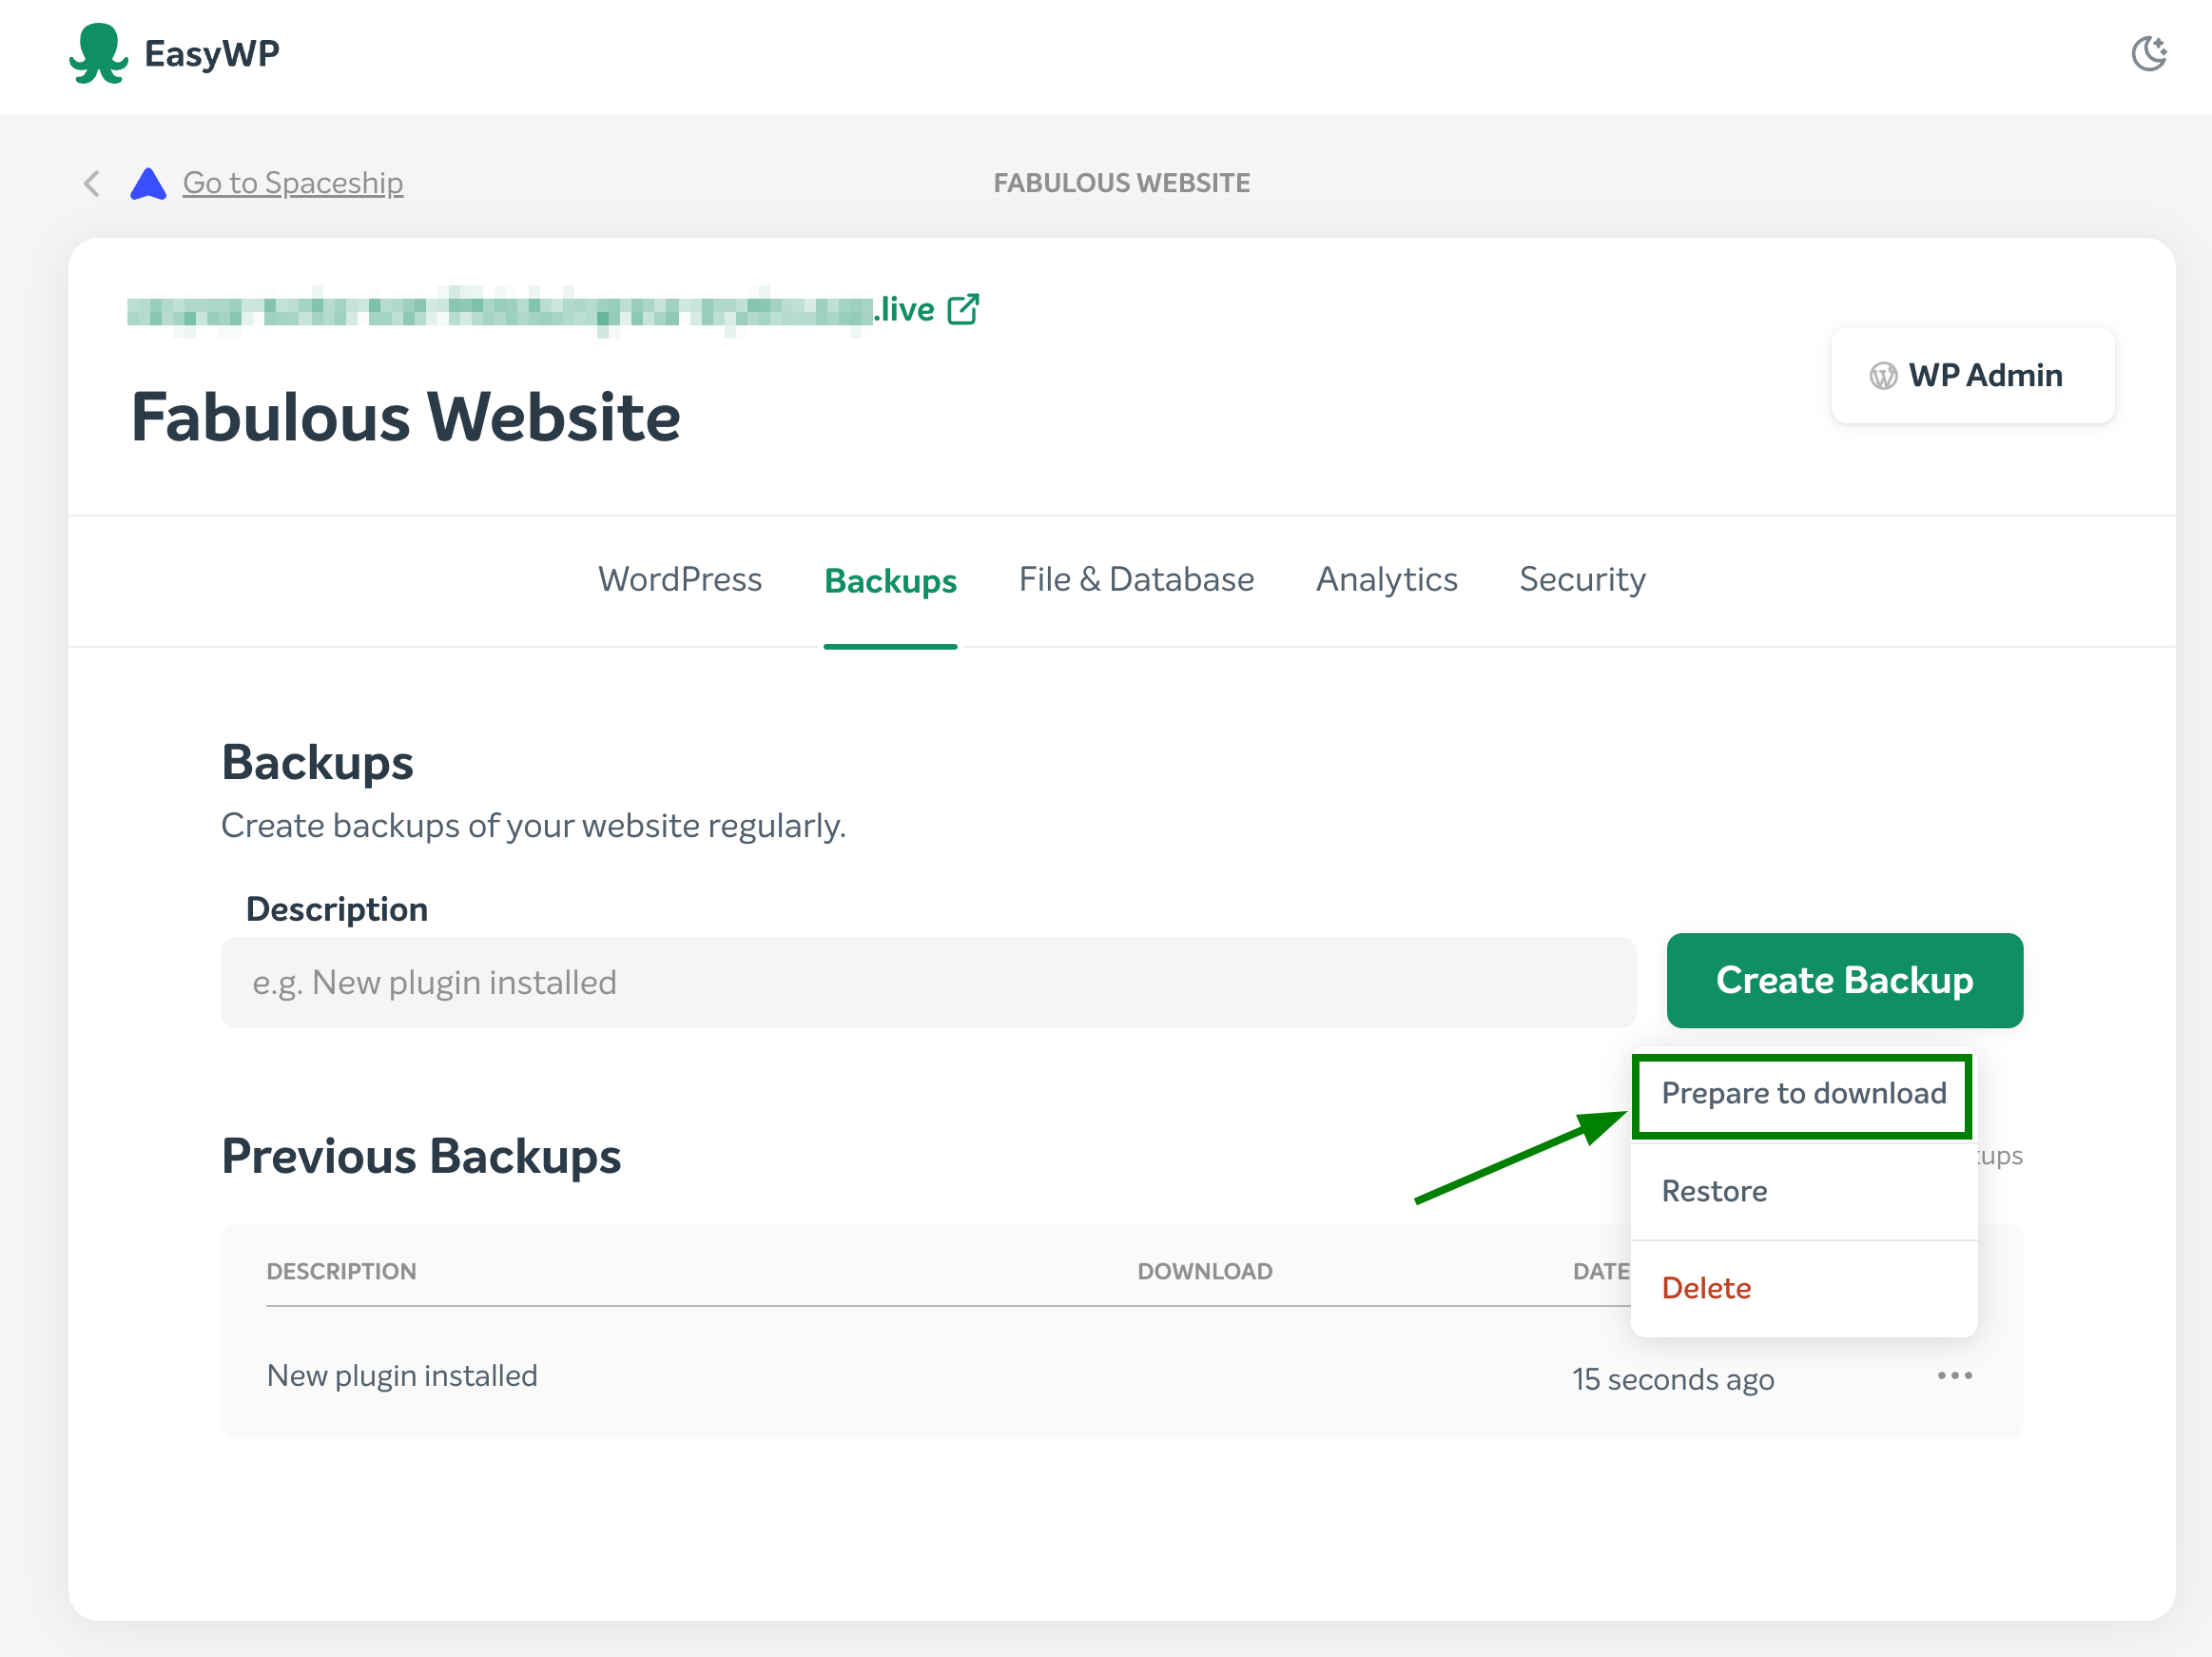
1. From within your Backups section, click the More (...) option to the right-hand side of the desired backup and select Prepare to download:
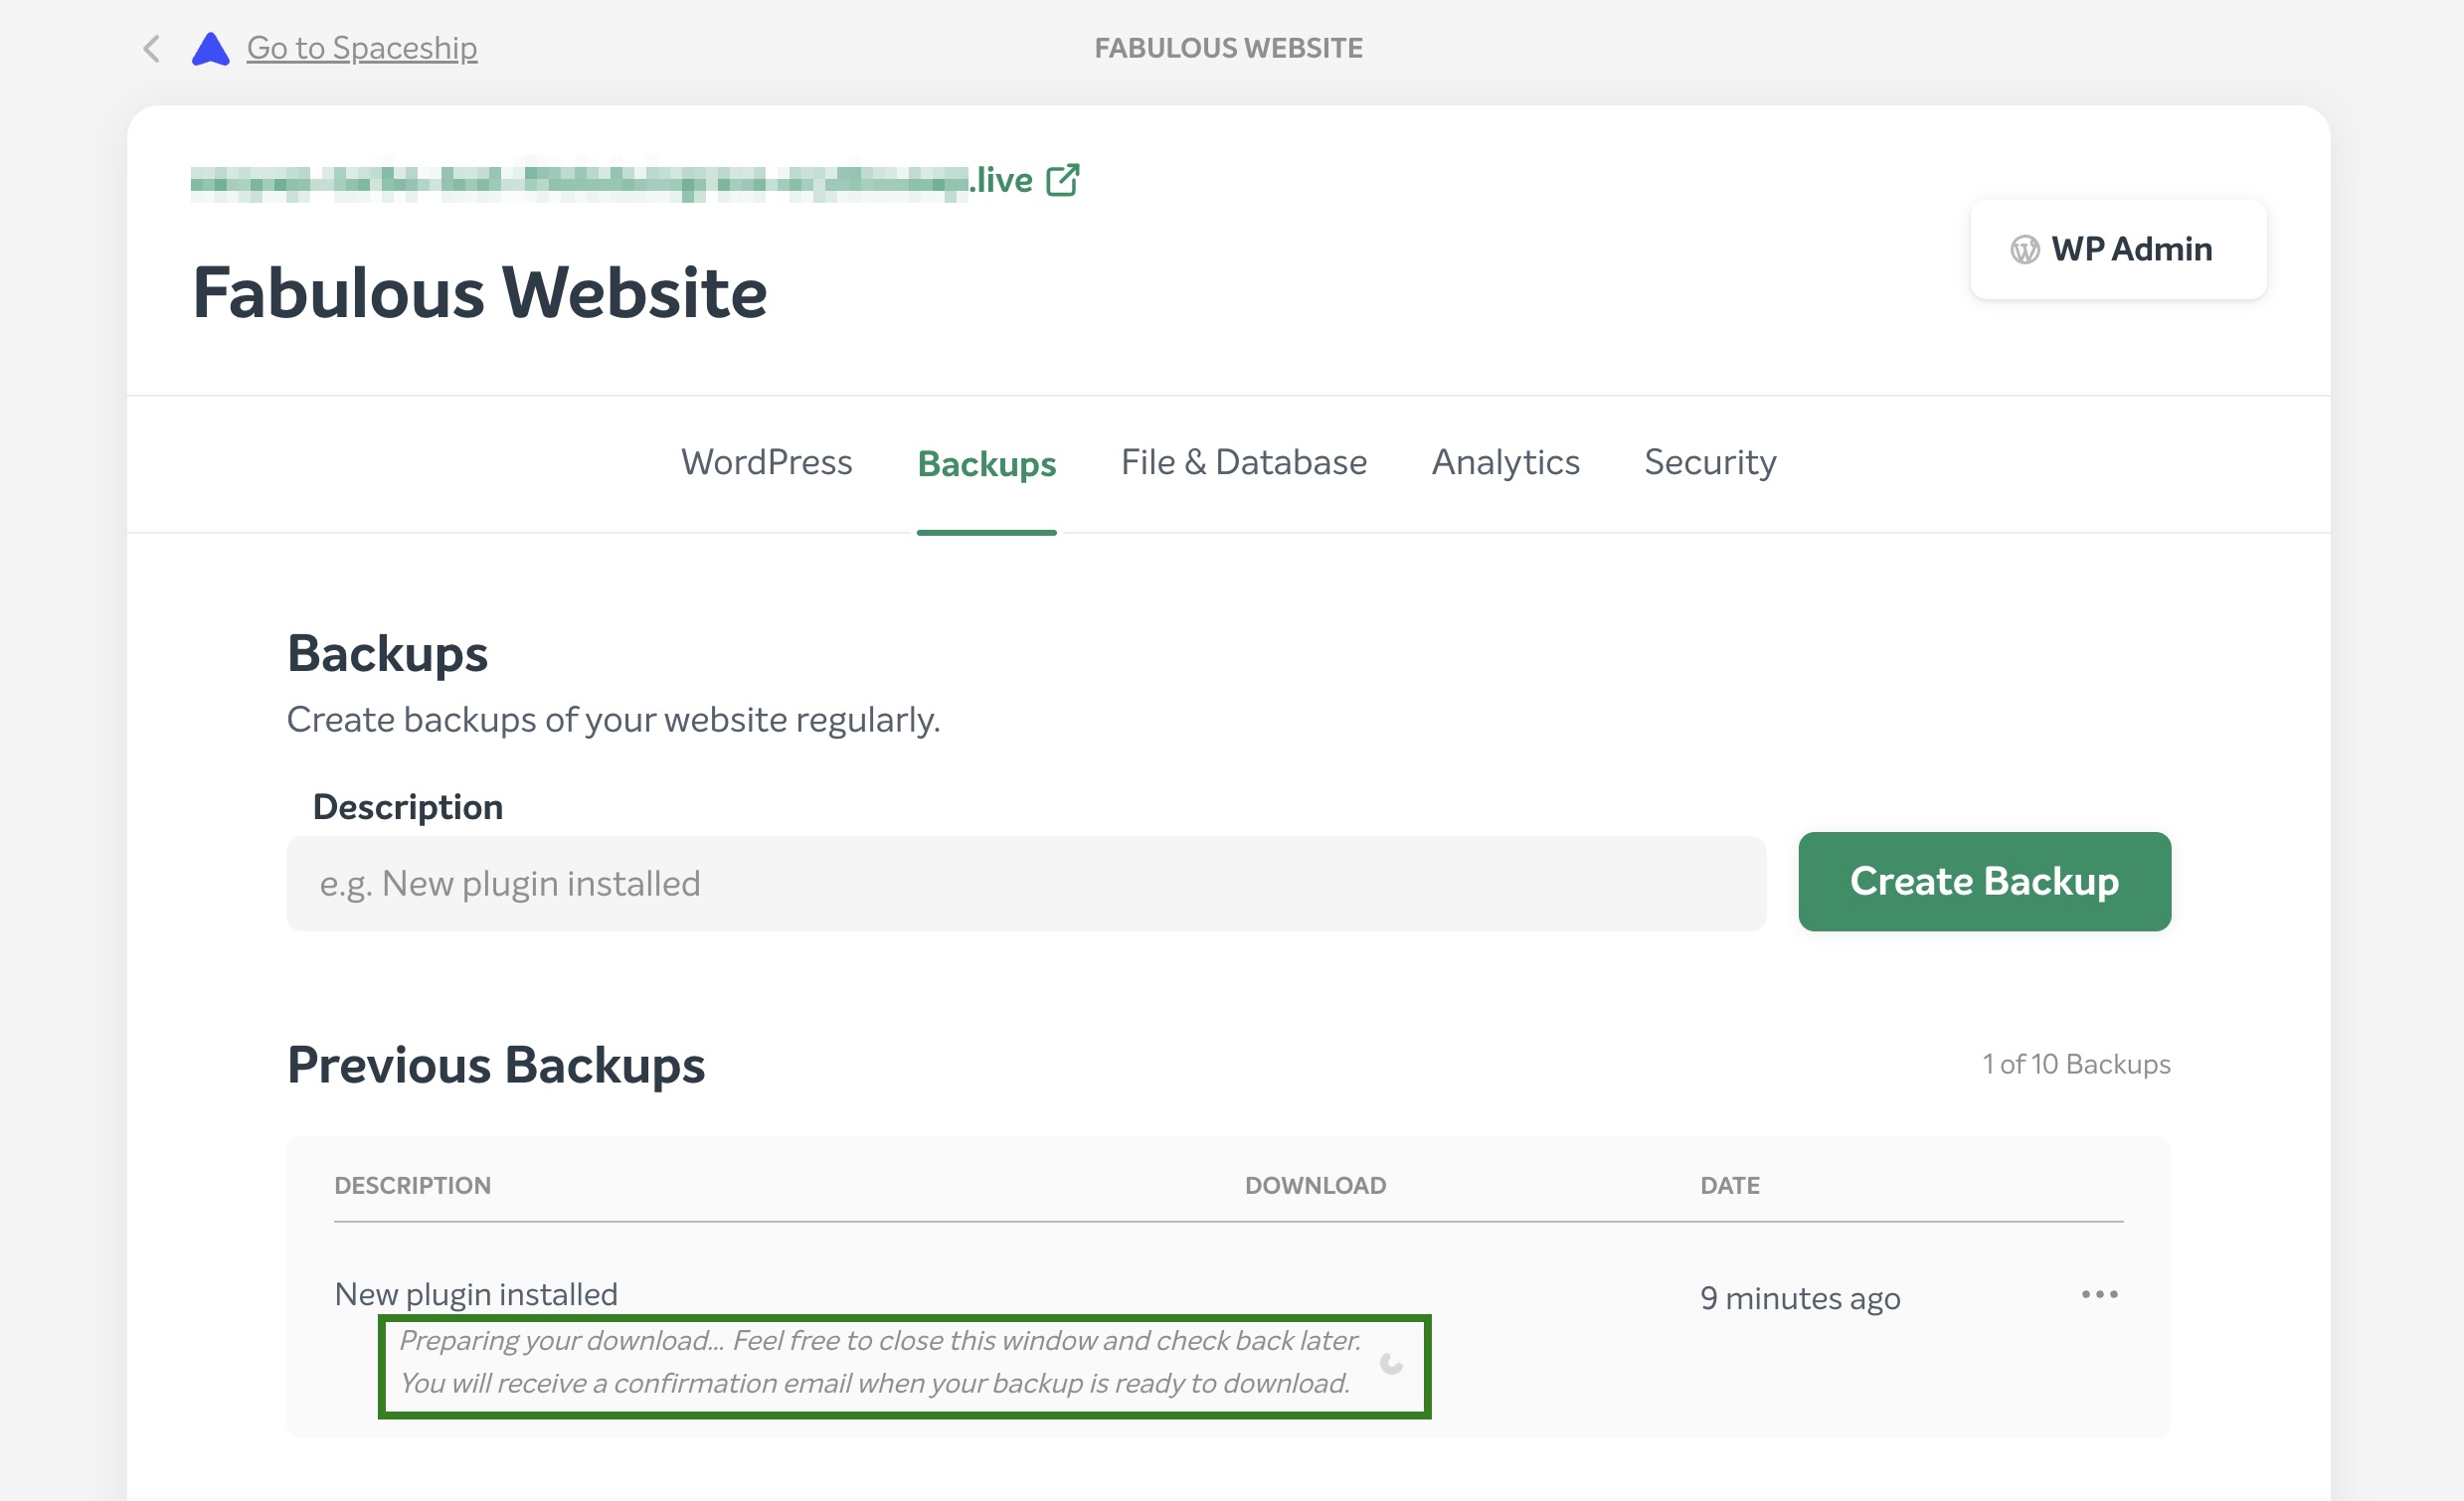
The system will start preparing your backup for downloading:
2. Once the backup is ready to be downloaded, you will receive a corresponding notification and two options to choose from:
to download a database;
to download a file backup of a WordPress application.
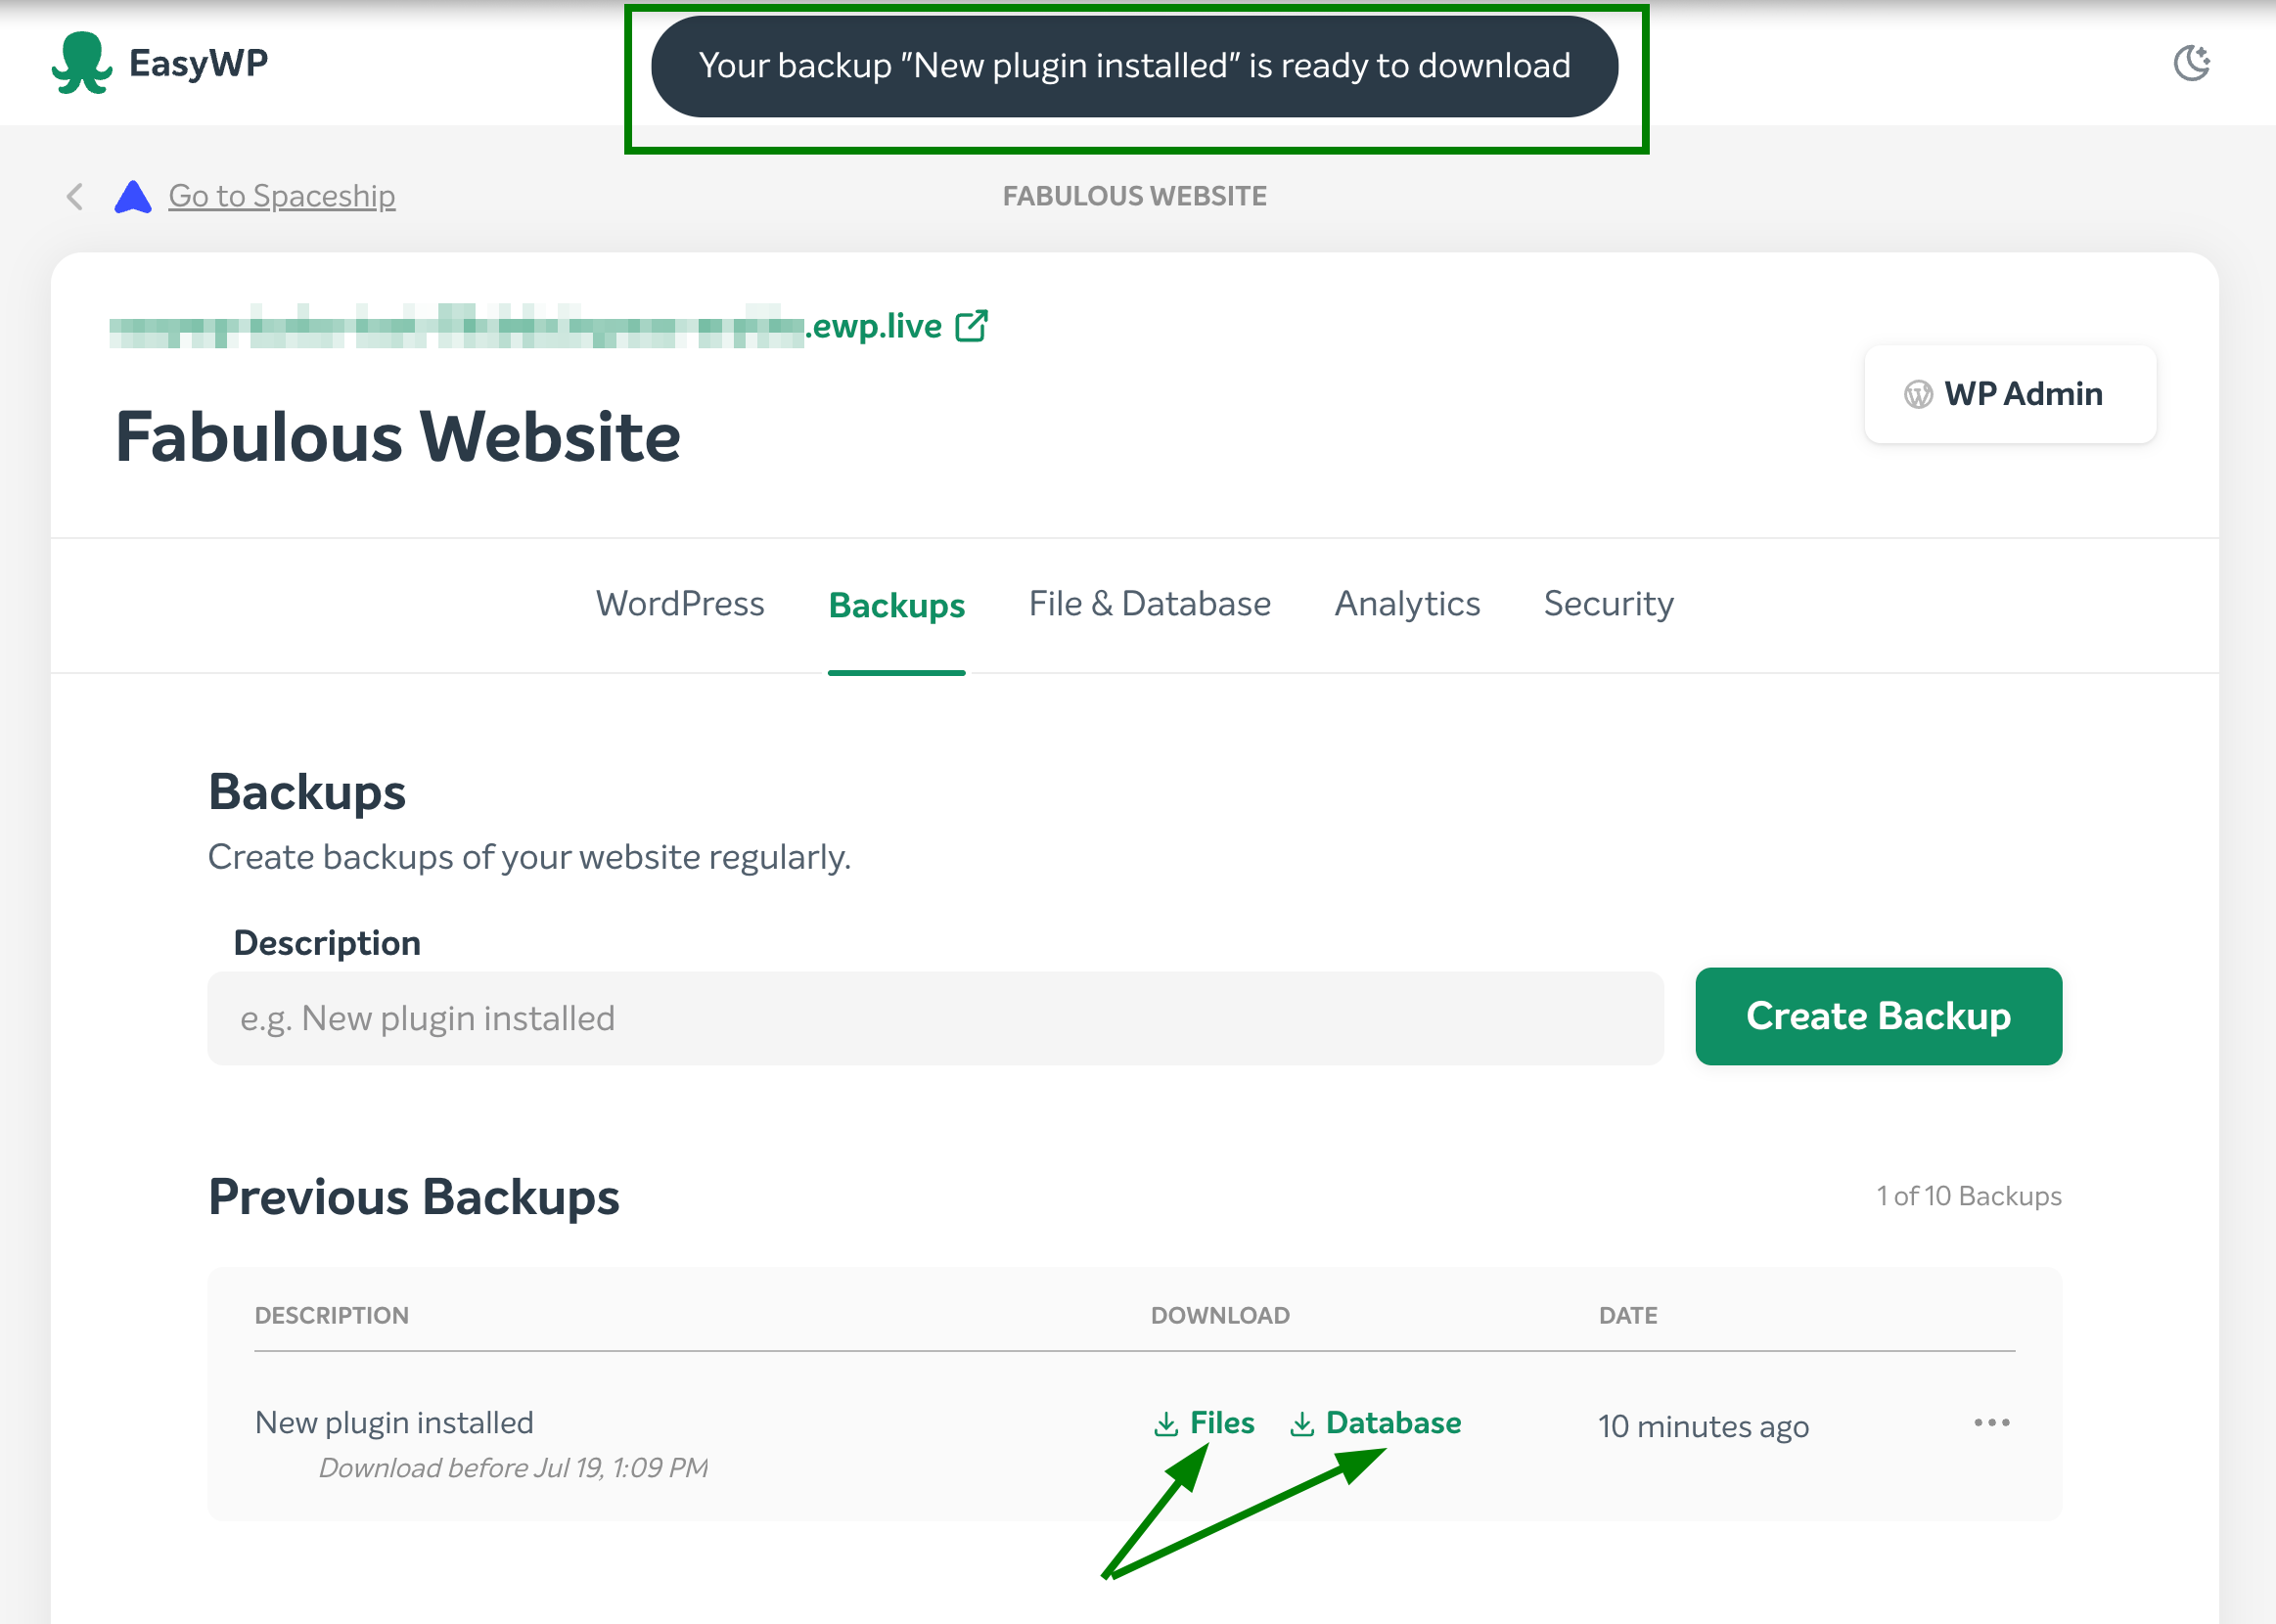
3. Upon selecting the desired backup, a corresponding .tar.gz archive will be downloaded to your local PC.
How to restore a WordPress site from an EasyWP backup
From within your Backups section, select a backup you would like to restore from the list of available backups. Click the More (...) icon and select Restore. Both files and the database will be restored.
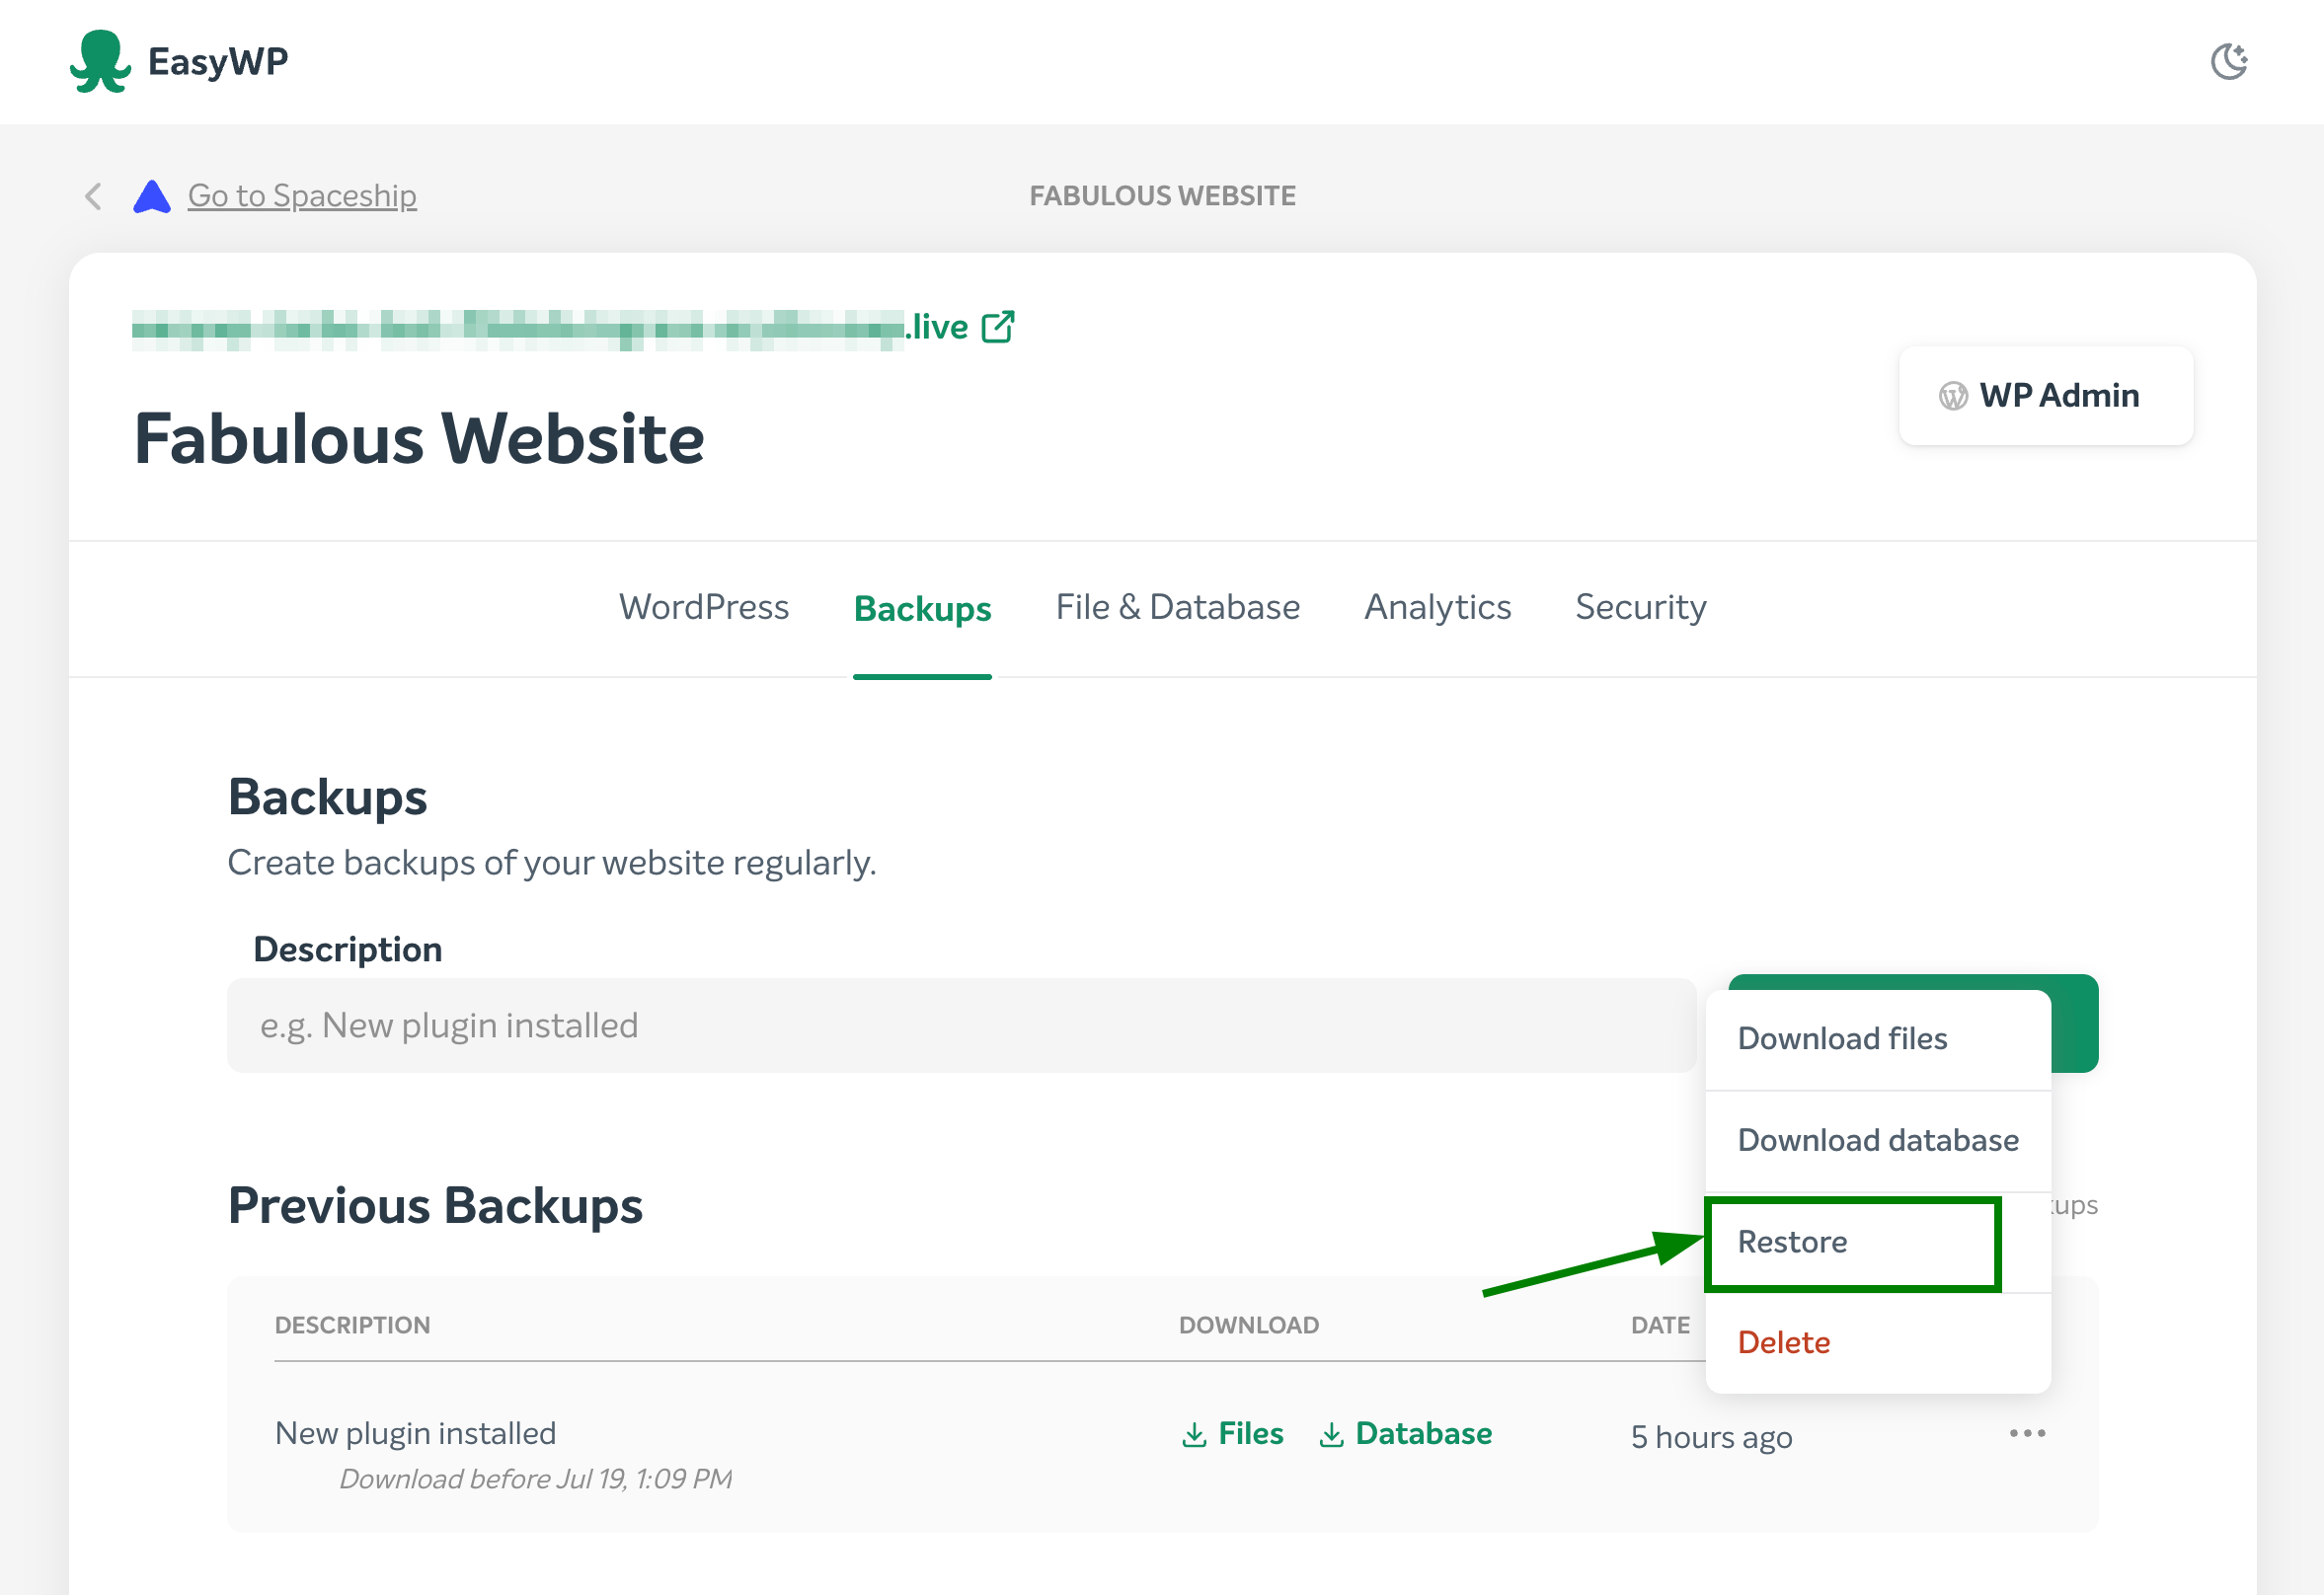
NOTE: If the backup restoration or creation process is currently in progress, the system will prevent you from initiating another restore or creating/deleting backups. Kindly wait until the process is complete before proceeding.
NOTE: Once the restoration process begins, it cannot be interrupted. The backup restoration will overwrite all current content with the backup one. An automatic backup before restore will be created automatically, so you can restore it back in case of any issue. When backup restoration is completed, you will receive the corresponding notification:
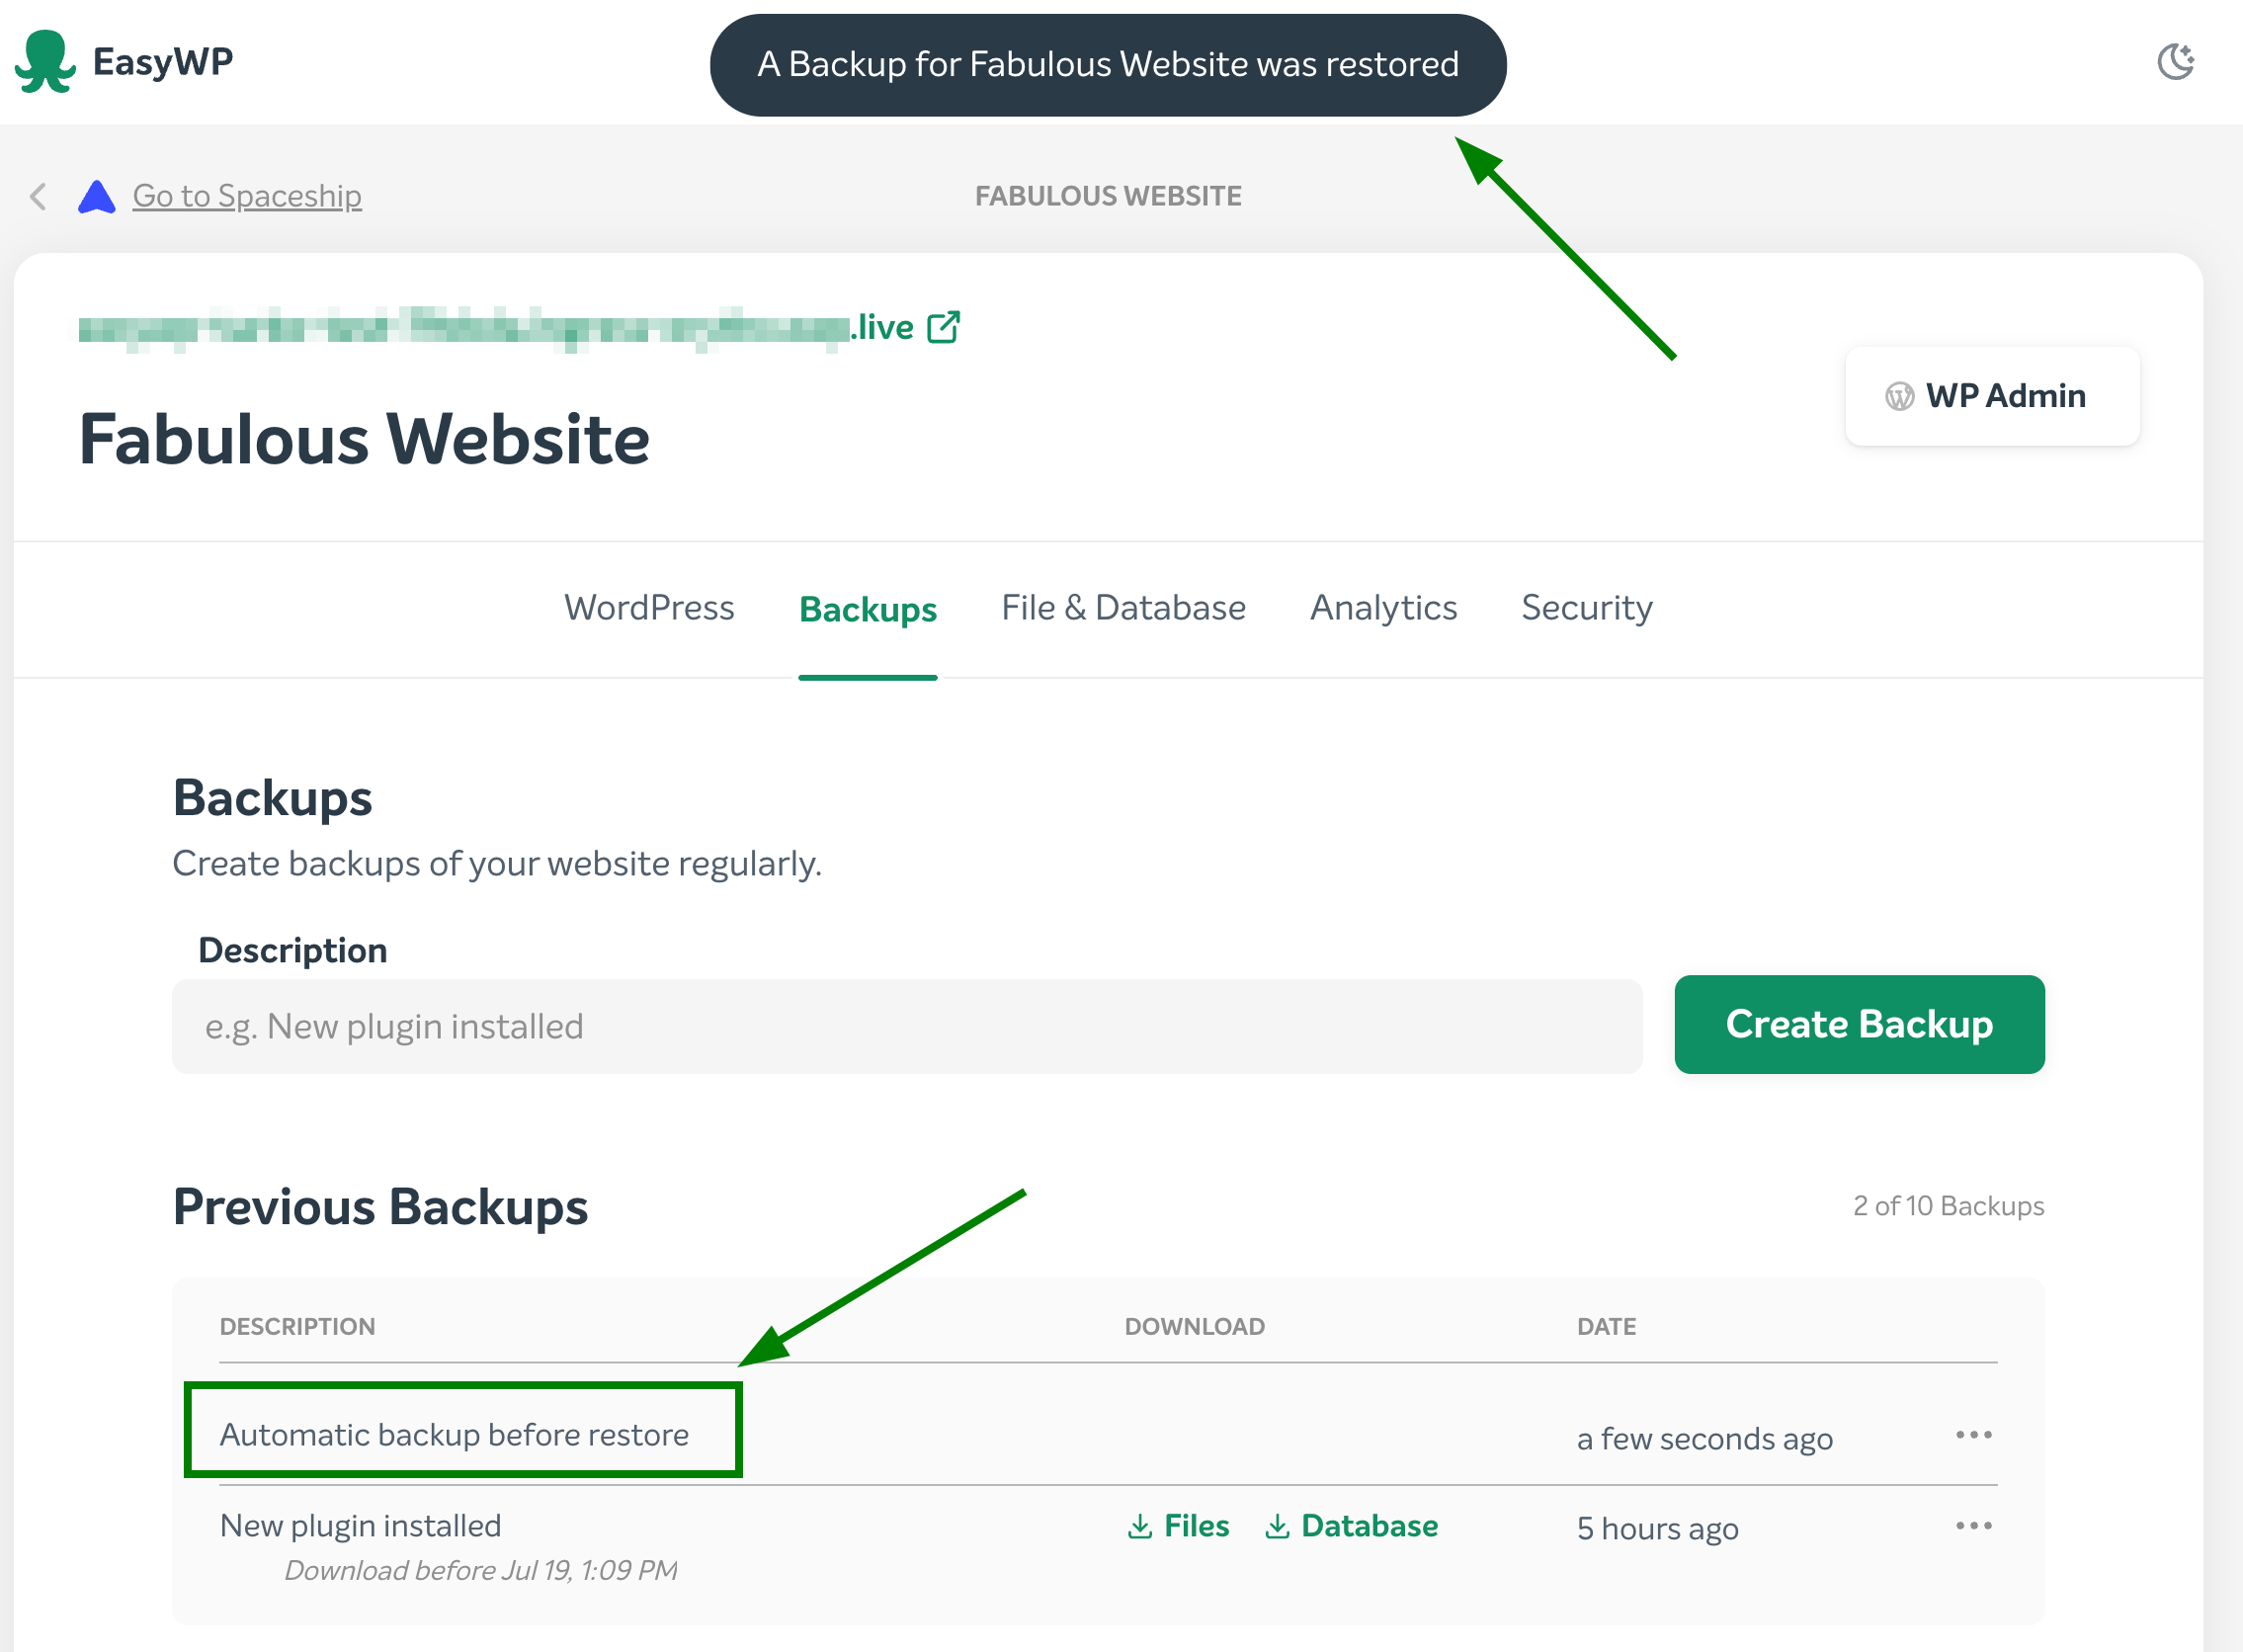
That's it!