Spacemail CardDav-Einrichtung Outlook für Windows
Dieser Artikel bietet eine Schritt-für-Schritt-Anleitung zur Konfiguration Ihres Spacemail-Adressbuchs in Outlook mit dem CardDAV-Protokoll.
Da Outlook CardDAV nicht nativ unterstützt, müssen Sie ein kostenloses Add-in eines Drittanbieters namens Caldavsynchronizer verwenden, um die Einrichtung abzuschließen.
Bitte beachten Sie, dass Caldavsynchronizer nicht mit dem neuen Outlook kompatibel ist.
Führen Sie zur Einrichtung die folgenden Schritte aus:
Besuchen Sie https://caldavsynchronizer.org.
Klicken Sie auf Download und wählen Sie die Version, die zu Ihrer Systemarchitektur passt.
Führen Sie das Installationsprogramm aus und folgen Sie den Anweisungen auf dem Bildschirm, um die Einrichtung abzuschließen.
Nach der Installation öffnen Sie Outlook. Ein neuer Tab namens CalDav Synchronizer erscheint im Menüband.
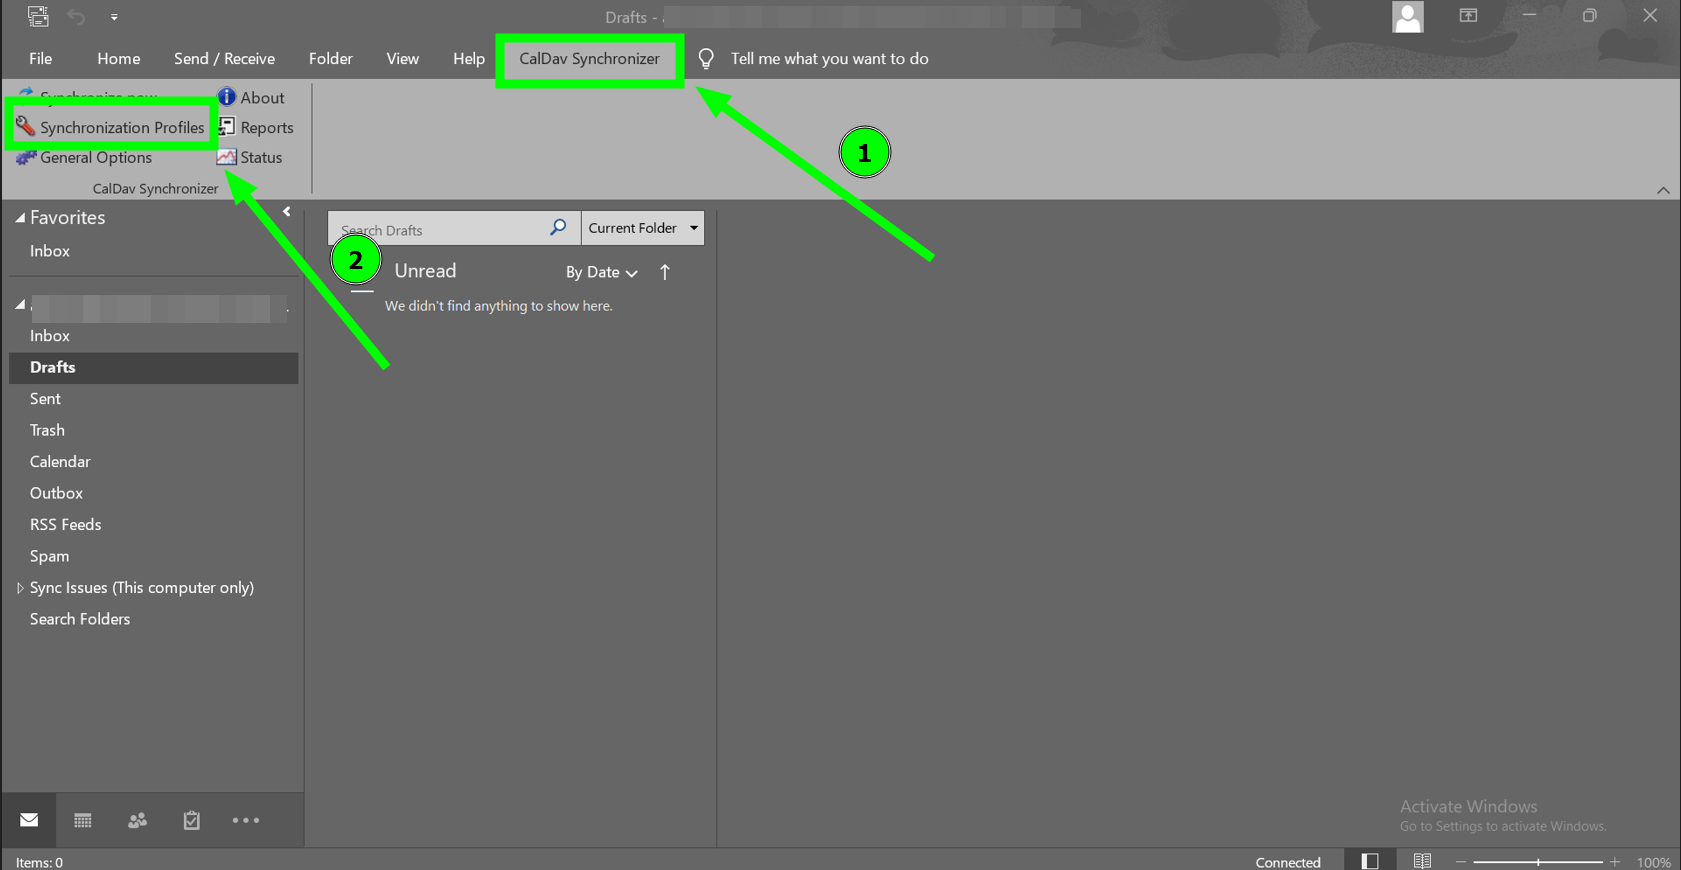
Klicken Sie auf die Registerkarte CalDav Synchronizer in Outlook und wählen Sie dann Synchronization Profiles:
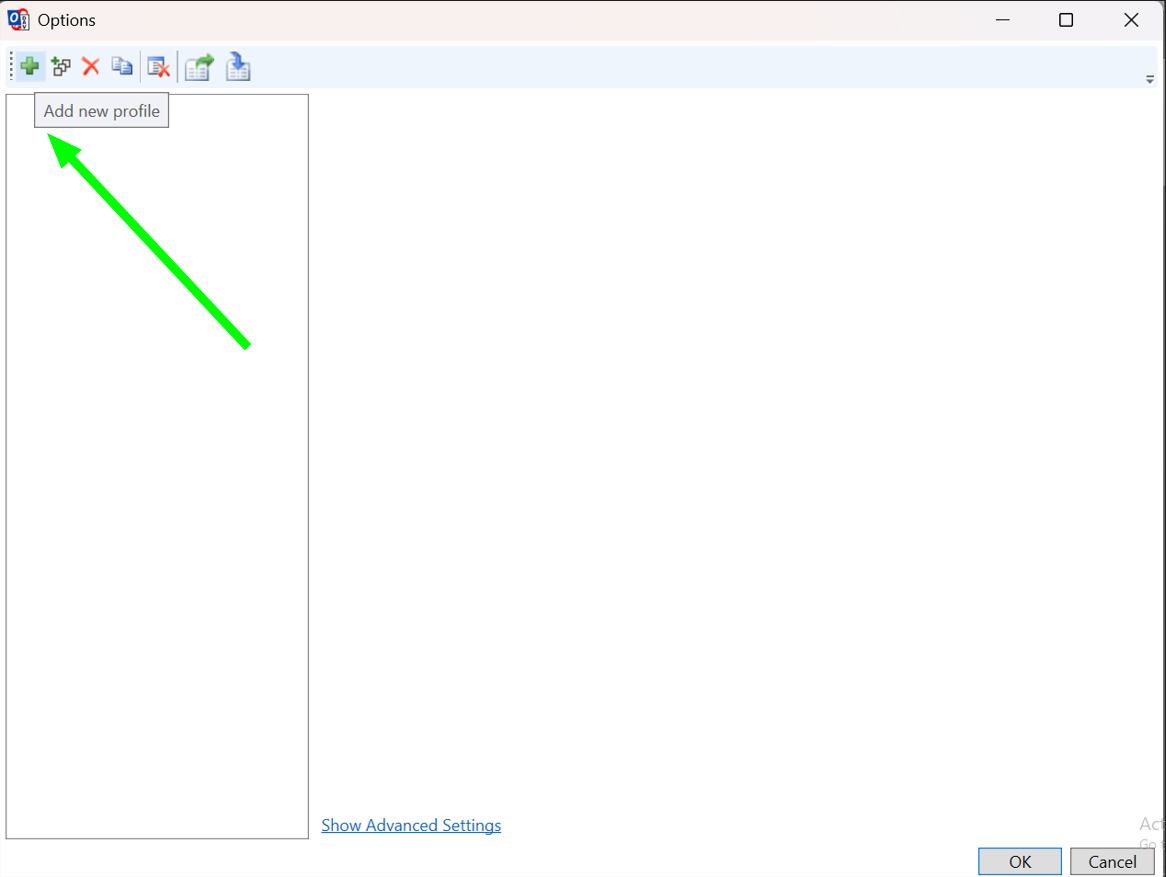
Klicken Sie auf Add new profile:
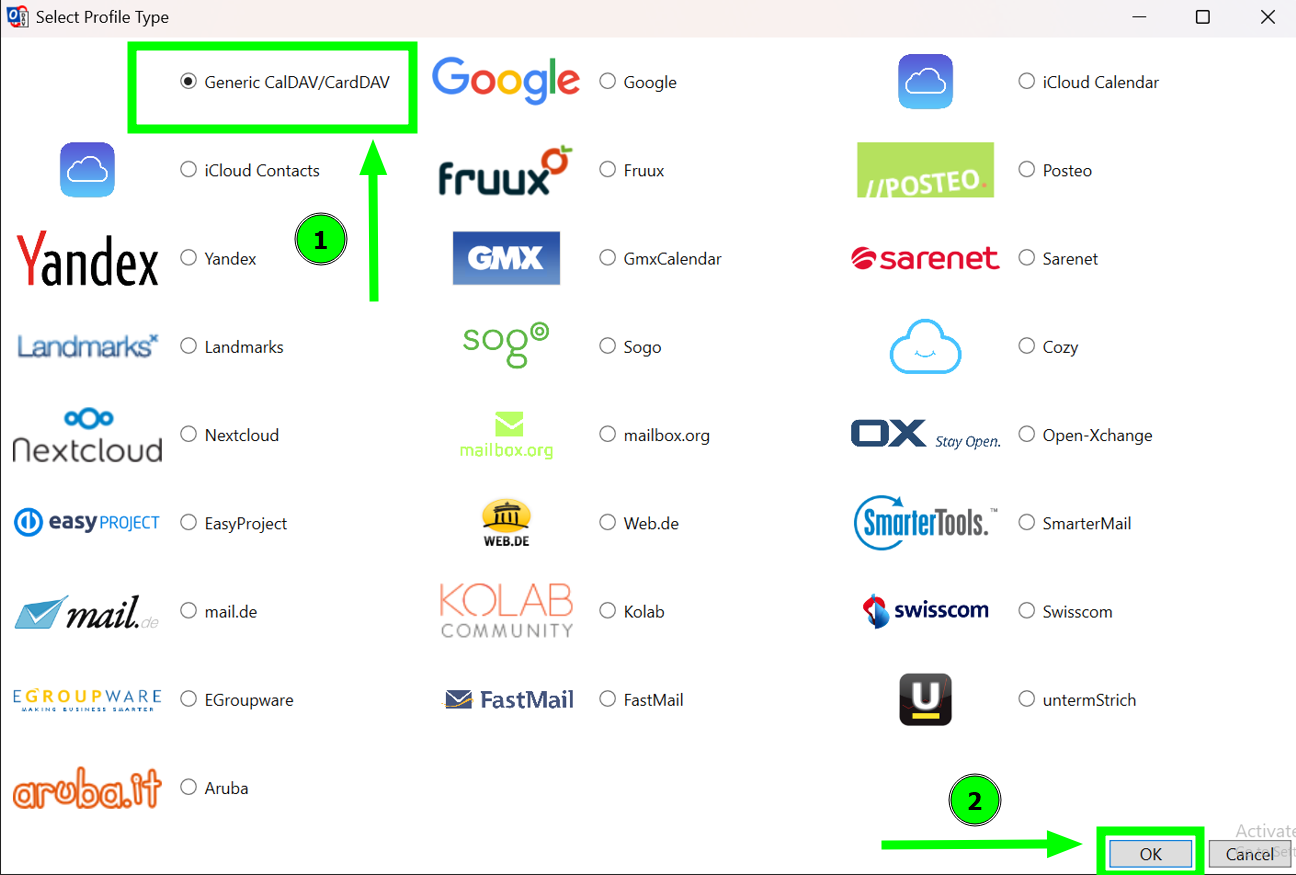
Wählen Sie in der Liste der verfügbaren Profiltypen Generic CalDAV/CardDAV:
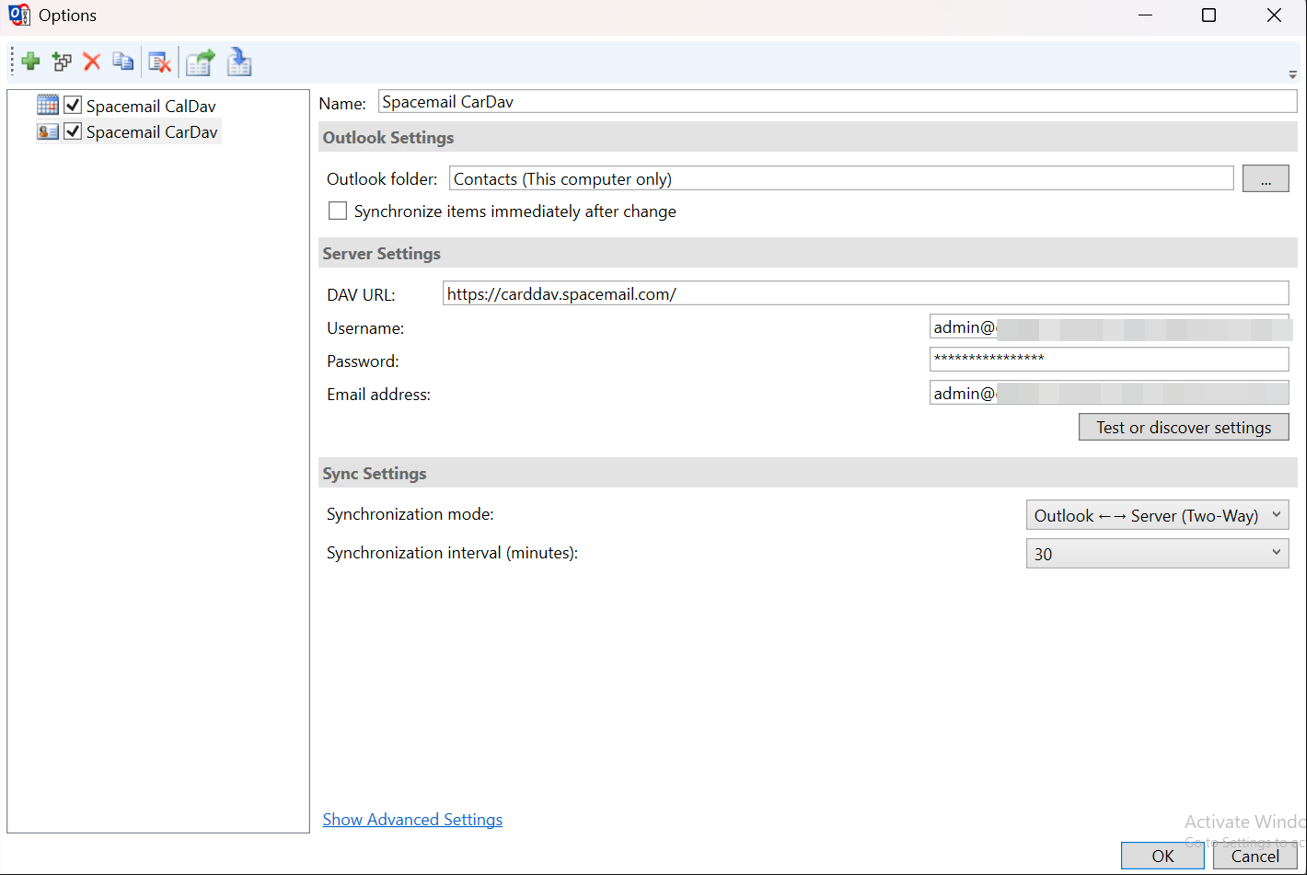
Geben Sie die erforderlichen CardDAV-Kontaktdaten ein:
Name: Geben Sie einen erkennbaren Namen für dieses Profil ein.Outlook-Ordner: Wählen Sie den Kontakte-Ordner in Outlook aus oder erstellen Sie einen neuen, in dem die Kontakte angezeigt werden sollen.
Elemente sofort nach Änderung synchronisieren: Wenn aktiviert, wird etwa 10 Sekunden nach dem Erstellen, Bearbeiten oder Löschen eines Elements in Outlook eine Teilsynchronisierung ausgelöst. Aktivieren Sie diese Option, wenn Sie möchten, dass Änderungen schneller synchronisiert werden.
DAV-URL: https://carddav.spacemail.com/.
Benutzername: Ihre vollständige Spacemail-E-Mail-Adresse (z.B. info@example.com).
Passwort: Das Passwort für dieses E-Mail-Konto.
E-Mail-Adresse: Ihre vollständige Spacemail-E-Mail-Adresse (z.B. info@example.com).
Legen Sie die Synchronisationsoptionen fest:
Synchronisationsmodus: Zwei-Wege-Synchronisation (empfohlen).
Synchronisationsintervall: Wählen Sie ein bevorzugtes Intervall (z.B. alle 15 Minuten).
Klicken Sie anschließend auf „Test or Discover Settings“. Sie sehen folgendes Fenster:
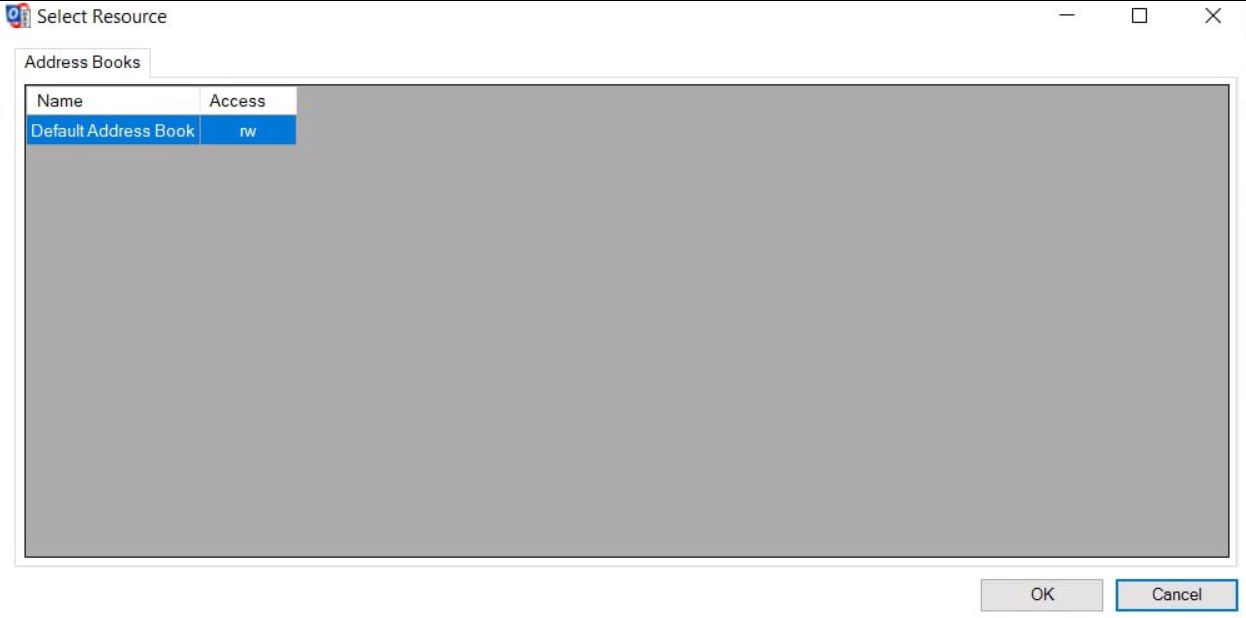
Sie müssen auf „OK“ klicken. Dann erscheint eine Meldung mit „Verbindungstest erfolgreich.“: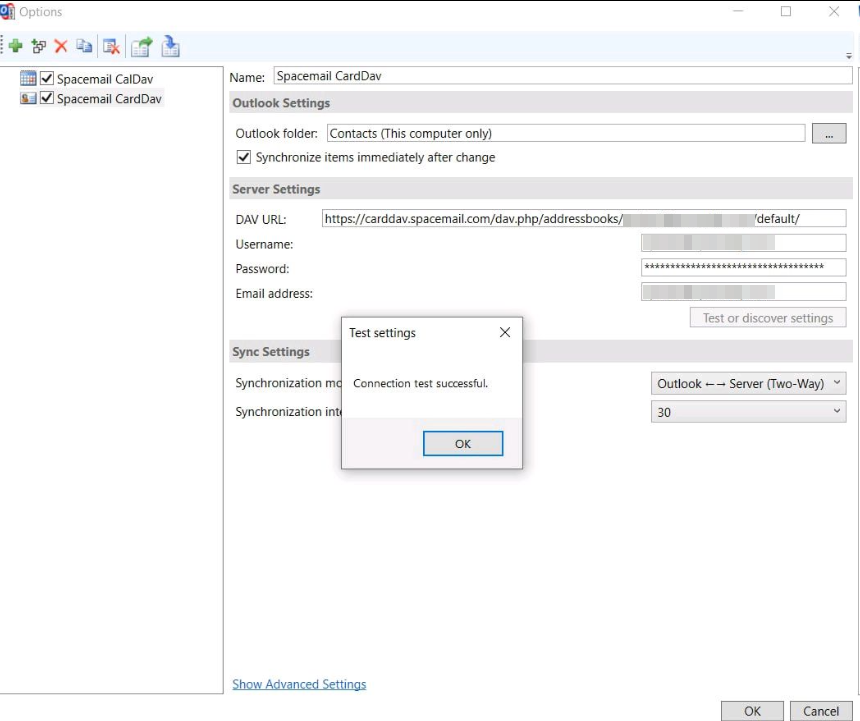
Klicken Sie auf OK, um das Profil zu speichern.
Ihre CardDAV-Kontakte sind jetzt erfolgreich mit Outlook verbunden und werden in beide Richtungen synchronisiert!