How to add SSL after hosting unboxing
If you didn’t install an SSL Certificate during Spaceship’s Unbox™ process, don’t worry. You can do it at any time. The process varies by hosting type, so in this article, we’ll take you through all of them.
Which SSL Certificate should I choose?
Adding an SSL Certificate to a website secures the connection between visitors and the site, enabling HTTPS and ensuring that transmitted data is encrypted and protected.
With Shared Hosting and EasyWP, you can choose a free SSL Certificate (FreeSSL) that lasts 90 days, or a low-cost SSL from a trusted Certificate Authority that lasts for a year.
Adding an SSL Certificate to Spaceship’s Shared Hosting and EasyWP
Spaceship makes it easy to add an SSL to both Shared Hosting and EasyWP WordPress Hosting after the Unbox™ process is complete. In this article, we'll show you how to do this for:
Unsure whether your site is ready for SSL installation?
Check your website’s connection status before you begin.
For Shared Hosting
1. Log in to your Spaceship account and go to Hosting Manager.
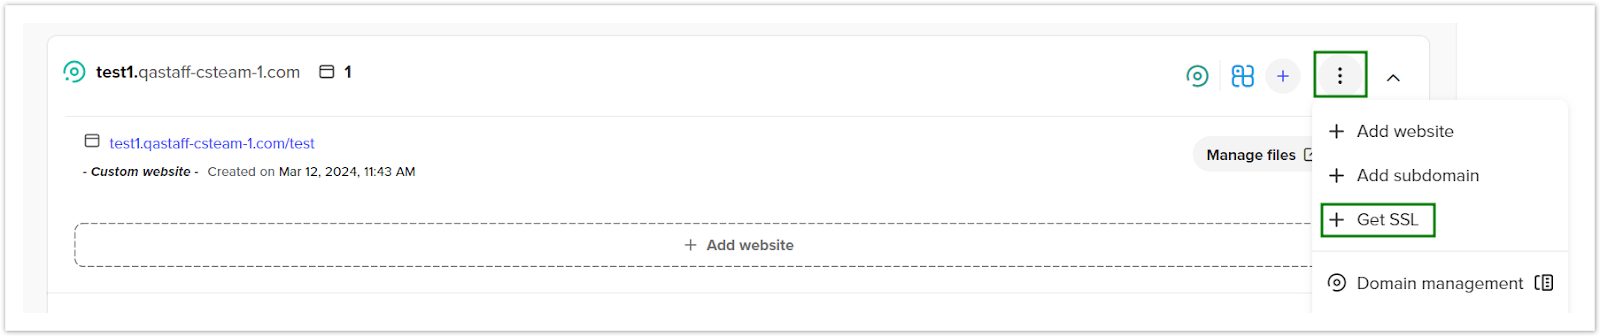
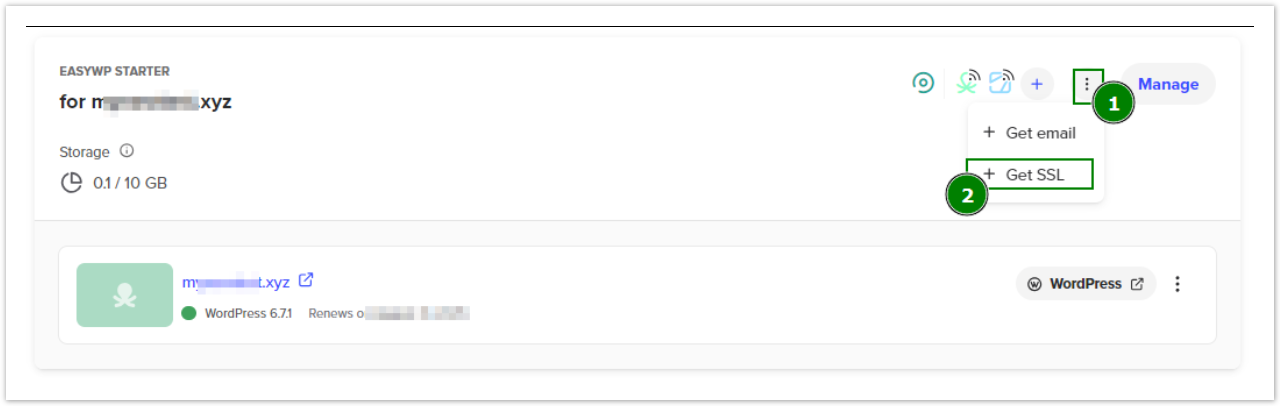
2. Click the three dots icon (⋮) next to the required domain and select “+ Get SSL”.
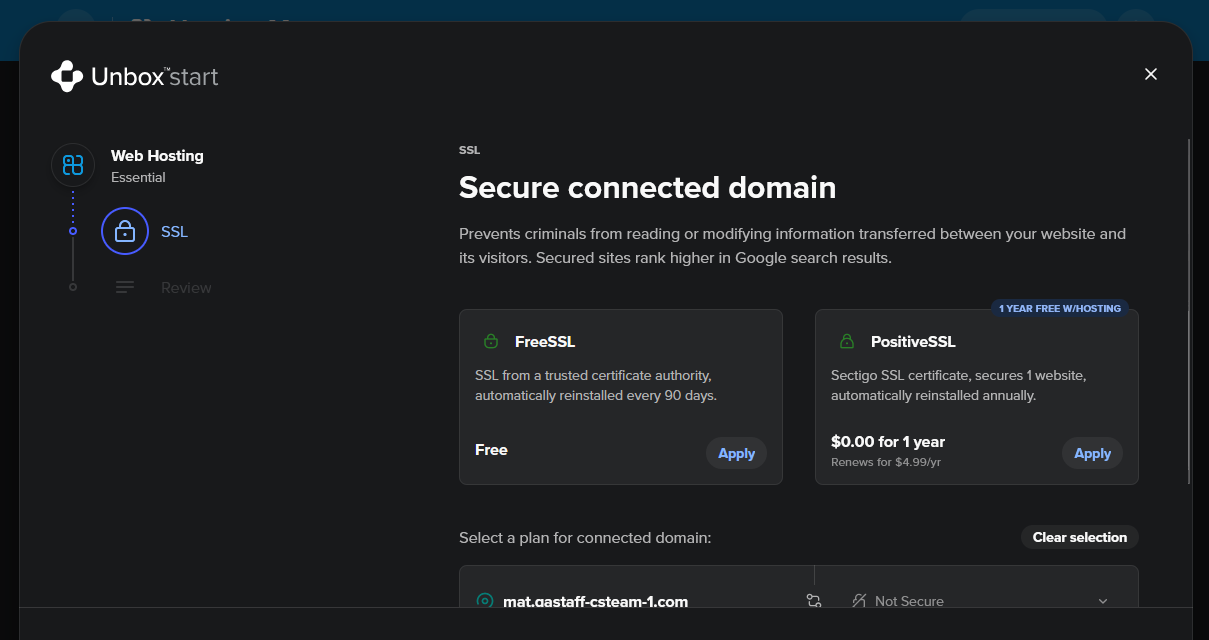
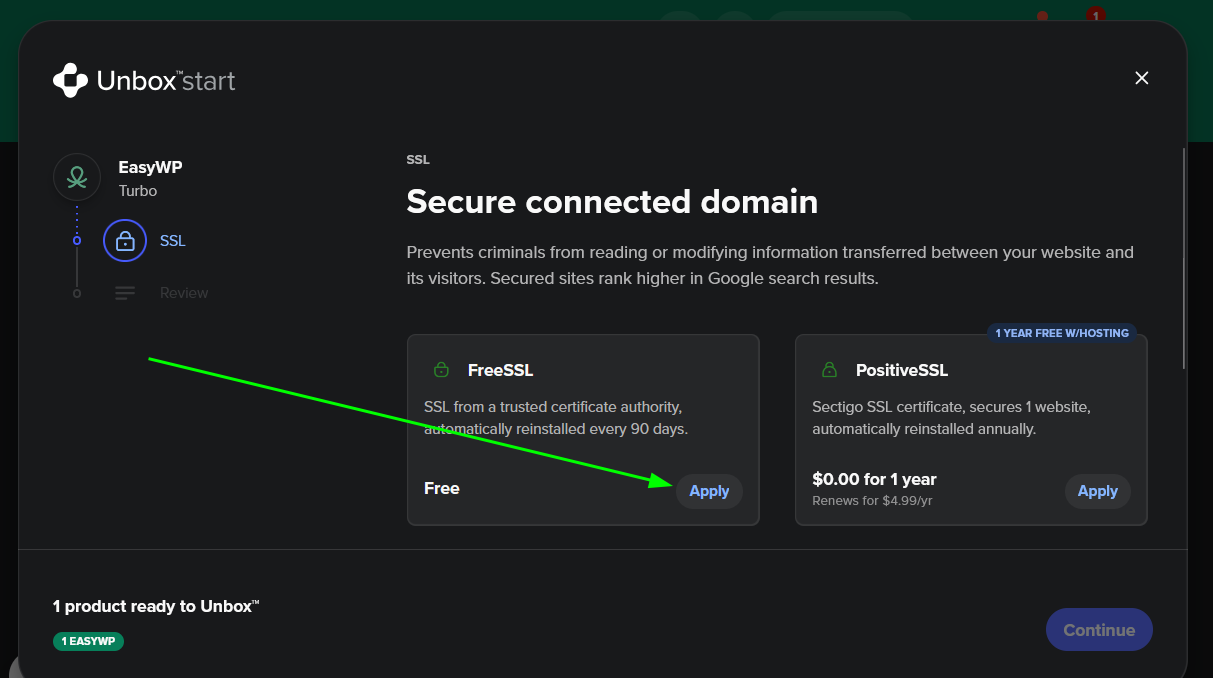
3. Select your preferred SSL option (FreeSSL or the one from the trusted CA).
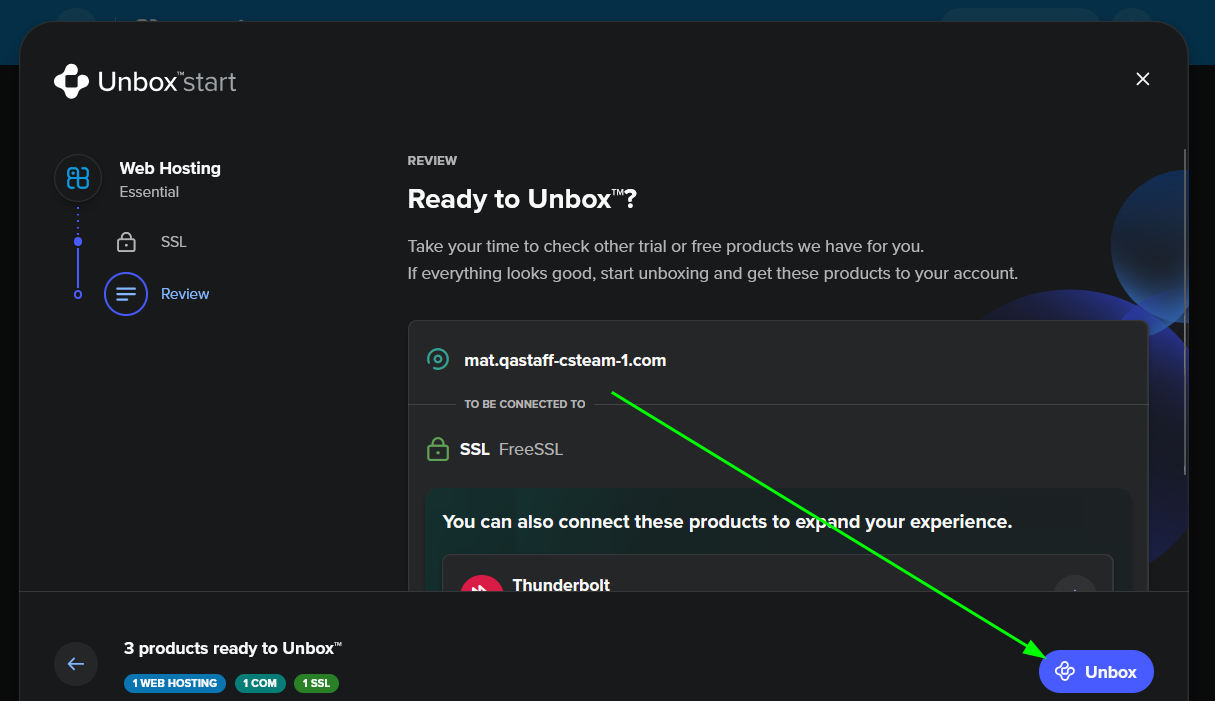
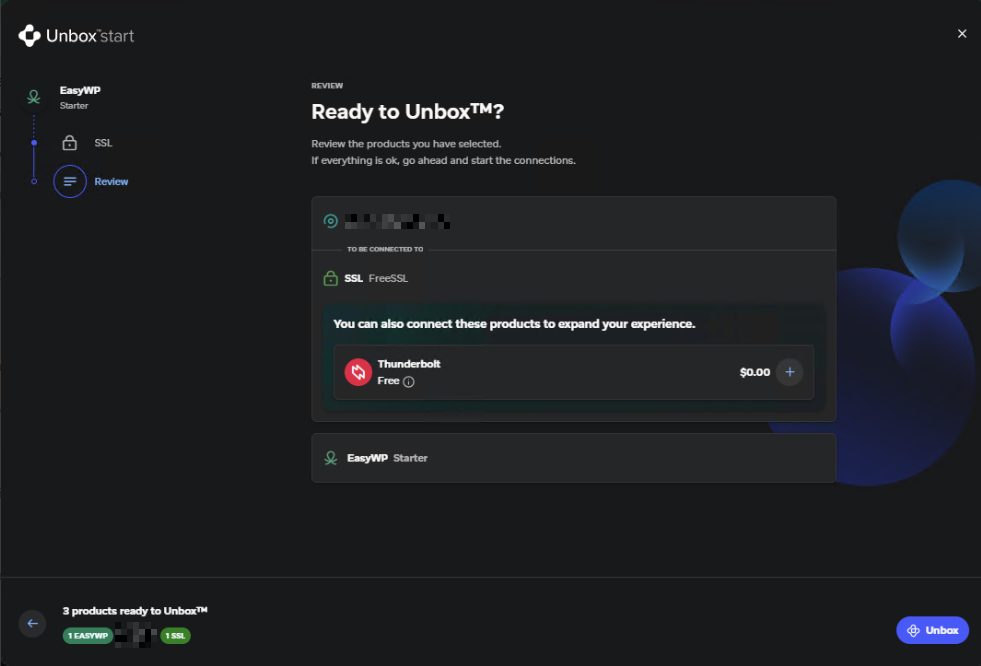
4. Confirm the setup in the dialogue window by selecting Unbox.
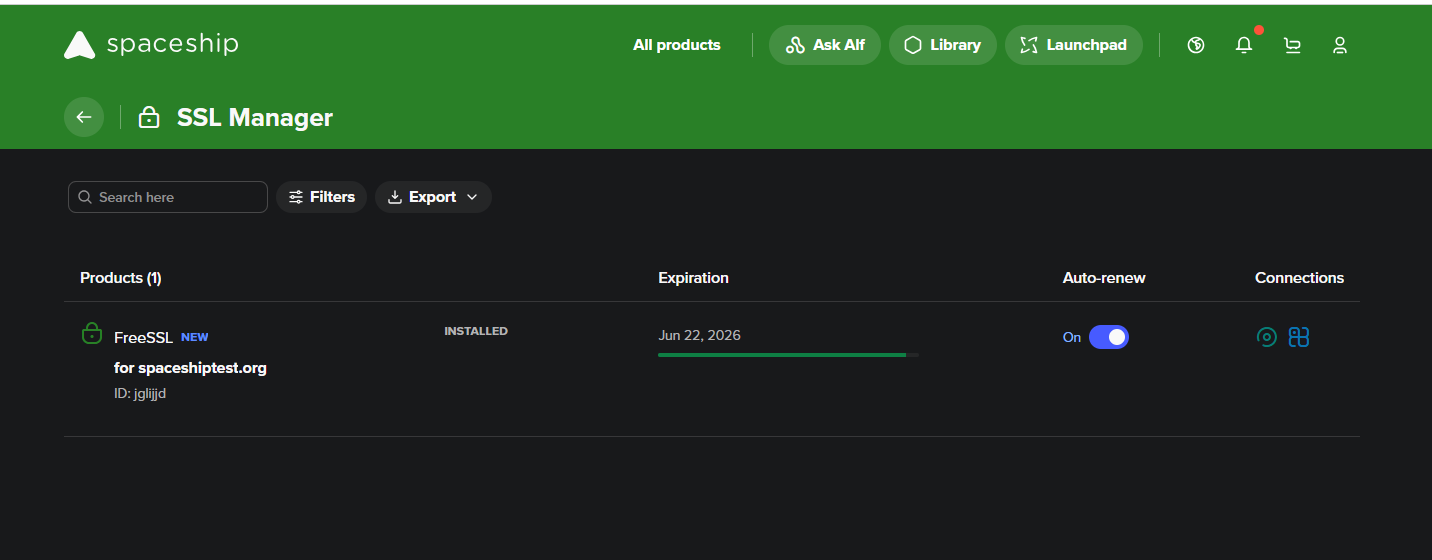
Your SSL Certificate will now be issued and installed automatically.
For EasyWP
For EasyWP, it’s possible to add an SSL Certificate from both the EasyWP Manager and from the Website Overview section.
Here is how you can add SSL via the EasyWP Manager:
1. Open EasyWP Manager.
2. Click the three dots (⋮) near the required domain and select "+ Get SSL".
3. Select your preferred option (FreeSSL or the one from the trusted CA).
4. Confirm the setup in the dialogue window by selecting Continue.

5. Confirm the setup in the dialogue window by selecting Unbox.
Your SSL Certificate will now be issued and installed automatically.
How to add an SSL from the Website Overview section
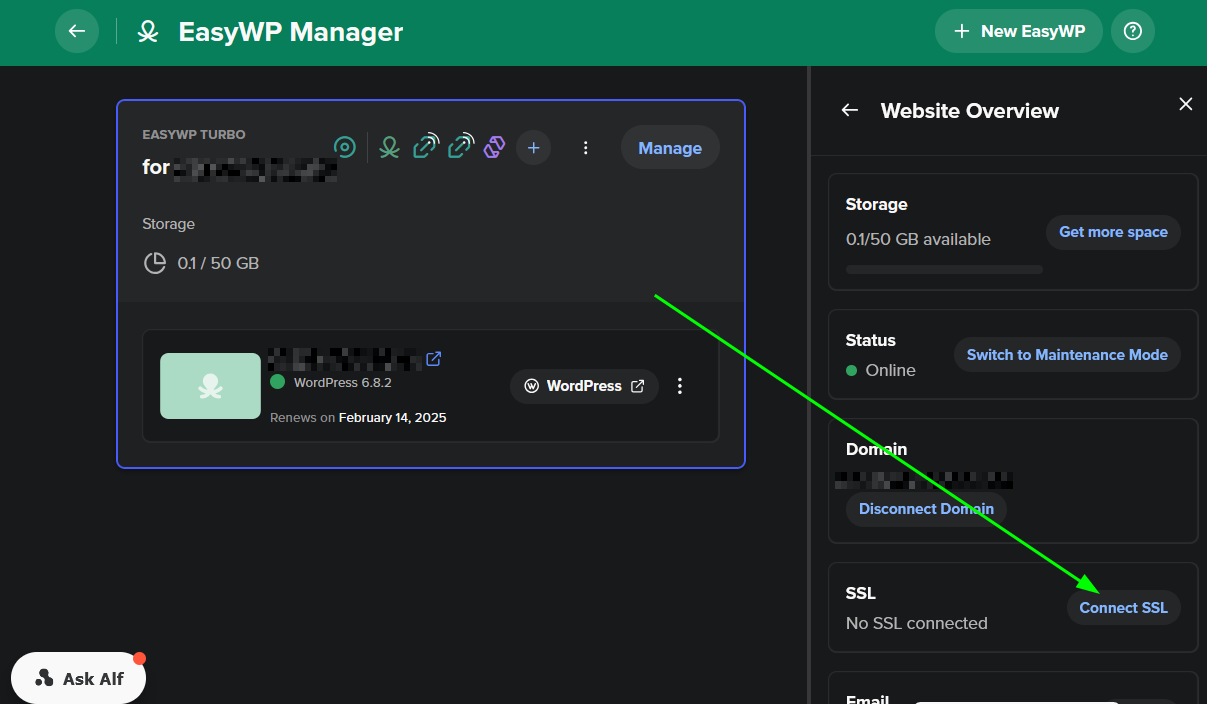
1. In EasyWP Manager, select Manage next to the website you need to install the SSL on. Then select Website Overview in the box on the right-hand side of the screen.
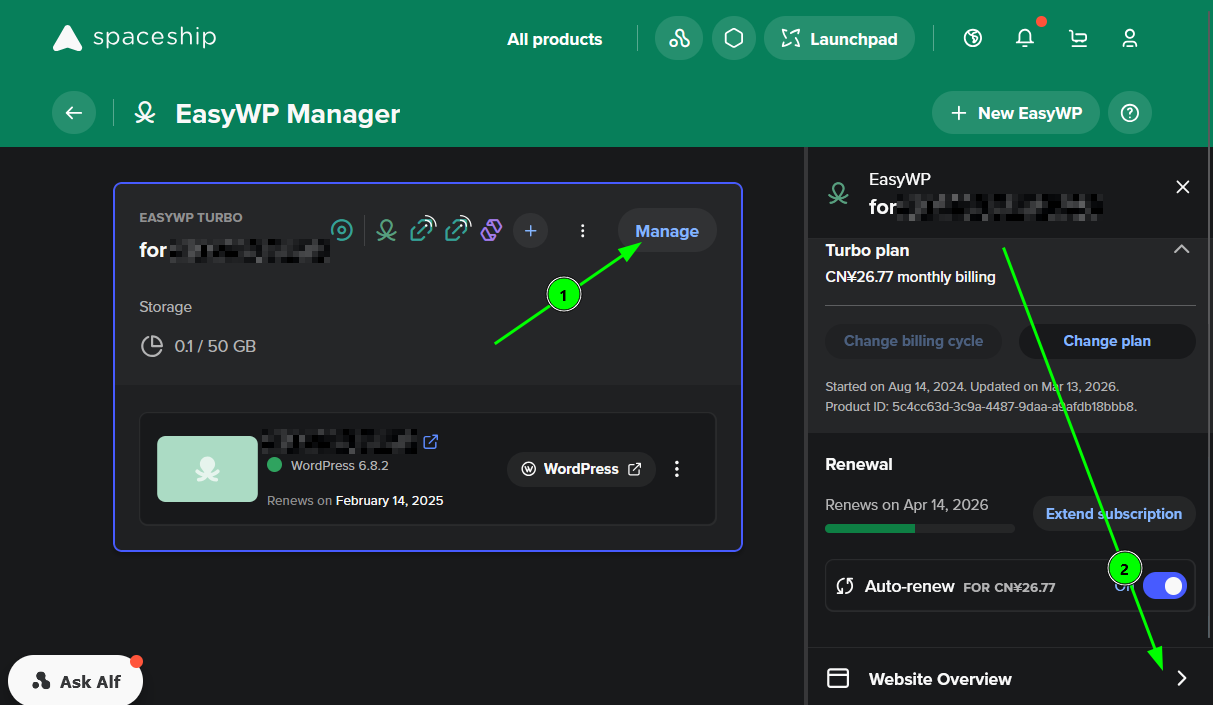
2. Select Connect SSL.
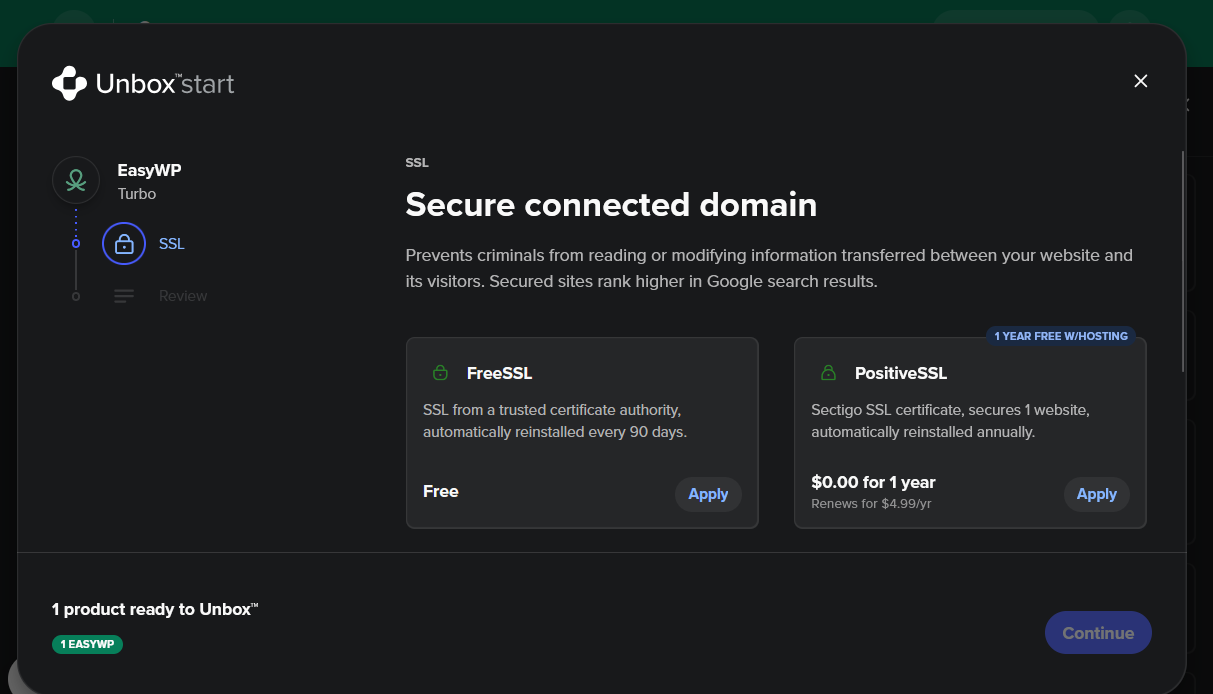
3. Choose your preferred SSL option (FreeSSL or the one from the trusted CA).
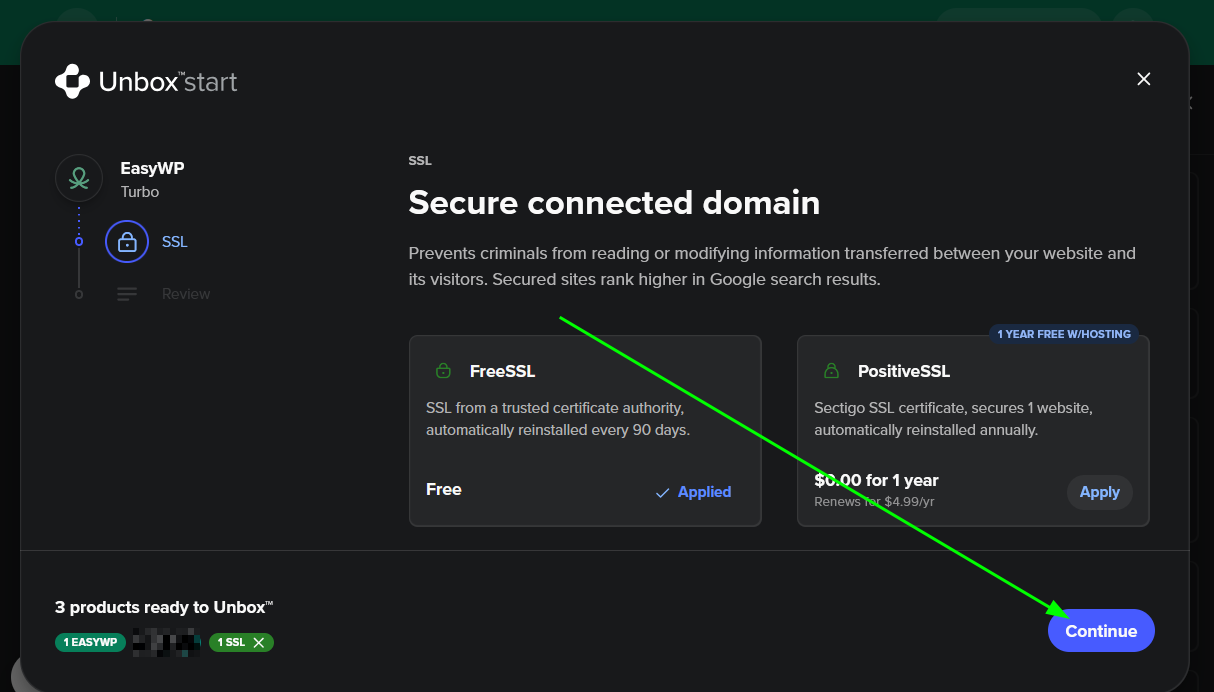
4. Confirm the setup in the dialogue window by clicking the Continue button. After this, the SSL Certificate will be installed by the system.
Checking your domain is ready for SSL installation
Before an SSL Certificate can be installed using the methods above, your domain must be connected to one of our hosting options. You can check whether your domain is connected to hosting in the Connection Manager.
Understanding the icons in Connection Manager
Pending : SSL installation is in progress. It will be issued within 15 minutes once the domain-hosting connection is active.

Corrupted : SSL exists in the system but is not functioning properly.

Active : SSL is properly installed and active for the website.

To learn more: Why SSL is not installed
With just a few clicks, your site will be secured and trusted with HTTPS - no complex setup, no certificates to paste manually.
Ready to go? Log in to your account and add an SSL today: Launch Hosting Manager