วิธีการเปิดใช้งานใบอนุญาต cPanel
หลังจากติดตั้งแพ็กเกจซอฟต์แวร์ cPanel (WHM) บนเครื่องเสมือน (VM) สำเร็จแล้ว ขั้นตอนต่อไปที่จำเป็นคือ ลงทะเบียนหรือเข้าสู่ระบบ (หากคุณมีบัญชีที่ใช้งานอยู่แล้ว) กับบริการใบอนุญาต cPanel
หมายเหตุ: เนื่องจากพอร์ต SMTP เริ่มต้นถูกปิดบนเครื่องเสมือนของเรา บริการอีเมลของ cPanel จึงไม่สามารถใช้งานได้ในขณะนี้ อย่างไรก็ตาม คุณสามารถตั้งค่าและใช้งานบริการอีเมลของบุคคลที่สามบางรายได้ (เช่น SendGrid หรือ Mailgun)
คู่มือนี้ให้คำแนะนำทีละขั้นตอนเกี่ยวกับวิธีการดำเนินการอย่างถูกต้อง
เมื่อแพ็กเกจซอฟต์แวร์ cPanel ติดตั้งเสร็จแล้ว ลิงก์ชั่วคราวสำหรับเข้าสู่ระบบ WHM จะถูกสร้างขึ้นในรูปแบบ https://[server_ip_address]:2087.
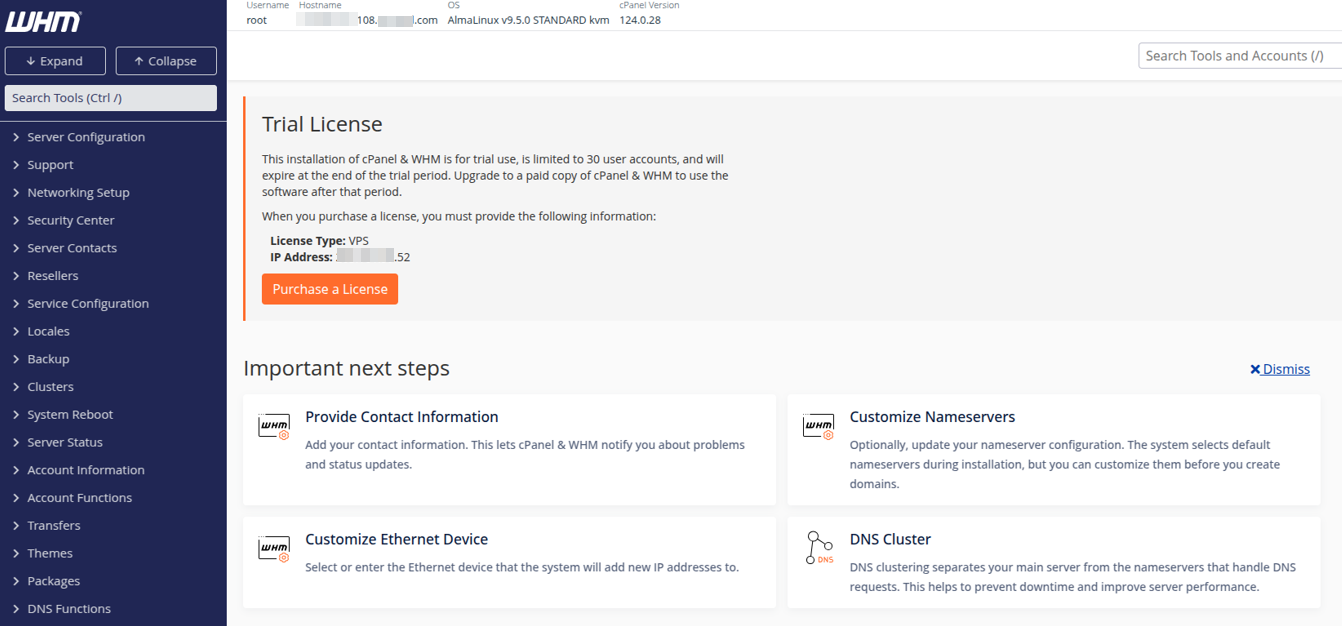
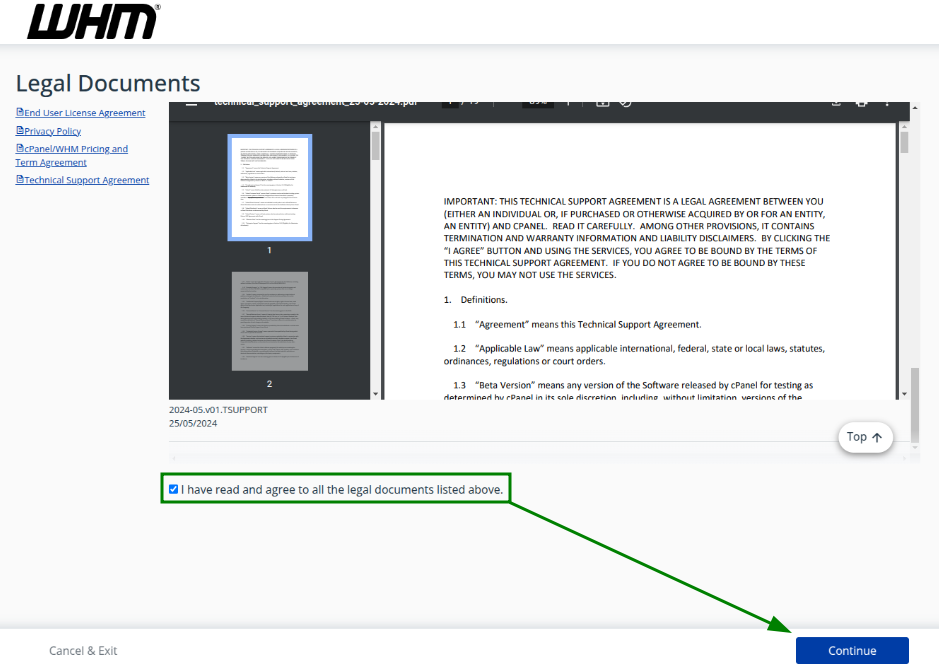
คุณยังสามารถรับลิงก์นี้ได้จากไฟล์บันทึก /var/log/cpanel-install.log ใน cPanel >> เมนู File Manager ลิงก์เข้าสู่ระบบ WHM จะอยู่ท้ายไฟล์หลังจากข้อมูลการติดตั้งสำเร็จใช้ลิงก์เข้าสู่ระบบที่สร้างขึ้นเพื่อเข้าสู่บัญชี WHM ของคุณ ตรวจสอบเอกสารทางกฎหมายที่ให้ไว้สำหรับการตรวจสอบของคุณ ติ๊กที่ช่อง “ฉันได้อ่านแล้ว” และคลิก “ดำเนินการต่อ”:
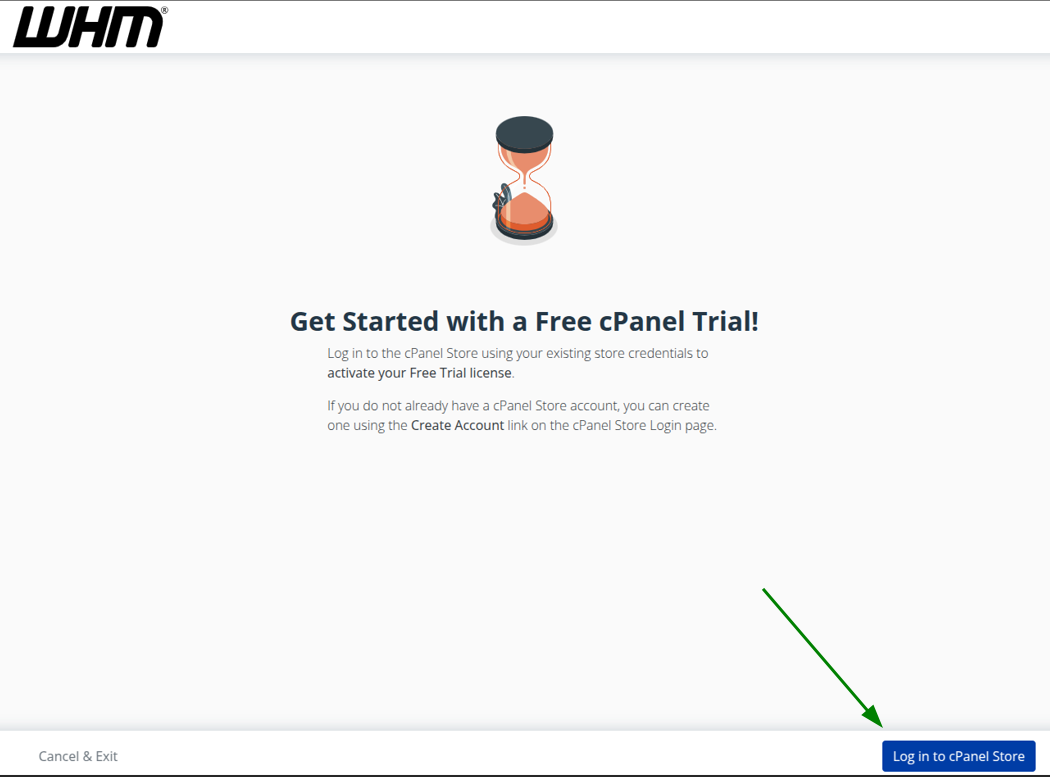
ขั้นตอนถัดไปคือเข้าสู่ระบบ cPanel Store คลิกที่ปุ่มที่เกี่ยวข้องตามที่แสดงในภาพหน้าจอ:
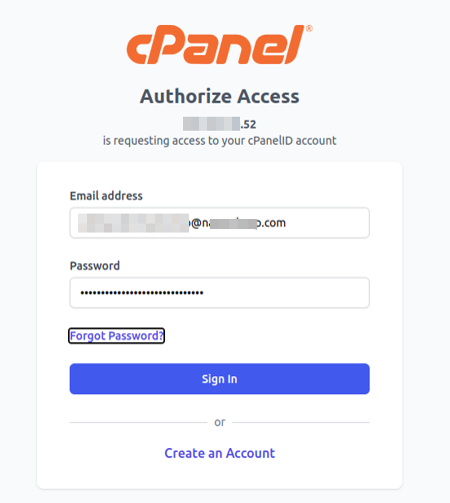
ในหน้าถัดไป ให้เข้าสู่บัญชี cPanel ของคุณ หากคุณยังไม่มีบัญชี คุณสามารถลงทะเบียนได้ในขั้นตอนนี้โดยคลิกที่ตัวเลือก “สร้างบัญชี”:
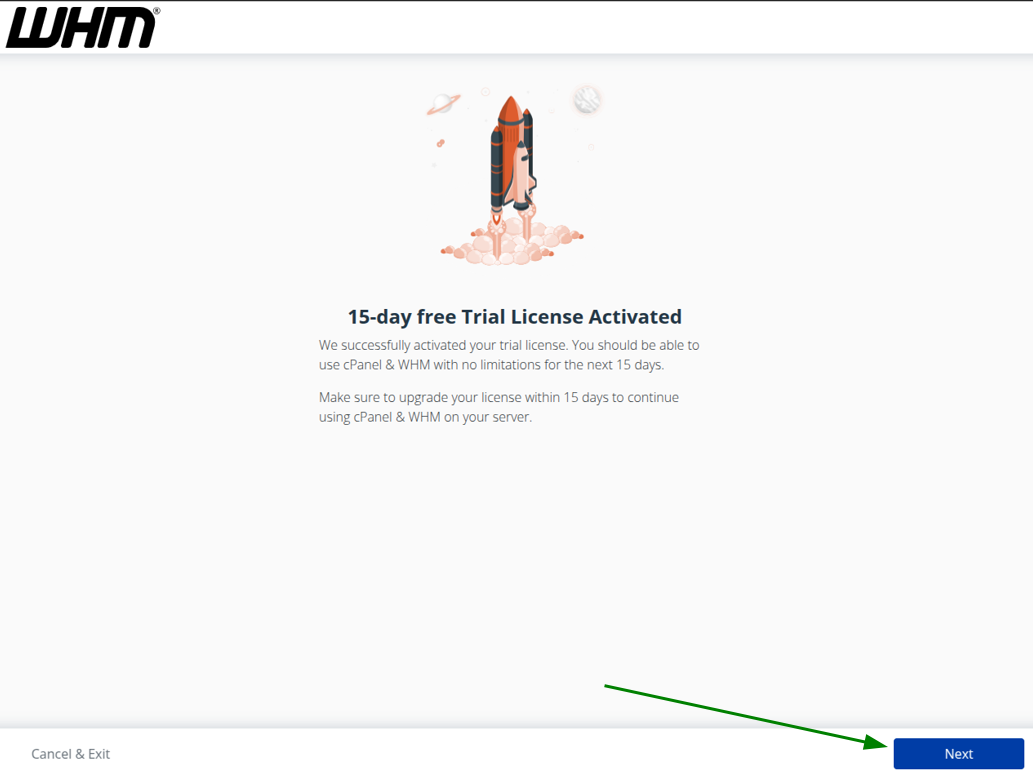
เมื่อเสร็จสิ้น หน้าข้อมูลเกี่ยวกับการเปิดใช้งานใบอนุญาตทดลองใช้งานฟรี 15 วันจะแสดงขึ้น อ่านข้อมูลและคลิก “ถัดไป”:
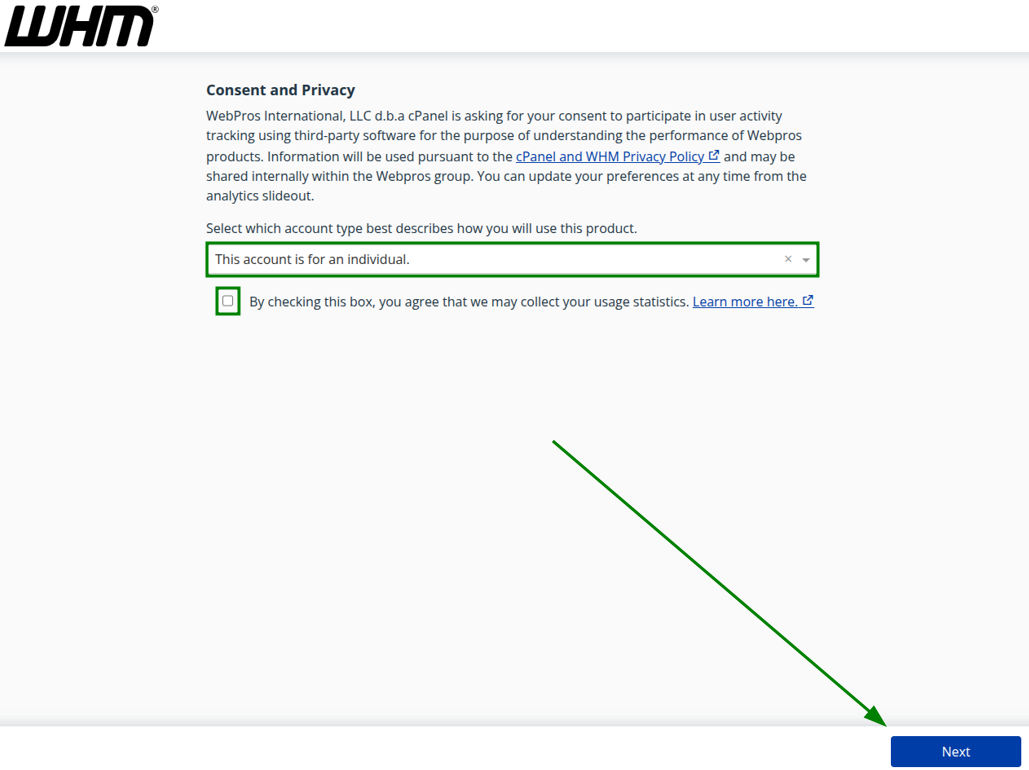
หน้าถัดไปเกี่ยวกับ ความยินยอมและความเป็นส่วนตัว เลือกประเภทบัญชีที่อธิบายวิธีที่คุณจะใช้ผลิตภัณฑ์ cPanel ติ๊กที่ช่อง (หากจำเป็น) และคลิก “ถัดไป”:
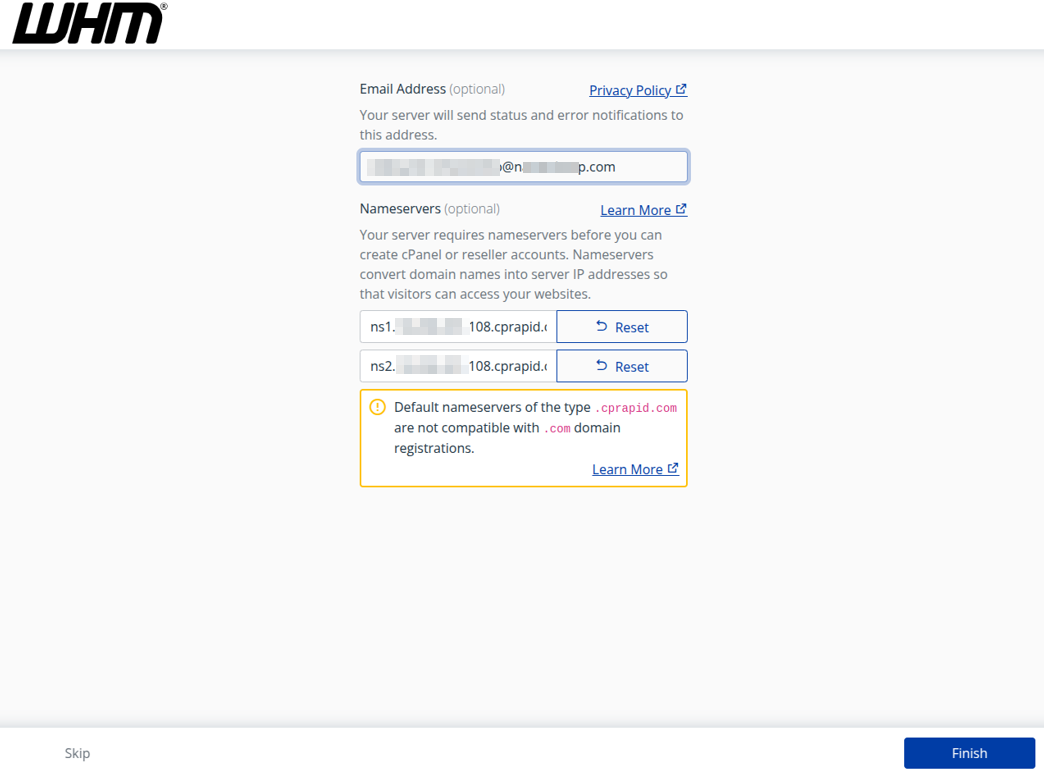
ตรวจสอบหน้าตัวช่วยตั้งค่าเซิร์ฟเวอร์และสิ้นสุดกระบวนการโดยคลิกที่ปุ่ม “เสร็จสิ้น”:
จากหน้า “Feature Showcase” คุณสามารถตรวจสอบและเปิดใช้งานฟีเจอร์ cPanel ที่แนะนำซึ่งอาจเป็นประโยชน์ หน้านี้อาจปรากฏขึ้นเป็นครั้งคราวเมื่อมีการอัปเดตหรือฟีเจอร์ใหม่ ๆ
เปิดใช้งานฟีเจอร์ที่ต้องการและคลิก “บันทึกการตั้งค่า” หรือข้ามขั้นตอนเพื่อเปิดใช้งานฟีเจอร์และคลิก “ออกไปยัง WHM”: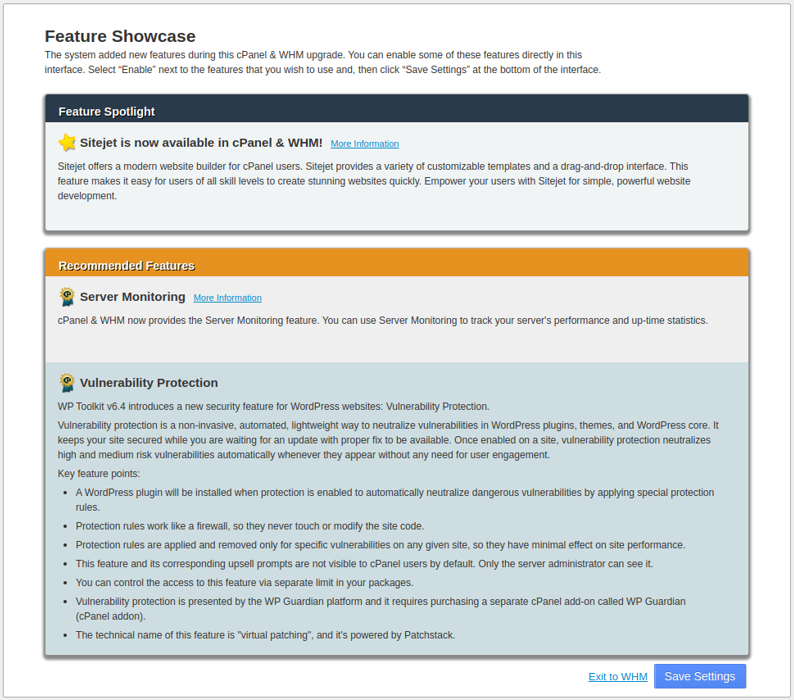
เสร็จสิ้นแล้ว คุณสามารถเริ่มใช้งานจากบัญชี WHM ได้เลย: