Thunderbird에서 Spacemail CardDav 설정
이 문서에서는 CardDAV 프로토콜을 통해 Thunderbird 이메일 클라이언트에서 Spacemail 주소록을 설정하는 단계별 지침을 제공합니다.
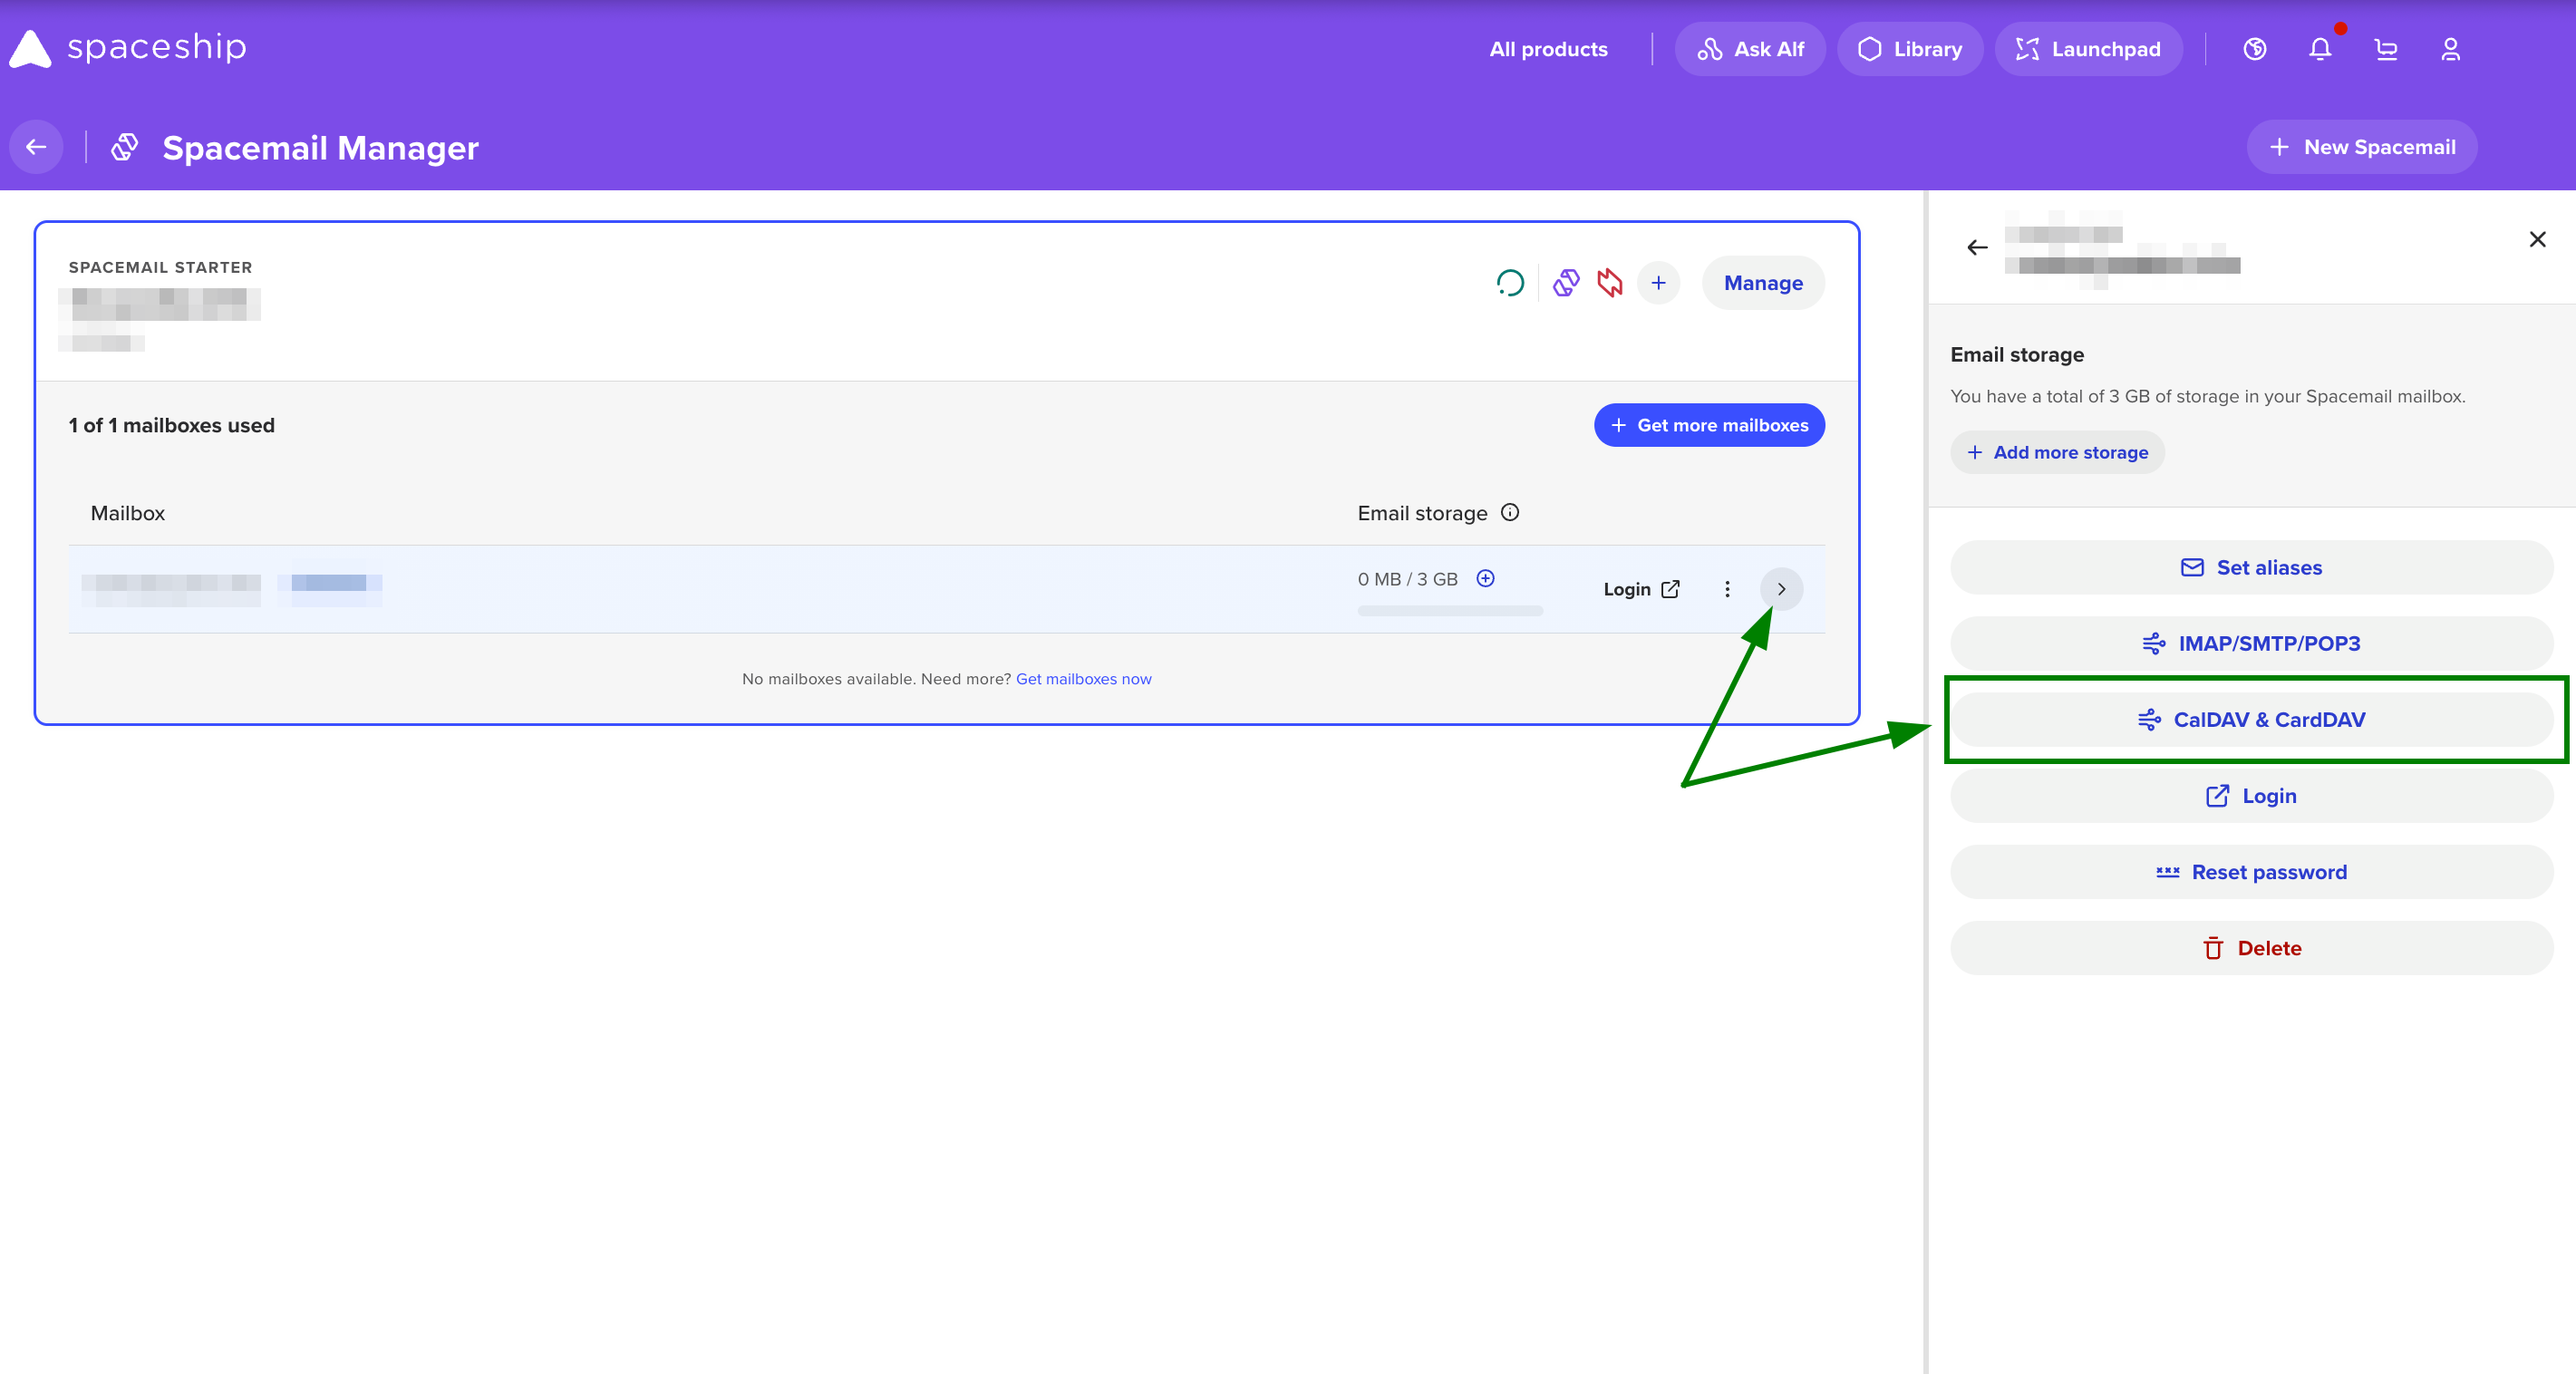
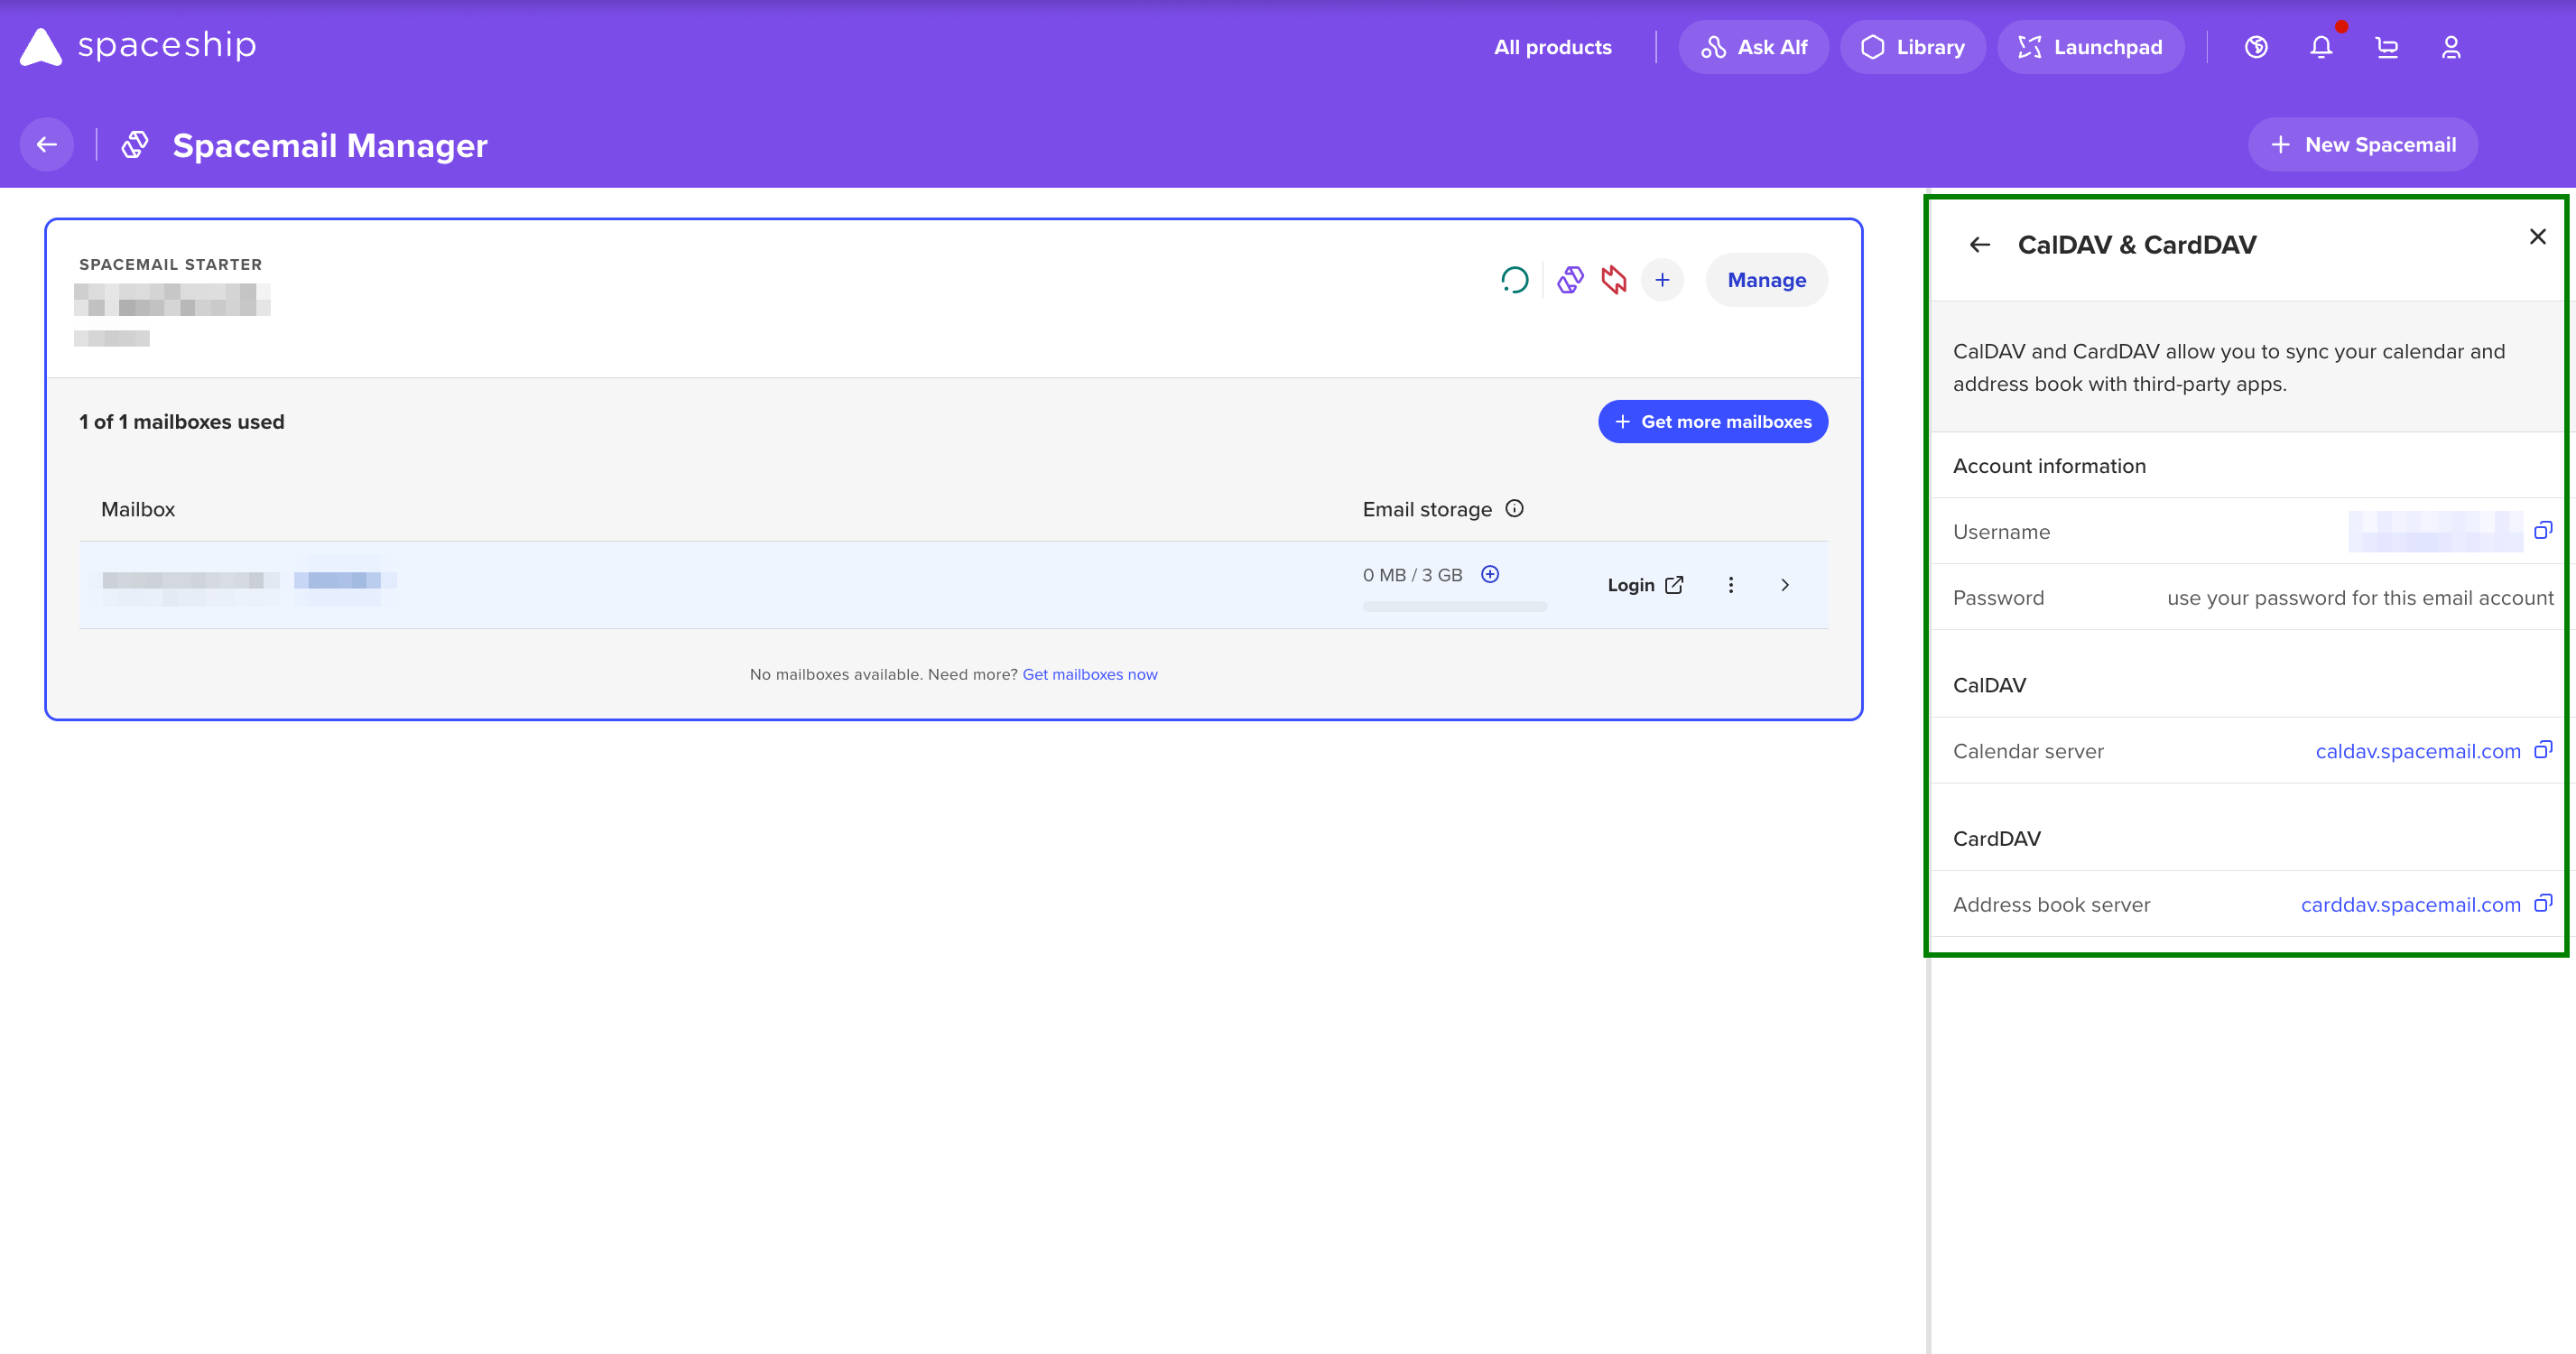
참고: 구성 세부 정보는 Spacemail 관리자에서 메일박스를 클릭하면 확인할 수 있습니다. 메일박스 사이드 패널에 "CalDAV & CardDAV"라는 버튼이 표시됩니다. 이 버튼을 클릭하면 모든 프로토콜 정보를 보여주는 상세 패널이 열립니다:
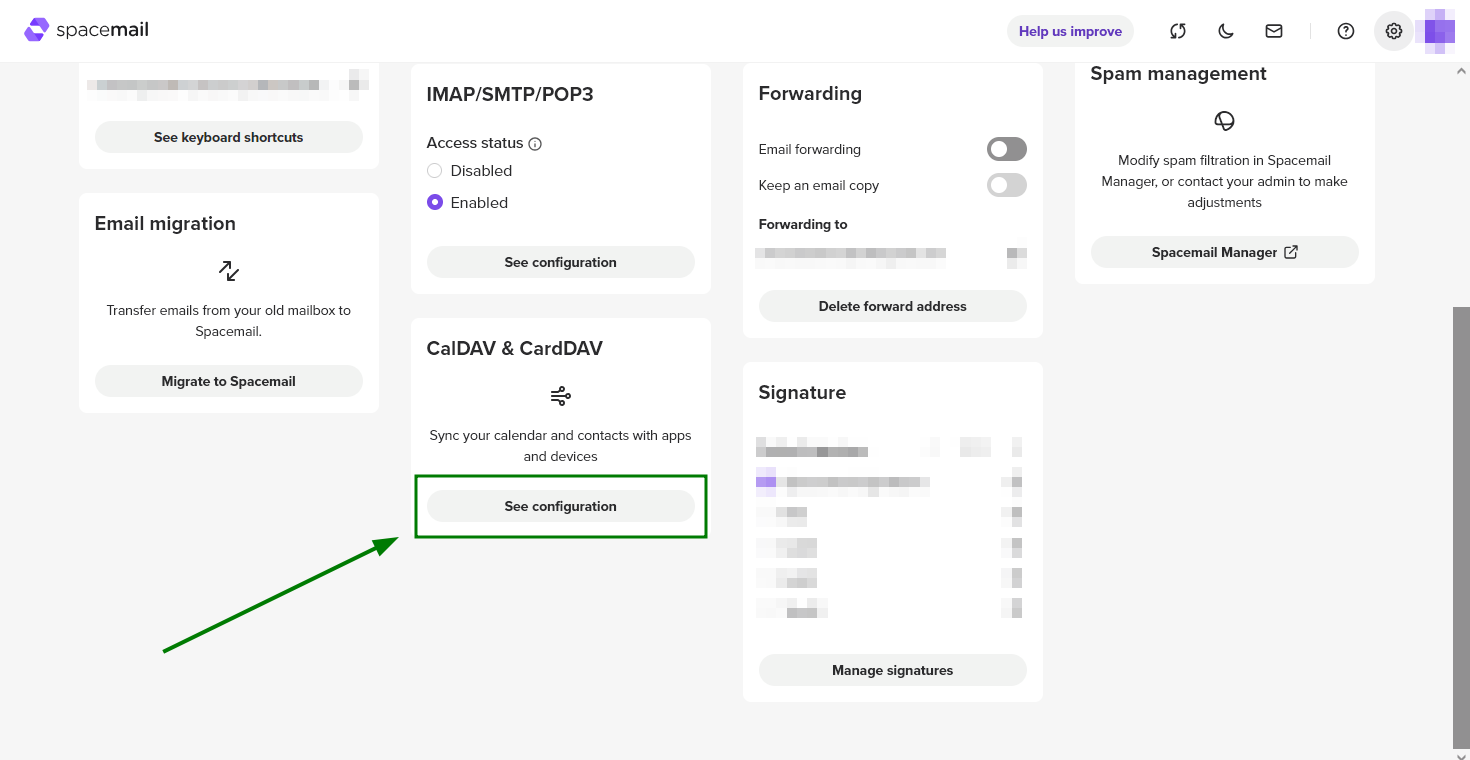
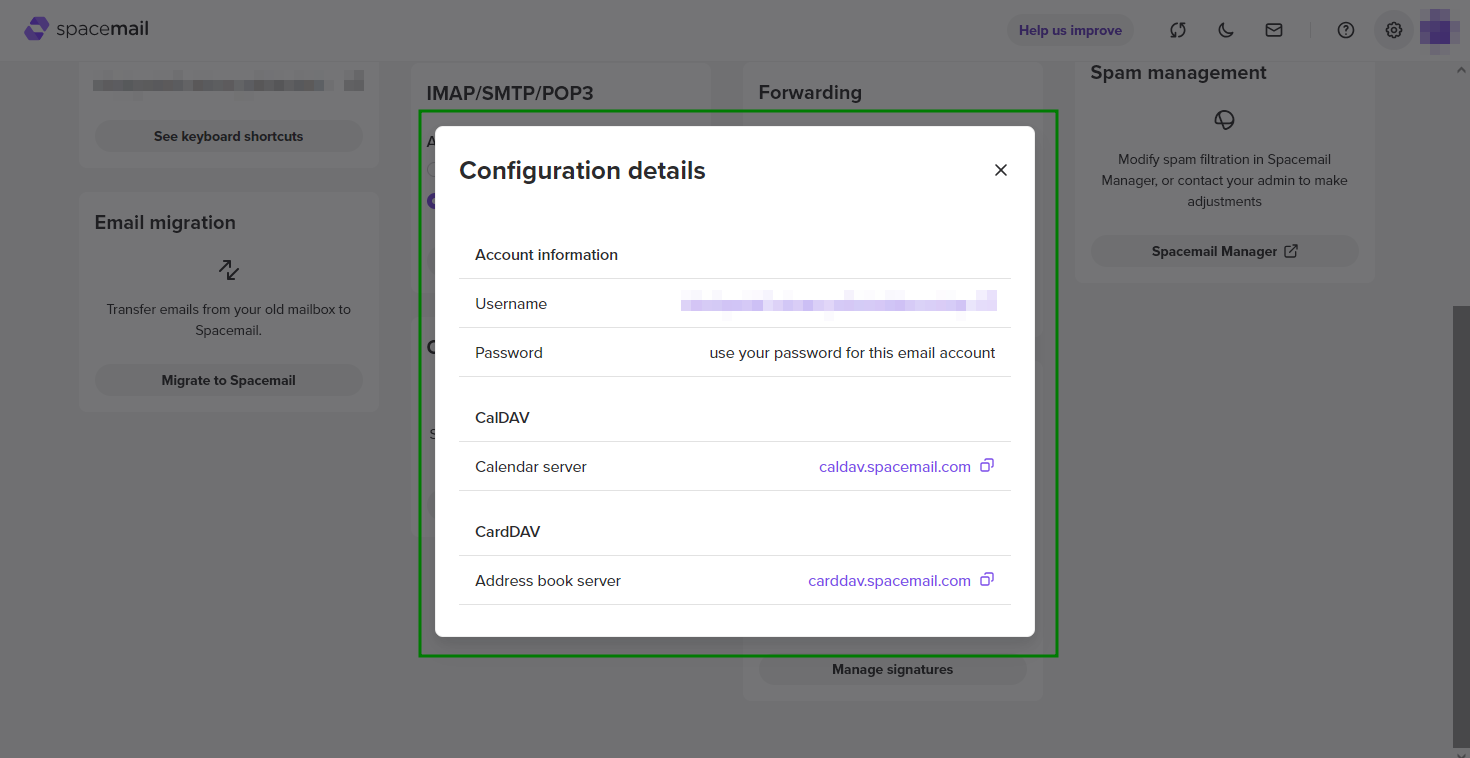
https://www.spacemail.com/login/ > 설정 > CalDAV & CardDAV > 구성 보기에 로그인하여 해당 정보를 확인할 수도 있습니다:
CardDAV 계정을 구성하려면 아래 지침을 따르세요:
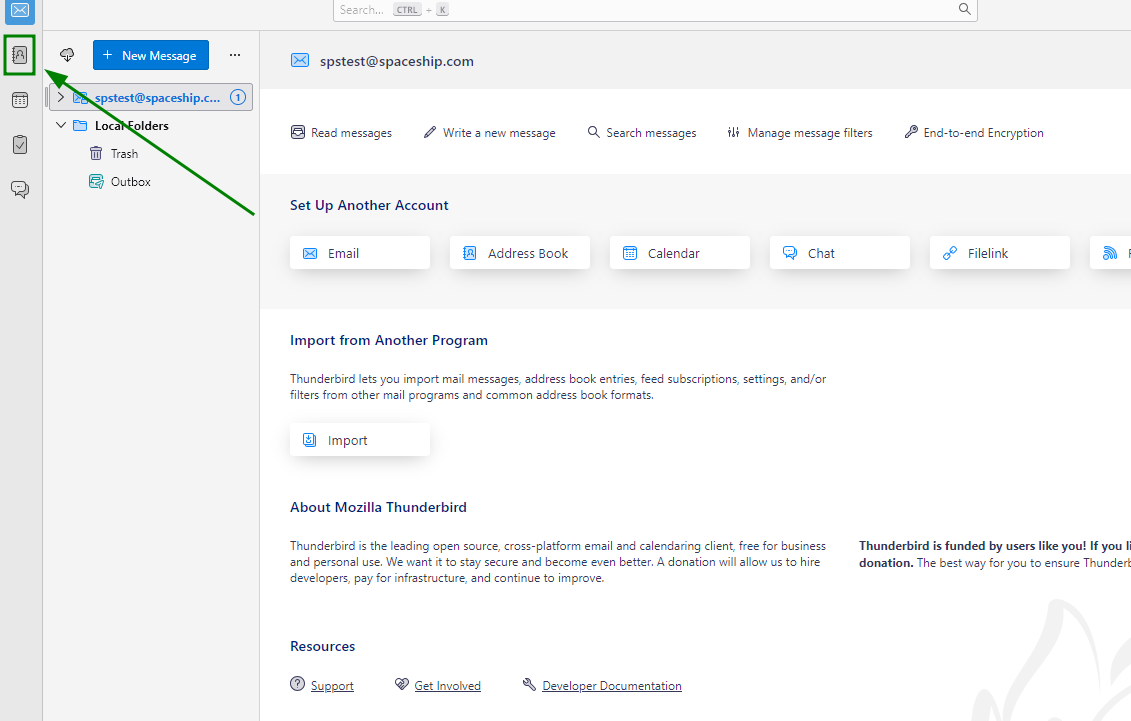
Thunderbird를 열고 ‘주소록’을 선택하세요:
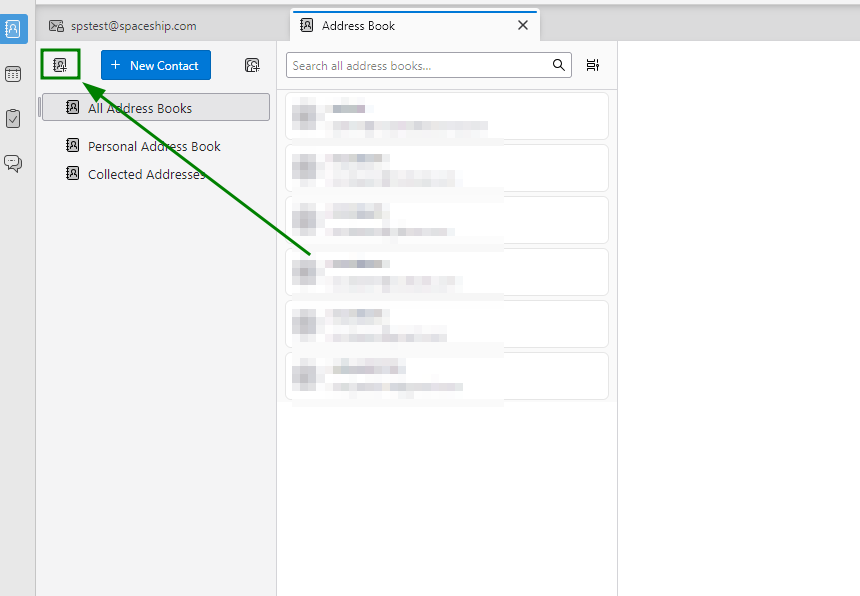
"새 주소록 만들기" 아이콘을 클릭하고 “CardDav 주소록 추가” 옵션을 선택하세요:
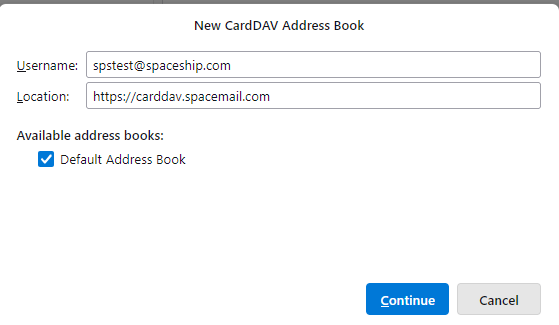
사용자 이름에는 전체 Spacemail 메일박스 이름을 입력하세요(참고: 예시로 테스트 이메일 주소 spstest@spaceship.com이 사용되었습니다).
위치는 주소록 서버: carddav.spacemail.com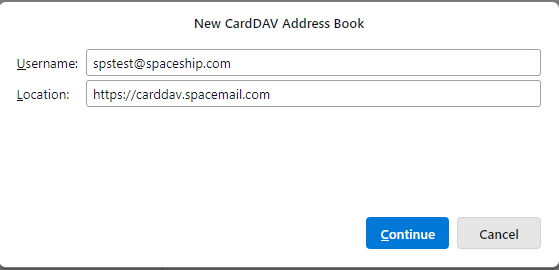
그 후 Spacemail 메일박스의 로그인 자격 증명을 입력하라는 메시지가 표시됩니다:
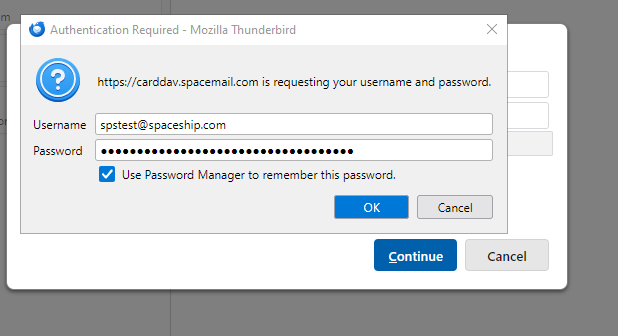
Spacemail 메일박스 비밀번호를 입력하고 비밀번호 필드에 입력한 후 확인사용 가능한 주소록이 목록에 표시됩니다:
추가된 주소록의 “속성” 옵션을 클릭하여 추가로 관리할 수 있습니다. 여기에서 이름, CardDAV URL, 그리고 동기화 간격을(를) 조정할 수 있습니다: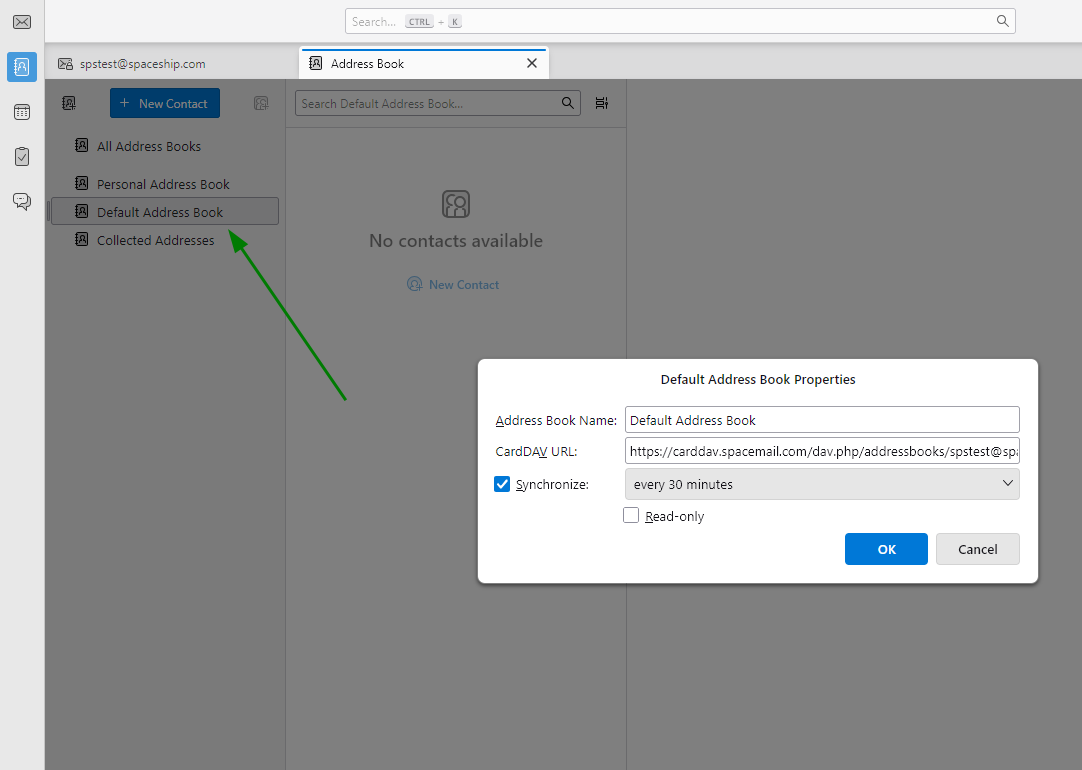
이제 Thunderbird에서 Spacemail 주소록을 사용할 수 있습니다.