Hur du ställer in Spacemail i macOS Mail med IMAP & SMTP
Denna handledning visar hur du ställer in ett Spacemail-konto i Mail-appen på macOS med IMAP för inkommande och SMTP för utgående e-post.
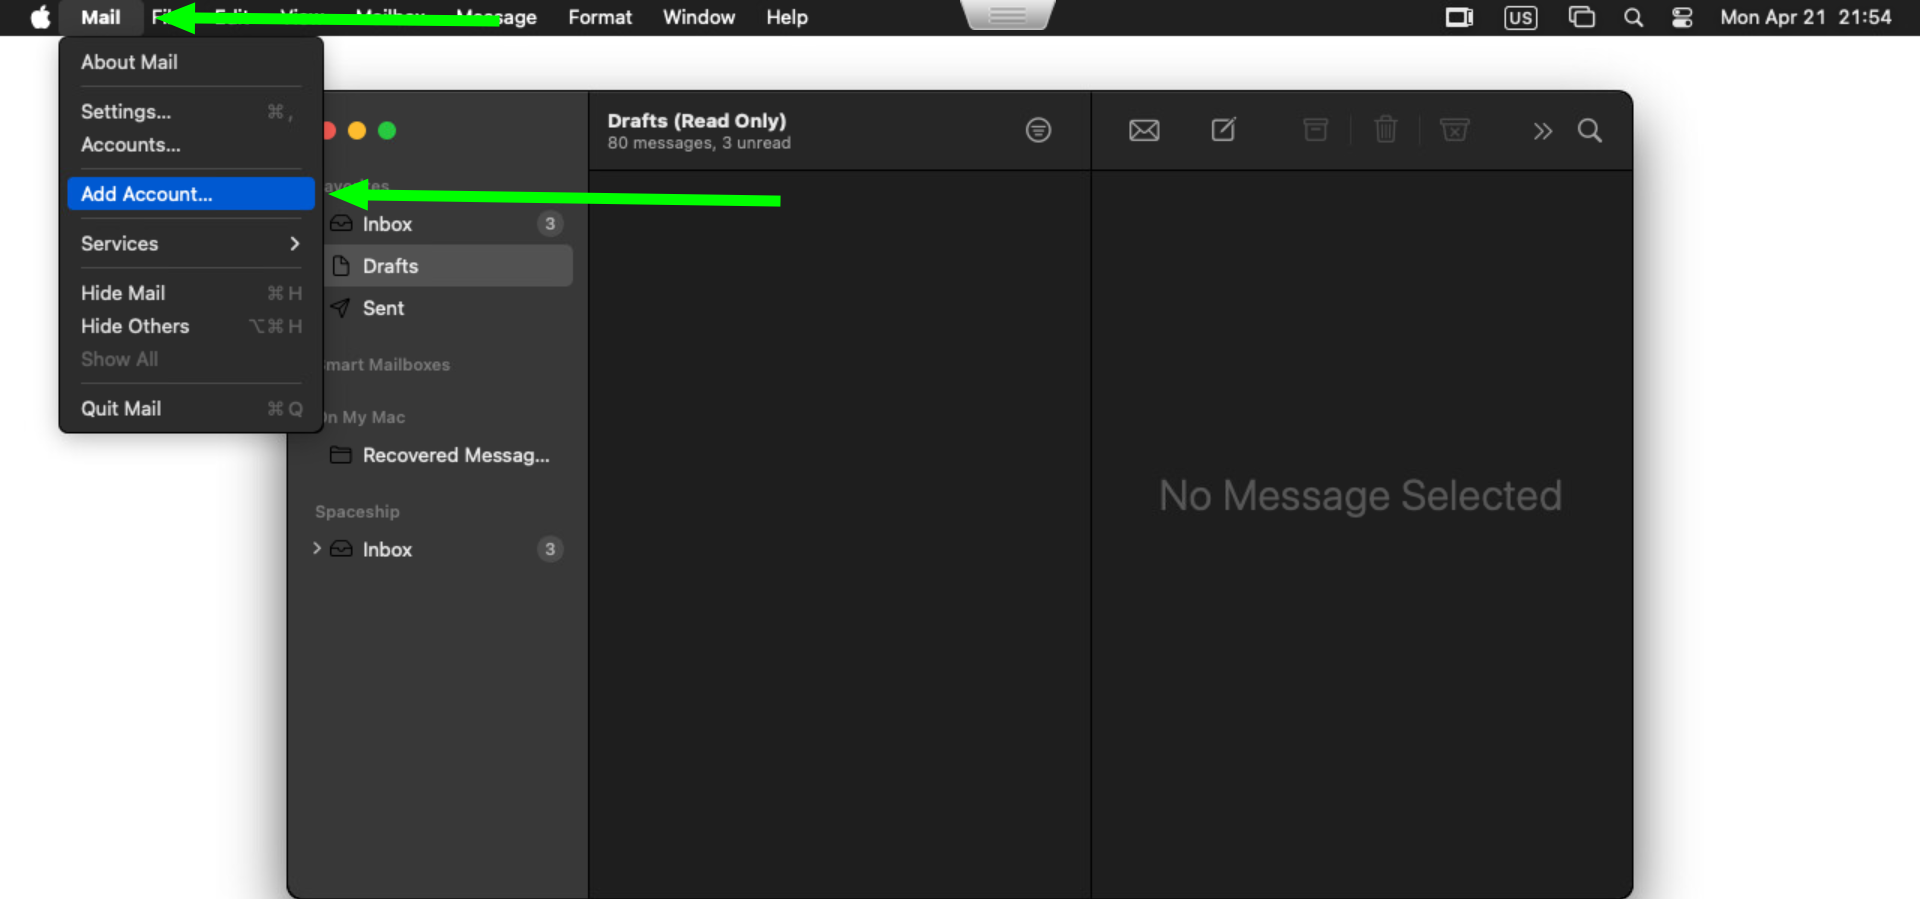
Om du redan har ett konto inställt i din applikation, klicka på Mail och välj alternativet Lägg till konto medan Mail är öppet på skärmen
Om det är första gången du använder Mail kommer du att se en popup där du kan lägga till e-postkontot. Välj alternativet Annat e-postkonto och klicka på knappen Fortsätt: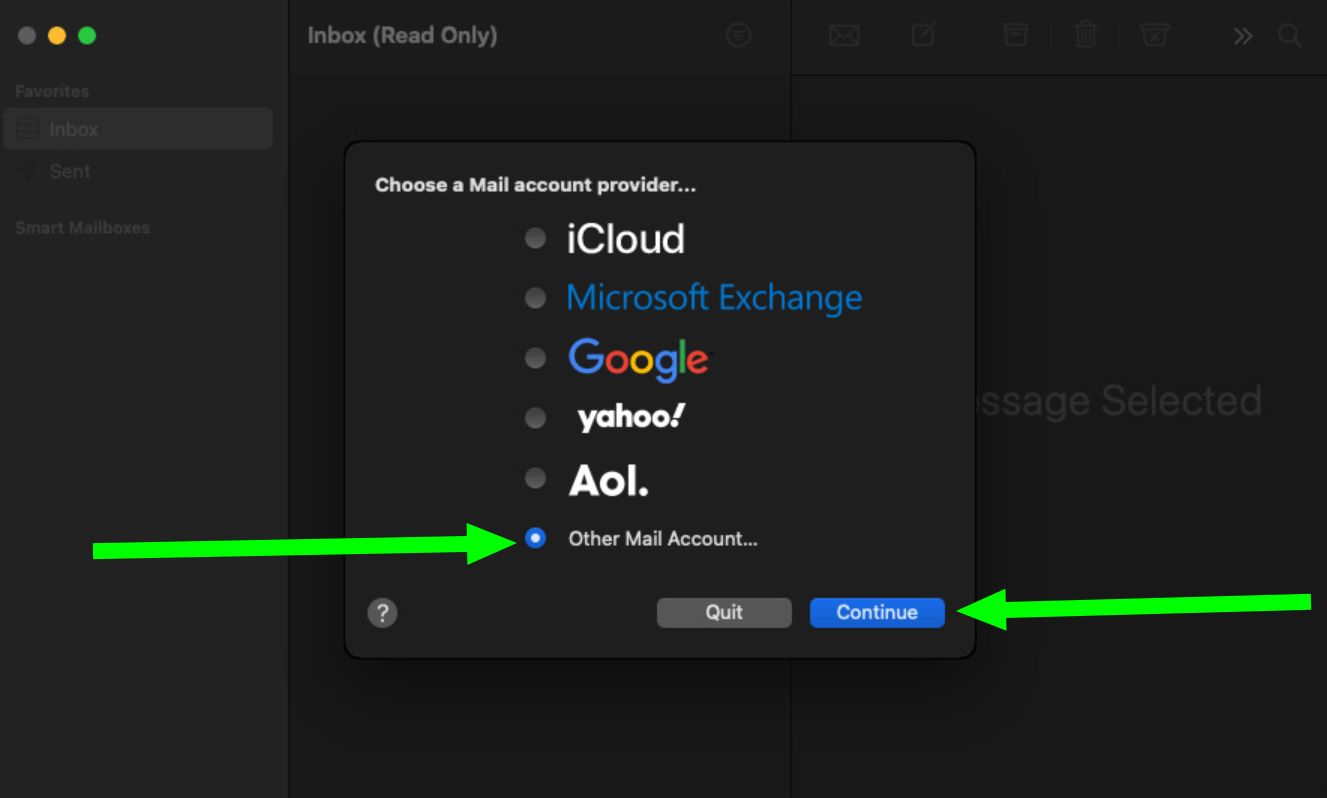
I fönstret Lägg till ett e-postkonto, ange ditt fullständiga namn, e-postadress och lösenord för e-postkontot, klicka sedan på Logga in:
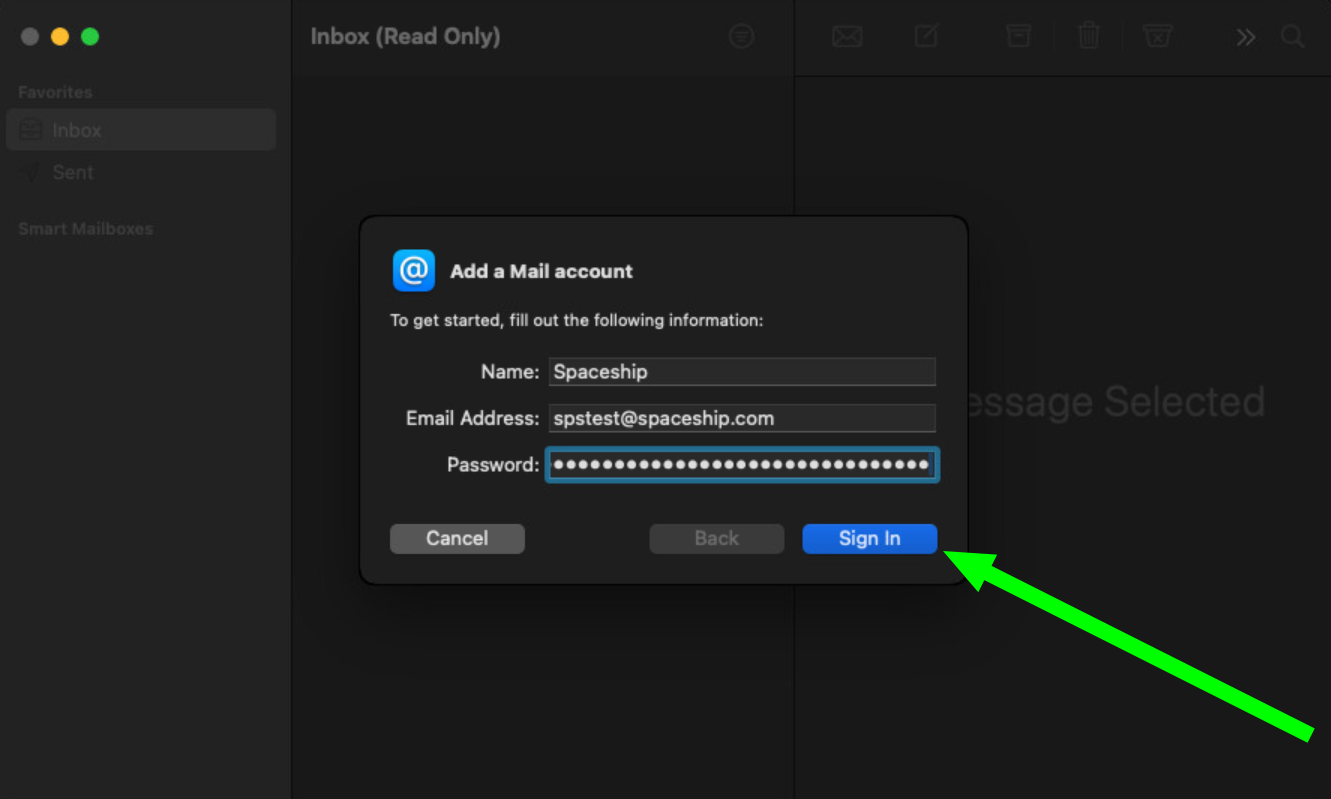
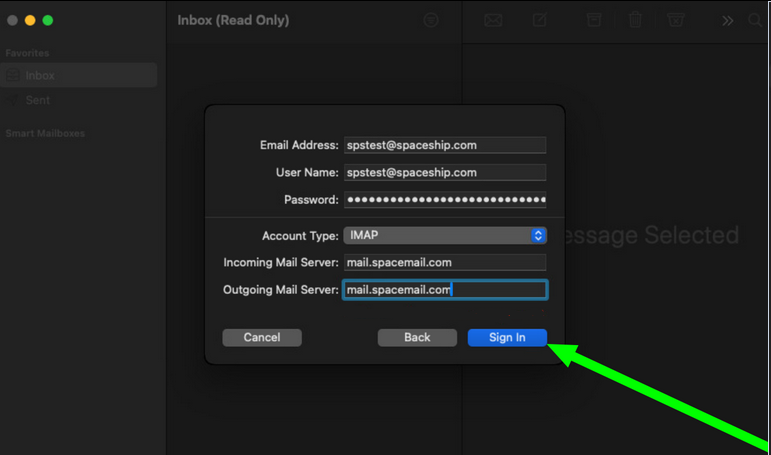
Applikationen försöker automatiskt hitta inställningarna. Bortse från resultatet och fyll i dessa rutor manuellt. Ange dina kontouppgifter:
E-postadress: fullständig e-postadressAnvändarnamn: fullständig e-postadress
Lösenord: lösenordet till din Spacemail-brevlåda
Kontotyp: IMAP
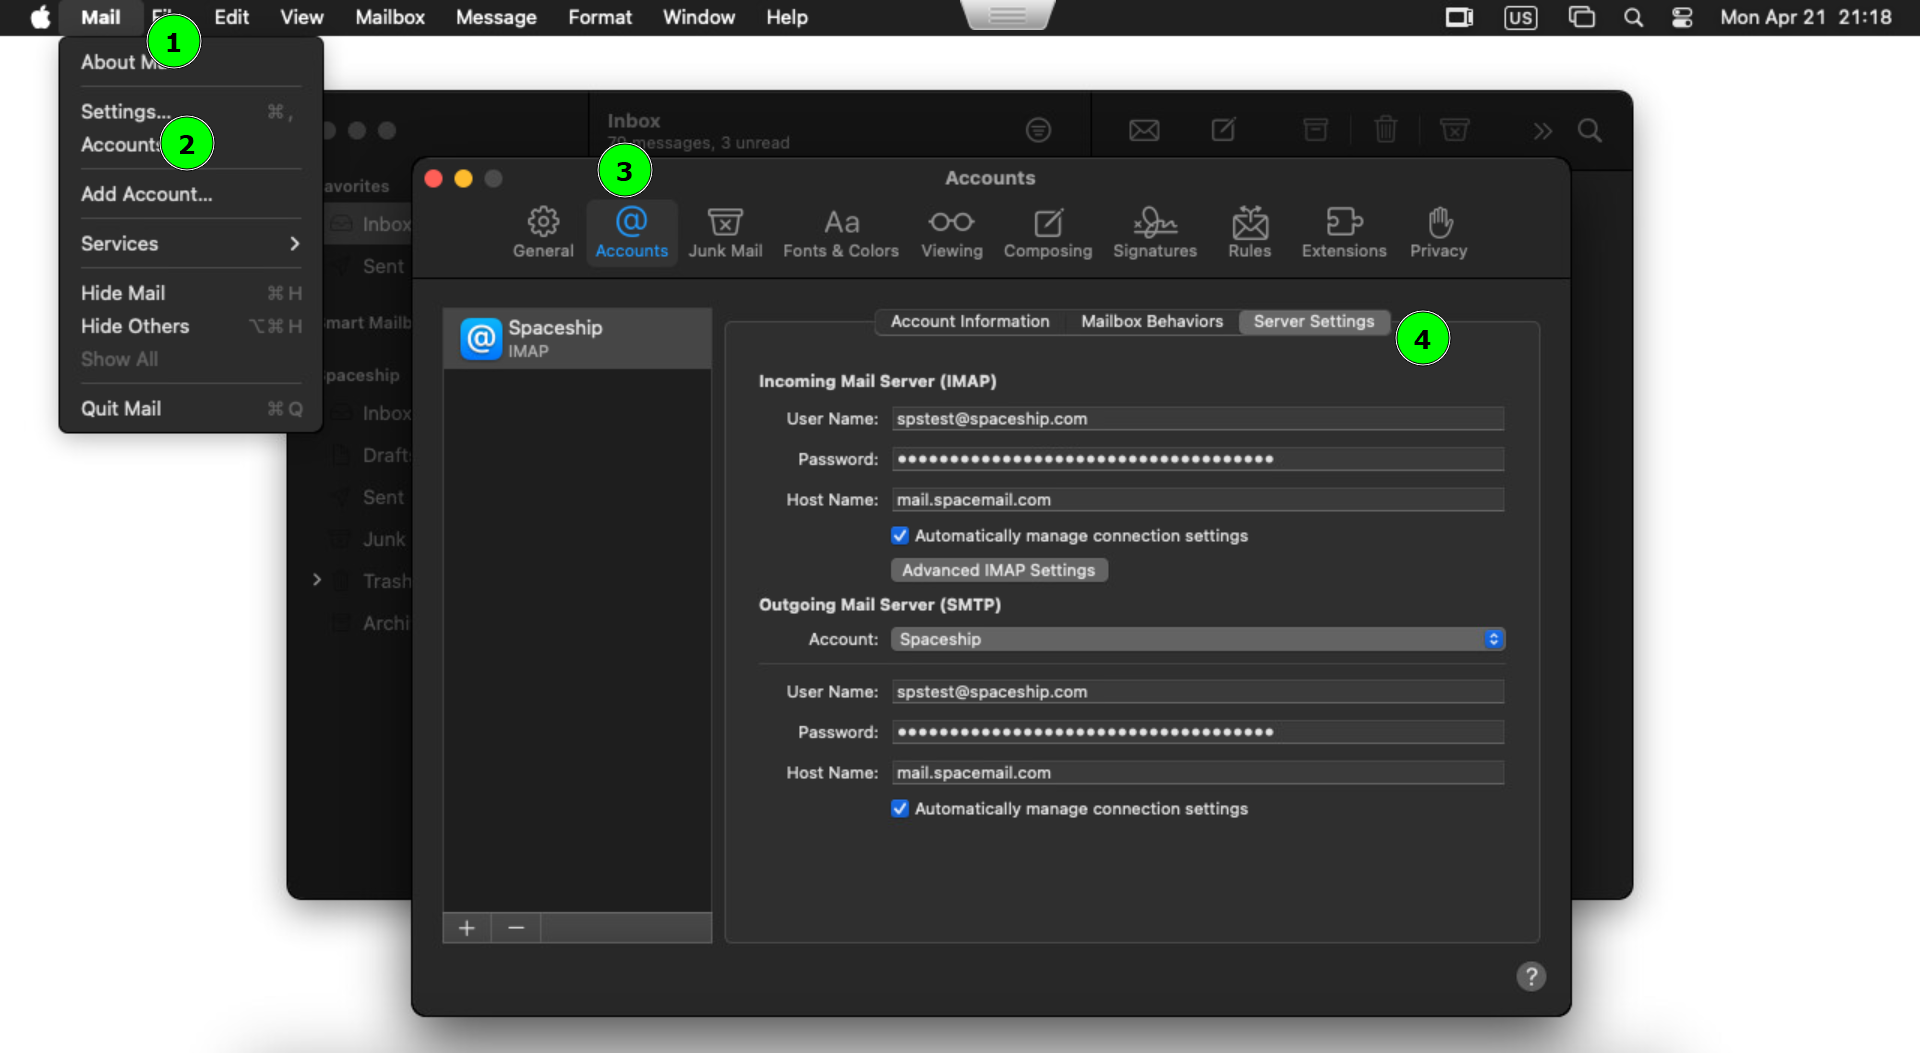
Inkommande e-postserver: mail.spacemail.com
Utgående e-postserver: mail.spacemail.com
Klicka på Logga in när uppgifterna är ifyllda:
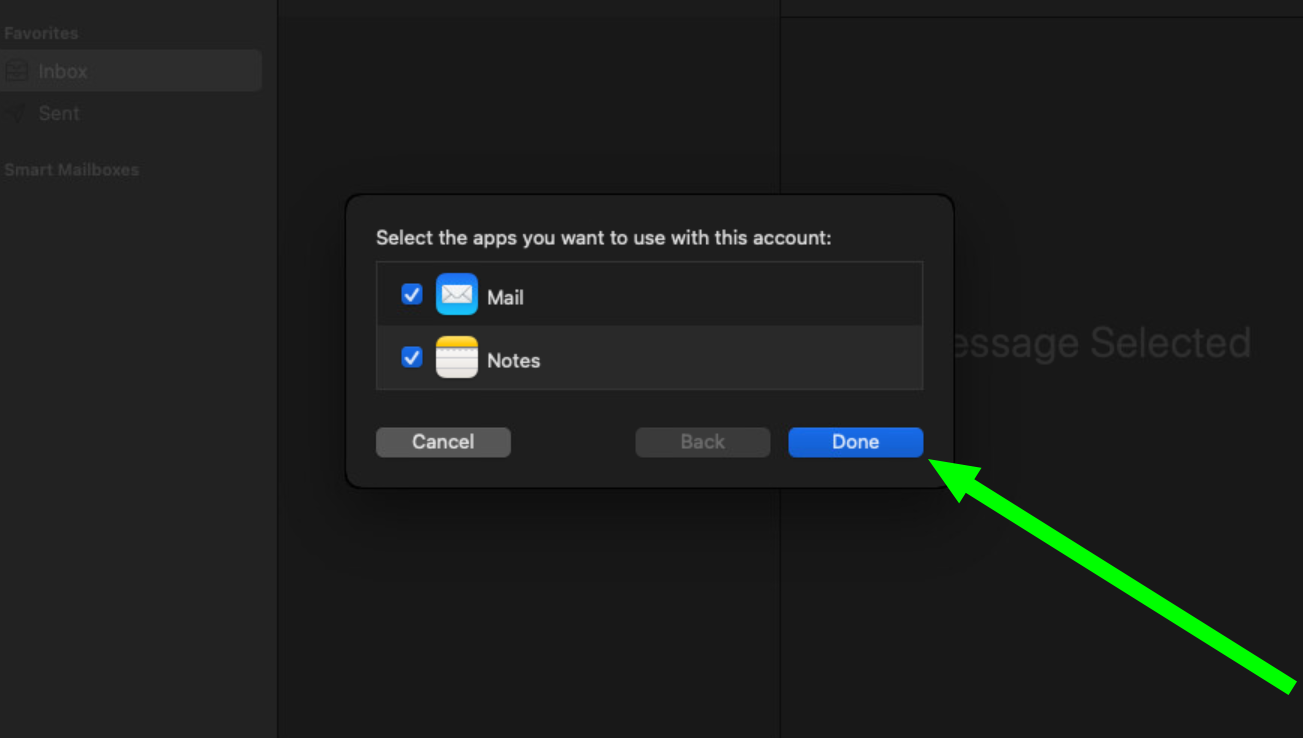
Du kan använda både Mail och Anteckningar här. Klicka på knappen Klar för att slutföra tillägget av brevlådan till Mail-appen:
Nästa steg är att kontrollera att inställningarna för inkommande och utgående e-postservrar är korrekta. Klicka på Mail och gå till Inställningar. Välj sedan Konton och gå till Serverinställningar:
Klicka på Avancerade IMAP-inställningar och fyll i följande uppgifter:
IMAP-sökvägsprefix: 993
TLS-certifikat: inget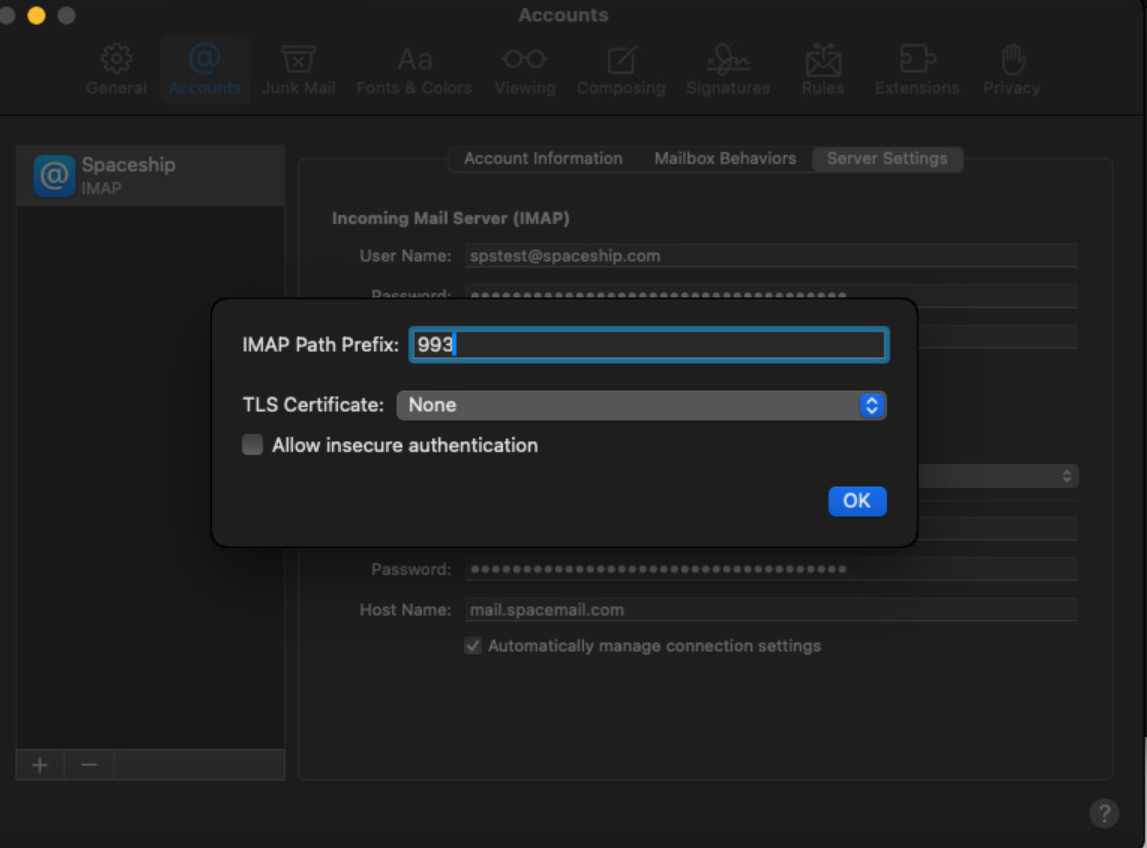
När du är klar, klicka på OK-knappen och spara ändringarna.
Om du har några frågor, tveka inte att kontakta vårt Supportteam för vidare hjälp.
Klart!