WHM पर Mailgun ईमेल कॉन्फ़िगर करना
Mailgun एक स्वचालित ईमेल सेवा है जो आपको अपनी वेबसाइटों और एप्लिकेशन से ईमेल भेजने, प्राप्त करने और ट्रैक करने में सक्षम बनाती है। यह मार्केटिंग और अन्य उद्देश्यों के लिए ईमेल प्रबंधन को भी सुगम बनाती है।
ध्यान दें: VMs पर कनेक्शन के लिए पोर्ट 25 डिफ़ॉल्ट रूप से बंद है। यदि आप पोर्ट 25 खोलना चाहते हैं, तो Mail Bridge खरीदें और इसे कॉन्फ़िगर करेंVPS Managerमें।
WHM पर SendGrid ईमेल कॉन्फ़िगर करने के लिए, कृपया इस गाइड का उपयोग करें।
WHM पक्ष पर अपने डोमेन नाम के लिए Mailgun सेवा और Email System कॉन्फ़िगर करने हेतु कृपया नीचे दिए गए चरणों का पालन करें:
चरण 1. Mailgun के लिए साइन अप करें। वे अलग-अलग कीमतों पर कई खाता प्लान सुझाते हैं, जिन्हें आप यहाँ देख सकते हैं:
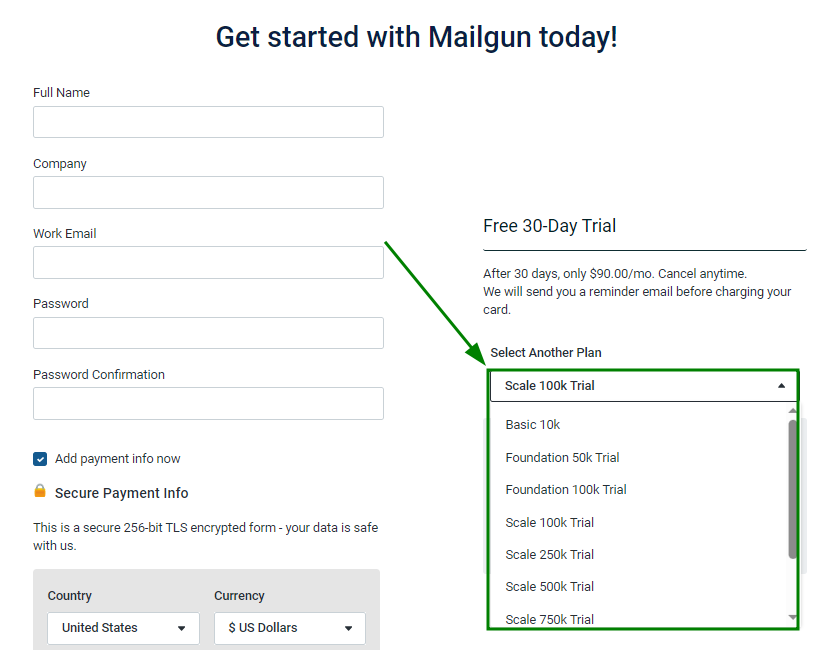
आप मुफ़्त में साइन अप करके खाता पंजीकृत कर सकते हैं। इस स्थिति में, सुनिश्चित करें कि “Add payment info” चेकमार्क चयनित न हो।
ध्यान दें: क्रेडिट कार्ड के बिना खातों को प्रतिदिन 100 संदेश भेजने तक सीमित किया जाता है:
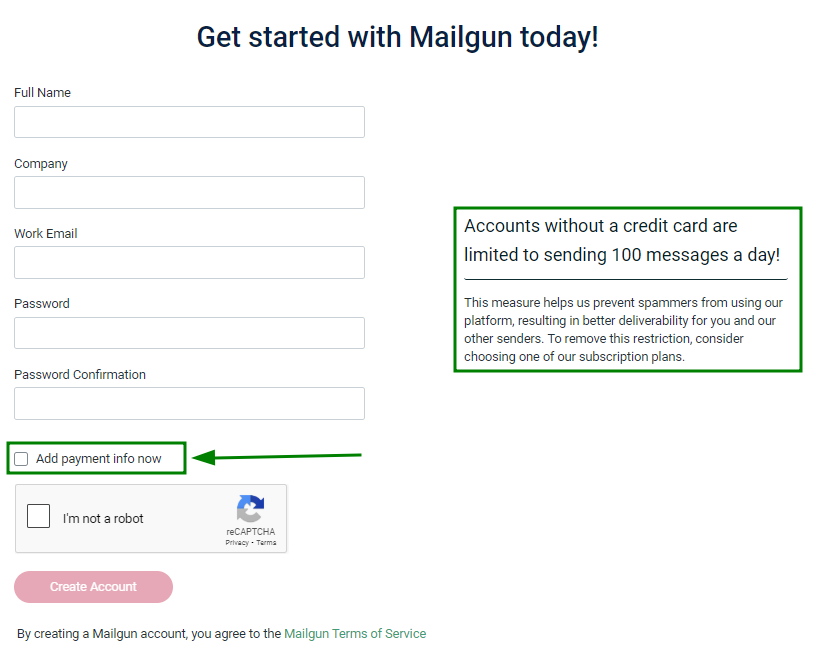
सब कुछ भर जाने के बाद, “Create Account” पर क्लिक करें।
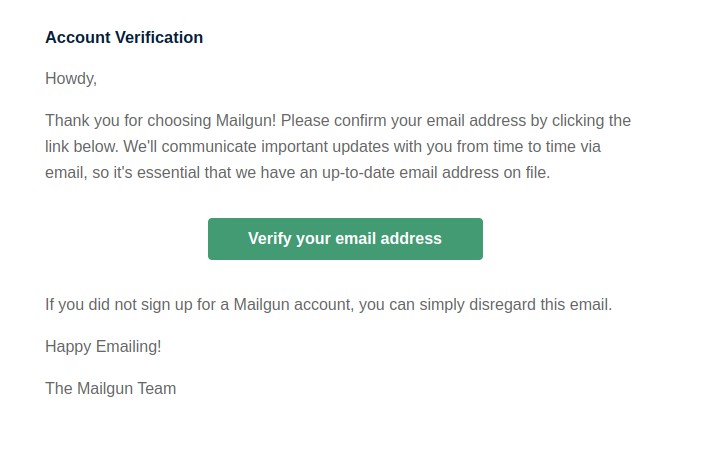
चरण 2. Mailgun से प्राप्त संबंधित ईमेल के अंदर “Verify your email address” बटन पर क्लिक करके अपने ईमेल खाते को सत्यापित करें:
चरण 3. Mailgun Sender Authentication सेट अप करें। ऐसा करने के दो तरीके हैं:
विधि 1:
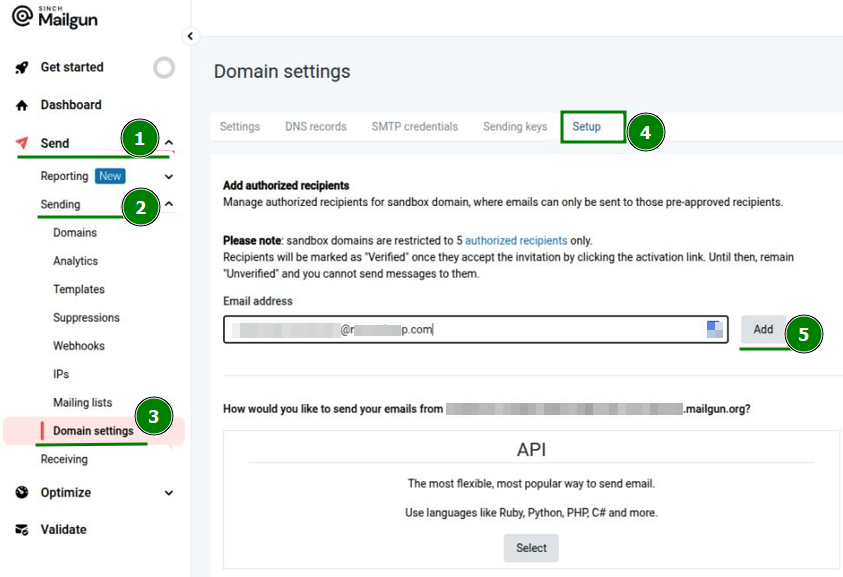
अपने Mailgun खाते में लॉग इन करें >> बाईं ओर के मेनू में “Send” सेक्शन पर क्लिक करें >> “Sending” >> “Domain Setting;
“Domain Settings” मेनू के अंदर, “Setup” सेक्शन में जाएँ;
आवश्यक ईमेल पता “Email address” फ़ील्ड में दर्ज करके अधिकृत प्राप्तकर्ताओं को जोड़ें >> “Add” पर क्लिक करें:
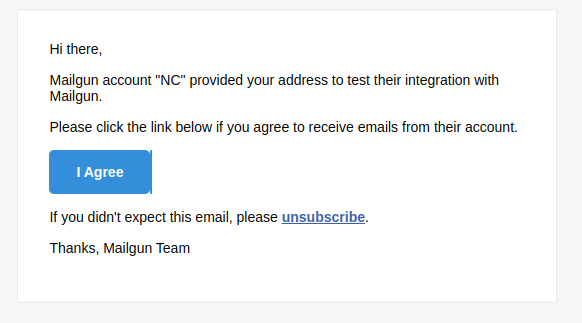
इसके बाद, आपको निर्दिष्ट ईमेल पते पर एक ईमेल प्राप्त होगा। इसके जोड़े जाने की पुष्टि करने के लिए, "I Agree" बटन दबाएँ:
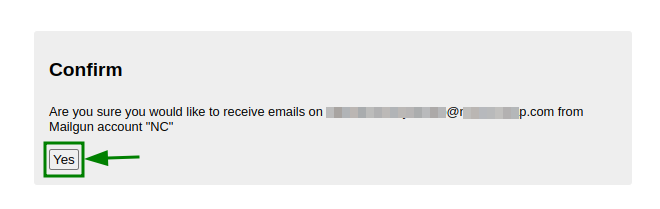
आपको ब्राउज़र में एक नए टैब पर रीडायरेक्ट किया जाएगा। ईमेल पता जोड़ने की पुष्टि करने के लिए "Yes" बटन पर क्लिक करें:
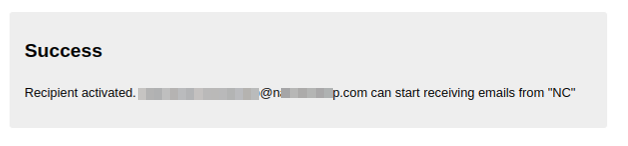
यह हो जाने पर, आपको एक “Success” संदेश प्राप्त होगा, जिसका अर्थ है कि संबंधित ईमेल खाता जोड़ दिया गया है:
विधि 2:
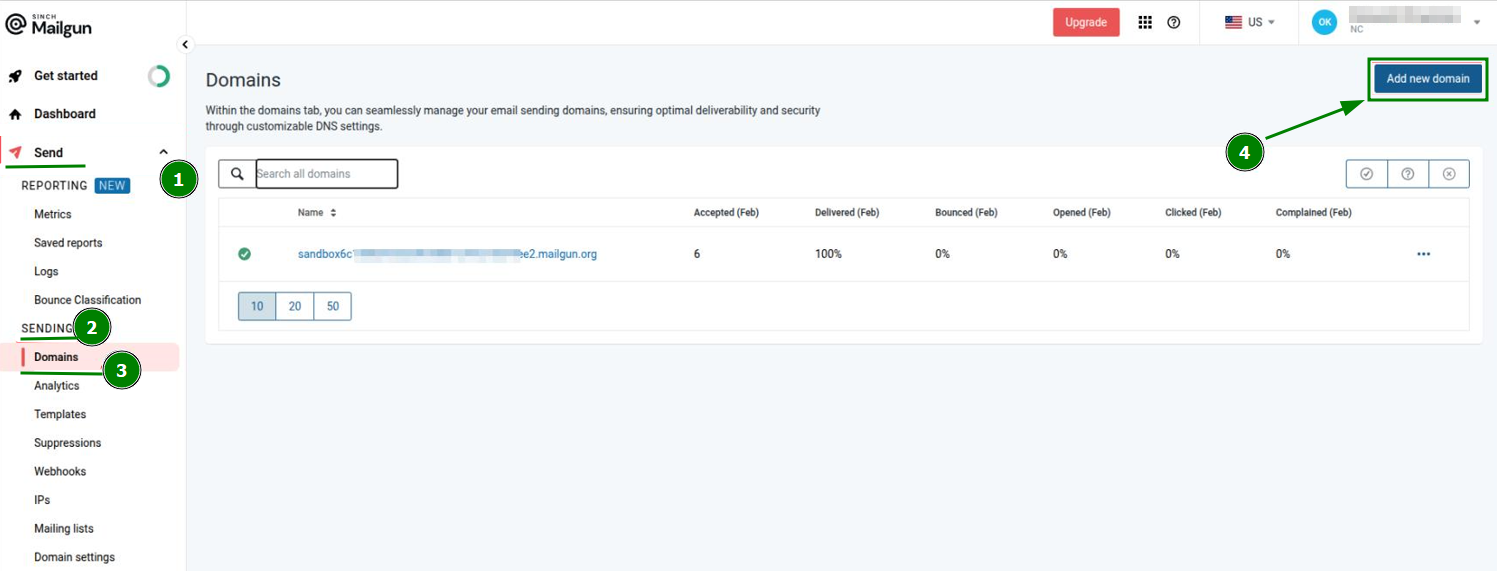
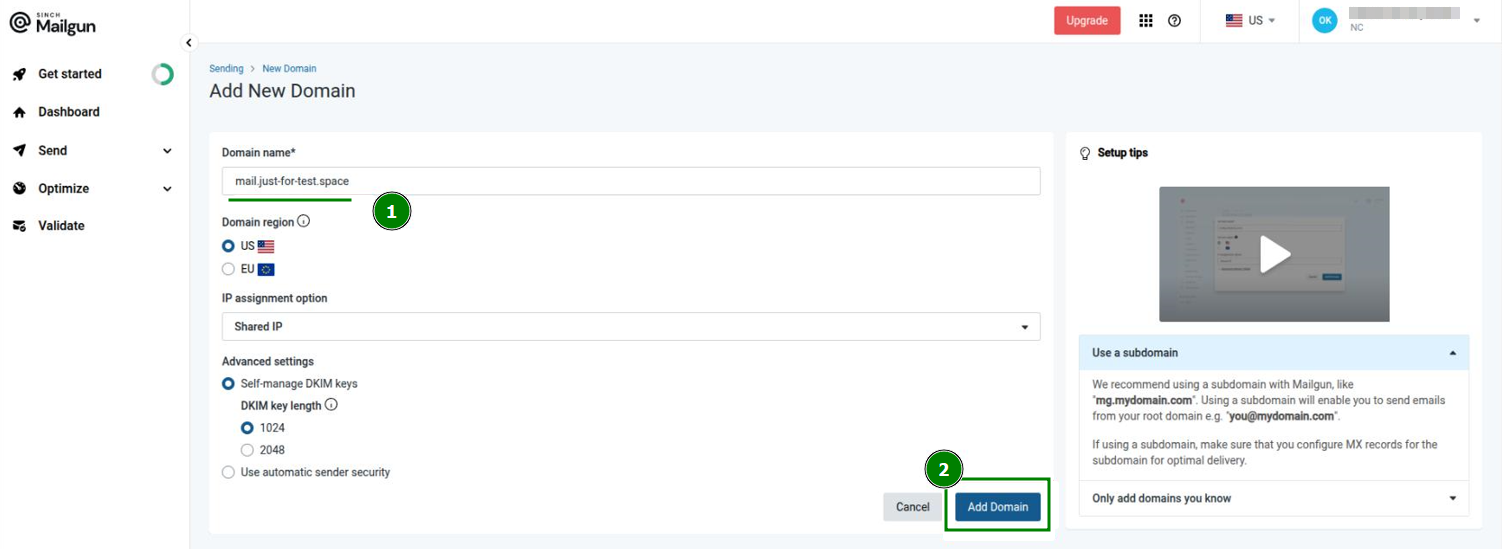
अपने Mailgun खाते में लॉग इन करें >> बाईं ओर के मेनू में “Send” सेक्शन पर क्लिक करें >> “Sending” >> “Domains”। इस सेक्शन से, “Add new domain” बटन पर क्लिक करें:
आपको एक ऐसे पेज पर रीडायरेक्ट किया जाएगा जहाँ से Mailgun सिस्टम में एक नया डोमेन जोड़ना संभव है। “Domain name” फ़ील्ड में इच्छित डोमेन दर्ज करें, आवश्यक विकल्प और उन्नत सेटिंग्स चुनें, और “Add Domain” पर क्लिक करें:
इसके बाद, डोमेन के लिए संबंधित TXT और MX DNS रिकॉर्ड कॉन्फ़िगर करके जोड़े गए डोमेन नाम को सत्यापित करना आवश्यक है।
जो रिकॉर्ड जोड़े जाने चाहिए उनकी सूची तथा उनकी स्थिति आपके Mailgun खाते में >> बाईं ओर के मेनू के “Send” सेक्शन >> “Sending” >> “Domains” >> “DNS Records” सेक्शन में जाकर देखी जा सकती है।
डोमेन के लिए DNS रिकॉर्ड बन जाने के बाद, ऊपर दाईं ओर "Verify" बटन पर क्लिक करें: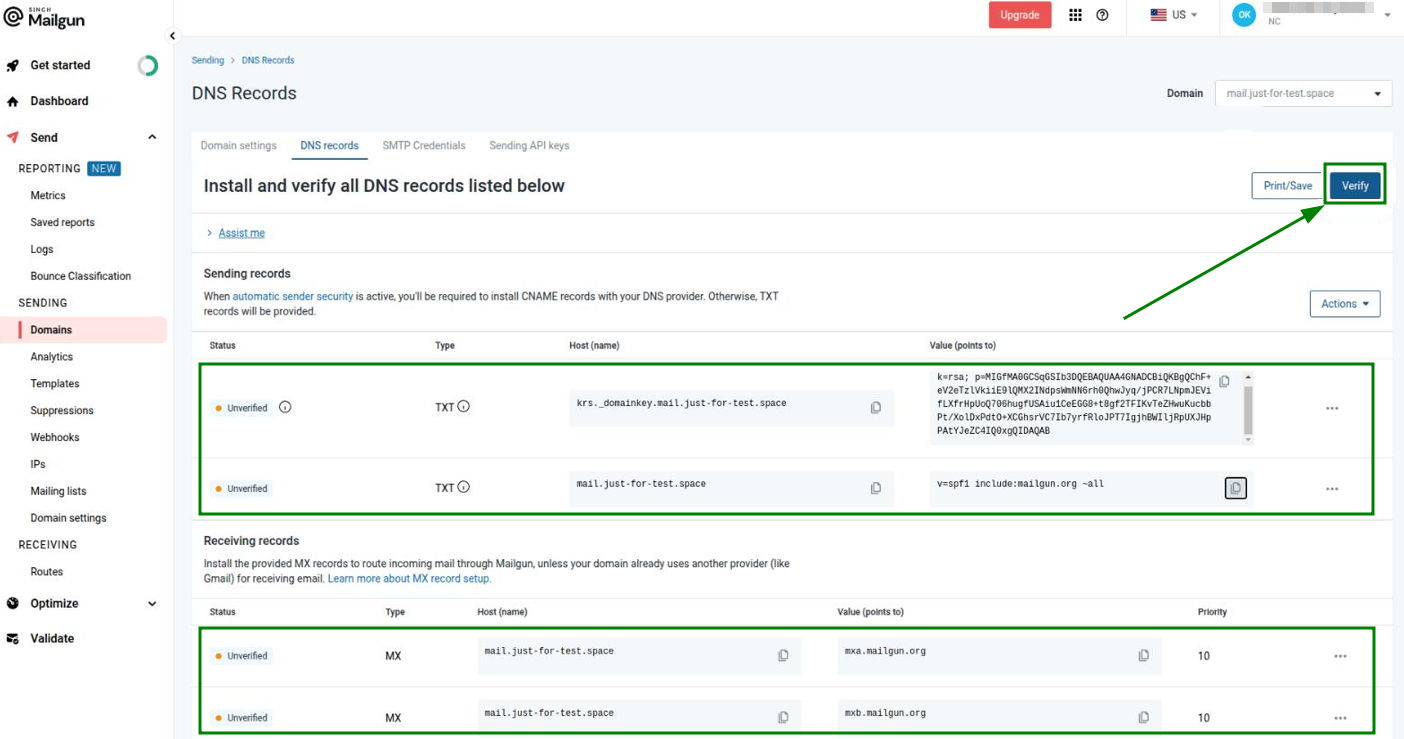
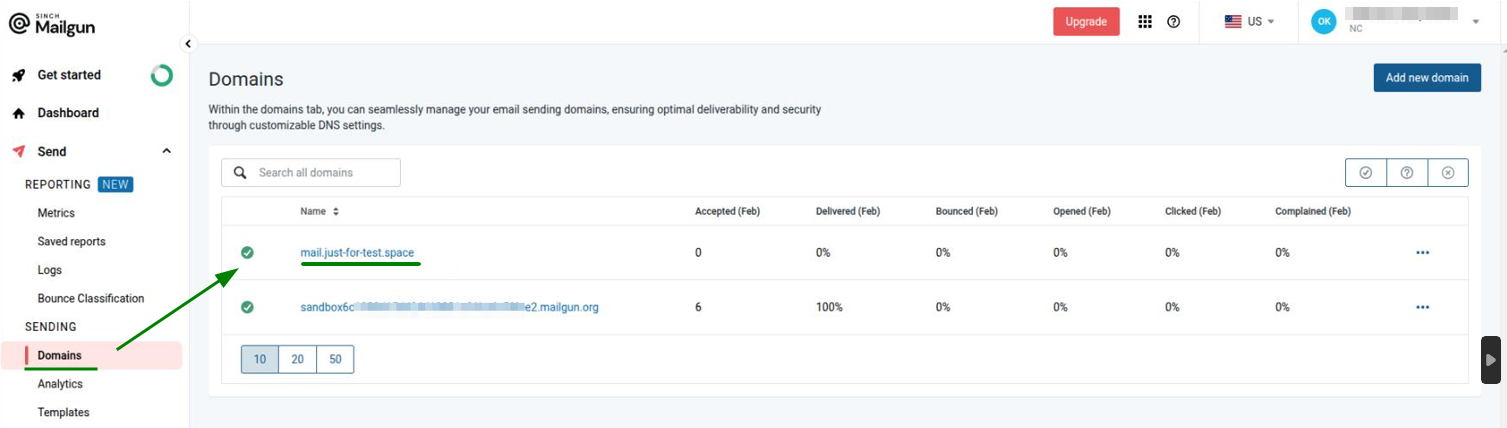
ध्यान दें: DNS रिकॉर्ड के प्रसारित होने में 24-48 घंटे तक लग सकते हैं।प्रसार पूरा हो जाने और सभी आवश्यक DNS रिकॉर्ड डोमेन में जोड़ दिए जाने के बाद, Mailgun सिस्टम इसे सत्यापित करेगा। अब डोमेन “Sending” मेनू के “Domains” सेक्शन में सूचीबद्ध होगा:
चरण 4. अगला चरण WHM पक्ष पर ईमेल खाते के लिए SMTP सेटिंग्स कॉन्फ़िगर करना होगा।
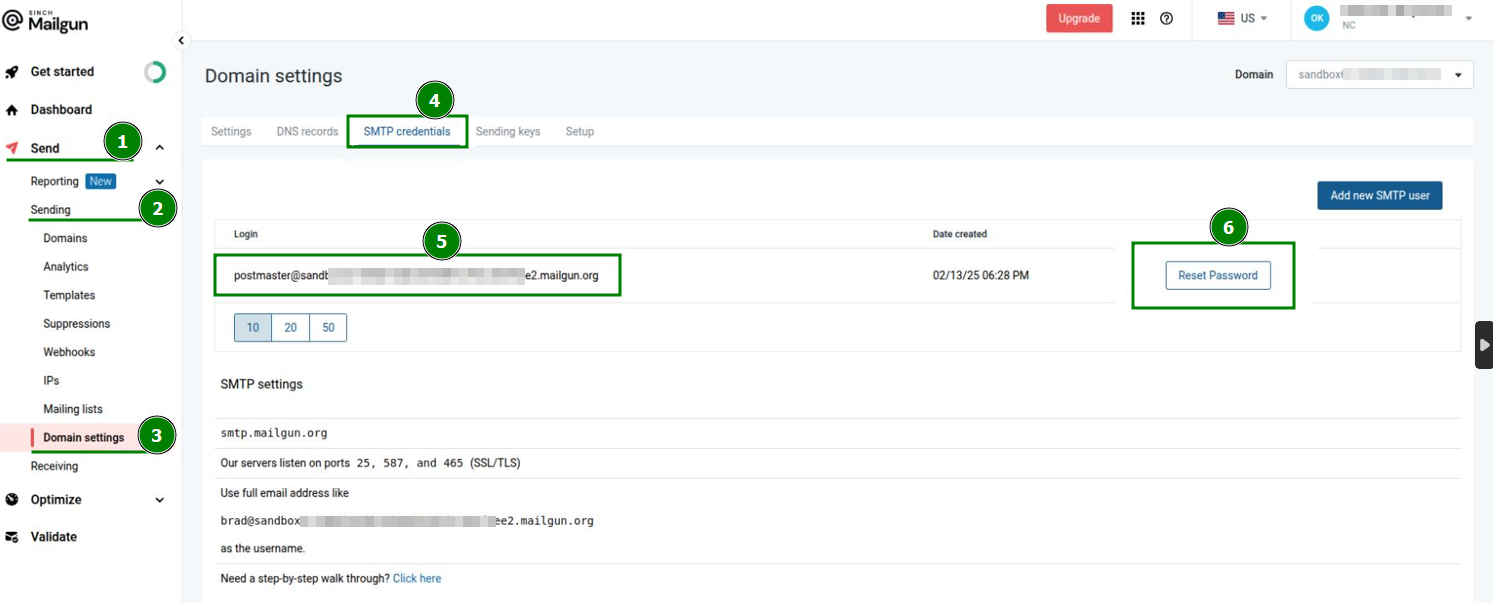
आवश्यक SMTP क्रेडेंशियल प्राप्त करने के लिए अपने Mailgun खाते में लॉग इन करें >> बाईं ओर के मेनू में “Send” सेक्शन पर क्लिक करें >> “Sending” >> “Domain Settings”। इस सेक्शन से, “SMTP credentials” टैब खोलें।
“Login” फ़ील्ड के अंतर्गत दिया गया मान कॉपी करें, पासवर्ड रीसेट करें और अगले चरण के लिए विवरण सहेज लें:
चरण 5. WHM पक्ष पर SMTP सेटिंग्स कॉन्फ़िगर करने के लिए WHM >> “Service Configuration” >> “Exim Configuration Manager” >> “Advanced Editor” टैब खोलें। “Section: AUTH” खोजें और उसके अंदर निम्न कोड जोड़ें:mailgun_login:driver = plaintextpublic_name = LOGINhide client_send = : mail@yourdomain.com : Password
जहाँ mail@yourdomain.com चरण 4 में “Login” फ़ील्ड के मान (postmaster@sandbox6c123456789ee2.mailgun.org) के समान होना चाहिए और Password वह होना चाहिए जिसे पिछले (चौथे) चरण में रीसेट किया गया था।
चरण 6. इसके बाद, “Section: ROUTERSTART” खोजें और वहाँ निम्न कोड जोड़ें:mailgun:driver = manualroutedomains = ! +local_domainstransport = mailgun_transportroute_list = "* smtp.mailgun.org::587 byname"host_find_failed = deferno_more
चरण 7. “Section: TRANSPORTSTART” खोजें और एक और कोड जोड़ें:mailgun_transport:driver = smtphosts = smtp.mailgun.orghosts_require_auth = smtp.mailgun.orghosts_require_tls = smtp.mailgun.org
चरण 8. नया कॉन्फ़िगरेशन सहेजें।
चरण 9. यह देखने के लिए एक ईमेल भेजें कि सिस्टम काम करता है या नहीं। ईमेल हेडर में “mailgun.” भाग शामिल होगा।