How to migrate a website to Spaceship Hosting
This guide will help you migrate your website from another hosting provider to Spaceship Web Hosting. Whether you’re just getting started or already using Spaceship, you’ll find detailed instructions on how to restore your website files and database using cPanel backup.
There are two main ways to migrate your site:
Option 1: Unboxing - during the purchase of your hosting subscription (recommended for new users) or via Hosting Manager if the hosting account is already active.
You can choose full or partial migration - restore a full hosting account or select what to migrate: websites, databases, and files & folders.
Only MySQL and MariaDB databases will be transferred.
Email accounts, as well as SSL certificates, will not be transferred - you’ll need to set these up again after migration.
Option 2: Manually - if your previous hosting account size is bigger than 20 GB.
Now, let’s review the migration process in detail.
Option 1: Website migration during the hosting unboxing (or via Hosting Manager)
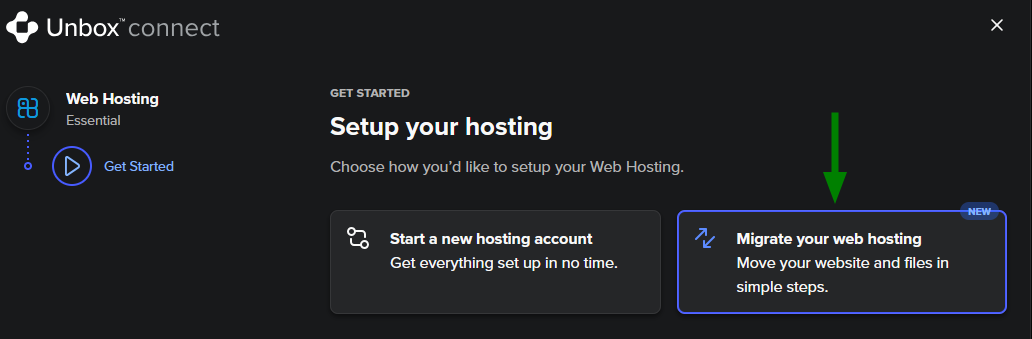
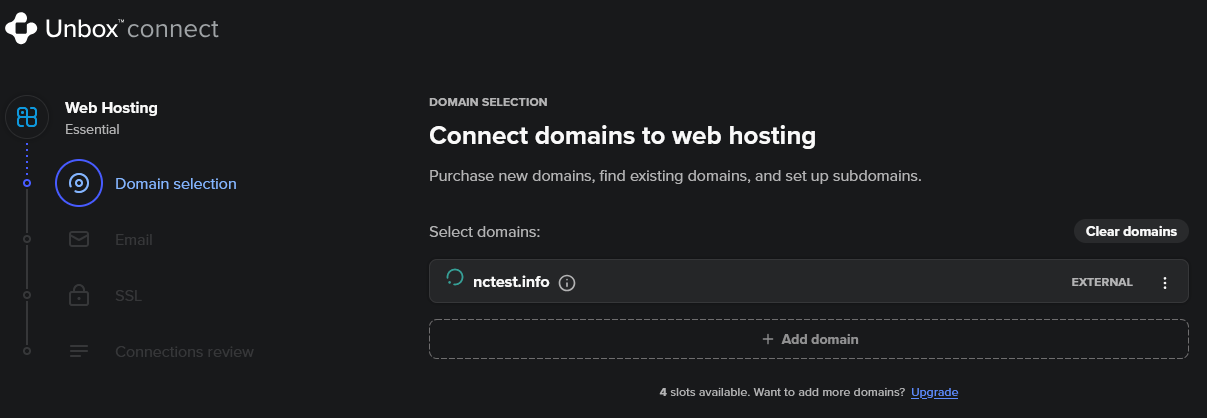
If you’re setting up your Spaceship Web Hosting for the first time, you can migrate your website as part of the unboxing process. Choose your hosting subscription here.
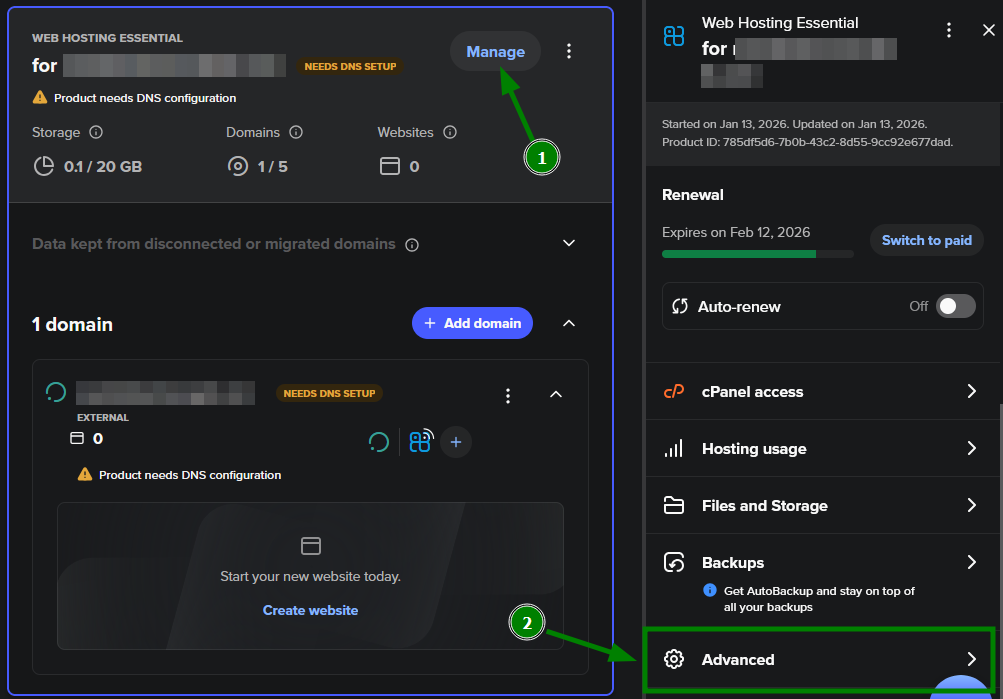
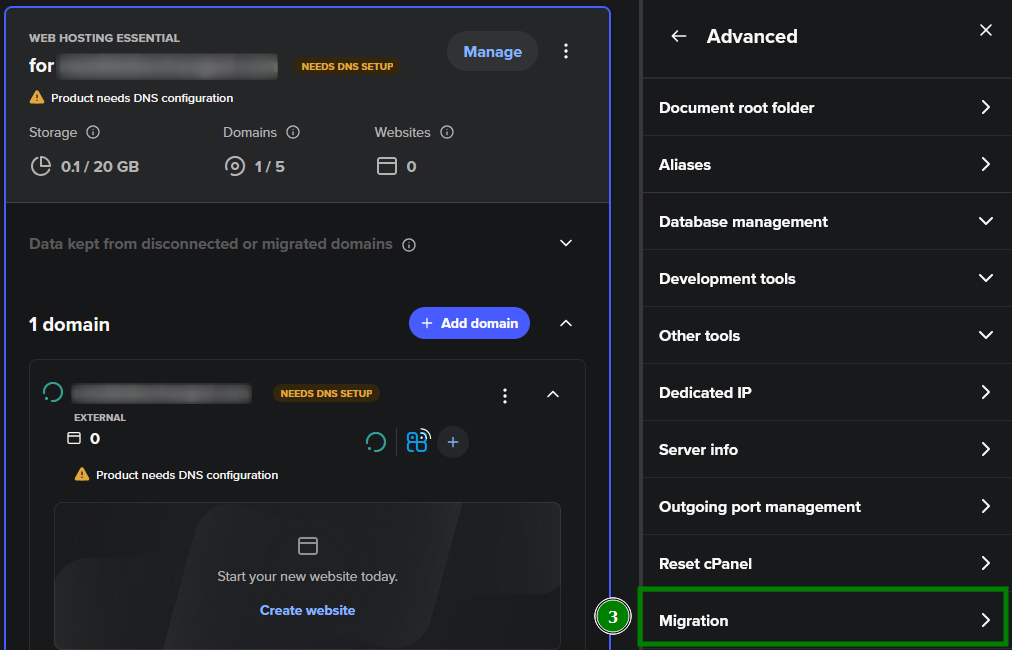
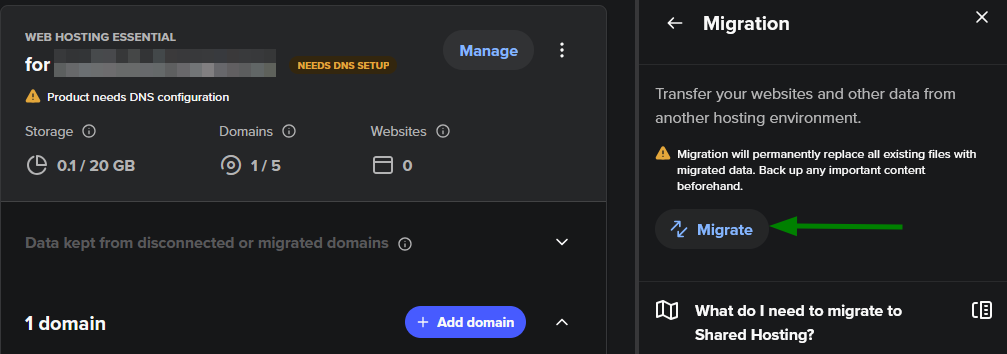
Or, if your hosting plan is already active, you can start the migration at any time from Hosting Manager → Advanced → Migration:
___________________________________________________________________________________
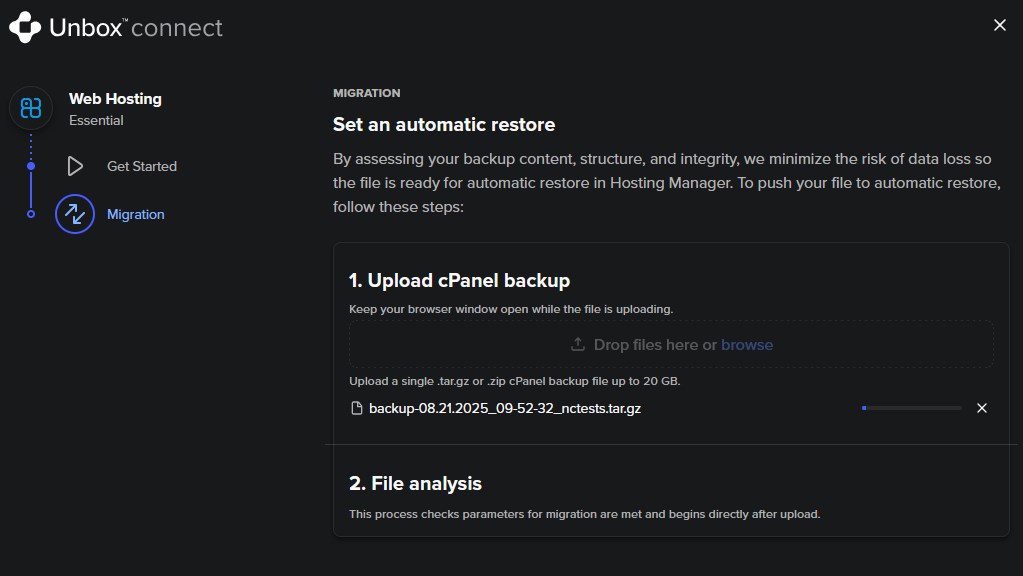
1) Select the Migrate your web hosting option at the first step:
2) Next, upload your backup file in .tar.gz or .zip format. Make sure the file is no larger than 20 GB.
Note: If your backup exceeds 20 GB, you’ll need to perform a manual restoration (see Option 2 below) or contact our Support Team for assistance.
3) After uploading, the system will automatically scan your backup file to verify that it meets the limits of your hosting plan.
If successful, you’ll see the following output. Click Continue:
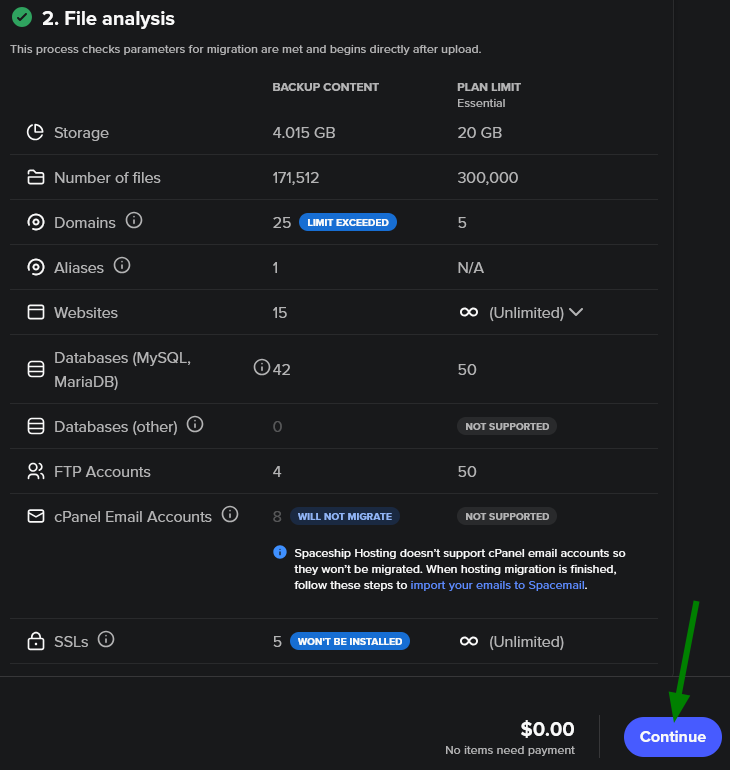
Note: If the cPanel backup exceeds your plan’s limits, you’ll be asked to either upload a smaller backup or upgrade your plan.
4) Next, choose how you want to proceed with the migration - select full or partial.
Full migration

In the migration summary, you'll see the backup size, total number of files, websites, databases, etc. Press Pay & Migrate (or Continue if already active):

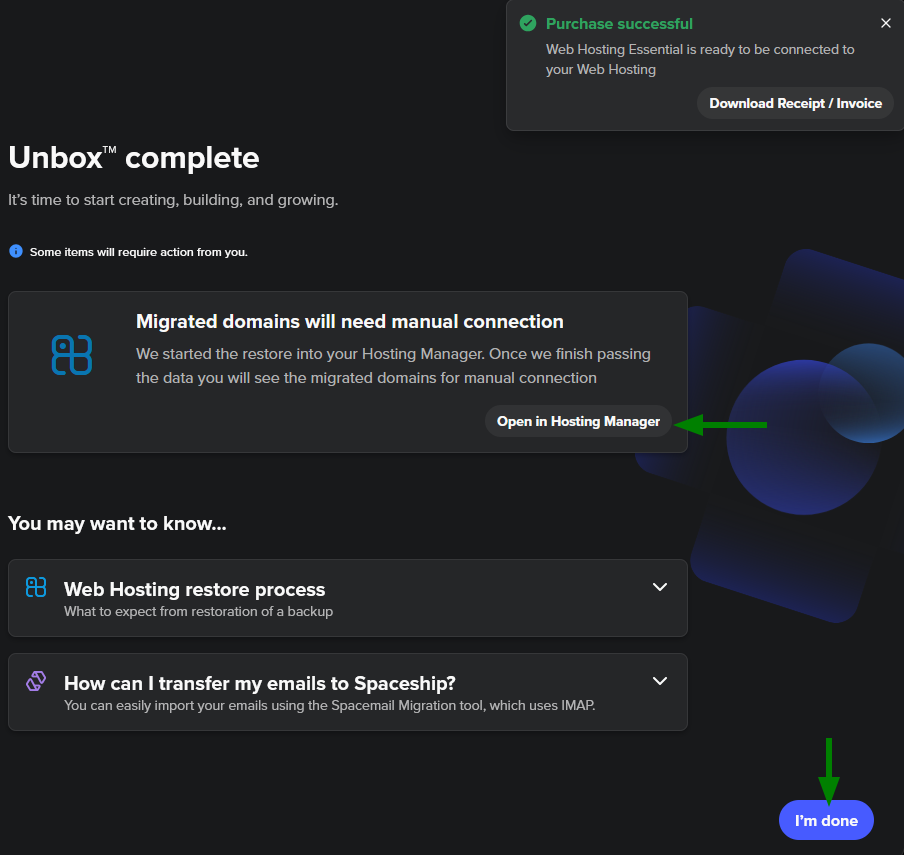
This will initiate hosting restoration on the Hosting server and finish the unboxing process simultaneously:
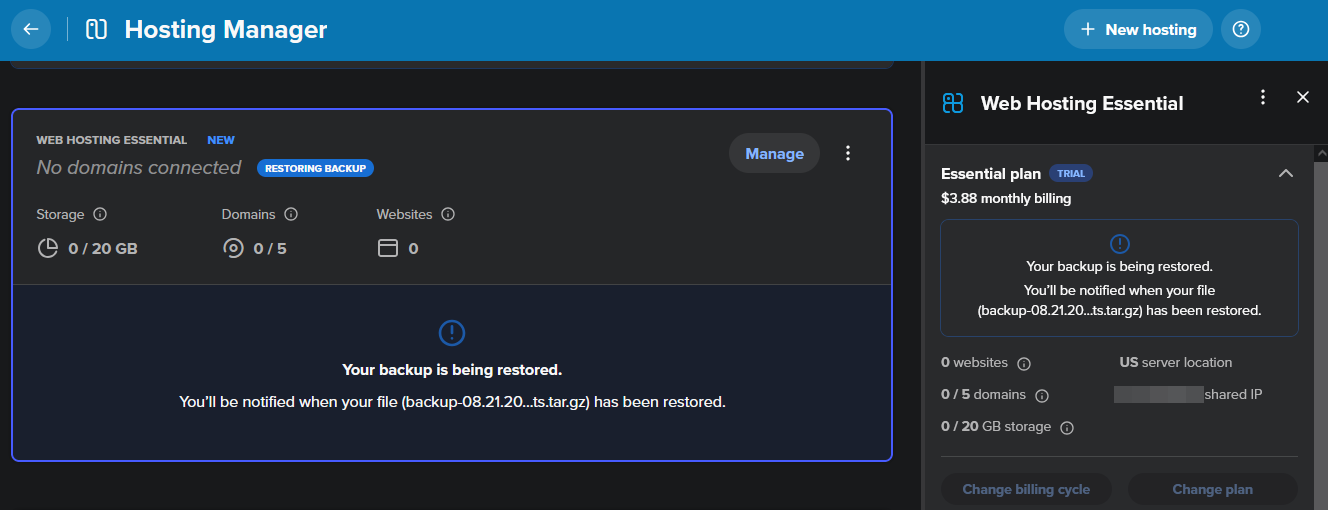
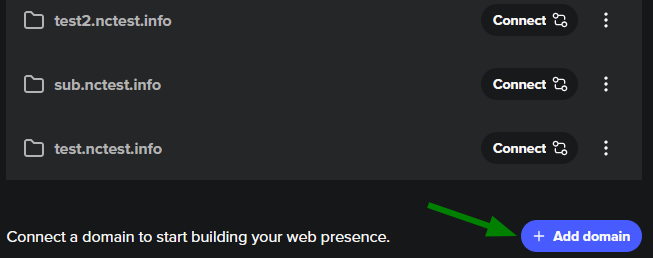
After the restoration finishes, you’ll receive a notification in your Spaceship dashboard. To complete the migration, connect the domain(s) that match the data from your backup file:
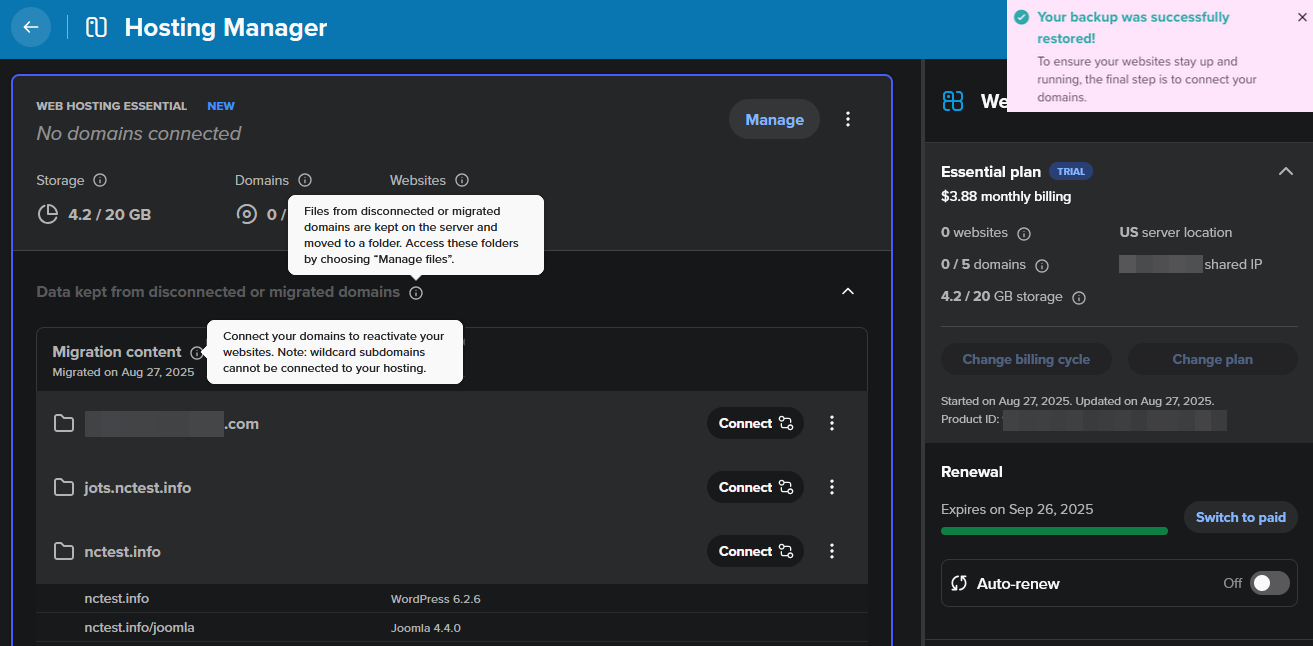
See the final steps below in this article.
Partial migration
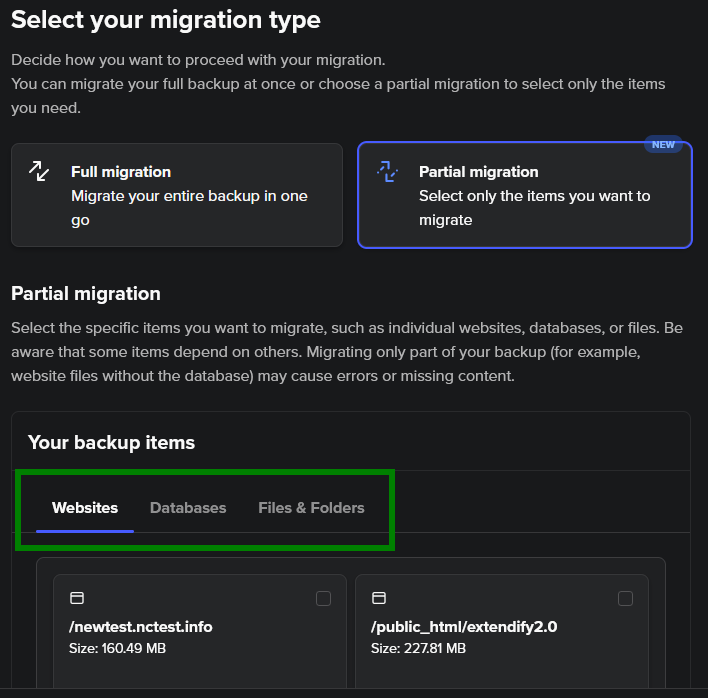
You can migrate multiple types of entities in a single action by selecting the required websites, databases, and files or folders. The selection is dependency-aware: when you select a website, its associated databases and files are included automatically. If you exclude a related database or file, the website will be unselected as well.
At any time, you can switch back to a Full migration if needed.
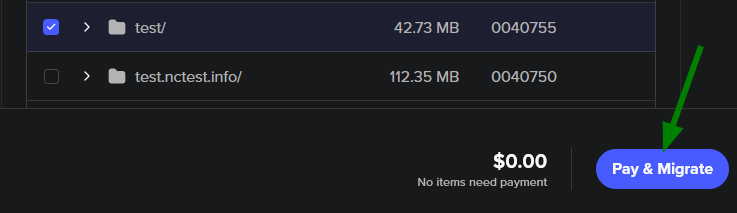
After selecting the files, click Pay & Migrate (or Continue if your plan is already active) to start the process:
The migration will begin; and the unboxing process is almost completed. Open Hosting Manager to finish domain connections that match the data from your backup file (or click I'm done to exit):
Final steps after the migration
Once the domain(s) is added, you can also add a Special Spacemail plan, enable a free SSL certificate, and include Autobackup.
If your domain’s nameservers are not yet set, you will need to update them to Spaceship nameservers in Domain Manager. If you are keeping third-party nameservers, make sure to update your A records to point to the correct IP address for your new hosting plan.
Keep in mind that DNS changes (including nameserver updates and A record modifications) can take up to 48 hours to propagate. You can use our DNS Propagation checker to monitor progress in real-time.
That’s it! Your website should now be successfully migrated and live on Spaceship Hosting.
Option 2: Website migration if the hosting account size exceeds 20 GB
In this case, you can migrate your website manually by following these steps:
Restore website files
Import databases
Updating configuration files
#1 Restore website files
Step 1: Upload the backup file
Upload your backup archive to your home folder via FTP or File Manager directly.
Advanced tip: If you have a direct backup download link (e.g., from your old hosting), you can upload it faster via SSH.
Enable SSH in cPanel >> Manage Shell, then go to the Terminal menu and run:
wget https://backup_URL.tar.gz
Replace https://backup_URL.tar.gz with your actual backup link and initiate upload by hitting Enter. The archive will be uploaded to the home folder.
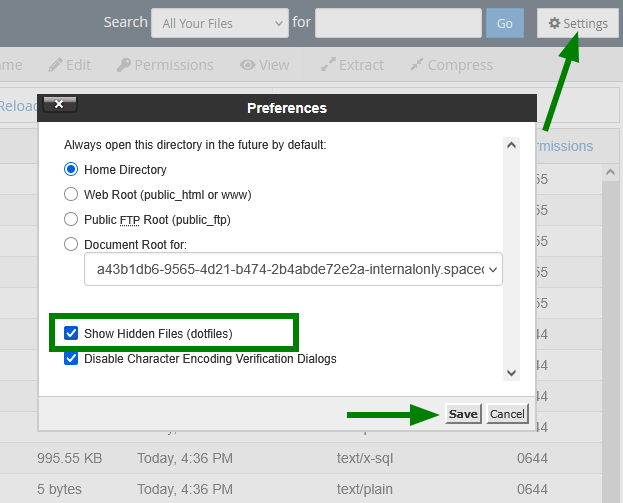
Step 2. Enable Show Hidden Files
In File Manager, click on the Settings button, check the box for Show Hidden Files (dotfiles), and click Save. If this option is not selected, you will not be able to see hidden files, and they will not be copied:
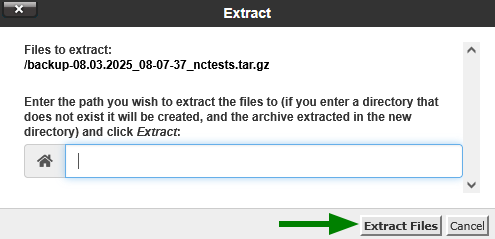
Step 3: Extract the archive
Right-click on your backup file and select Extract.
Note: You may extract the archive in some backup folder, in case files inside the archive are not organised in a folder, or leave the path empty, and the files will be extracted in the same folder where you have uploaded the backup.
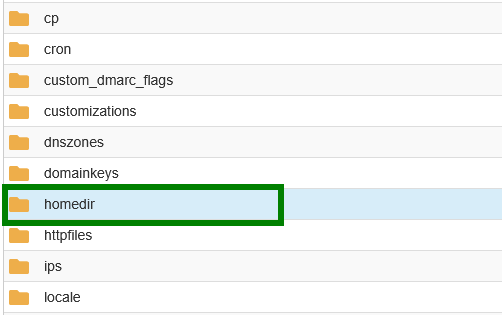
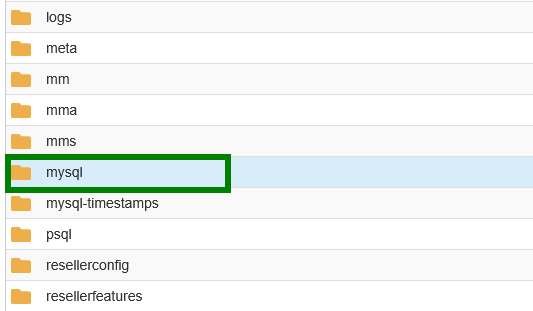
Step 4: Navigate the backup structure
After extraction, you’ll see several folders. The most important ones are:
mysql/– contains your database dumps (.sql files)homedir/– contains your files
Other folders may contain metadata such as cron jobs, SSL certificates, addon domain configurations, etc.
Step 5: Move website files to the root folder
Find homedir, open it, and there you will find your home folder:
Next, locate the root folder of your website, open it, and copy all the files in it:
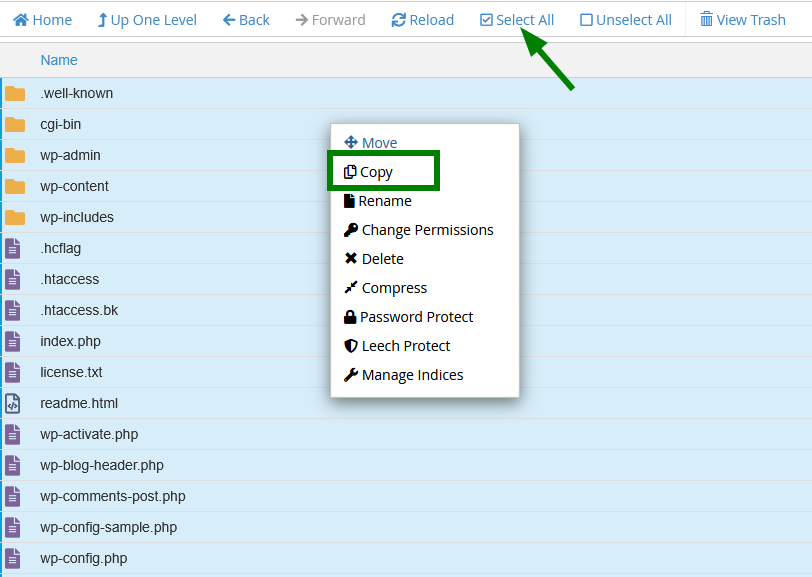
In the pop-up window, enter the desired location on your hosting account (e.g., /yourdomain.tld or your custom folder) and click on Copy files. Then, you can check this folder, and all the files should already be there.
# Restoring the database
If your website contains a database (e.g., if you have a CMS-based site), you’ll need to restore it manually. Here’s how to do it.
Step 1: Identify the database your site uses
To determine which database belongs to your website, you’ll need to check the site’s configuration file. This file contains the database name, username, and password.
Each CMS or framework stores this information in a different location. Below are the typical paths:
Application name | Path to the config file |
|---|---|
WordPress |
|
Joomla |
|
PrestaShop |
or
|
Moodle |
|
Laravel |
|
Codeigniter |
|
Drupal |
|
OpenCart |
|
MediaWiki |
|
WHMCS |
|
If your CMS/framework isn’t listed here, look for files named something like config.php, settings.php, database.php, or similar.
Step 2: Find and download the database file
Go back to the archive folder that you’ve extracted, find the mysql folder there, and open it:
You’ll find one or more .sql files - these are your MySQL database dumps. Identify the correct one (based on name or timestamp), then download it to your PC.
Step 3: Restore the database
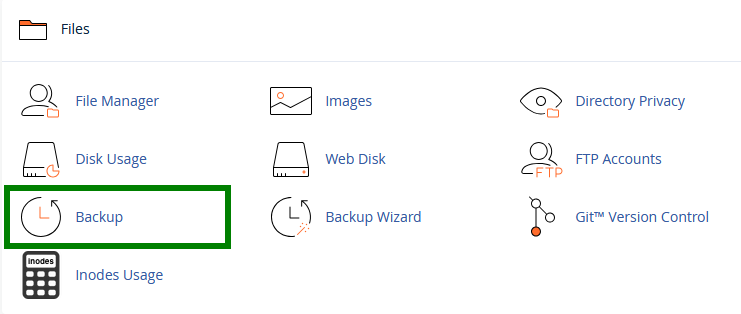
There are three ways to import the database using cPanel (Backup, phpMyAdmin, or Terminal menus). Choose the one that suits your setup:
1) Via cPanel >> the Backup menu:
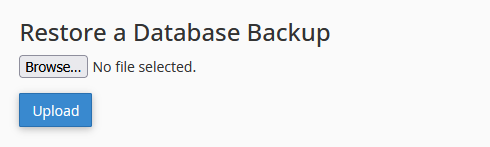
Choose the previously downloaded .sql file on your PC and click Upload.
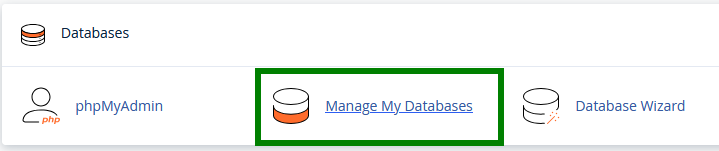
Then you will need to create a database, user, and add the user to the database in cPanel >> Manage My Databases menu:
The database should’ve already been created when you uploaded the .sql file. Let’s create a user (save the password - you will need it later):

Add the user to the database. On the next page, check the option All Privileges, and click on Make changes:

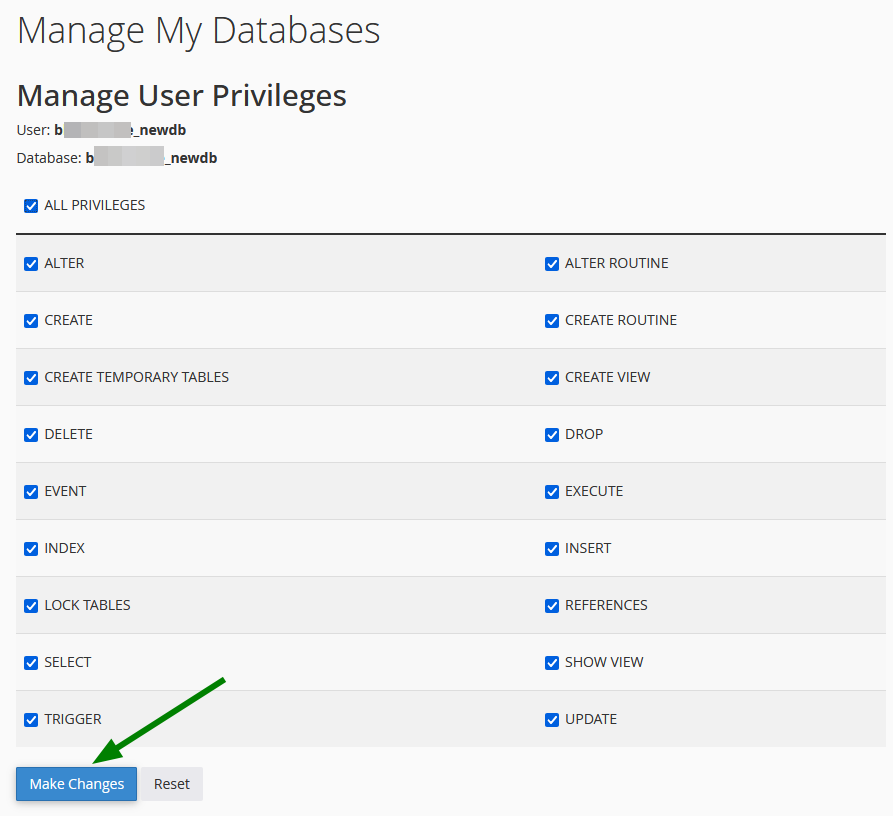
This way, the database will be assigned to the corresponding user.
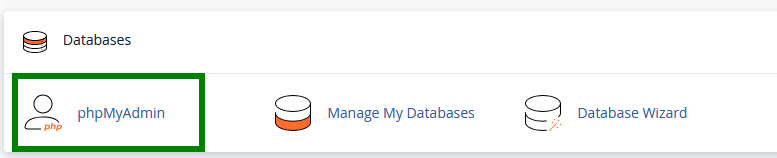
2) Via cPanel >> the phpMyAdmin menu:
Note 1: Use this method only if your database is smaller than 1 GB.
Note 2: The database and user should already be created via the Manage My Databases menu.
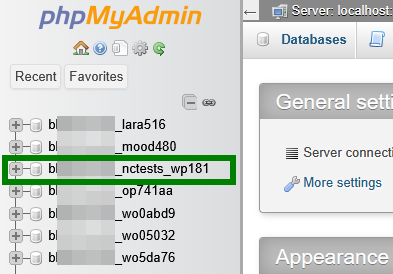
First, locate the database name in the list and click on it:
Go to the Import tab and browse to the corresponding .sql file on your PC:
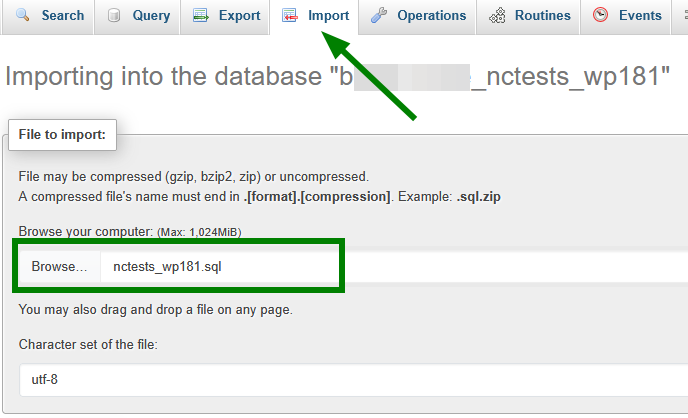
Scroll down and click Go to start the import. If your database was successfully imported, you will see a green notification.
3) Via cPanel >> Terminal menu.
Before you begin, ensure that SSH is enabled via the Manage Shell menu, the database and user have already been created in the Manage My Databases menu, and the database password is saved.
Run the following command in Terminal:
mysql -u DB_USERNAME -p DB_NAME < /home/cPanel_user/path/to/file.sql
Replace:
DB_USERNAMEwith your database user;DB_NAMEwith your database name;/home/cPanel_user/path/to/file.sqlwith the full path to your SQL file.

After entering the command, press Enter. You’ll be prompted to enter the database password. Then again, hit Enter, and the import will start.
# Configuration files update
After restoring your website files and database, you need to update the configuration file of your website so it can connect to the newly uploaded database on Spaceship Web Hosting.
In File Manager, navigate to your website’s root directory and open the config file with database details (right-click >> Edit).
Look for lines that define the database name, username, and password. They may look something like this (varies by CMS):

Replace the values inside the quotes with the actual database name, user, and password that you created during the restoration process, and save the changes.
Check your website! If your domain is already pointing to the Spaceship Hosting server, you can now open it in your browser. If everything is set up correctly, your website should be live and functional.
If you also want to migrate your emails to our Spacemail service, use our Migration tool or a third-party email client. The details can be found here.