Jak povolit SSH přístup a připojit se ke svému hostingovému účtu
SSH, neboli Secure Shell, je kryptografický síťový protokol navržený pro bezpečné propojení dvou zařízení přes nezabezpečenou síť. Umožňuje šifrovanou komunikaci, která zajišťuje, že data přenášená mezi zařízeními zůstávají důvěrná a chráněná před možným odposlechem.
Zatímco tradiční metody používají kombinace uživatelského jména a hesla, použití SSH klíčů zvyšuje bezpečnost i pohodlí.
Jak povolit SSH přístup
Pro zahájení SSH přístupu je nejprve nutné povolit SSH přístup pro váš hostingový účet. To můžete provést v nabídce Správa Shell v cPanelu.
Jak povolit SSH:
Přihlaste se ke svému cPanel účtu.
Přejděte do sekce Exkluzivní .
Klikněte na Správa Shell:
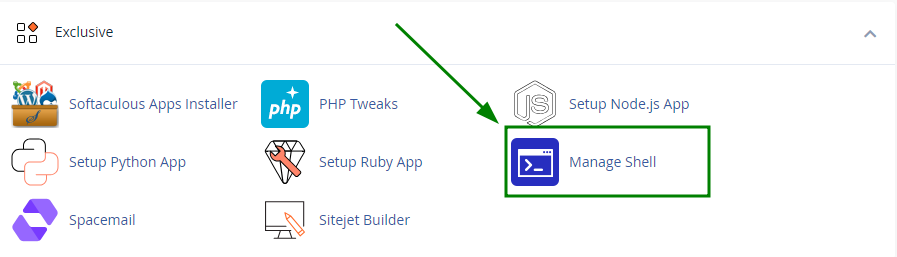
POZNÁMKA: Nabídku lze také otevřít z vašeho Spaceship účtu > Správce hostingu > klikněte na „Spravovat“ > „Pokročilé“ > nabídka „Další nástroje“ > klikněte na Spravovat SSH: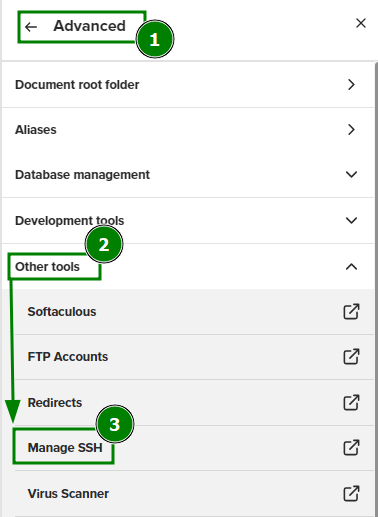
Ve výchozím nastavení je SSH přístup pro hostingové účty vypnutý. Můžete jej zapnout v rozhraní Správa Shell naproti možnosti „Povolit SSH přístup“:
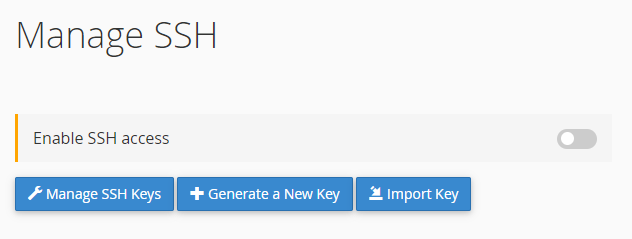
Pro aktivaci SSH pro váš cPanel účet klikněte na přepínač (1).
Po povolení se zobrazí tabulka „Přístupové údaje“ (2) s informacemi potřebnými pro zahájení SSH připojení: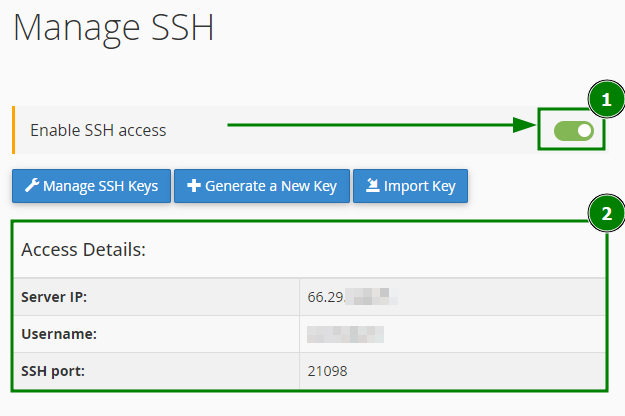
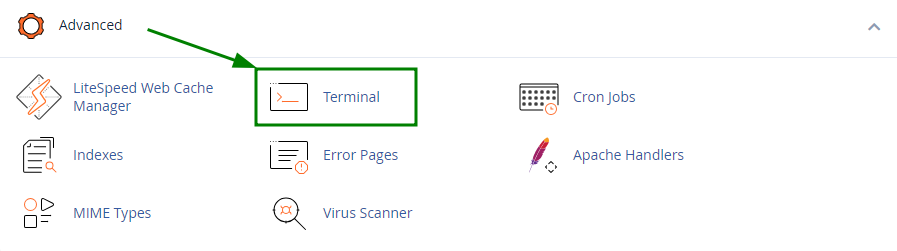
Po povolení SSH pro váš účet se v cPanelu zpřístupní nabídka Terminál v sekci Pokročilé:
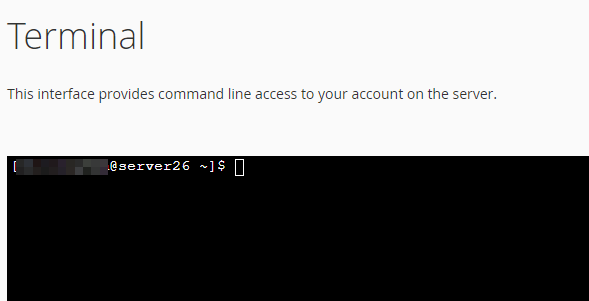
Toto rozhraní umožňuje přímou práci s příkazovou řádkou ve vašem hostingovém prostředí:
Správa SSH klíčů
Po povolení SSH můžete spravovat své SSH klíče pomocí následujících možností v nabídce cPanelu „Správa Shell“:
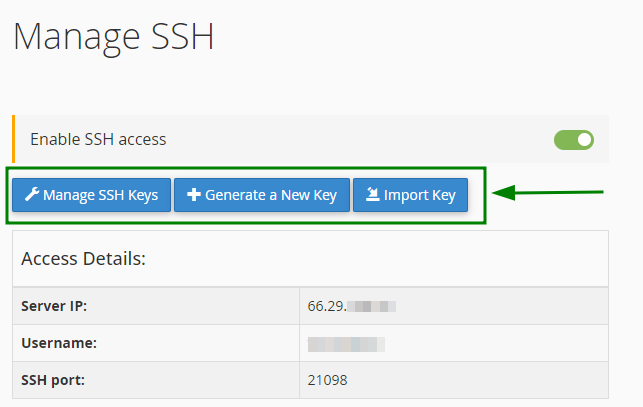
Spravovat SSH klíče: Zobrazit a spravovat existující klíče.
Vygenerovat nový klíč: Vytvořit nový SSH pár klíčů.
Importovat klíč: Přidat existující SSH klíč.
Tyto možnosti vás přesměrují do oblasti SSH přístup v cPanelu, kde můžete provádět příslušné úkony s klíči:
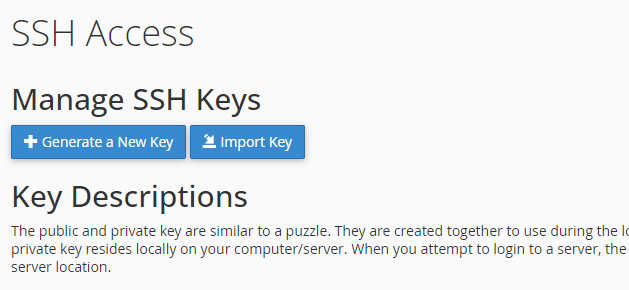
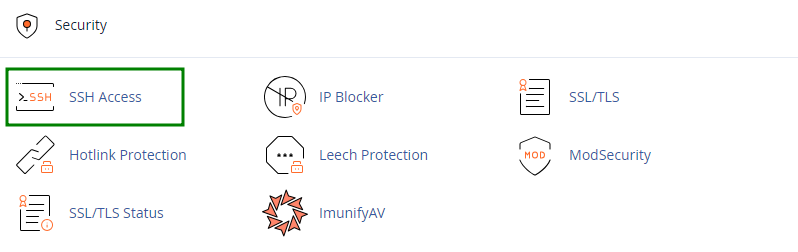
POZNÁMKA: Nabídku SSH přístup lze také najít v sekci „Zabezpečení“ v cPanelu:
Generování nového SSH klíče
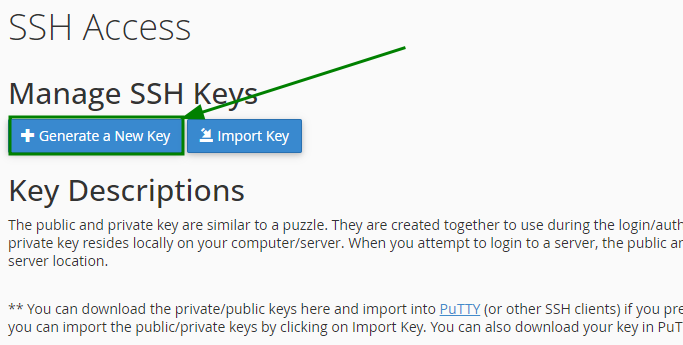
Pokud ještě nemáte existující pár SSH klíčů, můžete jej vytvořit v nabídce SSH přístup kliknutím na tlačítko Vygenerovat nový klíč:
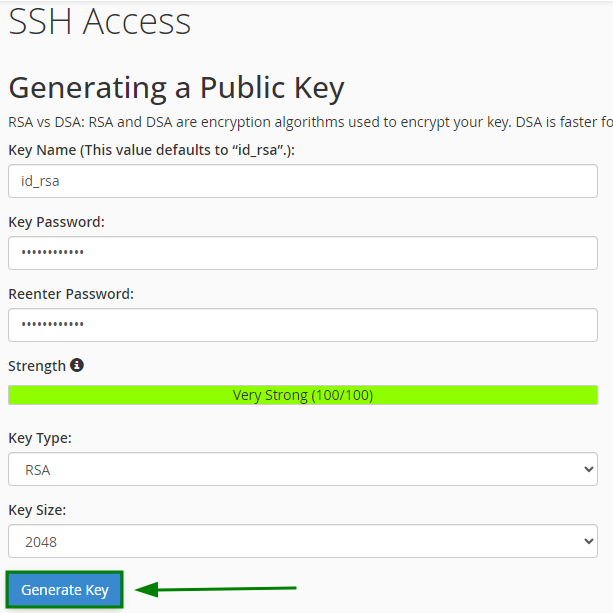
Budete vyzváni k zadání následujících údajů:
Název klíče: Přiřaďte svému klíči rozpoznatelný název.
Heslo ke klíči: Přidejte heslo ke klíči.
Typ klíče: Vyberte mezi RSA a DSA.
Velikost klíče: Pro RSA je pro silné zabezpečení doporučeno minimálně 2048 bitů.
Po vyplnění údajů klikněte na Vygenerovat klíč:
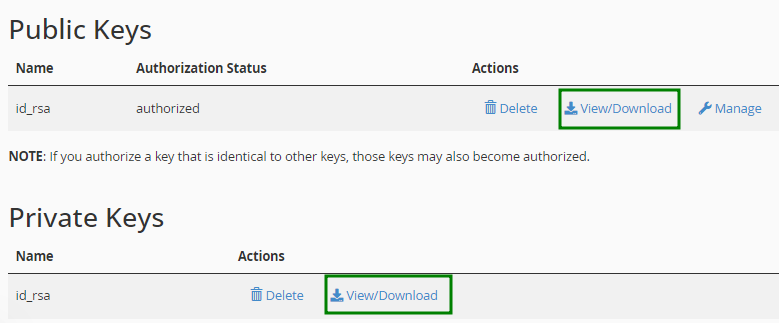
Budou vytvořeny a zobrazeny veřejné i soukromé klíče v příslušných sekcích nabídky cPanelu „SSH přístup“.
Odtud si můžete vygenerovaný klíč stáhnout jako textový soubor kliknutím na tlačítko Zobrazit/Stáhnout:
Import SSH klíče
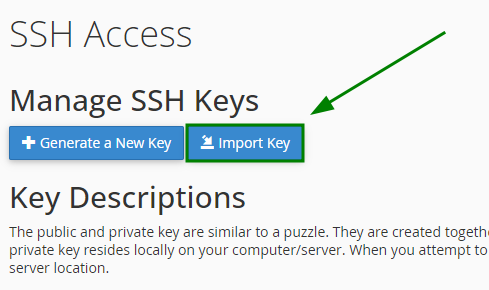
Pokud již vlastníte pár SSH klíčů, můžete jej importovat do svého cPanel účtu pomocí možnosti Importovat klíč v nabídce „SSH přístup“:
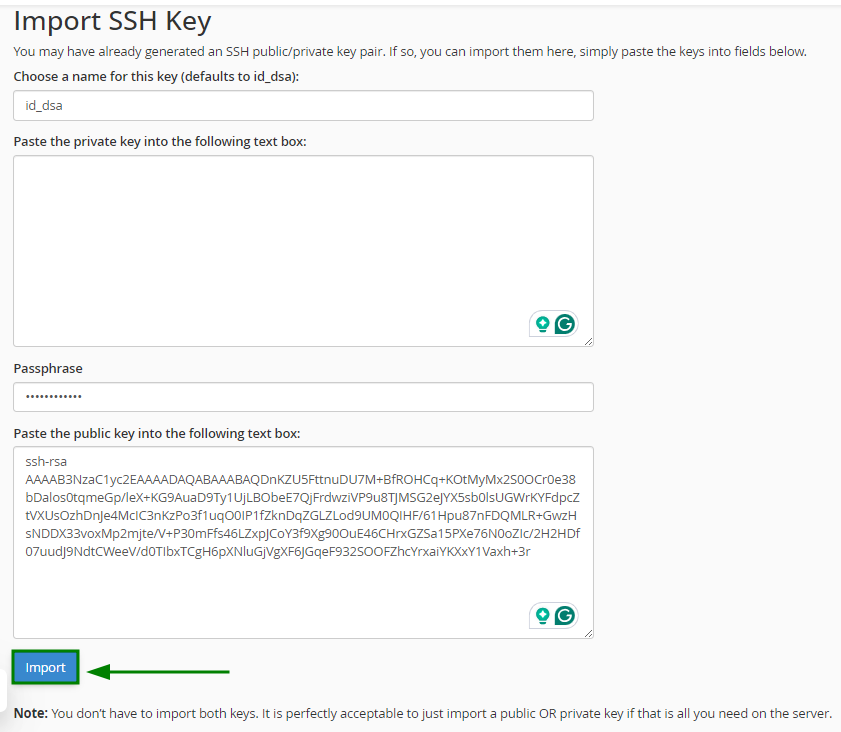
Budete vyzváni k zadání následujících údajů:
Název klíče: Pojmenujte svůj klíč (např. id_rsa).
Soukromý klíč: Volitelné; ponechte prázdné, pokud není potřeba.
Heslová fráze: Zadejte, pokud váš klíč nějakou má.
Veřejný klíč: Vložte obsah svého .pub souboru.
Po dokončení klikněte na tlačítko Importovat :
Autorizace SSH klíče
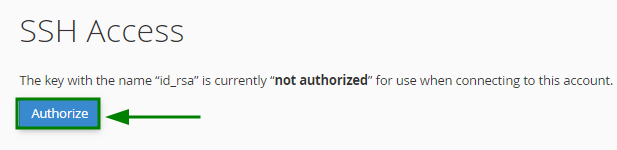
Po vygenerování/importu páru SSH klíčů je dalším krokem autorizace klíče. Proveďte to tak, že v nabídce cPanelu „SSH přístup“ > sekci „Veřejné klíče“ vyhledáte příslušný pár klíčů > kliknete na Spravovat vedle klíče:

Klikněte na tlačítko Autorizovat pro ověření SSH klíče:
Po dokončení se zobrazí zpráva „Úspěch“. Stav autorizace klíče bude také změněn na „autorizováno“ v nabídce „SSH přístup“:

Jak se připojit přes SSH pomocí klíčů
Po vygenerování/importu SSH klíče a jeho autorizaci je možné se k vašemu hostingovému účtu připojit přes SSH.
Existuje mnoho SSH klientů. V našem příkladu použijeme PuTTY SSH klient, abychom vám ukázali, jak se připojit k serveru přes SSH pomocí páru klíčů vygenerovaných v cPanelu.
Stáhněte si vygenerovaný SSH klíč z nabídky „SSH přístup“ > klikněte na „Zobrazit/Stáhnout“ vedle požadovaného klíče v sekci „Soukromé klíče“:
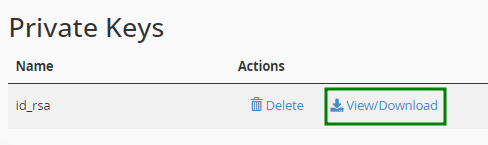
Pokud jste nevygenerovali nový pár klíčů, ale importovali existující a autorizovali jej, použijte importovaný soubor pro připojení k serveru v PuTTY.Ve složce PuTTY spusťte puttygen.exe pro otevření aplikace PuTTY Key Generator. Jakmile jste uvnitř, přejděte na kartu Soubor v horním menu > klikněte na tlačítko Načíst soukromý klíč:
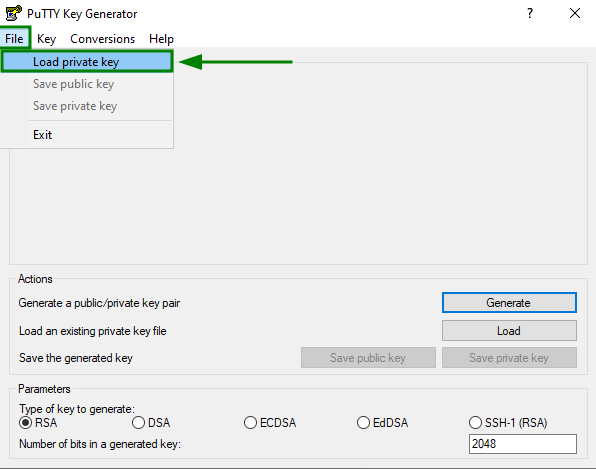
Vyhledejte soubor SSH klíče na svém PC a klikněte na „Otevřít“.
POZNÁMKA: Při vyhledávání SSH klíče na vašem počítači pro import použijte filtr „Všechny soubory (*.*)“: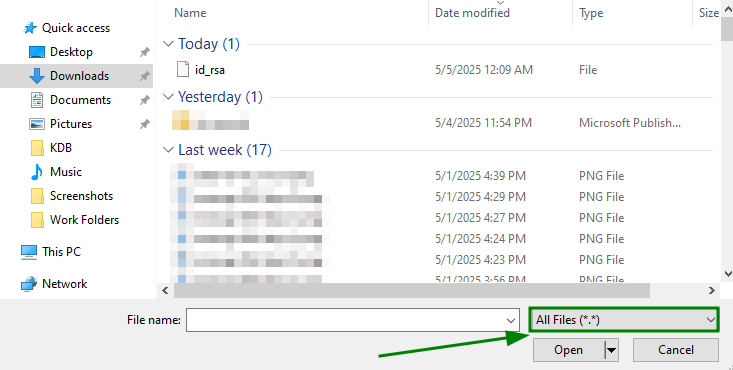
Pro dokončení procesu importu budete vyzváni k zadání heslové fráze SSH klíče (heslo použité při generování SSH klíče).
Po ověření hesla se zobrazí odpovídající úspěšná zpráva: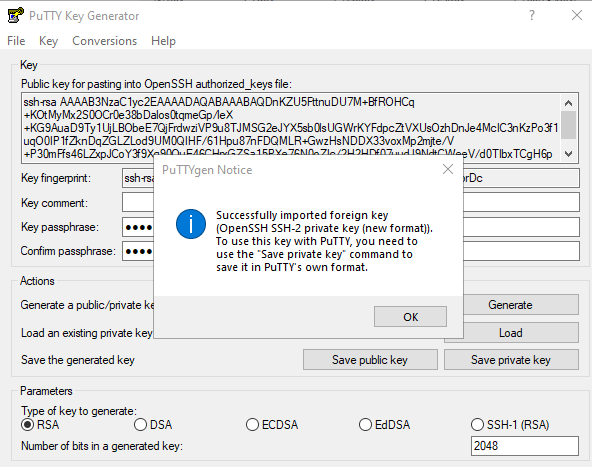
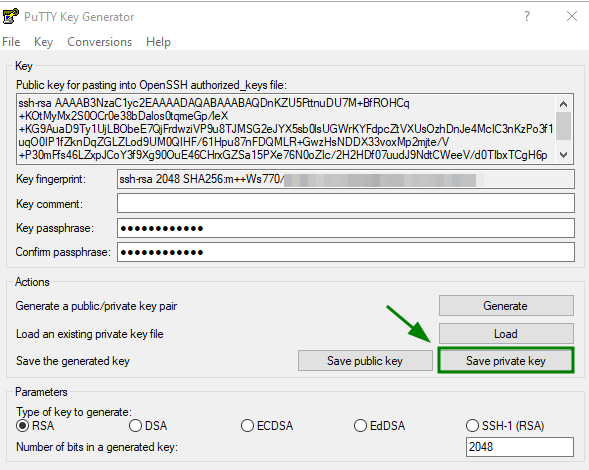
POZNÁMKA: Pokud nechcete přiřadit heslo ke klíči, ponechte pole „Heslová fráze klíče“ a „Potvrdit heslovou frázi“ prázdná.Klikněte na tlačítko Uložit soukromý klíč pro uložení klíče ve formátu .ppk:
Nyní otevřete aplikaci PuTTY. V levém sloupci „Kategorie“ přejděte na Připojení > SSH > Auth > Přihlašovací údaje.
Klikněte na Procházet v poli Soubor soukromého klíče pro autentizaci a vyberte uložený .ppk soubor: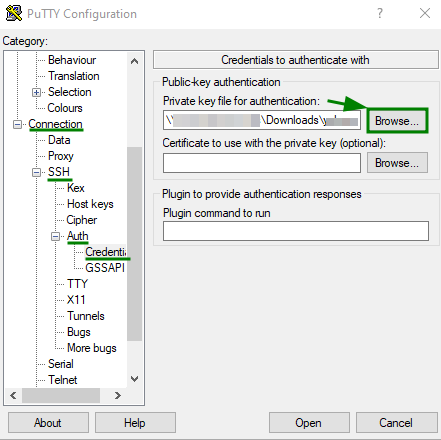
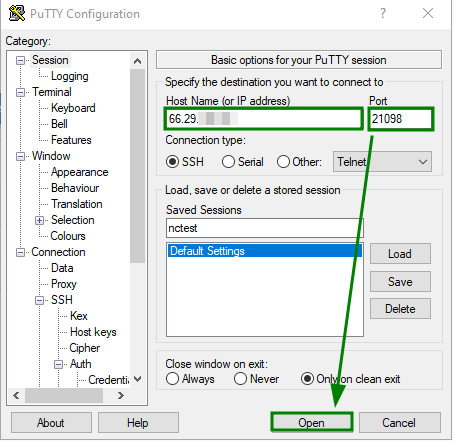
Poté otevřete sekci „Relace“ v levém menu. Na této stránce zadejte následující údaje:
Host Name (nebo IP adresa) - IP adresa serveru, na kterém je váš cPanel účet hostován. Lze zjistit v nabídce cPanelu „Správa SSH přístupu“.
Port - měl by být 21098.
Klikněte na „Otevřít“:
Po otevření konzole zadejte následující údaje:
login as - vaše uživatelské jméno cPanel účtu;
Heslová fráze pro klíč “” - heslo SSH klíče.
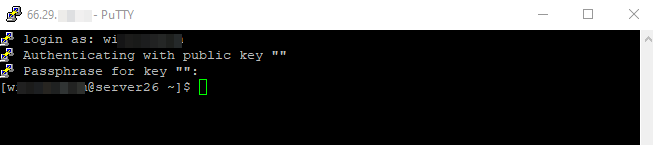
Pokud je vše správně, spojení se serverem bude navázáno: