How to set up FastVPN on a Tomato Router
This tutorial will walk you through configuring FastVPN OpenVPN on Tomato firmware and will help you establish a permanent VPN tunnel from your router. This guide was prepared and based on an OpenVPN installation on a Netgear Nighthawk 7000 router that has been flashed with Tomato OpenVPN firmware.
Before getting started
The following is required to configure OpenVPN on Tomato firmware:
A FastVPN account (Don't have one? Sign up here);
An internet connection to the Tomato flashed router;
Access to your FastVPN Account Panel.
IMPORTANT NOTE: Regardless of what model of router you have or the version of Tomato firmware you are installing, there is a small chance of bricking your router (i.e., rendering the router completely useless) if the process of putting Tomato on the router does not complete properly. Please thoroughly read and follow the related documentation regarding the updating procedure for your router.
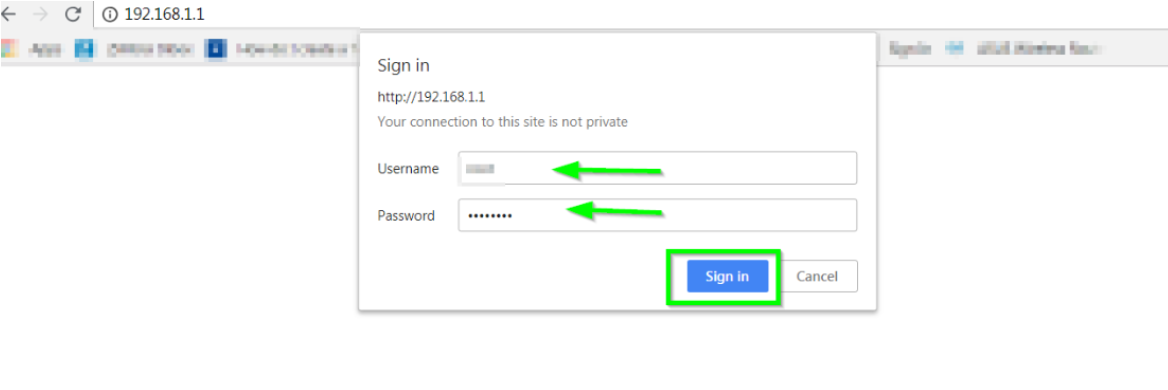
1. Log in to the router control panel by entering the router’s default IP address 192.168.1.1 into the address bar of your preferred browser (if you changed your router's default IP address, enter that into your browser instead). While connecting using 192.168.1.1, the URL may change to http://192.168.1.1.
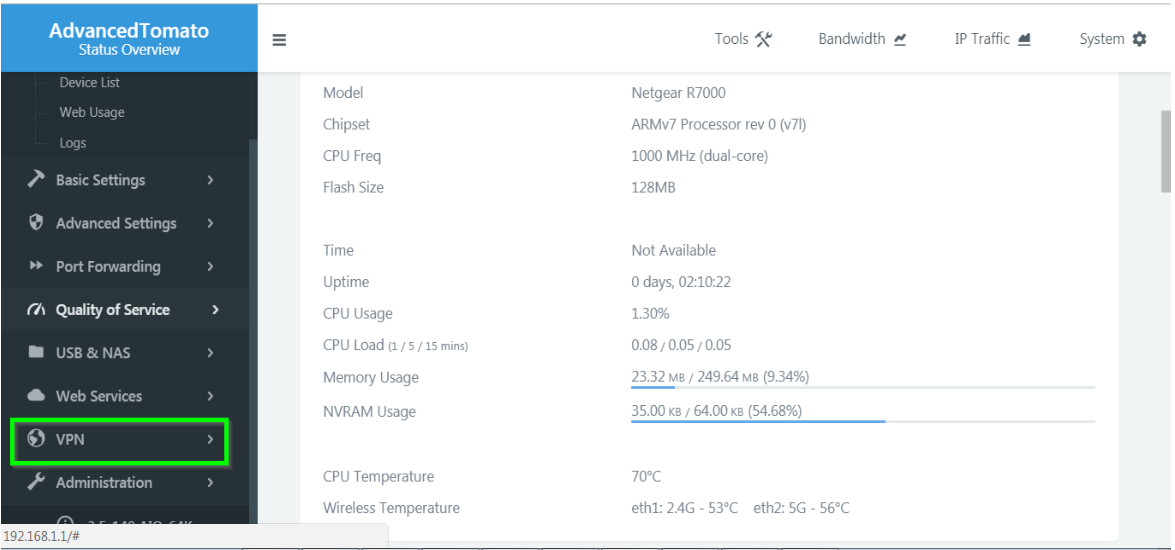
2. You will be redirected to the user interface of the router; select VPN listed under Status Overview on the menu on the left:
3. Click on the OpenVPN Client option, and you will land on its Basic tab:
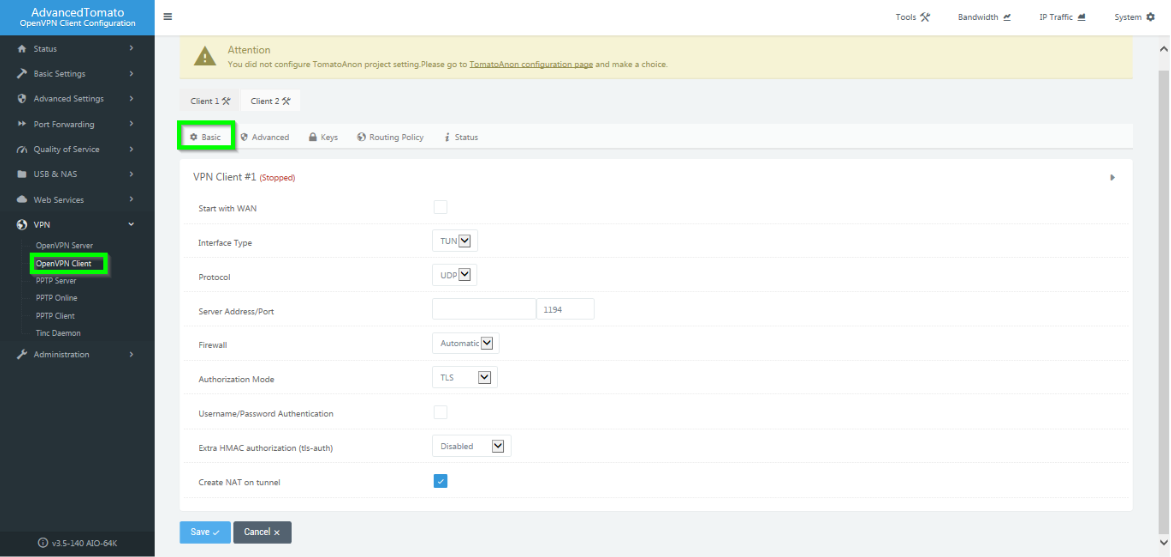
Basic
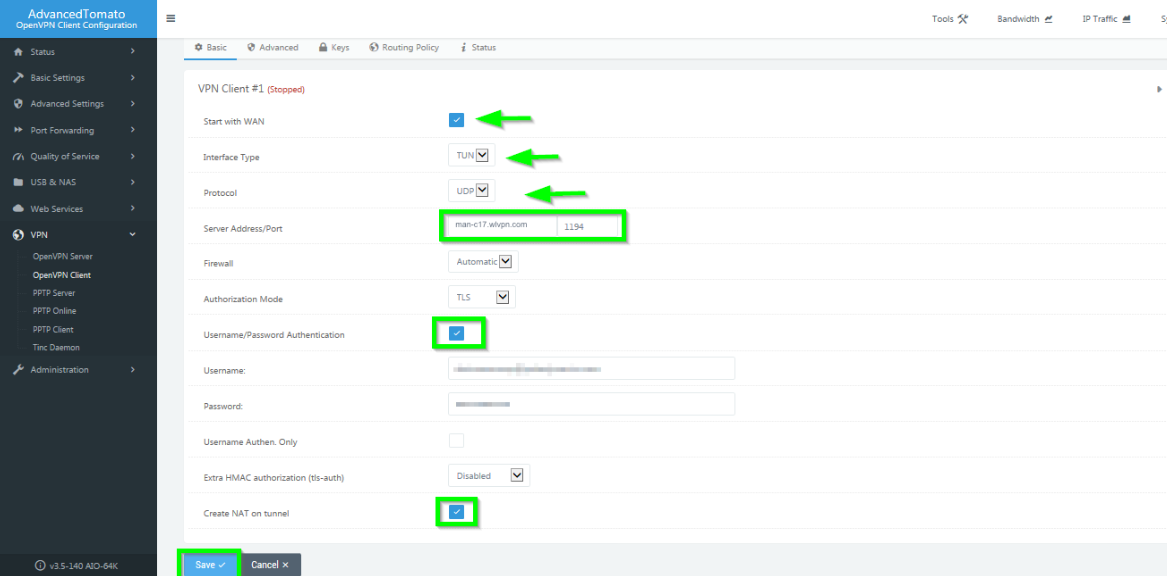
4. A more detailed view of the step-by-step process is as follows. Enter the details as given below:
Start with WAN: Click to enable;
Interface Type: TUN;
Protocol: UDP or TCP. However, UDP is the fastest and most preferred protocol;
Server Address/Port: Choose a server from our server list and enter the address in this field (to access the server list, log into the FastVPN Account panel with your username and password, select the Server List tab to select your preferred server)/1194.
Note: You can also use the server address without the .vpn addition. E.g. man-c17.wlvpn.com
Firewall: Automatic;
Authorization Mode: TLS;
Username/Password Authentication: Click to enable;
Username: username from the FastVPN Account panel
Password: FastVPN Password, available from the FastVPN Account panel
Extra HMAC authorization (tls-auth): Disabled;
Create NAT on tunnel: Click to enable;
Click on the Save button at the bottom.
Advanced
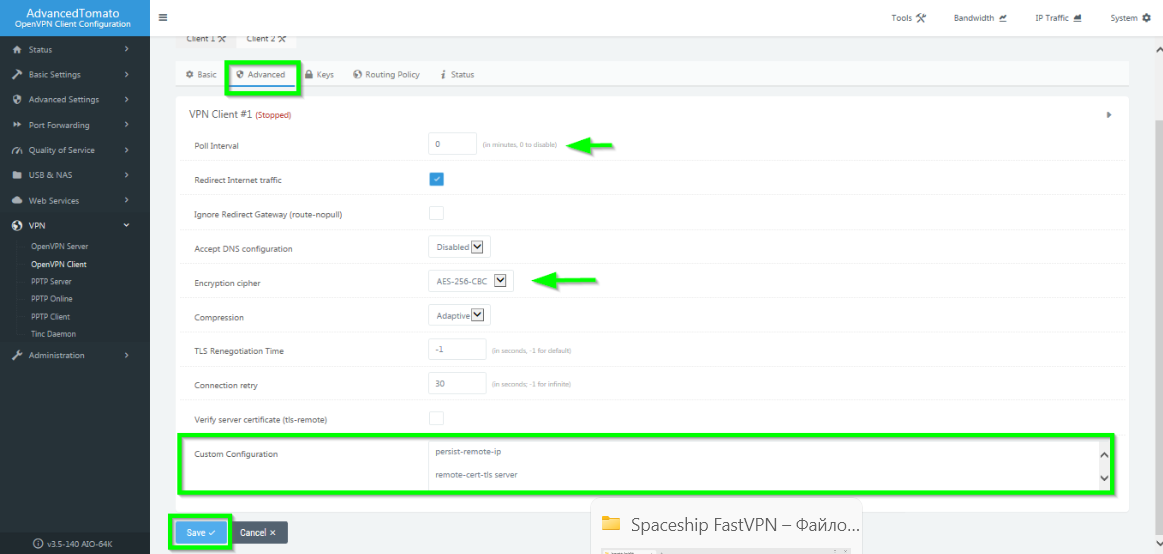
5. Navigate to the Advanced tab and enter the details as given below:
Poll Interval: 0;
Redirect Internet traffic: Check to enable;
Accept DNS configuration: Set to disabled;
Encryption cipher: AES-256-CBC;
Compression: Adaptive;
TLS Renegotiation Time: -1;
Connection retry: 30 seconds;
Verify server certificate (tls-remote): Leave unchecked;
Custom Configuration box: Copy and paste the following italicized text into this box:
persist-remote-ip
remote-cert-tls server
keysize 256
tls-cipher TLS-DHE-RSA-WITH-AES-256-CBC-SHA:TLS-DHE-DSS-WITH-AES-256-CBC-SHA:TLS-RSA-WITH-AES-256-CBC-SHA
Click on the Save button:
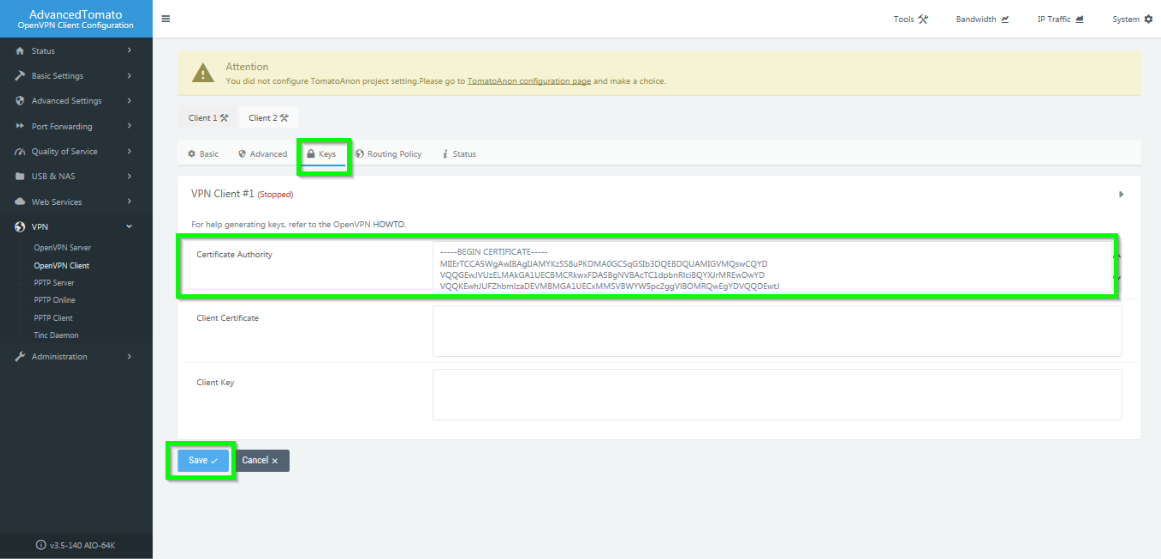
Keys
6. Copy and paste the whole content of the certificate into the FastVPN Certificate Authority box and click the Save button at the bottom:
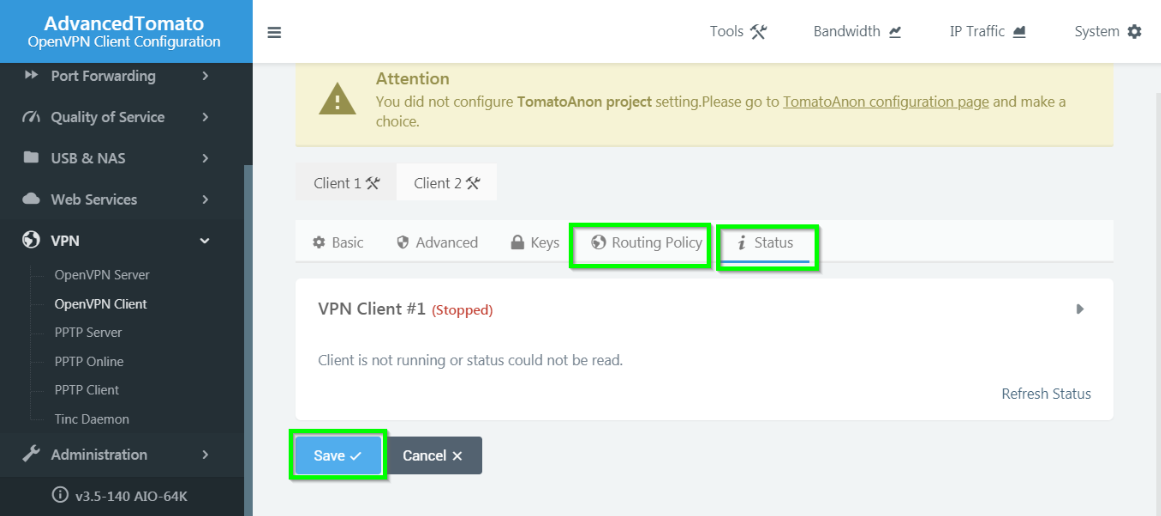
Routing Policy and Status
7. Leave the default settings for Routing Policy and Status. Click on the Save buttons given at the bottom of both tabs:
Connecting your Tomato Router to the VPN
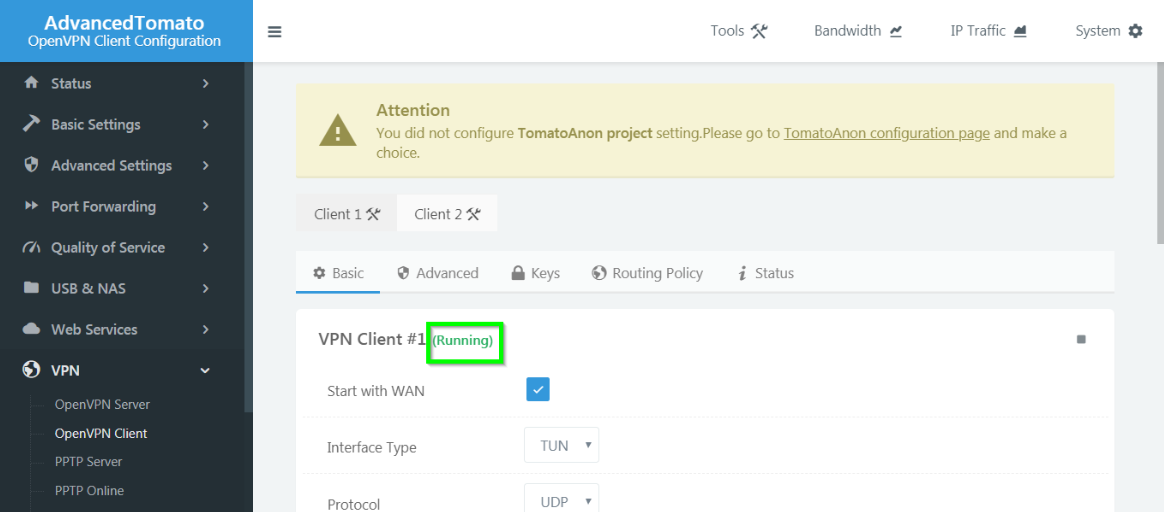
8. Navigate back to the Basic tab and click on the Start VPN Client play button to start connecting FastVPN via the OpenVPN protocol:

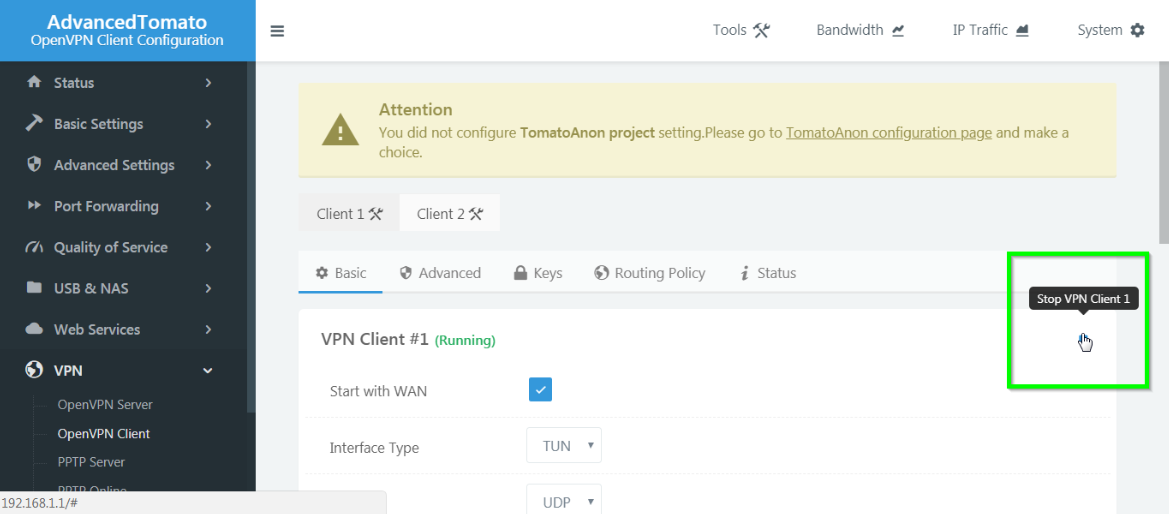
9. You can confirm the connection status from the Running prompt displayed next to the title VPN Client:
Disconnecting the VPN
Click on the Stop VPN Client button to disconnect FastVPN via the OpenVPN protocol on a Tomato router:
If you have any questions or problems configuring your Tomato router, contact our Support Team.