How to set up OpenVPN on Debian
The following is required for OpenVPN to work on Debian 12:
A working installation of Debian 12 running the GNOME Desktop Environment;
Access to your FastVPN account panel in order to get your network credentials;
A secure FastVPN connection (Don’t have one? Sign up here!).
Follow the steps below to configure OpenVPN in Debian 12:
1. Download the OpenVPN configuration files
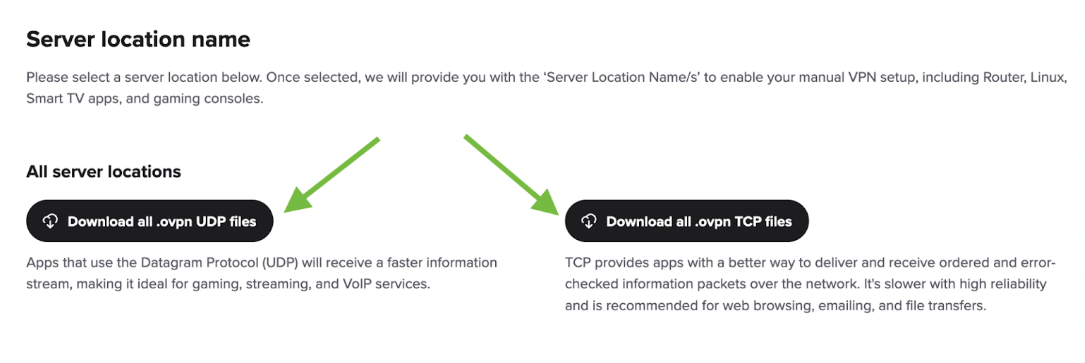
To complete the configuration, upload a config file that defines the settings or preferences for the OpenVPN connection.
You can download all of the config files for all of our servers directly from https://vpn.ncapi.io/groupedServerList.zip.
Or from the FastVPN Account Panel :
Click the Extract button in the Archive Manager window that appears.
Select Documents on the left and click Extract to extract the OpenVPN config files into your Documents folder.
2. Install the needed OpenVPN packages.
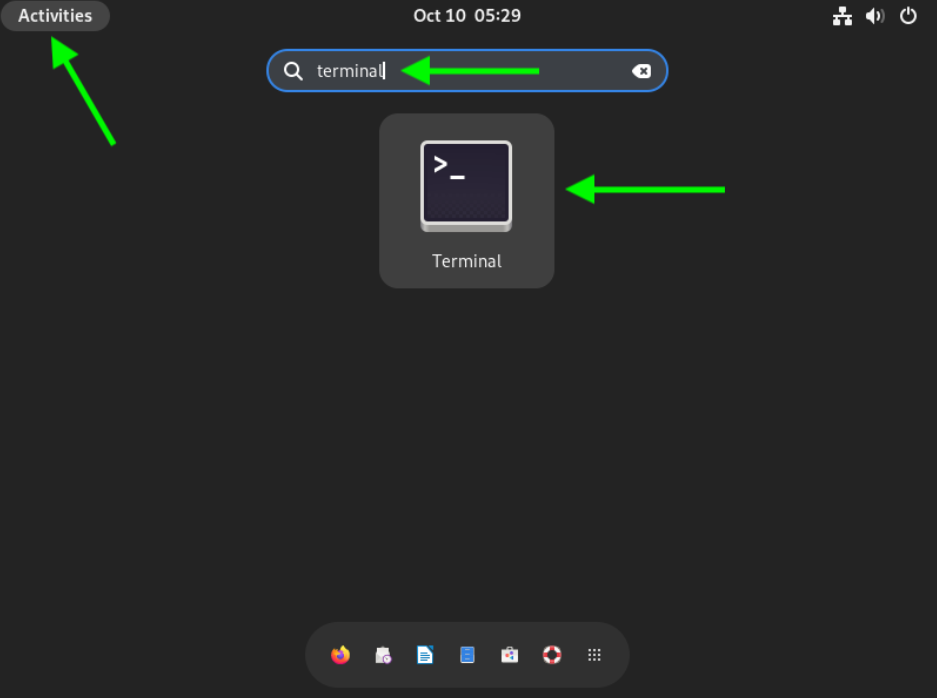
Click Activities at the top of the screen, type Terminal in the search box, then click the Terminal icon to launch a Terminal window:
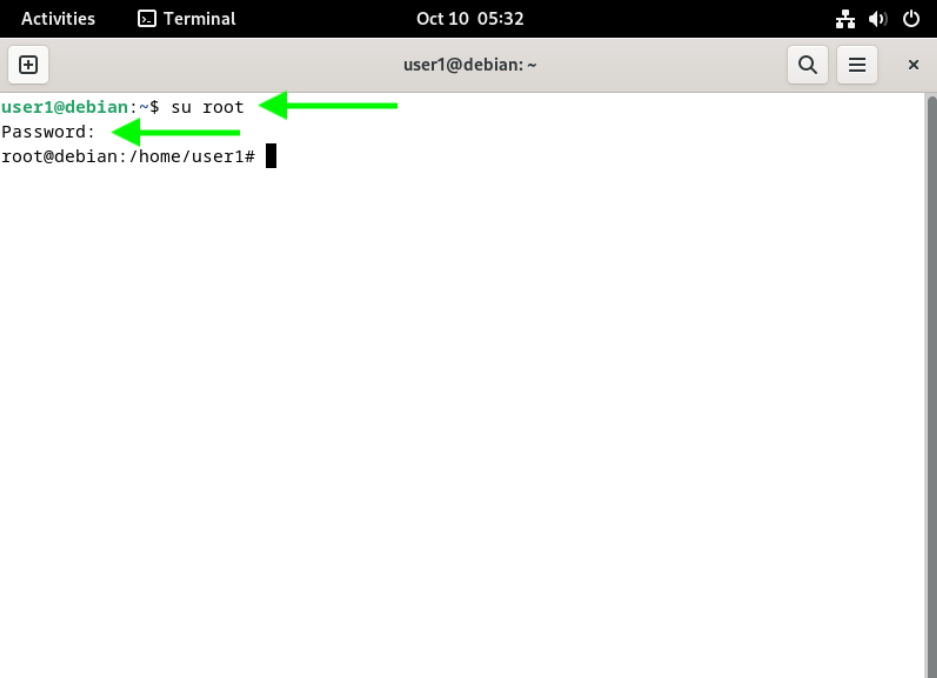
Type the following command to switch to the root user to allow us to install the needed OpenVPN packages:
su root
Next, you will be prompted to enter the password for root:
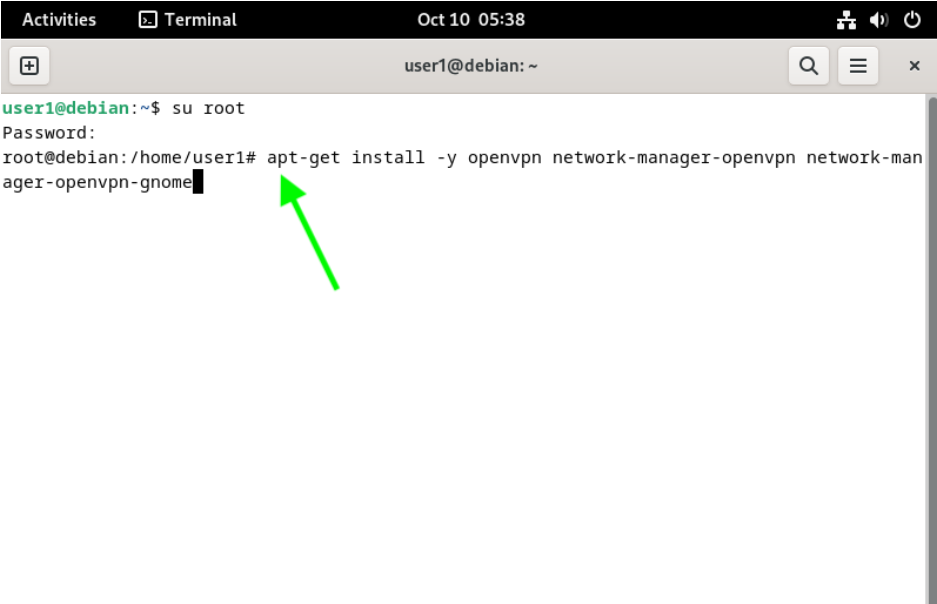
Type the following command to install the needed OpenVPN packages:
apt-get install -y openvpn network-manager-openvpn network-manager-openvpn-gnome
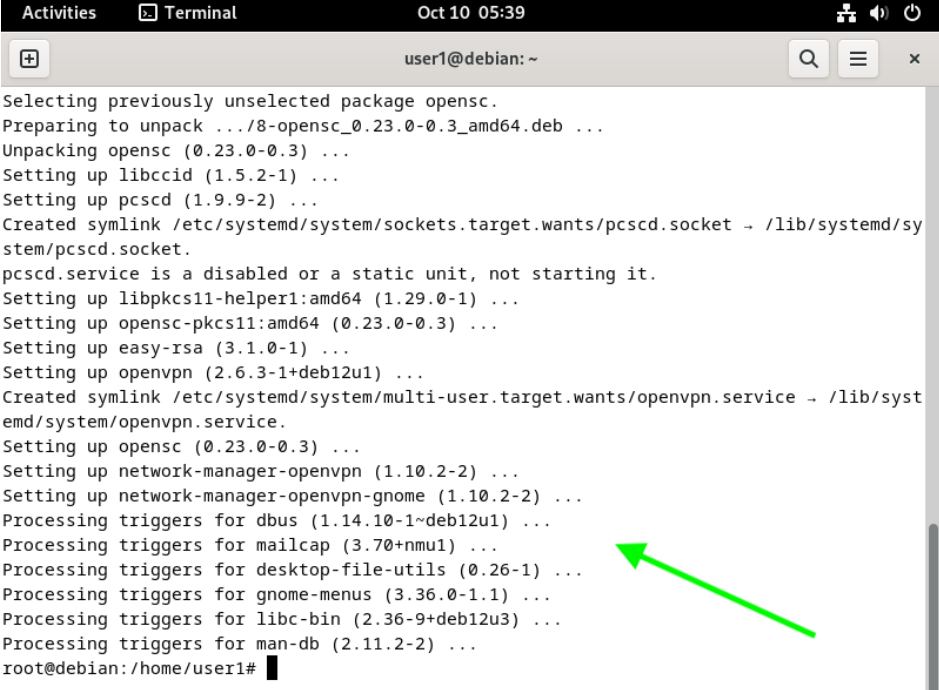
After the packages finish installing, you should see the output similar to what is shown below. Please report any errors to our support team so we can help you troubleshoot any issues.
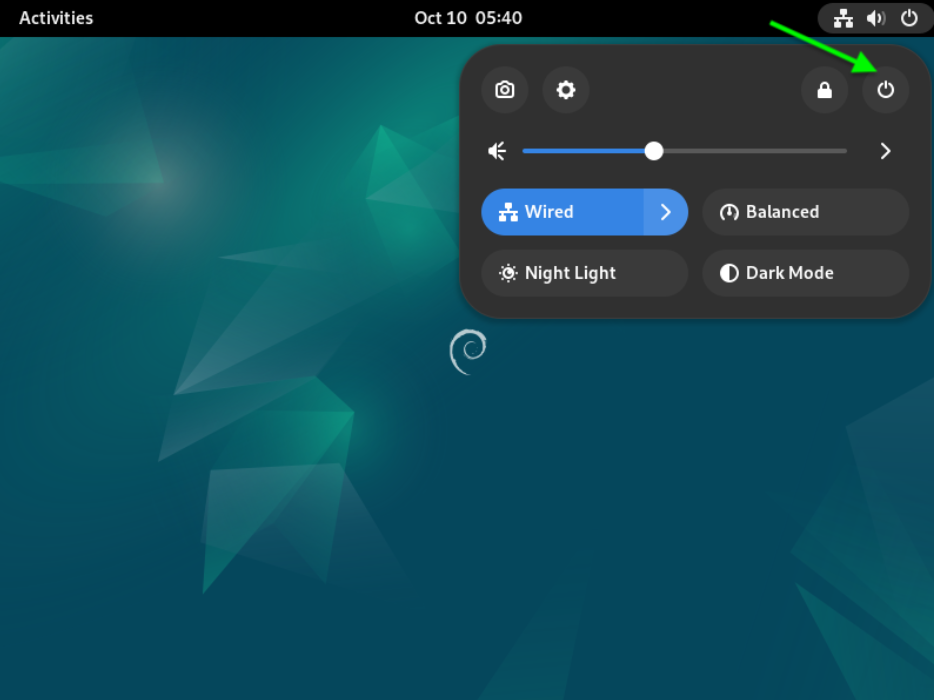
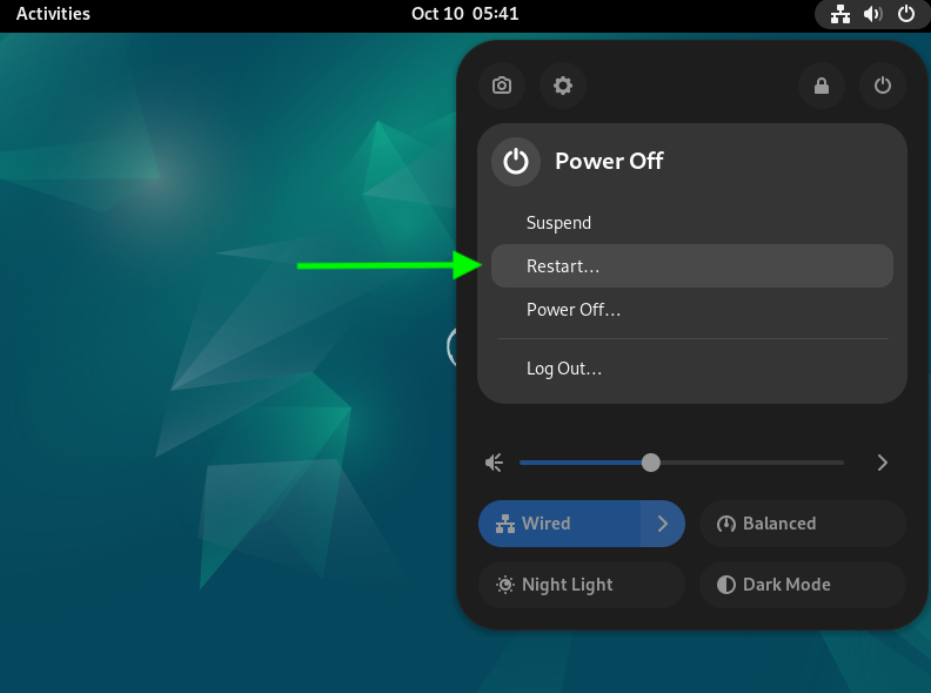
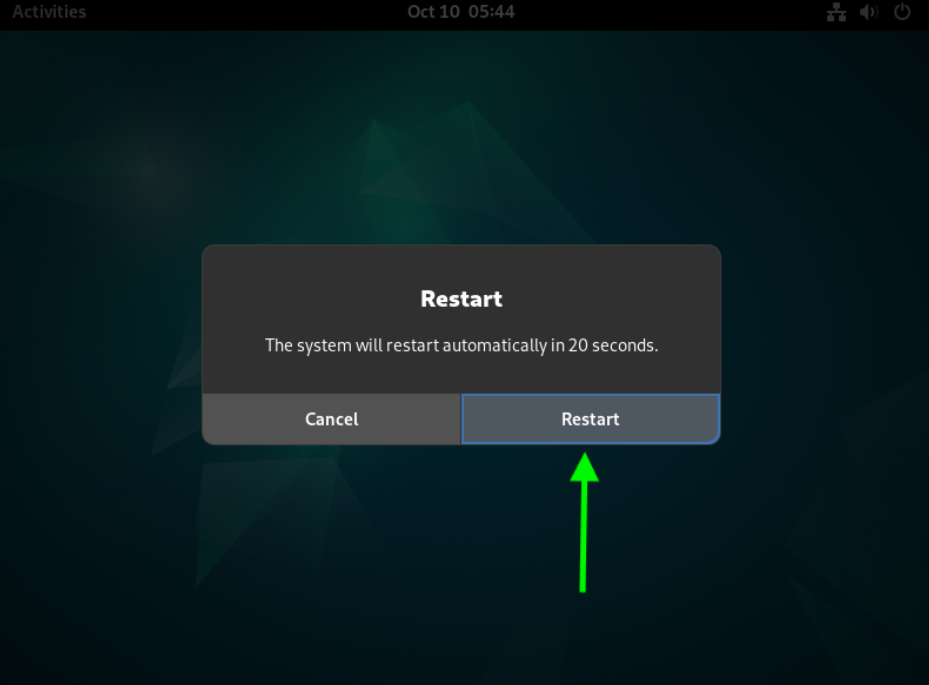
Close the Terminal window and click on the power button icon at the top of the screen in the upper right, click the Power button in the menu that appears, and then click the Restart button to restart your system:
3. Create our OpenVPN connection and import our connection settings
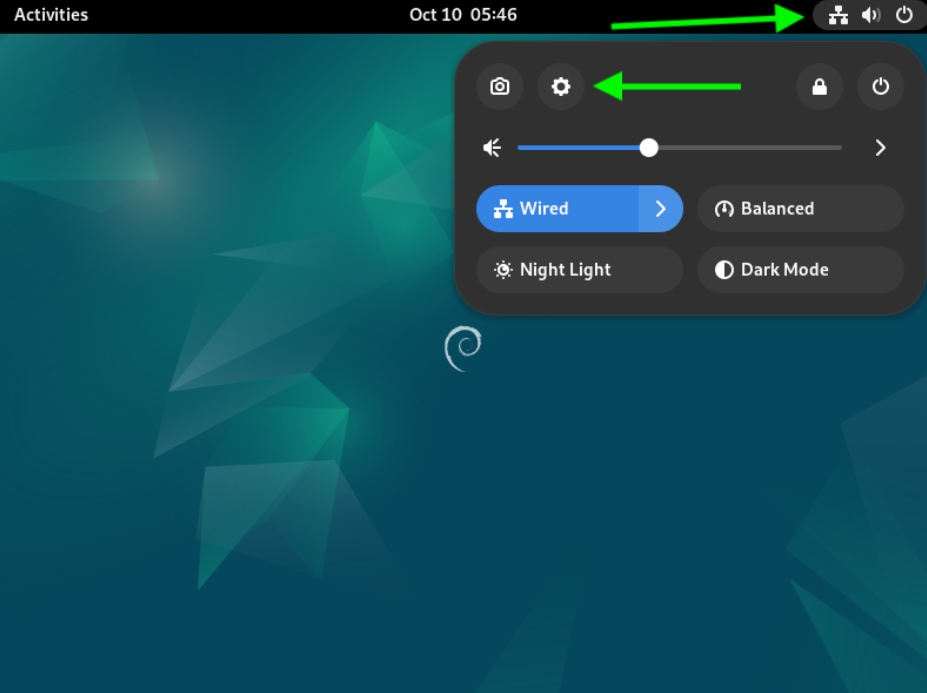
Click on the network connections icon at the top of your screen and then click the Settings gear button in the menu that appears, as shown below:
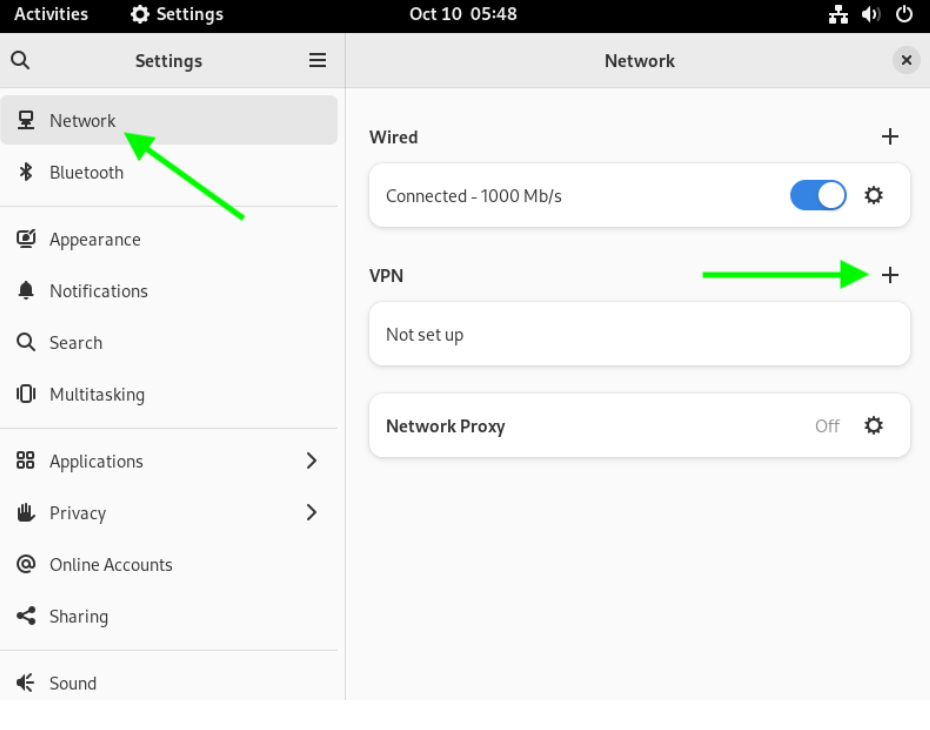
Select Network on the menu on the left and then click the + button as shown below in the Network window to add a new connection:
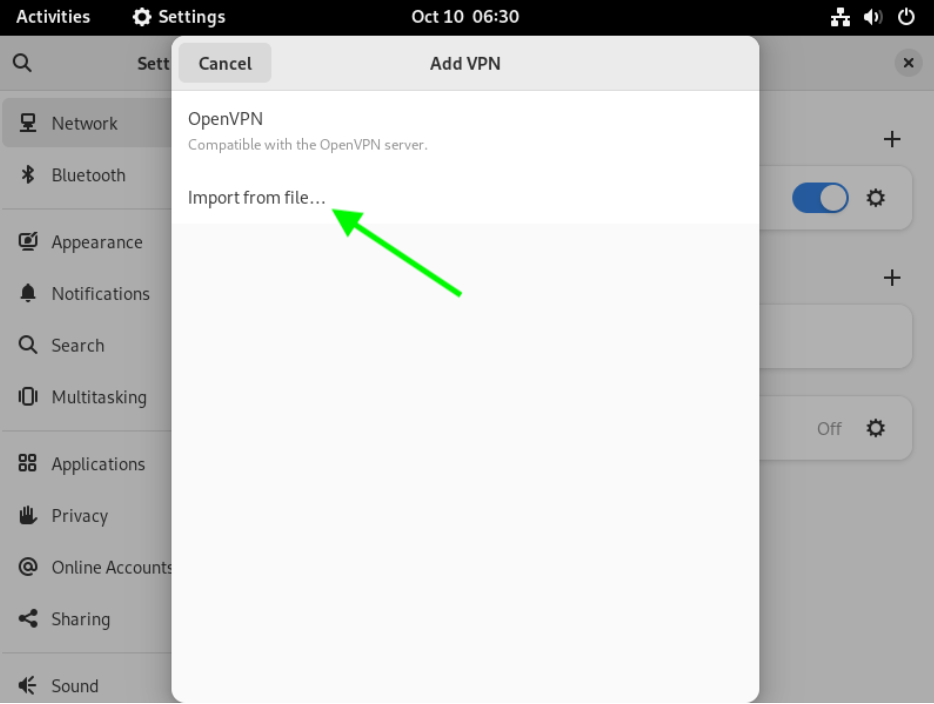
Choose Import from file... in the Add VPN window that appears:
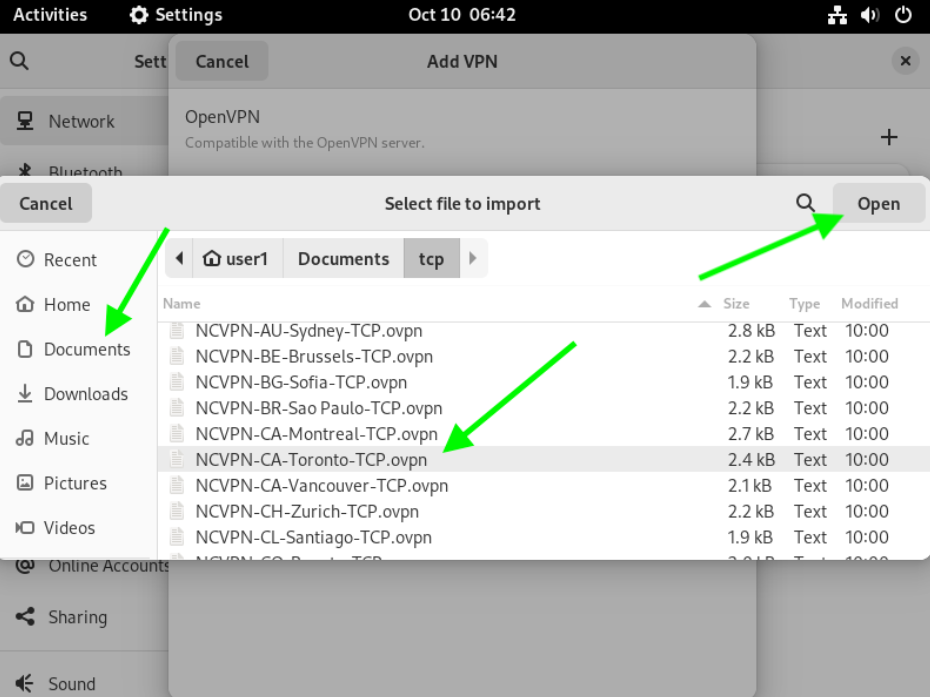
Select the config file (Saved earlier in our Documents folder) that matches your desired VPN server location and click the Open button (The naming convention for our config files is NCVPN-COUNTRY-City.ovpn). For our example, we are using the NCVPN-CA-Toronto.ovpn config file:
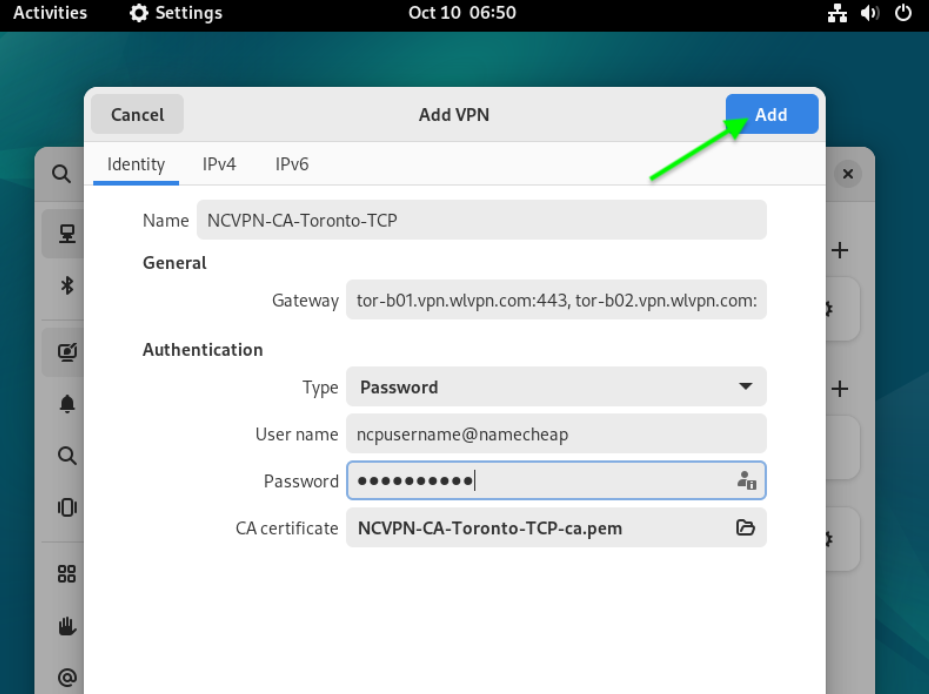
In the Add VPN window that appears, enter the details as given below in the Identity tab:
Name: Enter your desired description of your VPN connection;
Type: Should be set to Password;
User name: Enter your FastVPN username, available from the FastVPN Account Panel;
Password: Enter your FastVPN password, available from the FastVPN Account Panel;
Click the Add button.
4. Time to connect to FastVPN with our new OpenVPN connection
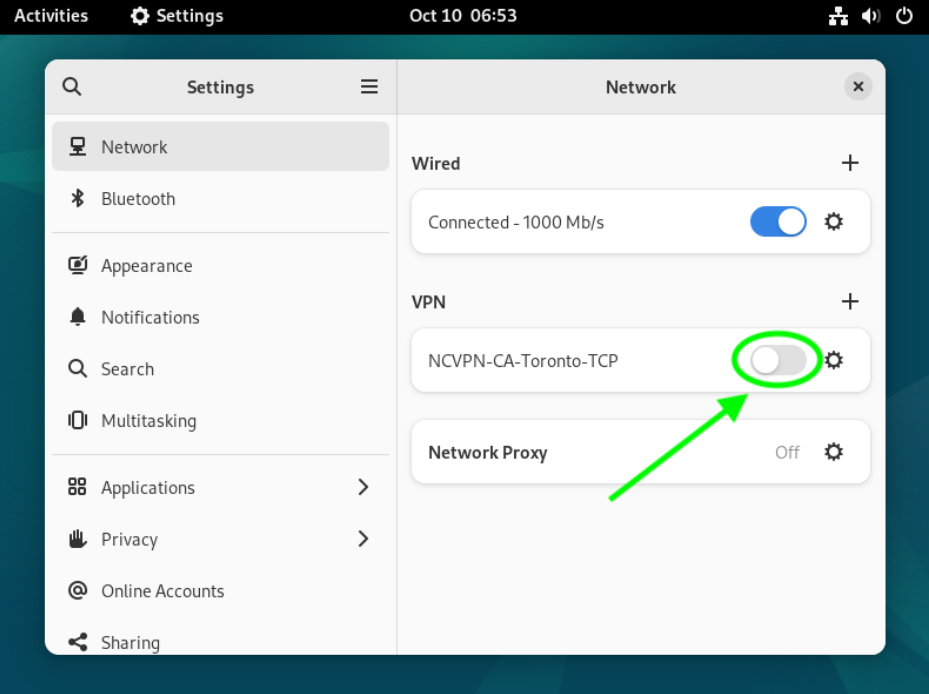
Click the toggle switch to the right of your newly created VPN connection (The name of your VPN connection will match the name you gave it in the previous step). This will start your new VPN connection:
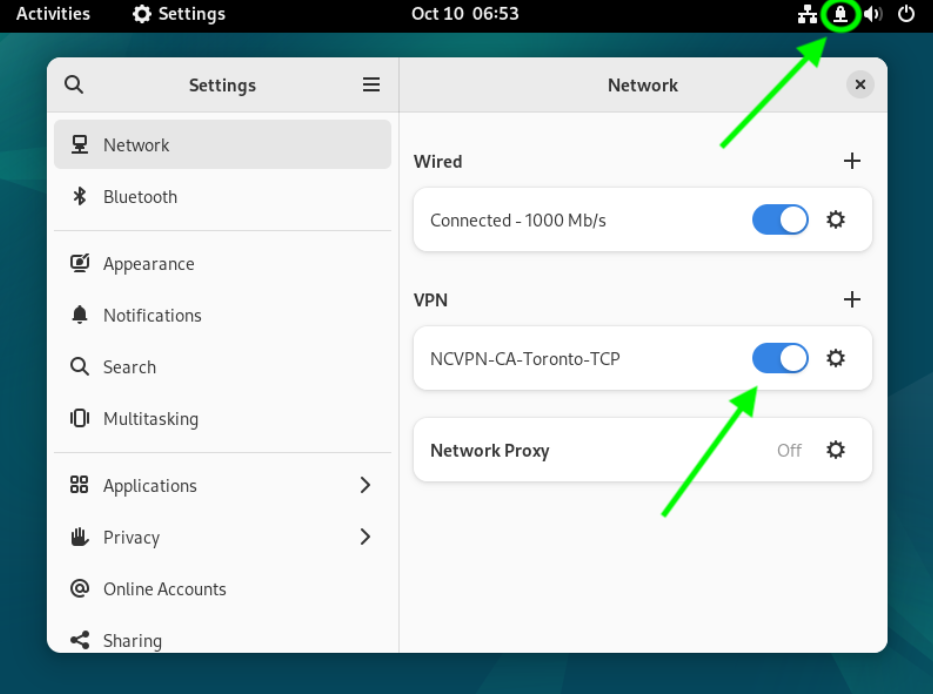
After you have successfully connected to FastVPN, you will see a padlock icon in the top right of your screen, and you will see the toggle switch for your VPN connection turn blue to indicate that it is active and connected:
To confirm that your IP address has changed to an anonymous private FastVPN, open your favourite web browser and go to https://www.namecheap.com/vpn/what-is-my-ip/
5. Disconnecting FastVPN
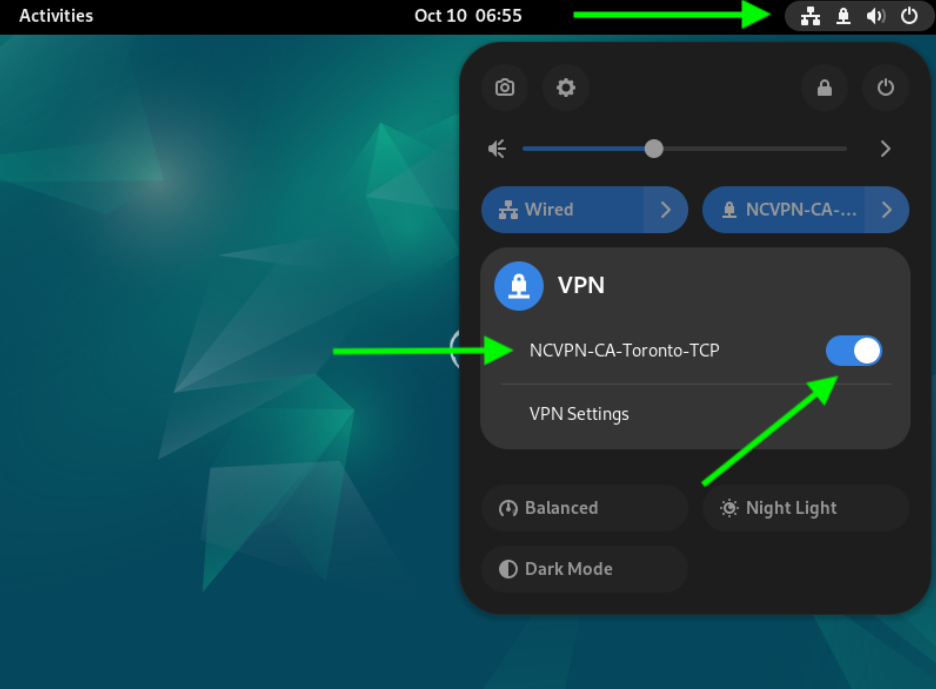
To disconnect from FastVPN, click the padlock or network connection icon in the top right of your screen, then click on the name of your VPN connection in the menu that appears, and then click Turn Off. After the VPN disconnects, the padlock icon will disappear, letting you know you have successfully disconnected:
If you have issues setting up your VPN, contact our Support Team for further assistance.