How to access your Starlight Virtual Machine
Once your Starlight Virtual Machine (VM) is up and running, you can connect to it directly from the Starlight Manager – additional tools, such as SSH clients, aren’t required. The application provides two access options: Console and Command Line Interface (CLI).
Both give you full control over your VM, allowing you to install or update software, manage files and users, configure services, etc. Console provides full, direct access to your VM: you can use it for troubleshooting, installation, or system recovery; and CLI is a quick, browser-based terminal for everyday management.
In this article, we will cover:
How to navigate and access the server management options;
The main differences between Console and CLI;
Basic commands for installing and updating software, configuring services, uploading files, and managing users.
1. How to access Console and Command Line
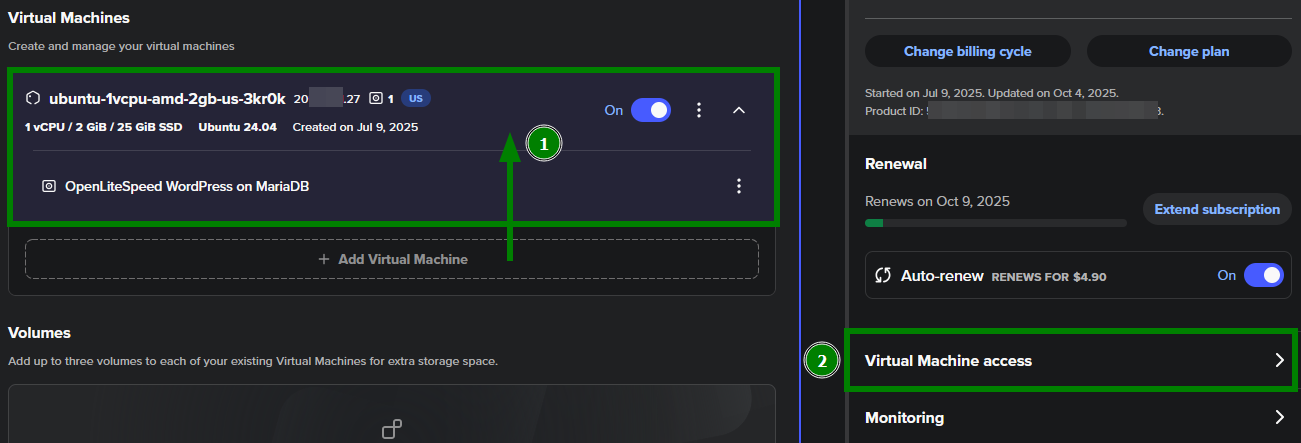
1. In the Starlight Manager app, click on your VM to open the VM Management menu (1) and go to Virtual Machine access (2):
2. In the side tab, click Launch command line or Launch console, depending on your needs. Tools will be opened in a new browser window:
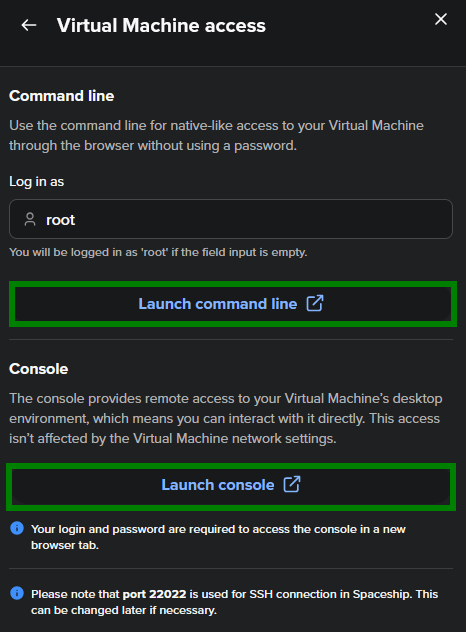
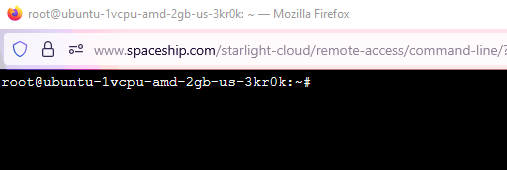
Command line:
Console (after root details are entered):

2. Differences between Console and CLI
Console access | CLI access | |
|---|---|---|
Purpose | Gives full system-level access. Used for advanced management and recovery. | Provides a simplified terminal for running commands quickly from the browser. Used for everyday administrative tasks. |
Login | Requires entering your login details - username and password. | Opens automatically without login. The username field is available, so you can specify which user to connect (root or other). |
Network resilience | It’s always available, even if your network connection to the VM (like SSH) is down or blocked. This means you can still manage and recover your VM in case of network issues. | Also provides robust connectivity, but if there are issues with the VM’s network configuration, Console is the fallback for troubleshooting and restoring access. |
Interface | Full-screen environment with full control over boot messages, restarts, and recovery modes. | Offers a modern, simplified command-line interface with features like mouse support, keyboard shortcuts, copy-paste, and command history. |
When to use | - VM not reachable via SSH or network. - Recovery, installation, or system debugging. - Viewing boot logs and console messages. | - Routine server management. - Software updates and configurations. - Lightweight admin tasks. |
3. Basic commands for various OS
Here are some essential Linux commands to help you manage your Virtual Machine. You can use them in both Console and CLI to install and update software, configure services, manage users, and handle files.
Action | Ubuntu / Debian | AlmaLinux / CentOS / Rocky / Fedora |
|---|---|---|
Update system packages |
|
|
Install software |
|
|
Remove software |
|
|
Start / stop a service |
|
|
Enable service on boot |
|
|
Check firewall (UFW or firewalld) |
|
|
Create a new user |
|
|
Give user sudo rights |
|
|
Change user password |
|
|
Edit a file |
|
|
Example: web server and firewall installation
Debian-based (Ubuntu, Debian 12):
apt install nginx -y - Installs the Nginx web server on your system
ufw allow 'Nginx Full' - Updates the UFW (Uncomplicated Firewall) rules to allow both HTTP (port 80) and HTTPS (port 443) traffic
systemctl enable nginx - Ensures that Nginx starts automatically every time the server reboots
systemctl status nginx - Verifies that the web server is responding
RHEL-based (AlmaLinux, CentOS, Rocky, Fedora):
dnf install httpd -y - Installs the Apache HTTP Server
systemctl enable httpd - Configures Apache to start automatically
systemctl start httpd - Starts the Apache service immediately
firewall-cmd --permanent --add-service=http - Opens port 80 (HTTP) in the firewall so visitors can access your web server over the standard web protocol
firewall-cmd --reload - Reloads the firewall configuration changes
systemctl status httpd - Checks the web server status.