Come utilizzare File Manager in cPanel
File Manager è uno strumento integrato in cPanel che ti permette di gestire i file e le cartelle del tuo sito web direttamente dal browser. Con esso, puoi copiare, spostare, organizzare, eliminare file e modificarne i permessi.
Accesso a File Manager
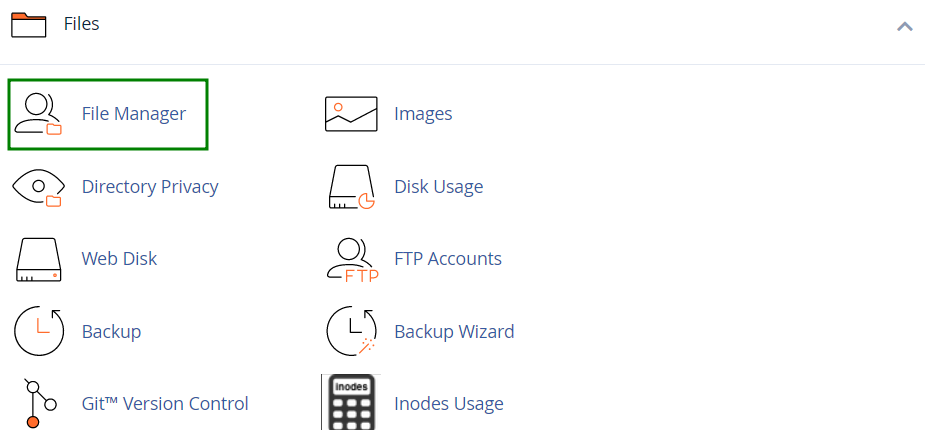
Puoi accedere a File Manager tramite il tuo account Spaceship > il menu Hosting Manager > Vai a cPanel > vai alla sezione File > il menu File Manager:
Per impostazione predefinita, File Manager si apre nella directory /home/user. Se necessario, puoi cambiare la directory predefinita utilizzando l'opzione Impostazioni:

All'interno della stessa finestra Impostazioni, hai anche la possibilità di abilitare Mostra file nascosti (dotfiles). Attivando questa funzione, i file di sistema nascosti, come .htaccess, diventano visibili in File Manager:

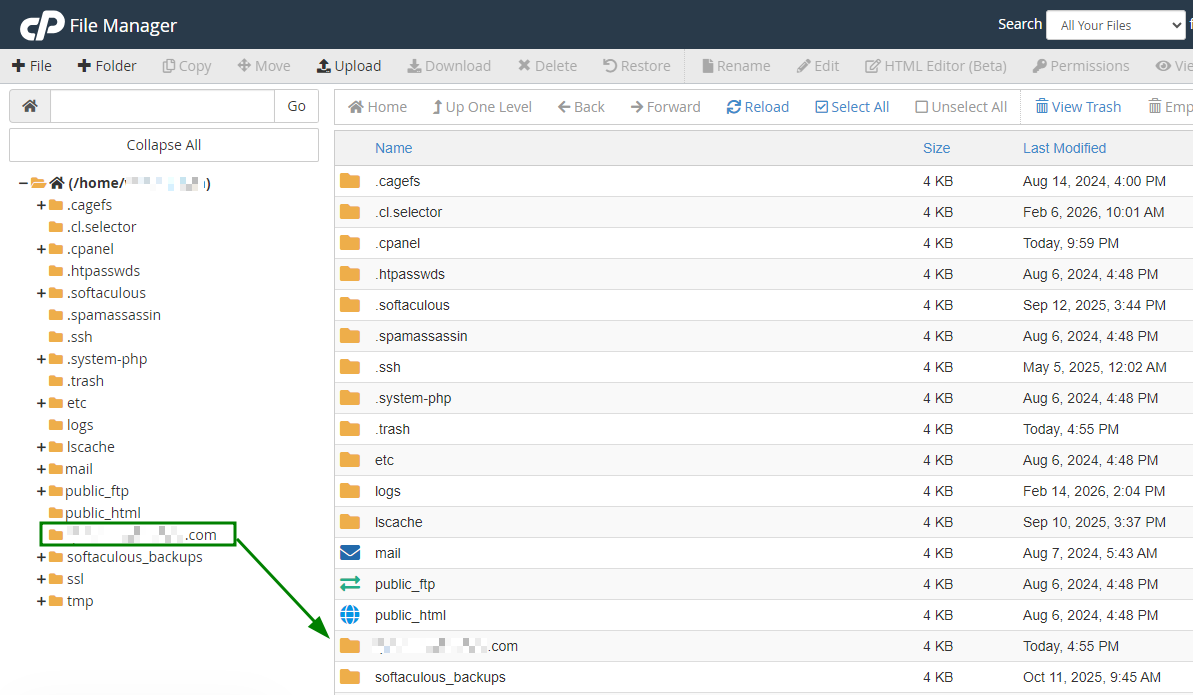
Per individuare la cartella root del documento per il tuo dominio, cerca la cartella che ha lo stesso nome del tuo dominio. Questa è la directory in cui dovresti caricare i file per il sito web associato al dominio:
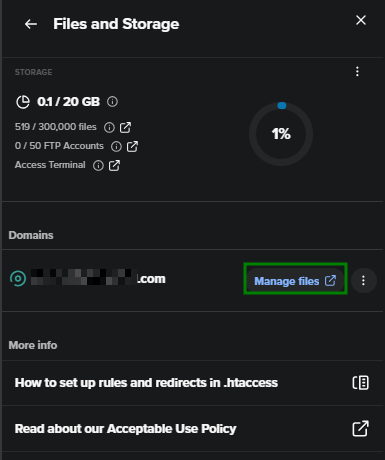
È anche possibile aprire la cartella root dei domini ospitati nel tuo account in File Manager. Per farlo, fai clic sul pulsante Gestisci vicino all'abbonamento hosting > il menu File e Archiviazione > tocca il pulsante Gestisci file opposto al nome del dominio in questione e verrai reindirizzato alla sua cartella root all'interno dell'interfaccia di File Manager:
Nota: C'è un'opzione per cambiare la root del documento per i domini ospitati su Spaceship Shared Hosting. Puoi farlo nel menu Hosting Manager > fai clic sul pulsante Gestisci accanto all'hosting in questione (dovrebbe apparire il pannello diviso) > il menu Advanced > Cartella root del documento :
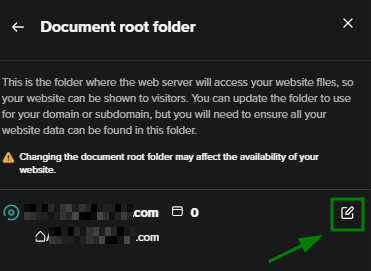
Una volta cambiata la cartella root del documento per il dominio, i siti creati non vengono spostati automaticamente nella nuova cartella. È necessario spostare manualmente i file lì.
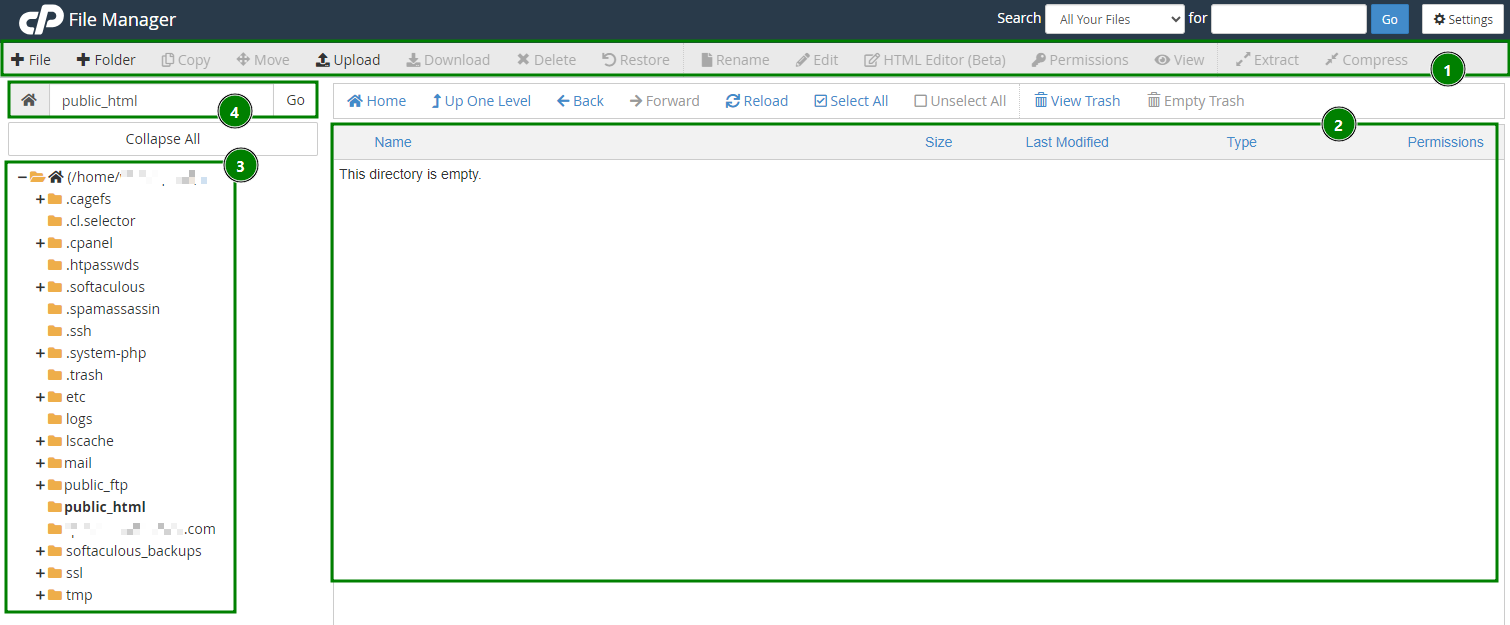
Interfaccia di File Manager
L'interfaccia di File Manager è composta da quattro sezioni principali:
Barra degli strumenti - contiene strumenti essenziali per la gestione dei file, come la creazione di nuove cartelle, l'eliminazione di file, il caricamento o il download di contenuti e altre azioni comuni.
Area elenco file - mostra i file e le cartelle presenti nella directory attualmente selezionata.
Nota: Se la directory non contiene file o cartelle, in quest'area verrà visualizzato il messaggio “Questa directory è vuota”.Pannello di navigazione - ti consente di navigare tra le diverse cartelle e passare da una directory all'altra all'interno del tuo account.
Campo directory corrente - mostra il percorso della cartella che stai visualizzando, aiutandoti a tenere traccia della tua posizione nella struttura dei file.
Funzionalità di File Manager
Nel menu sono disponibili le seguenti opzioni di gestione dei file:
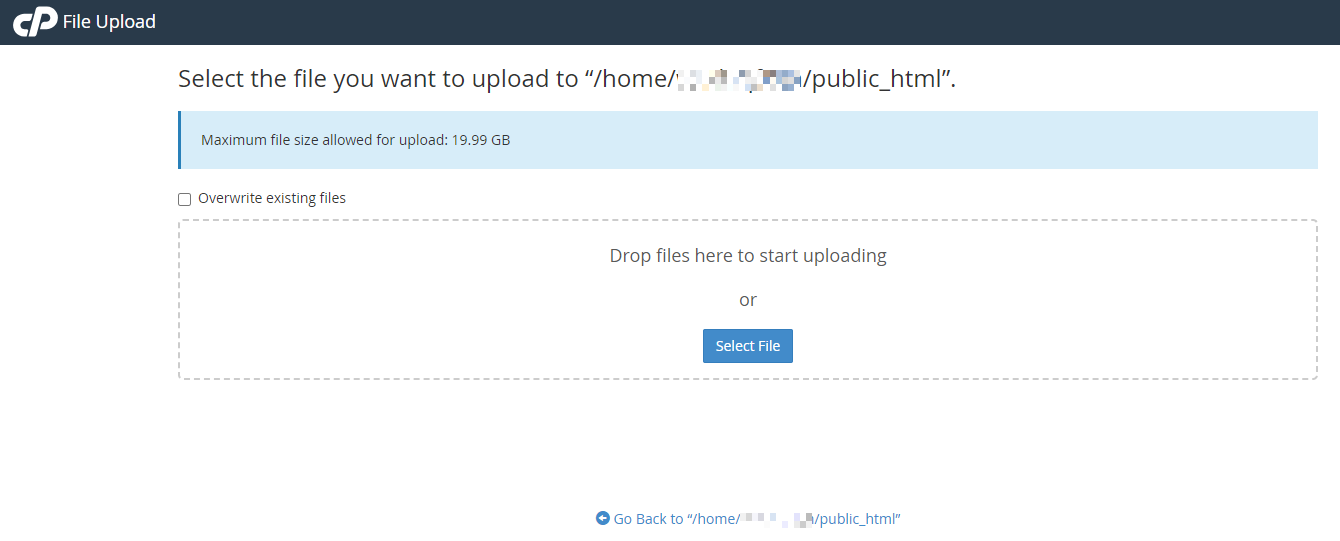
Carica

Seleziona un file che desideri importare in cPanel dal tuo computer locale e fai clic su Apri/Scegli sul tuo PC oppure trascinalo semplicemente nella finestra di caricamento:
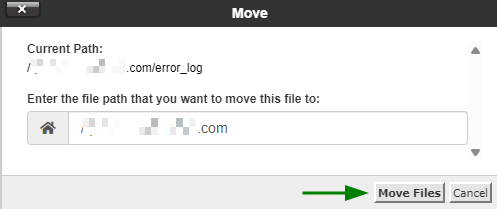
Copia/Sposta
Seleziona il/i file che desideri copiare/spostare e premi l'icona Copia o Sposta . Per selezionare più file, tieni premuto il tasto Ctrl+Command:

Una volta fatto, conferma la destinazione nella finestra pop-up di conferma:
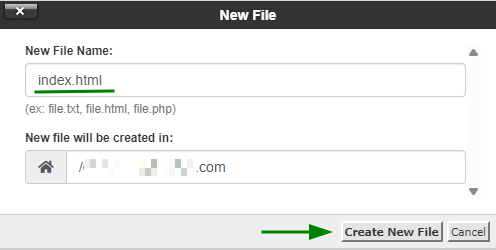
Crea un nuovo file/cartella
Per creare un nuovo file/cartella, apri la cartella/directory in cui deve essere posizionato il file/cartella. Fai clic sull'icona +File/+Cartella, assegna un nome al file e conferma l'azione nella finestra pop-up:

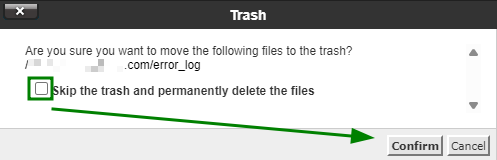
Elimina
Seleziona il/i file da rimuovere e premi l'icona Elimina . Conferma l'azione nella finestra pop-up:

I file eliminati vengono trasferiti nella cartella .trash del sistema. Se desideri eliminare definitivamente il/i file, seleziona l'opzione “Salta il cestino ed elimina definitivamente i file”:
Nota: I file rimarranno nella cartella cestino per 90 giorni. Dopo questo periodo, verranno eliminati automaticamente dal server.
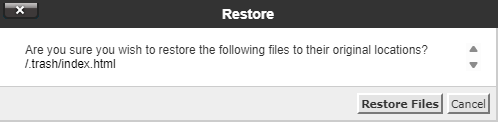
Ripristina
Per ripristinare un file, vai nella cartella .trash situata nella directory /home/user/. Seleziona il/i file desiderati, quindi fai clic sull'icona Ripristina:

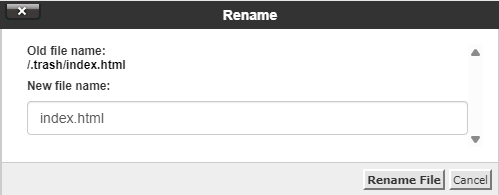
Rinomina
Apri la cartella che contiene il/i file che vuoi rinominare. Seleziona il/i file, quindi fai clic sull'icona Rinomina:

Dopo di ciò, apparirà una finestra di conferma:
Modifica
Scegli il file che vuoi modificare e fai clic sull'icona Modifica. Si aprirà un editor di file:


Comprimi
Archiviare più file in un unico archivio è utile per creare backup, trasferire dati in un'altra directory e ridurre la dimensione dei file. I file compressi occupano meno spazio su disco e si scaricano più velocemente su Internet. Puoi comprimere i dati in un unico archivio .zip, .gz o .bz2.
Per comprimere il/i file, fai clic sul pulsante Comprimi , seleziona il tipo di compressione desiderato e comprimi i file:


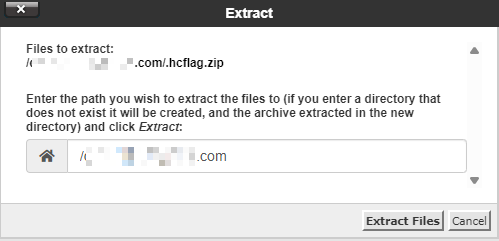
Estrai
È possibile estrarre file o archivi compressi facendo clic sul pulsante Estrai :

Il sistema suggerirà di estrarre il file nella stessa directory in cui si trova attualmente. Tuttavia, puoi selezionare un'altra directory inserendo il percorso nella finestra pop-up:
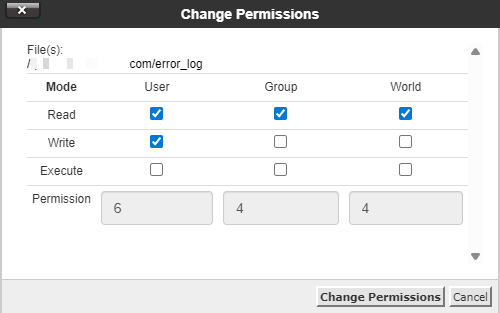
Cambia permessi
Seleziona il file o la cartella per cui desideri cambiare i permessi, quindi fai clic sull'icona Permessi, oppure fai clic con il tasto destro e scegli Cambia permessi dal menu a discesa:

Imposta i valori di permesso desiderati e fai clic su Cambia permessi per applicare le modifiche:
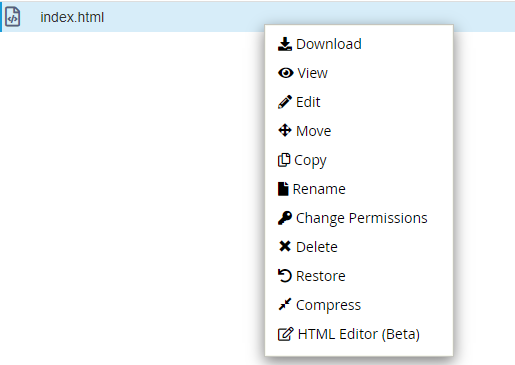
Nota: Le funzionalità di File Manager sopra elencate possono essere trovate anche facendo clic con il tasto destro su un file selezionato e scegliendo l'opzione corrispondente dall'elenco a discesa: