Hur du ställer in Spacemail DNS-poster på Wix-namnservrar
Om din domän använder Wix namnservrar (t.ex. nsXX.wixdns.net, nsXX.wixdns.net) följer du dessa steg för att konfigurera dina Spacemail DNS-poster:
Steg 1. Logga in på ditt Wix-konto.
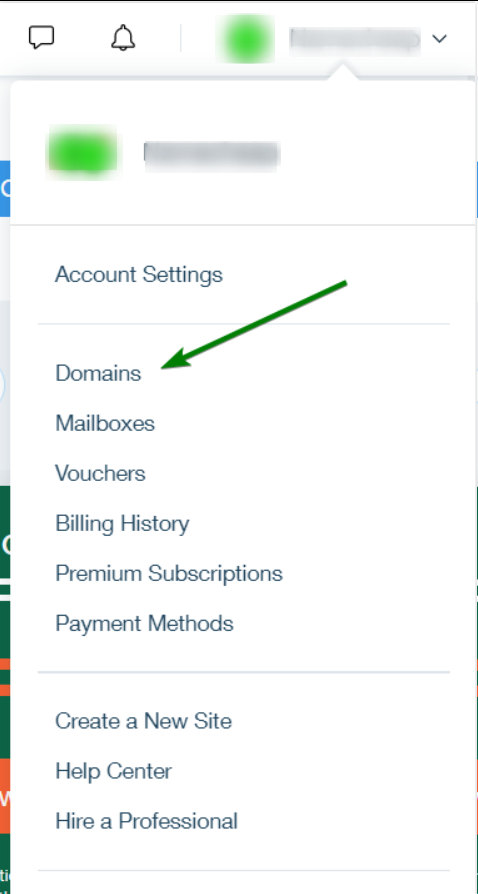
Steg 2. Klicka på användarnamnet för ditt Wix-konto (uppe i sidans övre högra hörn) och välj avsnittet Domains :
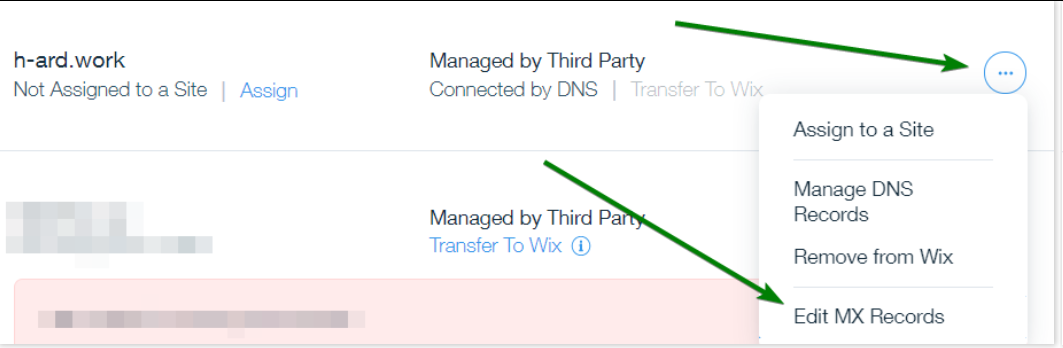
Steg 3. Leta upp den aktuella domänen, expandera menyn med fler alternativ och välj alternativet Edit MX Records:
Steg 4. Klicka på Other för att manuellt lägga till MX-posterna:
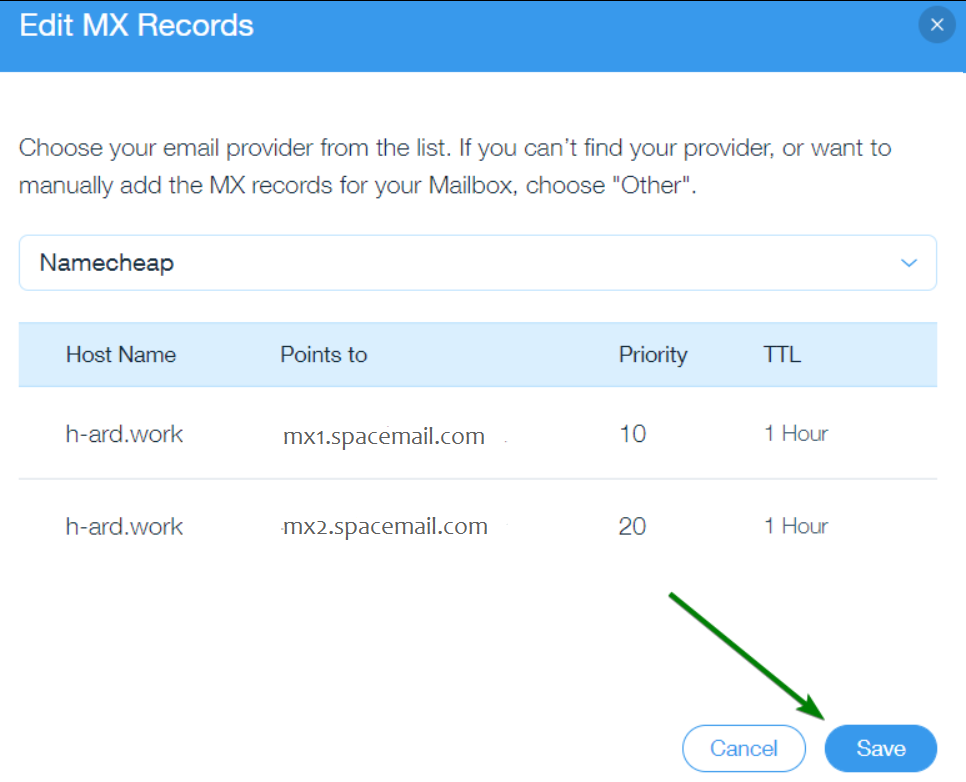
Följande DNS-poster ska läggas till för ditt domännamn:
Värdnamn: lämna tomt | Pekar på: mx1.spacemail.com | Prioritet: 10 | TTL : 1 timme
Värdnamn: lämna tomt | Pekar på: mx2.spacemail.com | Prioritet: 20 | TTL : 1 timme
Obs! Det går inte att ändra prioritetsvärdena (t.ex. 0, 10, 20) för MX-poster i Wix. Prioritetsvärdena tilldelas automatiskt baserat på den ordning i vilken du lägger till posterna. Den första posten du lägger till får prioritetsvärdet 10, nästa får prioritetsvärdet 20 och så vidare.
Steg 5. Därefter behöver vi lägga till SPF-, DKIM- och DMARC-poster. DNS-posten SPF (Sender Policy Framework) hjälper till att skydda din domän mot e-postförfalskning och identitetskapning genom att förhindra att spammare skickar e-post i ditt namn.
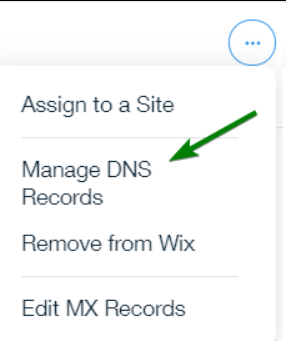
Gå till menyn med fler alternativ igen och klicka på alternativet Manage DNS Records:
Obs! Du kommer att se ett popup-fönster med texten "Om du redigerar eller tar bort domänens standardposter för A eller CNAME kan din webbplats sluta fungera." Klicka på "Jag förstår" och fortsätt med konfigurationen av SPF-posten.
Obs 2: Posttypen SPF används inte längre. Därför rekommenderar vi att du lägger till SPF-poster i TXT-sektionen i dina DNS-poster:
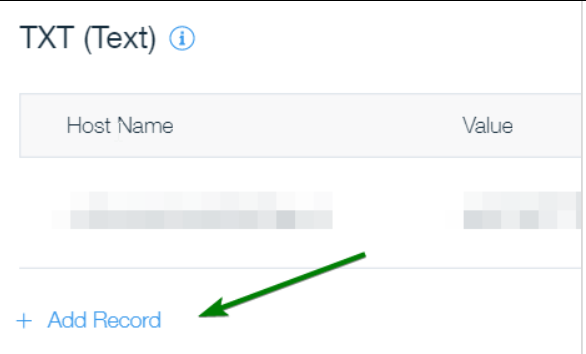
Värdnamn: lämna tomt | TXT-värde: v=spf1 include:spf.spacemail.com ~all | TTL: 1 timme

DKIM-posten är en obligatorisk post för att säkerställa att utgående e-post fungerar korrekt. En DKIM-post innehåller information om domänen, som publiceras av domänägaren. E-postmeddelanden som är signerade med DKIM verkar mer legitima för mottagarna och hamnar mer sällan i skräppost- eller spammappar.
Värdnamn: spacemail._domainkey | TXT-värde: det unika värdet ska kopieras från ditt Spaceship-konto | TTL: 1 timme
Följ dessa steg för att hitta det i ditt Spaceship-konto och konfigurera det:
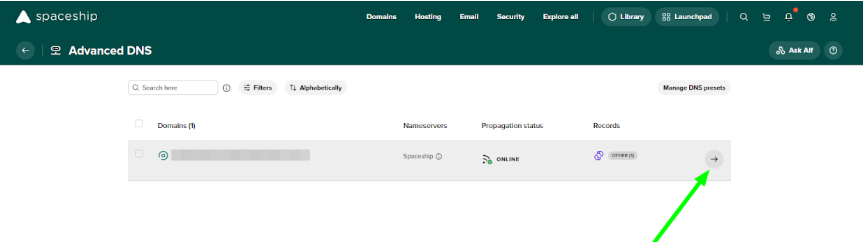
Gå till applikationen Advanced DNS.
Hitta ditt domännamn som är kopplat till Spacemail och klicka på pilen bredvid det:
Rulla ned till avsnittet "Inactive records", klicka på pilen för att expandera och hitta "Spacemail DNS records":
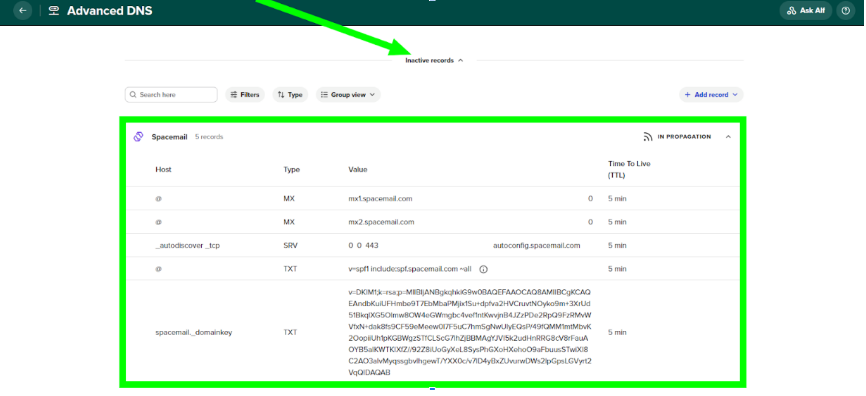
Leta upp en TXT-post som börjar med "v=DKIM1; k=rsa; …" och lägg till denna post i DNS-zonen för din domän med värdnamnet "spacemail._domainkey".
Dessutom rekommenderar vi starkt att du även konfigurerar en DMARC-post. Moderna e-postleverantörer (inklusive Microsoft Outlook, Hotmail, Gmail och Yahoo) förlitar sig i allt högre grad på DMARC som en del av sina system för avsändarrykte och validering mot spam. Domäner utan en korrekt konfigurerad DMARC-post löper större risk att få problem med leveransbarhet, hamna i skräppostmappen eller drabbas av ryktesbaserade begränsningar.
För att konfigurera DMARC måste du först generera en DMARC-post med hjälp av ett onlineverktyg för DMARC-generering (till exempel MXToolbox DMARC Record Generator) och sedan lägga till den som en TXT-post i din domäns DNS-zon.
Typ: TXT-post | Värd: _dmarc | Värde: v=DMARC1; p=none; rua=mailto@yourdomain.com (eller det som genererats med hjälp av ett onlineverktyg för DMARC-generering) | TTL: Automatisk
OBS! DMARC-policyn kan senare justeras till quarantine eller reject beroende på din e-postkonfiguration och dina övervakningsinställningar.
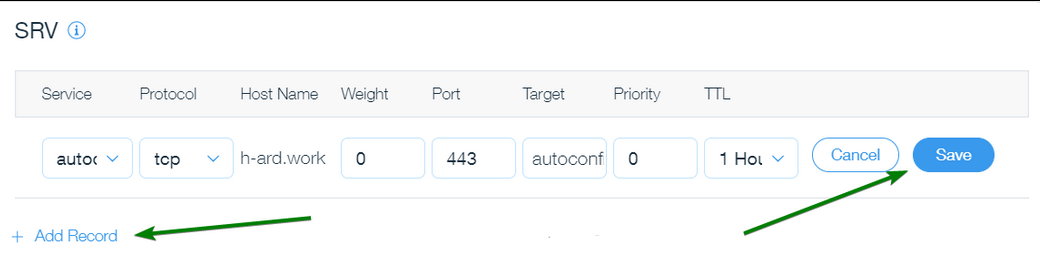
Steg 6. SRV-posten används för att publicera tjänster och upptäcka tjänster. Dess huvudsakliga syfte är att göra det möjligt för tjänster att köras på icke-standardiserade portar och minska konfigurationsbördan när e-postklienter ställs in.
Tjänst: autodiscover | Protokoll: tcp | Värdnamn: lämna tomt | Vikt: 0 | Port: 443 | Mål: autoconfig.spacemail.com | Prioritet: 0 | TTL: 1 timme
Tänk på följande: Om din domän är registrerad hos en tredjepartsregistrator måste du också lägga till TXT-posten för verifiering.
TXT-posten för verifiering finns i applikationen Advanced DNS. När du är där klickar du på knappen Manage, letar upp avsnittet Configure your DNS settings for products to work correctly och klickar på View guides. Rulla sedan ned och välj Verifying domain ownership.
Se till att spara alla ändringar en efter en med knappen Save.
Det kan ta upp till 60 minuter innan de nya posterna har spridits fullt ut. Du kan använda valfri onlinekontroll för att se om spridningen är klar. Du kan gärna kontrollera det här.
Det var allt! Om du har några frågor eller behöver hjälp får du gärna kontakta oss. Våra kunder får för närvarande hjälp dygnet runt året om via Live Chat och e-post.